Don't like the adverts?  Click here to remove them

1976 fj45

Had a great start this afternoon.. 4mm steel is pretty thick stuff to work with!

P1020172.JPG


I decided to work from the back towards the front, the plan is working well. Quite difficult on the drilling of the material but happy to see some action going with the old truck.

P1020170.JPG


Have decided to introduce a rear cross member that runs between the back leaf spring mounts. Have marked and drilled around the rivets and intend to weld the rivets to the plate. When the inner sides go in I'm planning to make a triangle shaped cross member. Then make strips to connect the cut off existing brace from the back panel and to scribe them into the new triangular member, weld in, and paint..

With the strips that are clamped in, it's already much more solid with less waggle to the frame.. thinking it's going to be super solid when done and ready to carry a heavy load!!

I like it! Back on it on the weekend... :thumbup:
 
I've had a couple of busy weeks away from this project, back to work to make a living!

P1020203.JPG


Have made it to the front on the passenger side with drilling and bolting the new upper and lower strips Hard going when you keep breaking drill bit's but have drilled and bolted 52 times sofar!Lol

P1020204.JPG


I've made 2 plates that reinforce the area where the leaf spring hanger attaches it'll be so solid there when it's ready to load the flat bed up!

P1020202.JPG


Looking pretty standard on the outside... just a few extra bolt's lol!

P1020173.JPG


Have made the basis of an engine stand for the 2f motor to move it around and store it in a dry place.


P1020174.JPG


Safe to move around and some day would like to hear it running as it's complete. It turns over but the carb is seized up..

P1020205.JPG


Who need's a 2f when you can update a few years! A good template to work out mounting this...

Having a hit on the chassis tomorow, I want to get to the point of unbolting the strips and do some more painting on the inside of the chassis so am on quite a mission!! :thumbup:
 
Progress indeed!

What engine are you thinking you want to install?

Regards,

Rodger
 
Hi Roger, I intend to fit a 1HDT with the A440f fully hydraulic auto transmission from an early 80. Hardly any electronics and can keep the 45 on a 12 volt system.

The trans is much longer so am going to have to remove the mid line hooped cross pipe and move it back to the area where I've reinforced the spring mount. Planning to use the cross pipe from a lj 70 as it has plenty of length and a better shape to go over the transfer case..

See how I get along today!! :thumbup:
 
So would that be the engine & box in the last photo?

Not being familiar with the 1HDT I couldn't make it out - probably more through old age and bad eyes.

That combination will be very nice, IMO, and obviously yours otherwise you would not be fitting it!

Following with much interest.

Regards,
Rodger
 
Don't like the adverts?  Click here to remove them
Hi Iwan have you put up moor pics I can not get them up r you getting on with the fj45 hope you r well all the best.:thumbup:
 
So would that be the engine & box in the last photo?

Not being familiar with the 1HDT I couldn't make it out - probably more through old age and bad eyes.

That combination will be very nice, IMO, and obviously yours otherwise you would not be fitting it!

I aim to fit the transmission to stay in but unfortunately the block has a failed big end bearing on no5 cylinder. A real shame as the rest of it is in good condition! Luckily have another block waiting to be collected..

DSC06180.jpg


Here's a picture of one installed, the dimensions are comparable to the 2f so will definitely fit in.. will need to introduce a gear box cross member mount..

P1020210.JPG


Which I have a few to choose from! Lol Top one is a hilux, red one is a 60 series, 3 one down is manual lj70, 4th one is auto lj71, next one manual 80, 6th one down is auto 81 and the lower one is 4 speed bj40.. Pretty sure I can make one of them work! Lol..

P1020211.JPG


Have a set of chassis mounts for the gearbox mount too if they will work...

Hi Iwan have you put up moor pics I can not get them up r you getting on with the fj45 hope you r well all the best.:thumbup:

Hi Tony! All is good mate... Have added a few pictures so you should see them! Hope you're well man!

P1020206.JPG


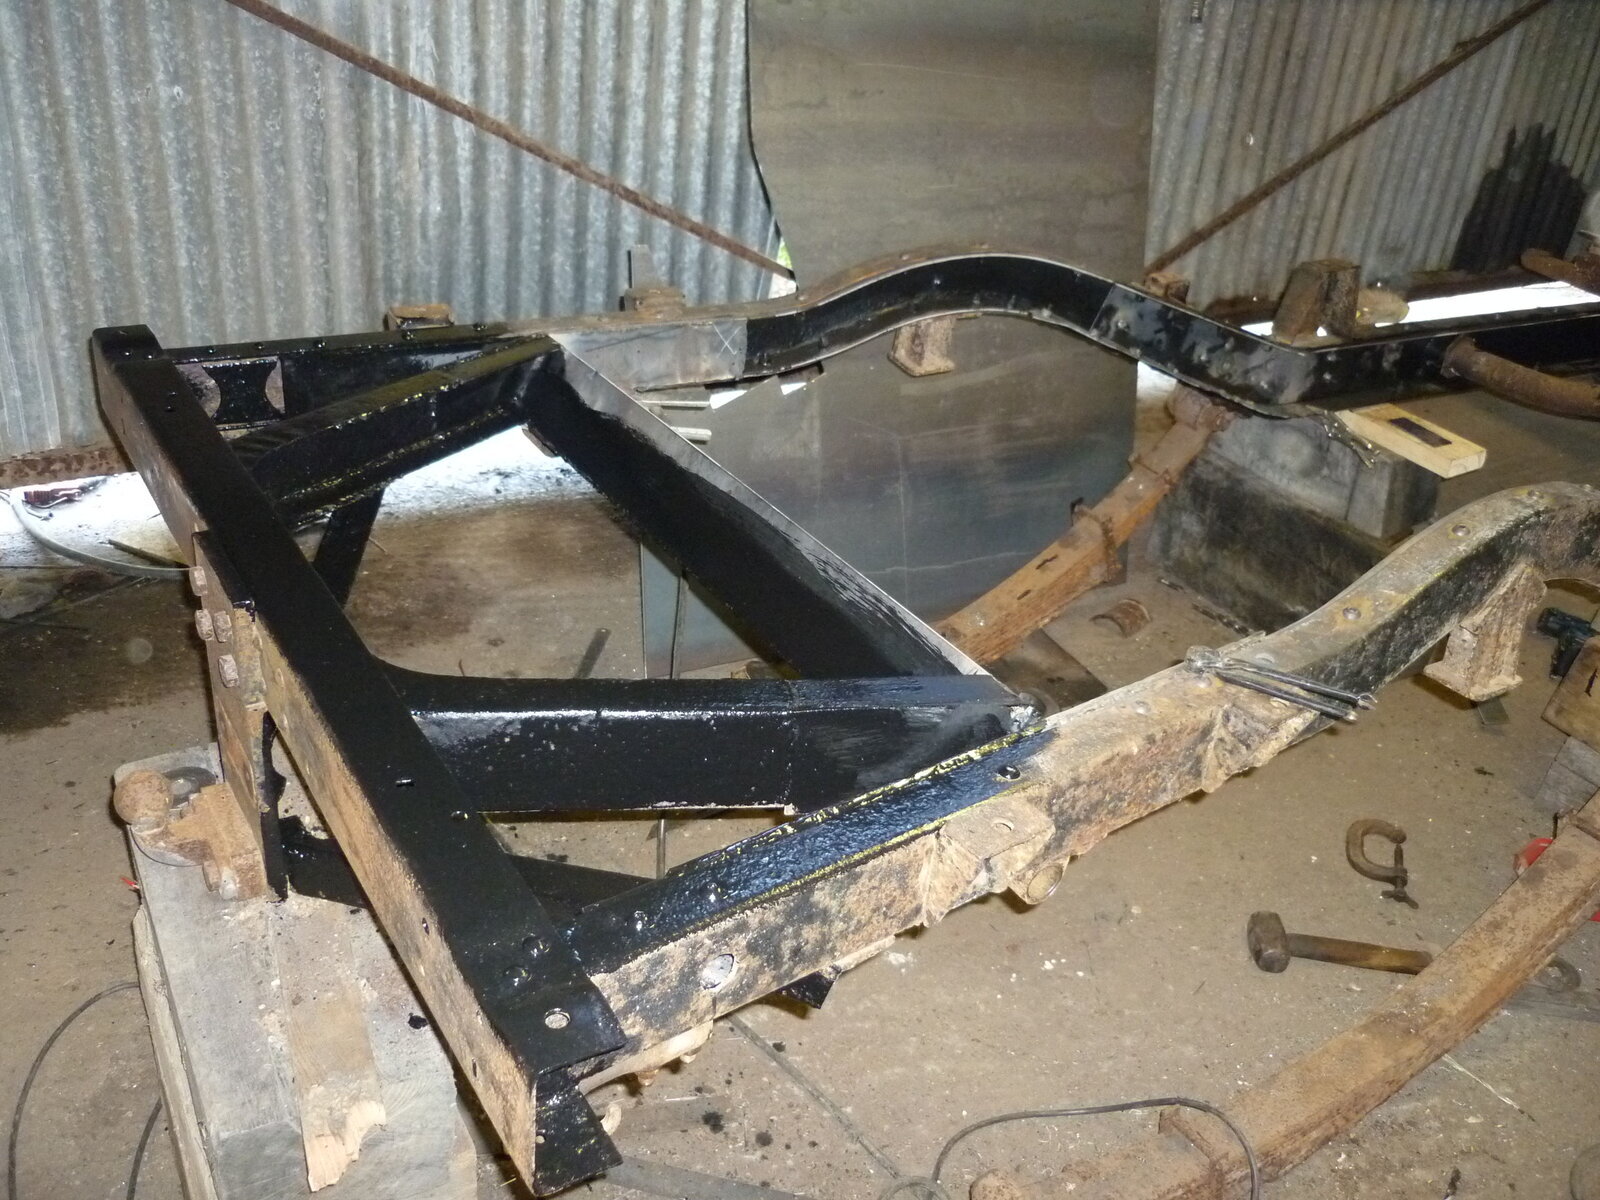
Another hit yesterday got the drivers side reinforcement plate drilled and bolted and the top done to the front.. as nearly all my drill bits have snapped drilling is taking a long time now using the earlier rejected drill bits!

Getting ready today to take the strips off and do the final cuts, then paint the inside of the chassis then fix them back in.. have just under 20 of the 100 bolts left and just enough to finish the bolting..

Need to buy drill bits, decent hole saw and get the gas solenoid sorted on the welder... coming on now!! :thumbup:
 
Hey Iwan,

I love what you are doing with that chassis. Never seen that done before. It will be way stronger than the original when you are done, that truck is going to last forever now. All those round bolt heads make it look like rivets on an old steam engine frame. Cool! Massive amount of work, though.

So its going to be an HDJ45. The photo of the installation in the green one looks good, it really suits the car better than the 2F, imho. This is going to be great when its done.

That connoisseurs collection of cross members had me really rolling on the floor, couldn't believe it. I reckon you could build any pre-95 Toyota with all the parts you must have in your shed. Awesome work, I'm really enjoying your build.
 
Yo Tel Boy! Many thanks for the comment maan! Its a challenge really and with it being really old, it so deserves to be made usefull again.

Had a great 9h hit on this today!

P1020214.JPG


Have undone the bolt work and painted por15 on the inner's between the new metal and the old, the rivets weld well to the plate! Been gearing up to get to the point of painting the inside of the chassis.. feel like I'm getting somewhere with this now!


P1020213.JPG


Later today managed to knock this out. it's well triangulated now made a C section out of strips well solid to say the least.

Thinking to work on this tomorow and hit the paid job wed, thurs, and friday Lol!:laughing-rolling::thumbup:
 

Attachments

  • P1020212.JPG
    P1020212.JPG
    379.8 KB · Views: 31
i like the dome head bolts to replicate the rivets.

youve had that G cramp some years son..:)
 
The clamps are invaluable really, I was thinkin when I got those and I believe I got them half a life time ago! Shocking really to think..

The por paint is a great product,,, am currently looking to buy some more. I had the 947ml us quart size but when you open and close the tin 4 or 5 times the lid glues itself to the tin.. yesterday had to destroy the tin to get the last bit out.. have to be tidy with the brush so the lip doesn't fill with the paint.

It's possible to buy 6 no x 113ml tins so you can take the time and not risk loosing the last part of the bigger tin. More expensive though.. or 473ml us pint.

Very slow and tired this morning! :thumbup:
 
We currently use the little cans for touch ups underneath from rock scraps etc but we put a layer of clingfilm between the can and lid. It works. It is expensive, but IMO worth every penny, and that film enables use to use every drop of it. Works on the bigger tins as well however the last strokes from any size tin is clear the lip.

Some of the clamps (and other tools - files, planes, etc) I have I inherited from my late father-in-law who was an engineer and Corinne remembers them from when she was a very little girl who spent a lot of time in his shed with him. He taught her how to use tools and not be feared of getting her hands dirty. There is stuff in those chests that I have no idea what it is for but whenever I'm stuck a rummage through them usually provides an answer.

Regards,

Rodger
 
The best thing of older tool's Roger is that they're made to last a long time.. for instance the clamps spoke of earlier have been hammered for over 20 years and when you buy the modern day Record equivalent clamps they just can't take the hammer like the older ones. Earlier tools were made for the user to use and modern tools are for the seller to sell! Then it doesn't matter if it last's five minutes! Because you bought a clamp!

P1020219.JPG


Have done a bit to the chassis, thought to refit the shock mount tube.. The cheap 50mm hole saw did the trick.

P1020220.JPG


Have also fitted the lj71 mid cross member, it's just behind the cab mounts and is linking the front leaf spring mounts together.

P1020222.JPG


A mockup of the front inner plate and the original mid tube removed I like the new 70 series hoop.. had a good push on with this last hit a good 4 days effort.

Really got to get back on the paid job and get back onto this in a week or so.. wreckon another 2.5 to 3 days will be ready to trial fit the engine transmission.

Light at the end of the tunnel is a welcome sight with this phase! :thumbup:
 
You may like this true story concerning my father-in-law's tools (he would have been 104 yesterday had he lived):

The blade on my 5 minute wonder surform was just not cutting it. Corinne thought that there were some spare blades in her father's stuff. Next thing she turns up with an unopened box and inside was a metal framed, wooden adjustable handle, surform. It still had the price on the box.... 7 shillings and 11 pence!

And, of course, it works a treat!!!!

The chassis work is looking really excellent.

Regards,

Rodger
 
Hi that is one good job you have on the go wot a lot of hard work it's coming on leaps and bounds I like the look of that a lot keep the pics comeing a big thanks for the pics hope you r well. It will be ever strong .
 
Glad you like it Tony! It's been a grind mate and happy with it really.. :thumbup:

puw xxxr.jpg


I've found this for you Tony, it's from an ebay old listing. From zooming in on the reg plate it looks like it has a similar number plate to the ones above in the thread. Either way it's a really nice one!:thumbup:
 
do you not rate galvanising?
ive read varying opinions. still undecided which way to go when i start my chassis refurb.
 
I've seen new thing's galvanised but wonder how galvanising a rusty piece (brown metal) would work?? If you look at a closed box section that's rusty on the inside, Surely you need to clean it up before you can drop it off at the galvanising place or for them to take the job on.. Plus you have to fit bolts into the the captive nuts that you want to use, I know only that.

To be honest maan, I have nightmares at night thinking that my 81 is rusty inside the chassis! Time to develop a system for inner chassis protection.. also with this job here to provide drain holes and holes for spraying in rust prevention...

This is interesting because I've seen 4mm steel deteriorate to 0mm in places but also this is over 44 year's old ..
 
Back
Top