Don't like the adverts?  Click here to remove them

Front Inner CV Boot!

Simon5030

Well-Known Member
Joined
Jul 15, 2014
Messages
273
Country Flag
great_britain
Well with just 2 weeks to i set off to Austria and Switzerland, just swapping tyres front to back and noticed my inner CV boot has split :angry:

So had a look round and there seems to be a few variants on how this task is done?

Actually looking at the job it looks straight forward, so my theory is
1) Remove lower ball joint, this seems to be bolted on so will not need splitting?
2) Split steering ball joint
3) Separate anti roll bar
Front Inner CV.jpg

After undoing the axle nut (35mm?) it looks like that is sufficient to allow the whole hub to swing out of the way on the top wishbone??
If the above is correct then its a pretty straight forward job!

Would it make sense to replace both inner and outer as a matter of course, outer looks fine but then so would the inner just before it split!

Another thought is that if the lower ball joint is bolted and i remove it, unless there are locating pins then there will be some float in the holes, will this affect my camber??

Sorry about the poor pic that was an after thought but will do a post job write up :)

Thanks

Simon
 
Well with just 2 weeks to i set off to Austria and Switzerland, just swapping tyres front to back and noticed my inner CV boot has split :angry:

So had a look round and there seems to be a few variants on how this task is done?

Actually looking at the job it looks straight forward, so my theory is
1) Remove lower ball joint, this seems to be bolted on so will not need splitting?
2) Split steering ball joint
3) Separate anti roll bar
View attachment 101737
After undoing the axle nut (35mm?) it looks like that is sufficient to allow the whole hub to swing out of the way on the top wishbone??
If the above is correct then its a pretty straight forward job!

Would it make sense to replace both inner and outer as a matter of course, outer looks fine but then so would the inner just before it split!

Another thought is that if the lower ball joint is bolted and i remove it, unless there are locating pins then there will be some float in the holes, will this affect my camber??

Sorry about the poor pic that was an after thought but will do a post job write up :)

Thanks

Simon

Hi Simon, I did mine a couple of weeks ago. Should be a thread here which will be my usual lack of information. Both sides had split on the inners.

Hub doesn't need splitting as is 35mm but as you say. You need to split tie rod end and the two very tight bolts that hold the bottom wishbone to the hub. Plus bottom shock bolt and roll bar link.

Drive shafts knock in and out easily, there are notches on the inner CVJ case I tapped with a big chisel. I only did the inner boots. When refiting make sure the C clips on the end of the axle spline are facing with their open side down.

I bought boots from Roughtrax. I have a Sealey band tool but there wasn't enough strap to get hold of. Ended up using jubilee clips which have worked fine. I think Roughtrax are now stocking a different boot. The grease that comes with boots isn't enough. The service manual says about 200g of grease for each inner joint.

I bought new clips from MrT for either side of the CV joints, but didn't use them. This is silly because I'm hoping not to need to do it again and if I do I'm sure I won't be able to find them!

I did both sides over a weekend, and I am very slow. Stop lots. And am easily distracted.
image.jpg
 
The lower ball joint is held to the knuckle with the two very tight bolts. You do not need to undo the big castellated nut in the middle. The two bolts give the location so you don't mess up camber.
 
The lower ball joint is held to the knuckle with the two very tight bolts. You do not need to undo the big castellated nut in the middle. The two bolts give the location so you don't mess up camber.


Rob
Many thanks for the pointers,
So are you suggesting that if i dont undo the 35mm hub nut the complete shaft can swing out (still connected to the hub) with enough room to replace the boot?

The other tech bit i wasn't quite clear on is keeping the fluid in the diff, i believe it can be split leaving the CV housing still in the diff, is this correct?

Grease: It seems like there is inssuficent grease supplied and i believe its just a standard Lithium grease, if my memory serves me this is usually black/grey in colour, i have a time of Lithium grease and its opaque in colour, are they the same thing becase i wouldnt like to mix them being different in colour?

Thanks

Hi Simon

Castellated nut I was refering to was on the bottom ball joint. It looks like you might need to undo it to lower the bottom wishbone. You don't. Just the two bolts either side of it.

You will need to undo the 35mm hub nut (also castellated!)

I drained the diff oil and used it as an opportunity to refil. If you don't pull the whole driveshaft I dont see how you can change the inner boot, unless you manage to get it over in the outer CV. I know there are various stretch tools. I don't know about them though. It was easy to remove when I hit the CV casing with a big hammer and blunt cold chisel, a copper drift would probably be better!

I used specific CV grease from Halfords. It's Lith-Moly, dark grey, and very sticky. I only had a small split and didnt seem to have lost much grease but inside was horrible white sludge. I used kitchen towel and brake cleaner to get it all out. This would be awkward without taking the whole driveshaft out.

Do make sure you mark everything when you pull it apart too. The cv joint itself is supposed to go back on the shaft in the same place, and sit in the outer casing in the same position.
 
Last edited:
Hi Simon

Castellated nut I was refering to was on the bottom ball joint. It looks like you might need to undo it to lower the bottom wishbone. You don't. Just the two bolts either side of it.

You will need to undo the 35mm hub nut (also castellated!)

I drained the diff oil and used it as an opportunity to refil. If you don't pull the whole driveshaft I dont see how you can change the inner boot, unless you manage to get it over in the outer CV. I know there are various stretch tools. I don't know about them though. It was easy to remove when I hit the CV casing with a big hammer and blunt cold chisel, a copper drift would probably be better!

I used specific CV grease from Halfords. It's Lith-Moly, dark grey, and very sticky. I only had a small split and didnt seem to have lost much grease but inside was horrible white sludge. I used kitchen towel and brake cleaner to get it all out. This would be awkward without taking the whole driveshaft out.

Do make sure you mark everything when you pull it apart too. The cv joint itself is supposed to go back on the shaft in the same place, and sit in the outer casing in the same position.


Rob

Really appreciate the pointers and help, boot is on order from Simon (Mr. T.), very quick response time!!
Will get some diff oil and do the job properly!

Regards
Simon
 
Don't like the adverts?  Click here to remove them
So Friday came an i was looking forward to escaping the sunshine by spending the time under my cruiser but alas it poured down!
Soon as the weather cleared i set to changing the inner CV boot!

Love these kerbside repairs!
1) Drained the front transfer box
IMG_20160610_153244.jpg


2)Remove the road wheel then centre hub cap, looks like that has never been off!!
Cracked the nut a little (35mm), this was surprisingly easy to do considering its supposed torque setting of 295Nm!
IMG_20160610_162339.jpg


3)Removed the steering ball joint, had to drill the pin out as it was rusted to bits! Gave me chance to test out my new ball joint tool :dance:
IMG_20160610_164503.jpg


4)Remove the bottom 2 bolts holding on the lower ball joint, again these seemed easier to undo than expected!
IMG_20160610_164718.jpg


5) Undid the bracket holding the brake pipe and abs wire
IMG_20160610_163252.jpg


6)Removed the centre hub nut and tapped the end of the shaft with a copper hammer and there was enough room to swing the hub out of the way without having to undo the anti roll bar joint!
IMG_20160610_165458.jpg


7) At this point Toyota have a special tool to pull the rear hub housing shaft (knocking bar) and release it from the snap ring, i managed to improvise and made a bar with a notch ground in it, bolted a washer on the back end and used a weight to shock the shaft out, it came out very smoothly, there are slots on the corners of the housing to hook the bar in. I think with any form of shock and a little pull it would have come out quite easily!
Note: At this point there is only the boot holding the boot holding the rear joint together so if the boot is split all the way round the shaft will just fall out of the housing, not sure how critical it is but Toyota mark the location of the bearings in the housings, this makes good sense especially on worn parts, make sure you mark things before they fall apart!!
IMG_20160610_165708.jpg


8) Shaft out, and i must say that the grease looks very grim!!, notice i have marked the position before doing anything else! Knew that cat litter would come in useful!
IMG_20160610_170235.jpg


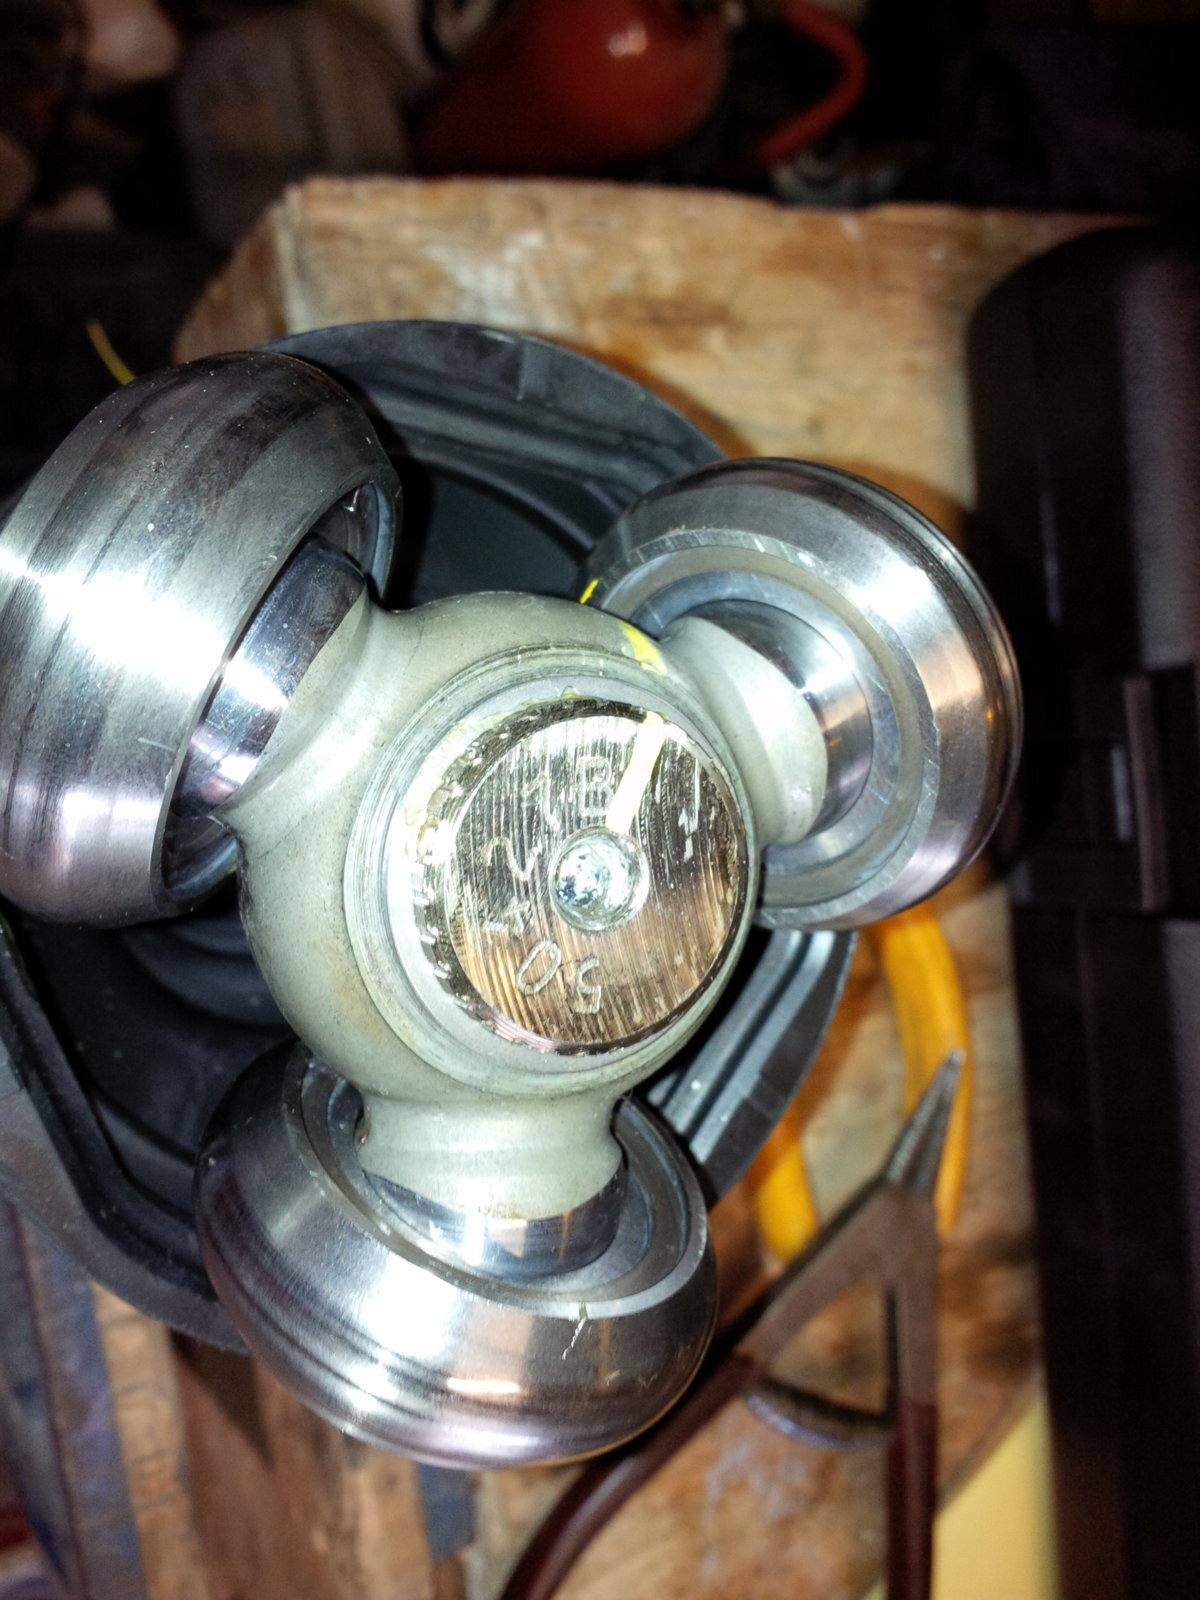
9) Cut the boot off so i could clean it before removing the tripod, marked the location of the tripod on the shaft so it could go back in the same position, the clip holding the tripod on is a circlip that has no holes for circlip pliers, this required some manipulation with small screwdrivers to get it off!! Spent some time cleaning the tripod as the emulsified grease was inside the bearings, lots of paraffin washes and airline work to clear it until spotless!
IMG_20160610_172332.jpg


10) Once everything was clean i put the small circlip on the shaft, after wrapping tape around the splines to stop the boot being cut, then put the boot on,
IMG_20160610_173628.jpg


11) Carefully tapped the tripod back on making sure the marks were aligned, put new circlip on, ready for the grease
IMG_20160610_175434.jpg


12)Now there are some murmurings about amounts of grease, as i bought mine as a kit from Mr. T then i expect the grease amount to be correct but for good measure i weighed it 250g, the grease capacity according to the manual is 260-270g but i assume that this is filled to the max as apposed to a good dollop?
Worked the grease into the join and then assembled, closed the small circlip but the large one was an absolute b****r to do! not sure if the is supposed to be a tool to do this but it required a lot of encouraging after greasing the seating slot for the ring, got it in the end!
IMG_20160610_180924.jpg


13) Fitted new snap ring to the shaft and it pretty much plopped back in, very easy to feel when its located, everything else is pretty much the reverse making sure its all clean and torqued up correctly (although i know most of you experienced people will have a good handle on whats tight enough!)

14) The last and final challenge was, for me, the biggest! getting the oil in the diff!! there really isnt much room, i tried first of all with a 1Lt bottle with a pipe on it but that failed as it wasnt possible to get the bottle high enough and still get the hose in, tried the same thing with an extension hose but this just led to me getting oily! Then hey presto, just as my good lady brought me a much needed cup of tea!
I used an old bit of hosepipe, measured the oil into her best measuring jug and just poured it in from the side!!
IMG_20160610_201125.jpg


All in all between rain storms and messing about learning it took me about 4 hours, if i had to do it again i would estimate about 2 hours at the side of the road!!
She is now fit to travel to Europe (Might let the good lady come as well seeing as she helped hold the pipe!!) :laughing-rolling:

Thanks to all for tips and suggestions, hope this gives some payback!

Simon IMG_20160610_174439.jpg
 
Last edited:
Nice write up. I like your removal tool. More sophisticated than my hammer. There is a tool to tighten those bands. Unfortunately the Roughtrax bands I had weren't quite long enough to use it.
image.jpeg
 
Great write up, thanks. Followed this today and was easy enough.

Biggest issue was the drain plug. Some Toyota monkey had damaged the hex hole and on closer inspection you could see where they had used a chisel to loosen the plug. I had to do the same with a chisel, fortunately I had bought a replacement one.

Grease looked the same as yours, but good clean and fresh grease good as new. Also used one of the band tightening tools which made a easy job of doing those up.


Tony

Thanks, makes all the effort worth while when it helps someone

Simon
 
Back
Top