Don't like the adverts? Click here to remove them
You are using an out of date browser. It may not display this or other websites correctly.
You should upgrade or use an alternative browser.
You should upgrade or use an alternative browser.
Landcruiser lj70 [creepycruiser]
- Thread starter Victor
- Start date
...Not really..
Turned out i had got the wrong inner bearing, guy behind the counter had messed up and given me the wrong one, so no extra cost for me there..
While home i put 'em on, and started putting it together, but i just couldn't get it right, everything binded upon tightening, diff would not center, and pinion seemed way further in then when i took it apart, so i gave up for the day..
Yesterday i examined it more, and it turns out the new bearing is thicker then the old one! Which resulted in the pinion binding on the carrier since i assumed they were the same and put in the old depth shim om the pinion.. Now i had to get me one of these that take bearings up to 75mm to get the bearing off again to either remove the shim or grind the bearing down..

So i spent today grinding away at a 10mm plate to form that tool, so basically i took 2 10mm plates, and ground them down in the middle, to form a "bowl" if you wish to call it that with a hole in the middle, then welded on 2 nuts, and 2 guides for 2 bolts, worked flawlessly!
So that's where i'm at atm.. So tomorrow i gotta grind down the inner sleeve on the bearing aprox. 2mm since that's how much longer the new one is.. Since i figured that if i just remove the shim i'll never get the bearing off again, since it would be flush against the pinion teeth..
So you could seriously say that this damn car is testing my patience to the fullest
Turned out i had got the wrong inner bearing, guy behind the counter had messed up and given me the wrong one, so no extra cost for me there..
While home i put 'em on, and started putting it together, but i just couldn't get it right, everything binded upon tightening, diff would not center, and pinion seemed way further in then when i took it apart, so i gave up for the day..
Yesterday i examined it more, and it turns out the new bearing is thicker then the old one! Which resulted in the pinion binding on the carrier since i assumed they were the same and put in the old depth shim om the pinion.. Now i had to get me one of these that take bearings up to 75mm to get the bearing off again to either remove the shim or grind the bearing down..
So i spent today grinding away at a 10mm plate to form that tool, so basically i took 2 10mm plates, and ground them down in the middle, to form a "bowl" if you wish to call it that with a hole in the middle, then welded on 2 nuts, and 2 guides for 2 bolts, worked flawlessly!
So that's where i'm at atm.. So tomorrow i gotta grind down the inner sleeve on the bearing aprox. 2mm since that's how much longer the new one is.. Since i figured that if i just remove the shim i'll never get the bearing off again, since it would be flush against the pinion teeth..
So you could seriously say that this damn car is testing my patience to the fullest
Feel bloody good atm! Diff is all put together and back in the axle again!
The new bearing, altugh matching numbers was about 2.5mm thicker then the old one, so in order to have a fighting chance to get it off again if i need to i had to grind it down that amount, so i could use the shim i already have, angle grinder for the most part, then finished it off with the bench grinder for wood, worked like a charm!
 2015-12-31 11.35.12 by Vc1r, on Flickr
Finally! So happy it's finally in, and the pile of parts is rapidly disappearing!
 2015-12-31 15.50.24 by Vc1r, on Flickr
Put the shafts in aswell, "Just because"
 2015-12-31 15.50.30 by Vc1r, on Flickr

The new bearing, altugh matching numbers was about 2.5mm thicker then the old one, so in order to have a fighting chance to get it off again if i need to i had to grind it down that amount, so i could use the shim i already have, angle grinder for the most part, then finished it off with the bench grinder for wood, worked like a charm!
Finally! So happy it's finally in, and the pile of parts is rapidly disappearing!
Put the shafts in aswell, "Just because"

Finally passenger side is done! Had some trouble with the preload, added least amount, and it was too light, removed it again, and too tight, had to agree with myself in the end that 7-8kg is Ok, and that it will probably wear in..
I's just a shame i'm so bad at taking photos during the work So a couple of aftershots is all i have..
Mmmm, after a couple of months pass side is now done
 2016-01-01 18.15.36 by Vc1r, on Flickr
Being the first to put 6 shooters on a coilbound lj70 (that i know of) i have some dilemmas to deal with.. Here the steering arm is hitting the coil before the steering stop, i am missing about 2cm to hit the stoppers, so i am thinking other springs, these are MASSIVE at 16cm, i have a couple of 13cm's lying around from when i first bought it. Dad thought i could grind some out of the arm, but i dont want to do that really.. One other idea we had was to move the whole coil up from the axle, and make the coilriser so that i get my desired 2cms..
 2016-01-01 18.15.54 by Vc1r, on Flickr
And ofcourse there is then the issue of having 3 rods infront of the axle, but i have an idea if everything fails
I's just a shame i'm so bad at taking photos during the work
Mmmm, after a couple of months pass side is now done
Being the first to put 6 shooters on a coilbound lj70 (that i know of) i have some dilemmas to deal with.. Here the steering arm is hitting the coil before the steering stop, i am missing about 2cm to hit the stoppers, so i am thinking other springs, these are MASSIVE at 16cm, i have a couple of 13cm's lying around from when i first bought it. Dad thought i could grind some out of the arm, but i dont want to do that really.. One other idea we had was to move the whole coil up from the axle, and make the coilriser so that i get my desired 2cms..
And ofcourse there is then the issue of having 3 rods infront of the axle, but i have an idea if everything fails
Good luck, I will eventually go with a cross over set up like yours, I'm pretty sure the panhard rod will have to be moved back so have been looking into aftermarket panhards for Jeep jks, they are bent to clear the diff pumpkin so would be possible to mount it quite a bit further back than standard
http://shop.jeepey.com/product/front-adjustable-track-bar-rhd-jk-panrjk002/
http://shop.jeepey.com/product/front-adjustable-track-bar-rhd-jk-panrjk002/
Decided to put everything together today to see what is touching what, and what needs done..
And it turns out it's not that bad!! I'm gonna have to relocate the panhard rod about 2-3cm further forward, as it's just rubbing the mount now on the parallell rod, So i practically just need room for the bolt!
Also gonna have to shorten the steering rod by a couple of cents as it just is abit to long now! And since the rods is now ontop of the arms i will have to lenghten the (yet!) stock bumpstops, so i'm essentially gonna lose some action in the coils, but damn that height of the rods! :O Just epic!
 2016-01-04 15.54.40 by Vc1r, on Flickr
 2016-01-04 15.55.26 by Vc1r, on Flickr
 2016-01-04 15.56.05 by Vc1r, on Flickr
And it turns out it's not that bad!! I'm gonna have to relocate the panhard rod about 2-3cm further forward, as it's just rubbing the mount now on the parallell rod, So i practically just need room for the bolt!
Also gonna have to shorten the steering rod by a couple of cents as it just is abit to long now! And since the rods is now ontop of the arms i will have to lenghten the (yet!) stock bumpstops, so i'm essentially gonna lose some action in the coils, but damn that height of the rods! :O Just epic!
Don't like the adverts? Click here to remove them
Errm.. Other then the fact that the rods is up and out of the way i have no bloody idea 
 2016-01-05 18.13.43 by Vc1r, on Flickr
Gonna be cutting out all that slanted part aswell, or i will have a bent rod!

Gonna be cutting out all that slanted part aswell, or i will have a bent rod!
- Joined
- Oct 13, 2010
- Messages
- 6,055
- Country Flag
Make sure your 100% happy with how strong the panhard mount is on the chassis. Add extra braces and gussets if necessary and keep an eye on all the welds after driving it, particularly after driving off road, to look out for cracks.
The panhard rod is under a huge amount of pressure and stress, possibly the most pressure out of all the suspension components and if it fails it could quite easily flip the vehicle, particularly if your driving it on the road.
My old house mate flipped his 80 on the highway after the panhard rod snapped on an off road trip and he thought he could limp home, with the axle ratchet strapped in place!
Iwan
Well-Known Member
- Joined
- Mar 28, 2011
- Messages
- 1,906
- Country Flag
Errm.. Other then the fact that the rods is up and out of the way i have no bloody idea
The setup that you're using is generally used on leaf sprung trucks with the "spring over axle " conversion. It allows the steering rods to fit through the leaf springs above. Also the Bundera is restricted when you do castor correction as the inner steering rod catches the control arms. But with taller lifts castor and prop angles are limited hence the "cut and turn" becomes appropriate.
As ben said.. be careful with the top panard mount as its very important that its solid.
I have the remains of 10 lj70's here and have a Bundera chassis that has been cut up. So if you feel you need a top panard chassis section can help. Maybe as yours is lhd may not be appropriate.
But the offer is there!
Hope the info helps
Car is out of the garage since a couple of weeks, not completley finished, but i had to have a rest from it!
After final assembly of the front axle there was an airleak in the diff lock system, confident it as the small O-ring in the diffhousing coupler i ordered new O-rings, so i sat out today to change that!
Well, it turns out it wasn't it.. I have an internal leak in the diff somewhere, think the 2 big O-rings at the end of the diff, where the ring and copper line goes on..
While at it, i checked the rear diff, as i know it's leaking somehwere, and turns out it also has an internal leak, so gonna have to tear it down aswell, when i rebuild the brakes for discs!
I'm thinking it's probably the 2 big O-rings inside the diff that's bad..
Back to the nice things! Drilled and added 2 bolts to each loading ramp, and then drilled matching holes in the truck bed so that they wont slide off while Un/loading
 2016-02-05 14.22.08 by Vc1r, on Flickr
 2016-02-05 15.02.35 by Vc1r, on Flickr
I think the total height landed at aprox 3.20m
 2016-02-05 15.02.55 by Vc1r, on Flickr
After final assembly of the front axle there was an airleak in the diff lock system, confident it as the small O-ring in the diffhousing coupler i ordered new O-rings, so i sat out today to change that!
Well, it turns out it wasn't it.. I have an internal leak in the diff somewhere, think the 2 big O-rings at the end of the diff, where the ring and copper line goes on..
While at it, i checked the rear diff, as i know it's leaking somehwere, and turns out it also has an internal leak, so gonna have to tear it down aswell, when i rebuild the brakes for discs!
I'm thinking it's probably the 2 big O-rings inside the diff that's bad..
Back to the nice things! Drilled and added 2 bolts to each loading ramp, and then drilled matching holes in the truck bed so that they wont slide off while Un/loading
I think the total height landed at aprox 3.20m
Uh oh! Been a long time since the ladt update..
2016 has been awesome as for the offroading part, and the Toyota have behaved all through the year (other then one mishap where i accidently knocked one of the rocksliders loose (Then there was that time where it decided to spew engine oil out the front seal)
Also, truck above is sold and replaced with a newer Volvo Fl6 with an Allison automatic gearbox, decided that the brown f4 was too old and uncomfy for what i want, so sold and bought different =)
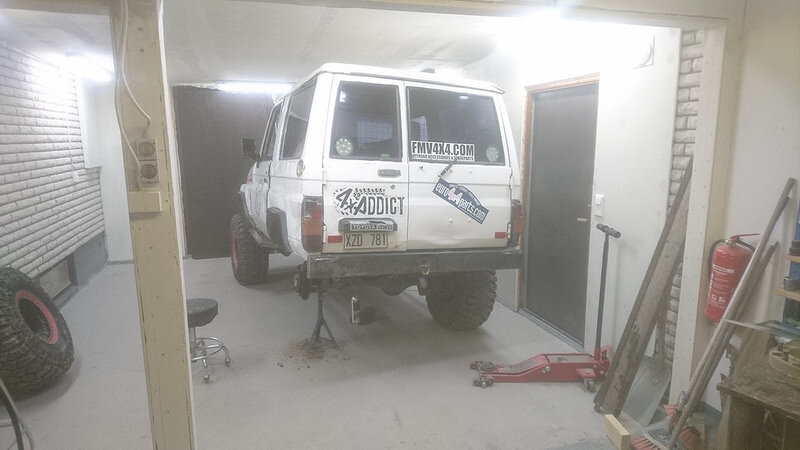
Now! Ater a tough year of offroading every rig needs some work, and i have been lacking interest really, and between expanding the garage with a new part and working i have not done anything to it, until last weekend where i finally got it in and started!
First on my long to-do list was brakes! For 1½ year now i have had parts on the shelf for a disc brake conversion on the rear, and for just as long have i only had 3 brakes as one rear cylinder gave up (For the third time!)
So i began tearing the drivers side down where i had no brakes
 2016-12-31 10.54.37 by Vc1r, on Flickr
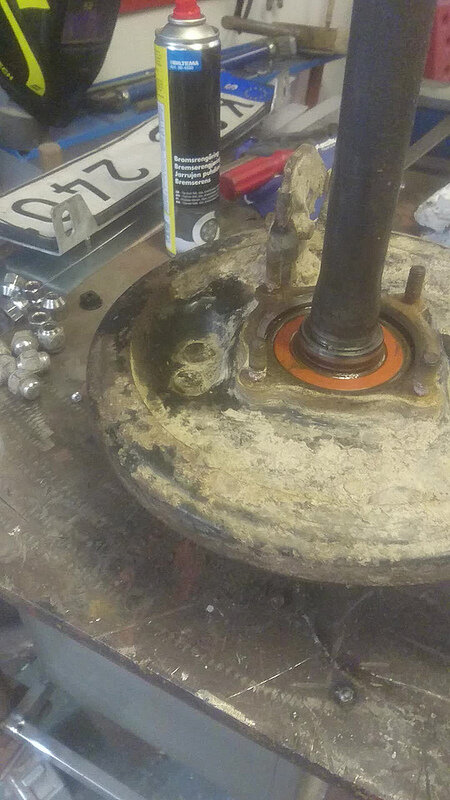
Where i discovered the bearing was shot! (click to view video)
 2016-12-31 10.05.05 by Vc1r, on Flickr
Unfortunatley i had neglected to buy new bearings! So until i had new bearings i started with the next part! Diesel tank!
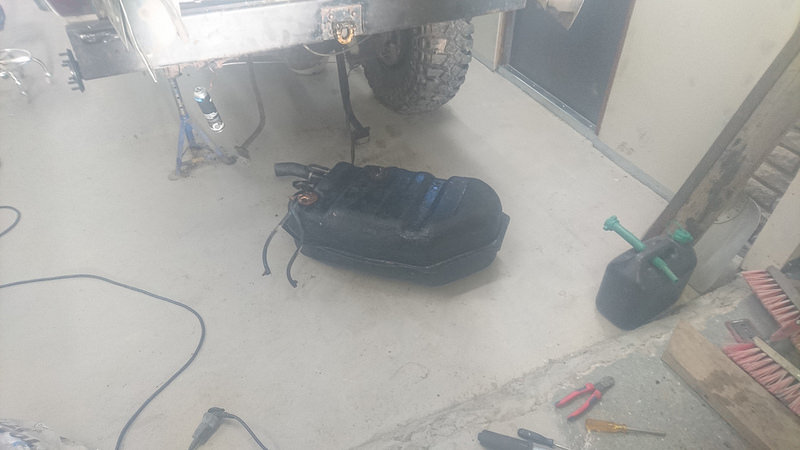
Couple of years of bashing had gotten it to start leaking, so my intial plan was to cut off the bad lower part, as i dont need 90 liters fuel cap. and rather have it flush with the frame
Tank out
 2017-01-01 11.43.31 by Vc1r, on Flickr
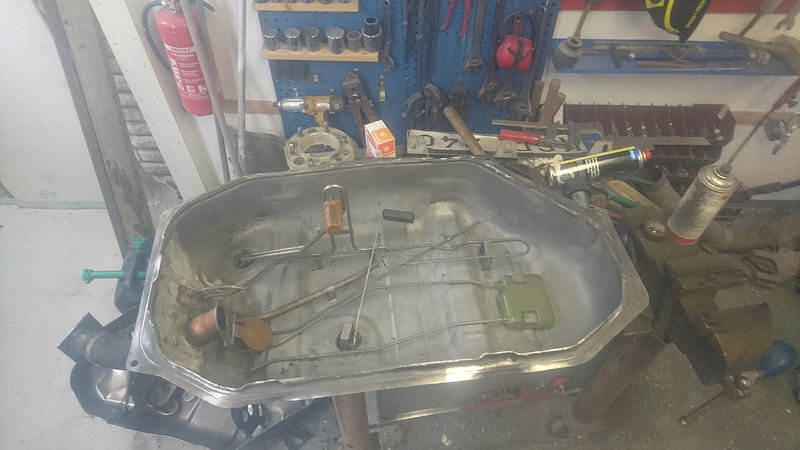
Incase you wondered, this is what the internals of a lj7 tank looks like!
 2017-01-01 14.25.28 by Vc1r, on Flickr
I soon scraped that idea though, as i found out the filler would be at the very bottom of the tank, and i believed that i would get a pretty big air pocket at the top, so i literally wouldnt get very much capacity at all, right now im looking at stainless steel boat tanks, which i found to be quite cheap, only like £300 for a 50 liter one! So gonna make me a fake one tomorrow in cardboard to make sure it fits good!
So this weekend i finally got my new bearings from France ( I order almost everything for euro4x4parts, quick delivery and superb service!)
So on with my bearing presstube!
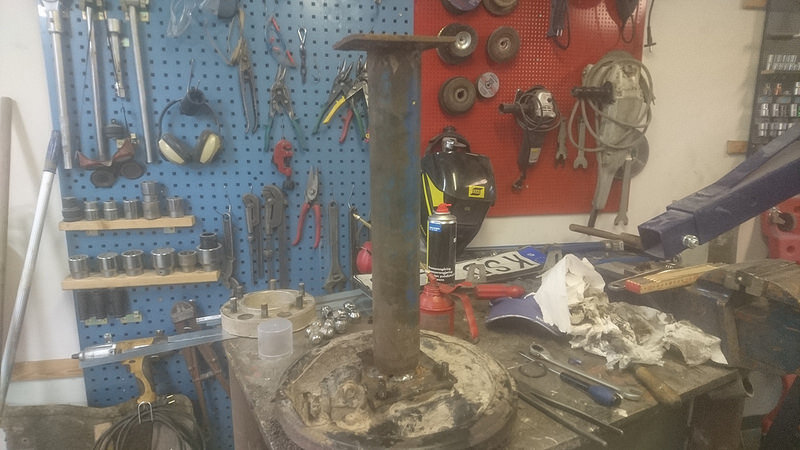 2016-12-31 11.25.57 by Vc1r, on Flickr
Fabricated another small piece to go between the big pipe and the new bearing, dont fancy pressing on the outer ring when i should be pressing on the inner race
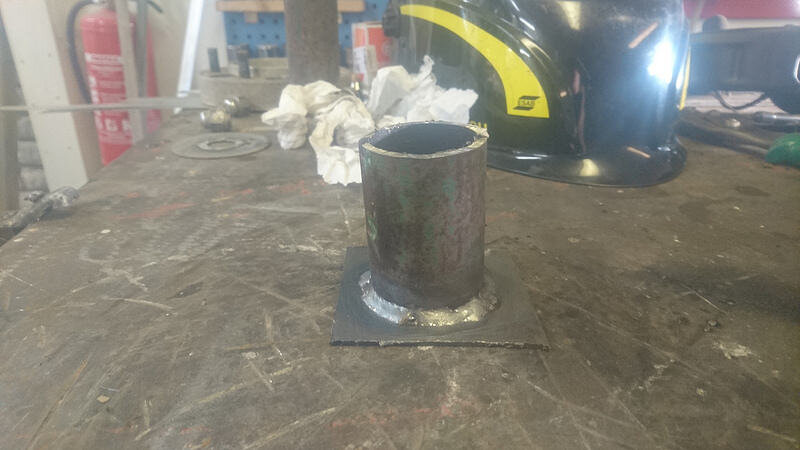 2017-01-01 11.43.49 by Vc1r, on Flickr
Soon had it together so put it in the diff and on with a disc!
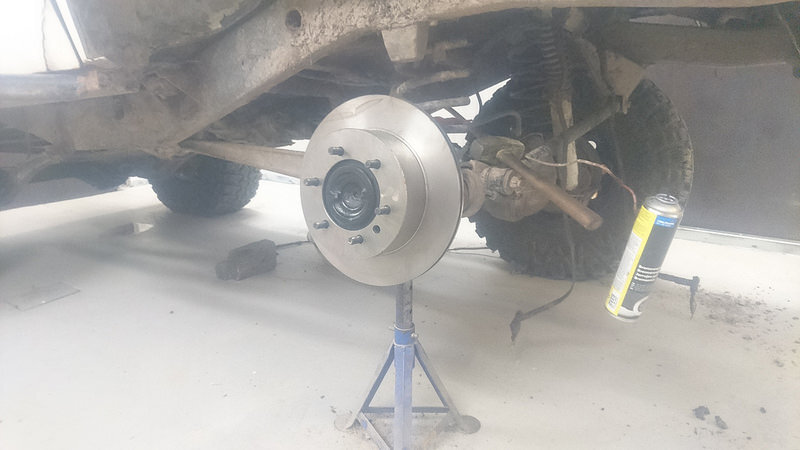 2017-01-06 13.28.39 by Vc1r, on Flickr
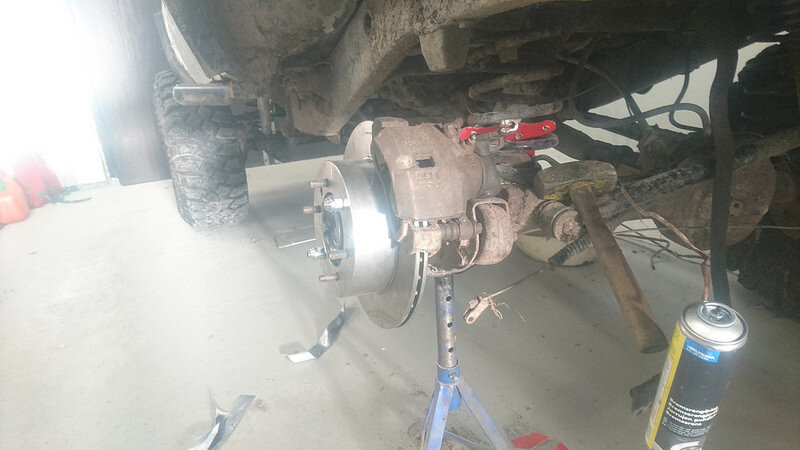
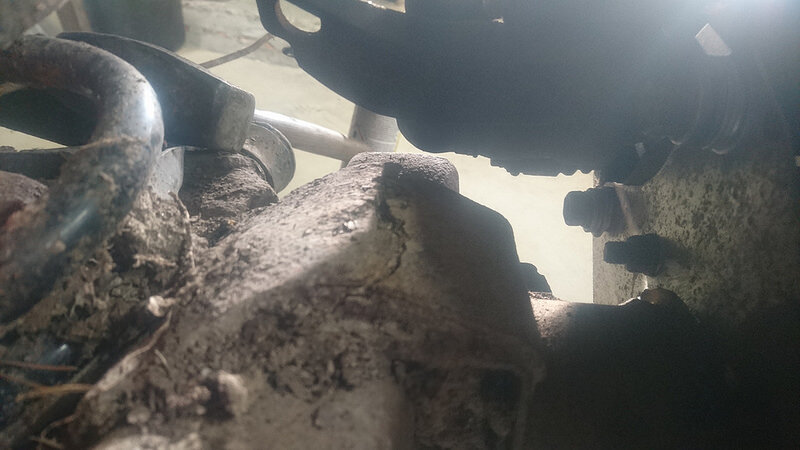
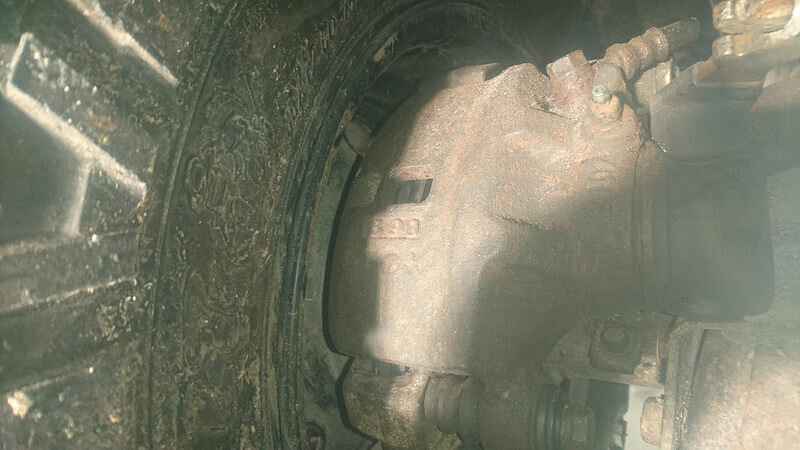
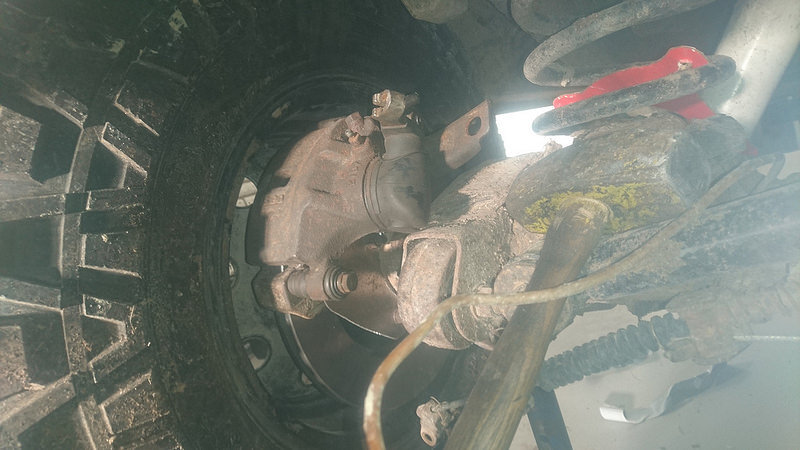
After a couple of cardboard templates this is what i found to work, it's gonna be tight as F*** against the frame, but it will work.. I think..
Couldnt have it any lower either way because of control arms hitting parking brake mechanism..
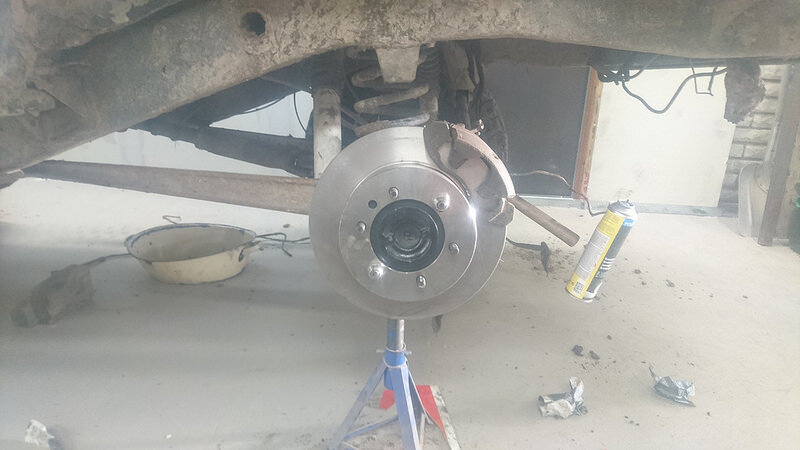 2017-01-07 11.13.44 by Vc1r, on Flickr
 2017-01-07 11.13.58 by Vc1r, on Flickr
 2017-01-07 11.14.12 by Vc1r, on Flickr
tested with wheel and my spacers, clears beautifully!
 2017-01-07 11.20.57 by Vc1r, on Flickr
 2017-01-07 11.21.09 by Vc1r, on Flickr
And look Ben, mine isn't upside-down!
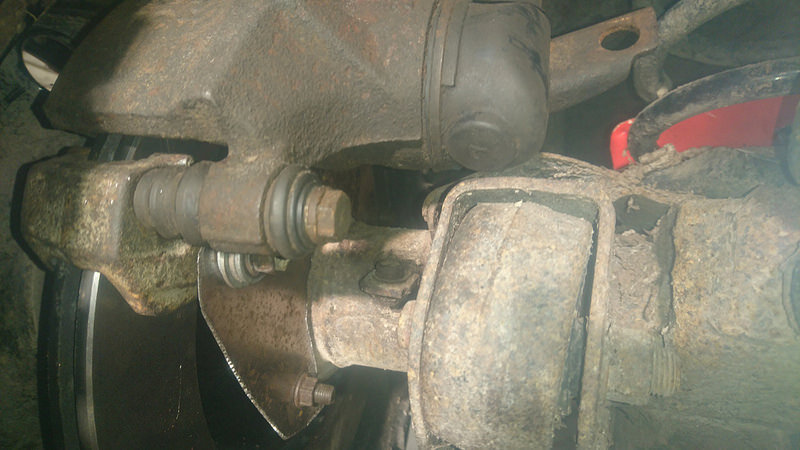 2017-01-07 11.21.21 by Vc1r, on Flickr
So! Time to make the final version! found some 8mm steel that will be good enough!
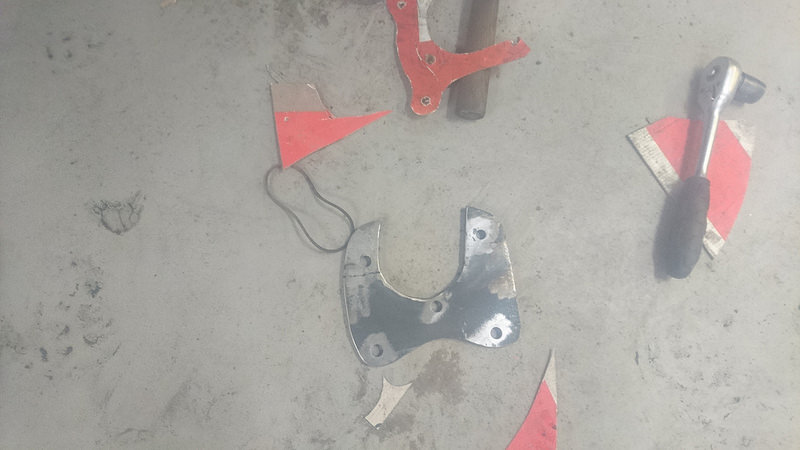 2017-01-07 16.20.22 by Vc1r, on Flickr
With my suspension i found it quite impossible to fit it over all four lugs, with the new suspension the control arms is further in, and i have very little room to wiggle around in..
2016 has been awesome as for the offroading part, and the Toyota have behaved all through the year (other then one mishap where i accidently knocked one of the rocksliders loose
Also, truck above is sold and replaced with a newer Volvo Fl6 with an Allison automatic gearbox, decided that the brown f4 was too old and uncomfy for what i want, so sold and bought different =)
Now! Ater a tough year of offroading every rig needs some work, and i have been lacking interest really, and between expanding the garage with a new part and working i have not done anything to it, until last weekend where i finally got it in and started!
First on my long to-do list was brakes! For 1½ year now i have had parts on the shelf for a disc brake conversion on the rear, and for just as long have i only had 3 brakes as one rear cylinder gave up (For the third time!)
So i began tearing the drivers side down where i had no brakes
 2016-12-31 10.54.37 by Vc1r, on Flickr
Where i discovered the bearing was shot! (click to view video)
 2016-12-31 10.05.05 by Vc1r, on Flickr
Unfortunatley i had neglected to buy new bearings! So until i had new bearings i started with the next part! Diesel tank!
Couple of years of bashing had gotten it to start leaking, so my intial plan was to cut off the bad lower part, as i dont need 90 liters fuel cap. and rather have it flush with the frame
Tank out
 2017-01-01 11.43.31 by Vc1r, on Flickr
Incase you wondered, this is what the internals of a lj7 tank looks like!
 2017-01-01 14.25.28 by Vc1r, on Flickr
I soon scraped that idea though, as i found out the filler would be at the very bottom of the tank, and i believed that i would get a pretty big air pocket at the top, so i literally wouldnt get very much capacity at all, right now im looking at stainless steel boat tanks, which i found to be quite cheap, only like £300 for a 50 liter one! So gonna make me a fake one tomorrow in cardboard to make sure it fits good!
So this weekend i finally got my new bearings from France ( I order almost everything for euro4x4parts, quick delivery and superb service!)
So on with my bearing presstube!
 2016-12-31 11.25.57 by Vc1r, on Flickr
Fabricated another small piece to go between the big pipe and the new bearing, dont fancy pressing on the outer ring when i should be pressing on the inner race
 2017-01-01 11.43.49 by Vc1r, on Flickr
Soon had it together so put it in the diff and on with a disc!
 2017-01-06 13.28.39 by Vc1r, on Flickr
After a couple of cardboard templates this is what i found to work, it's gonna be tight as F*** against the frame, but it will work.. I think..
Couldnt have it any lower either way because of control arms hitting parking brake mechanism..
 2017-01-07 11.13.44 by Vc1r, on Flickr
 2017-01-07 11.13.58 by Vc1r, on Flickr
 2017-01-07 11.14.12 by Vc1r, on Flickr
tested with wheel and my spacers, clears beautifully!
 2017-01-07 11.20.57 by Vc1r, on Flickr
 2017-01-07 11.21.09 by Vc1r, on Flickr
And look Ben, mine isn't upside-down!
 2017-01-07 11.21.21 by Vc1r, on Flickr
So! Time to make the final version! found some 8mm steel that will be good enough!
 2017-01-07 16.20.22 by Vc1r, on Flickr
With my suspension i found it quite impossible to fit it over all four lugs, with the new suspension the control arms is further in, and i have very little room to wiggle around in..
Update!
Bit of a bad pic, but had to grind the plate a bit as the pad fouled on it..
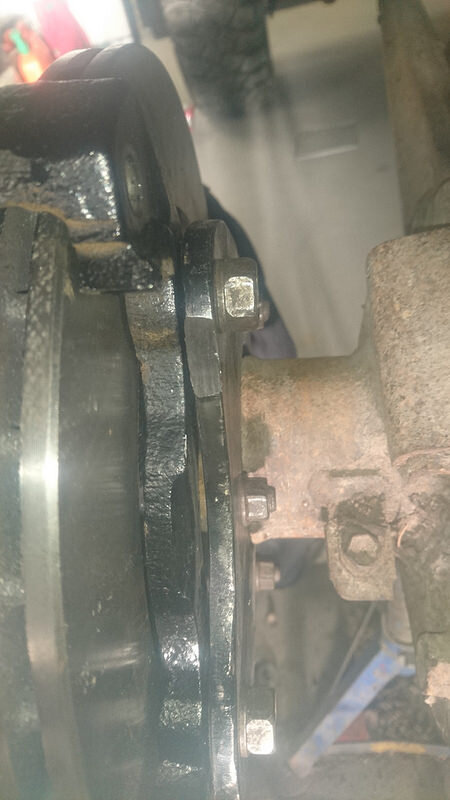 2017-01-14 11.16.57 by Vc1r, on Flickr
You can really tell by the radius on the pads that they are made for smaller discs
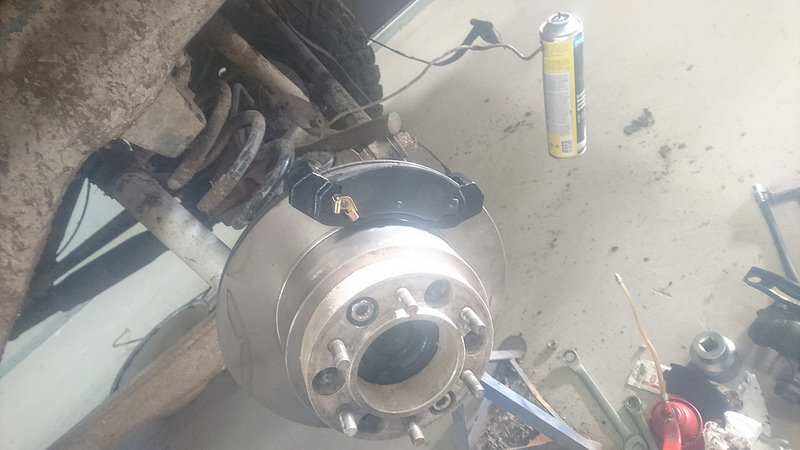 2017-01-14 11.17.11 by Vc1r, on Flickr
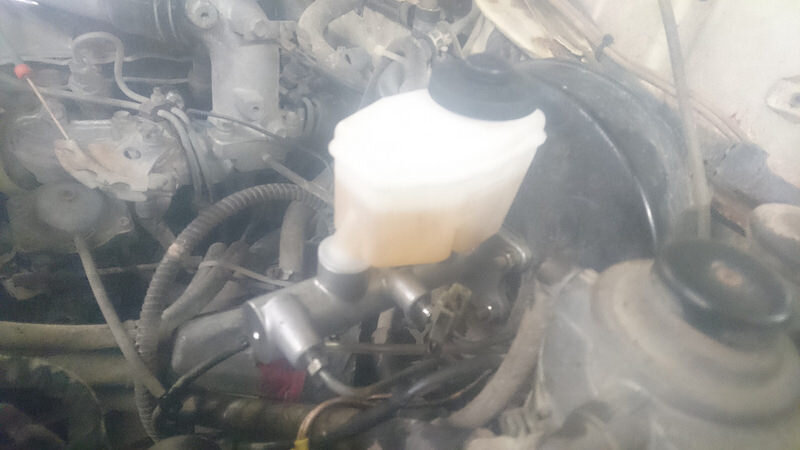
New master brake cylinder, Hdj 80 series, Bolt-On! :tumbup:
 2017-01-14 16.20.28 by Vc1r, on Flickr
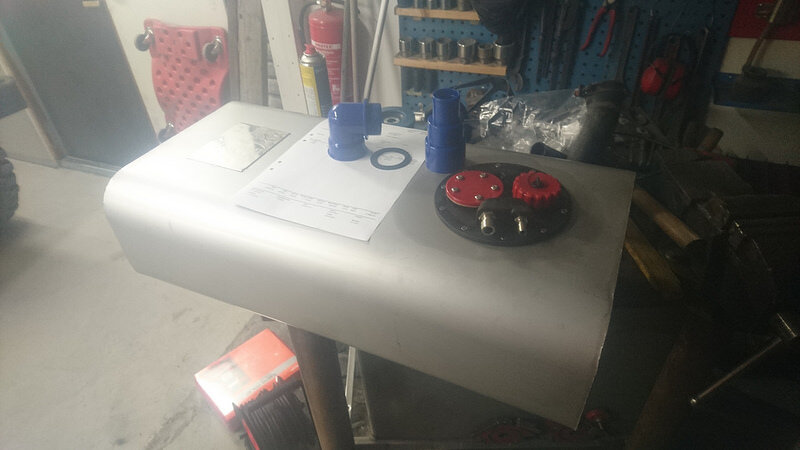
The new tank arrived this Friday too! Gonna mount it in the original location with some heavy duty shield underneath!
 2017-01-13 15.44.11 by Vc1r, on Flickr
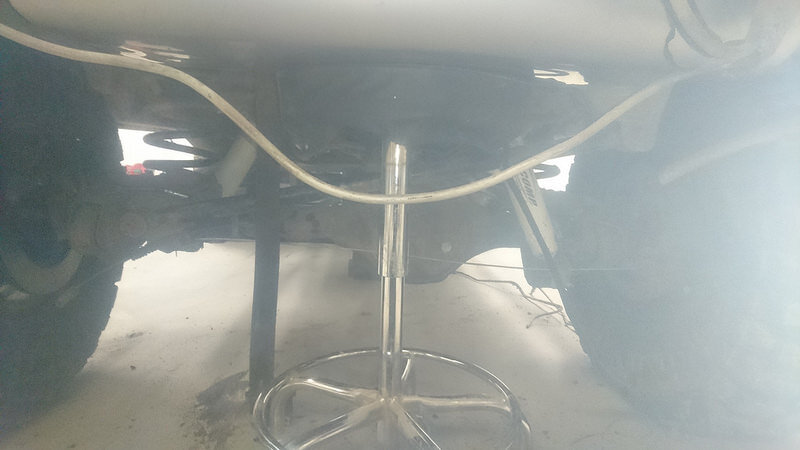
Came up with a new way to use the garage stool (It winds up and down when you spin the part you sit on )
) 
 2017-01-14 15.48.44 by Vc1r, on Flickr
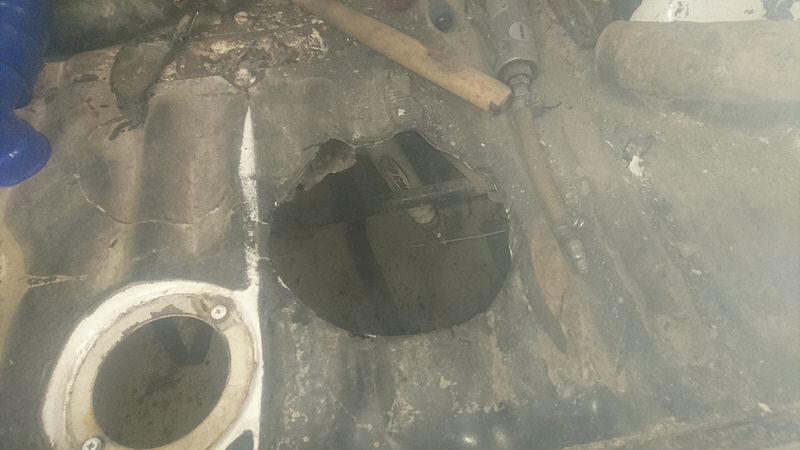
Hole made for the tank!
 2017-01-14 16.20.06 by Vc1r, on Flickr
Hole made for the refill pipe, gonna be cutting the stock pipe off and then connect with a rubber hose!
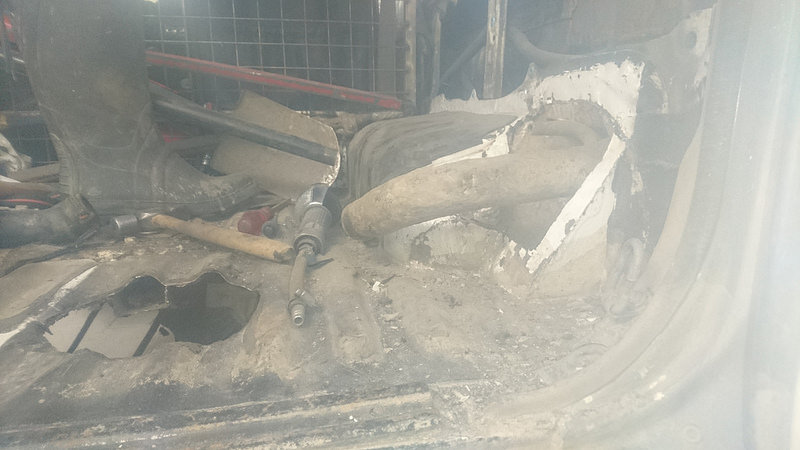 2017-01-14 16.20.16 by Vc1r, on Flickr
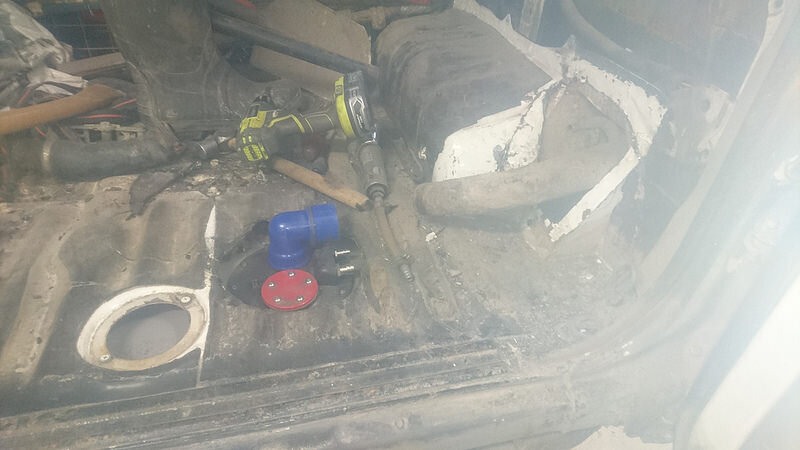 2017-01-14 16.46.19 by Vc1r, on Flickr
Bit of a bad pic, but had to grind the plate a bit as the pad fouled on it..
 2017-01-14 11.16.57 by Vc1r, on Flickr
You can really tell by the radius on the pads that they are made for smaller discs
 2017-01-14 11.17.11 by Vc1r, on Flickr
New master brake cylinder, Hdj 80 series, Bolt-On! :tumbup:
 2017-01-14 16.20.28 by Vc1r, on Flickr
The new tank arrived this Friday too! Gonna mount it in the original location with some heavy duty shield underneath!
 2017-01-13 15.44.11 by Vc1r, on Flickr
Came up with a new way to use the garage stool (It winds up and down when you spin the part you sit on
 2017-01-14 15.48.44 by Vc1r, on Flickr
Hole made for the tank!
 2017-01-14 16.20.06 by Vc1r, on Flickr
Hole made for the refill pipe, gonna be cutting the stock pipe off and then connect with a rubber hose!
 2017-01-14 16.20.16 by Vc1r, on Flickr
 2017-01-14 16.46.19 by Vc1r, on Flickr
Update!
All hoses are now connected to the tank, testran and works perfectly!
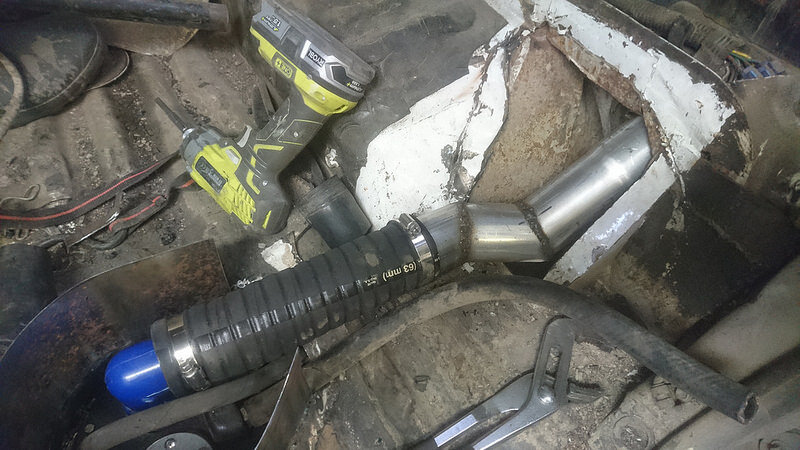 2017-01-28 15.33.23 by Vc1r, on Flickr
I did cheat when starting the toy up though, bleeding is for pussies! I just started cranking, and eventually she roared to life! (Did this when changing filter too, so i knew she'd take the abuse)
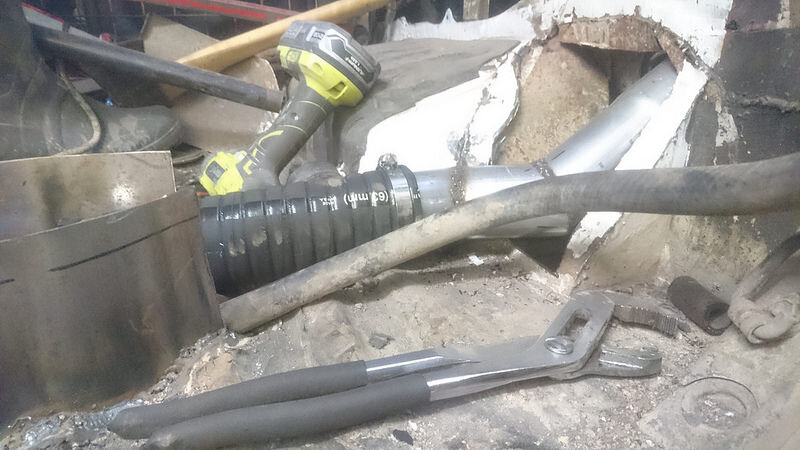 2017-01-28 15.33.38 by Vc1r, on Flickr
Now with some paint. Also got some glasfibrebondo on the welds, just incase..
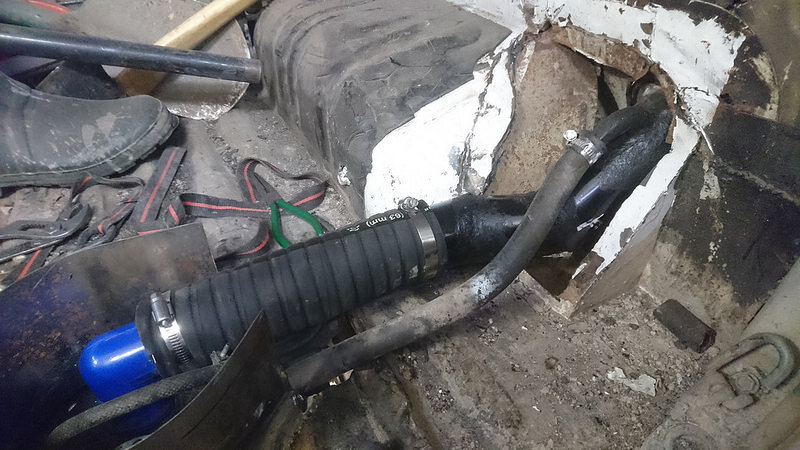 2017-01-29 16.39.51 by Vc1r, on Flickr
I'll be fabricating a box to cover everything, however the brakes have a higher prio right now! I can always drive around with a hole in my trunk, but not without brakes
Bit tight against the panhard mount though! And this is after i cut the bolt
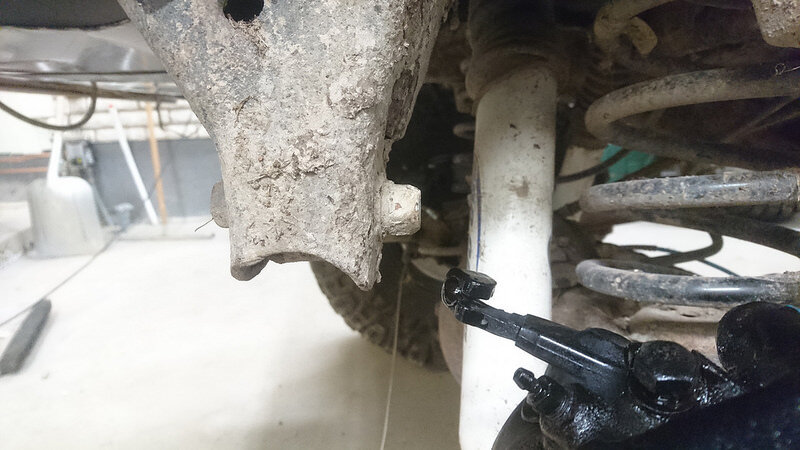 2017-01-29 16.39.25 by Vc1r, on Flickr
Just need to get some fine thread bolt during the week, then i can finally assemble next weekend and test drive!
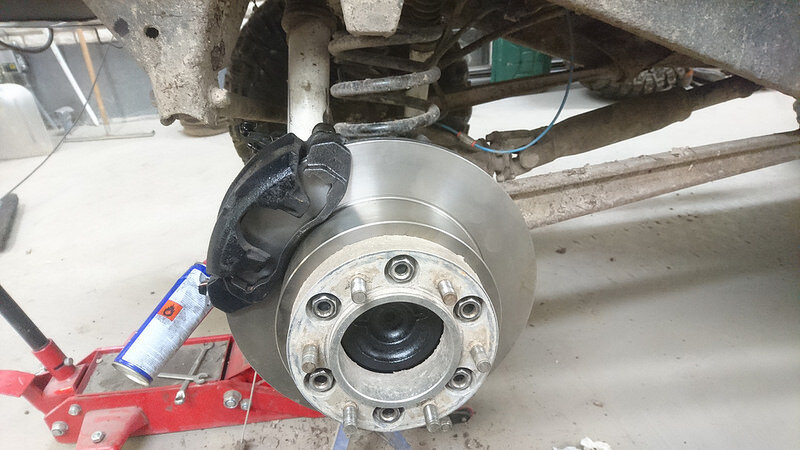 2017-01-29 16.39.37 by Vc1r, on Flickr
All hoses are now connected to the tank, testran and works perfectly!
 2017-01-28 15.33.23 by Vc1r, on Flickr
I did cheat when starting the toy up though, bleeding is for pussies! I just started cranking, and eventually she roared to life! (Did this when changing filter too, so i knew she'd take the abuse)
 2017-01-28 15.33.38 by Vc1r, on Flickr
Now with some paint. Also got some glasfibrebondo on the welds, just incase..
 2017-01-29 16.39.51 by Vc1r, on Flickr
I'll be fabricating a box to cover everything, however the brakes have a higher prio right now! I can always drive around with a hole in my trunk, but not without brakes
Bit tight against the panhard mount though! And this is after i cut the bolt
 2017-01-29 16.39.25 by Vc1r, on Flickr
Just need to get some fine thread bolt during the week, then i can finally assemble next weekend and test drive!
 2017-01-29 16.39.37 by Vc1r, on Flickr
Some pretty big plans in the workings 
Engine is on it's last stand, and im not gonna bother with it, so therefore i'm gonna do an engine swap for an OM602 Merccedes turbodiesel, paired with a 722.3 Auto gearbox! Still undecided on a transfer box though, need a divorced one for that!
Eventually im looking to get around 200-250Hp in the new engine, so i'll be getting a Dieselmeken built dieselpump, and change the turbo for something bigger
Also, since i am well aware this package might be a bit longer then the stock gearbox im planning to move the rear axle about 20-30cm's to get the room needed


