
Don't like the adverts? Click here to remove them
You are using an out of date browser. It may not display this or other websites correctly.
You should upgrade or use an alternative browser.
You should upgrade or use an alternative browser.
LJ70 Build Thread!
- Thread starter Ben
- Start date
RJ70 BUNDERA
New Member
- Joined
- Feb 20, 2014
- Messages
- 12
- Country Flag

what's going on ben! lol its not like you not upgrading while its apart!........hint hint some of these....http://www.google.com.au/url?sa=t&r...M4rAViqX0T_U7yolw&sig2=gRUJfbkJP46129LCdyUXQw
or these!") ......http://www.google.com.au/url?sa=t&r...hrKv3Wrs23ytHZ8OA&sig2=RcLwknHmK0xLP450kWiWRQ....
......http://www.google.com.au/url?sa=t&r...hrKv3Wrs23ytHZ8OA&sig2=RcLwknHmK0xLP450kWiWRQ....
or these!
Last edited:
RJ70 BUNDERA
New Member
- Joined
- Feb 20, 2014
- Messages
- 12
- Country Flag
haha true tony!


Hi Ben, since you know more about 70 series than me, could you tell me what diff ratio's do you think are in the RJ70 if picked up?
I have attached the vin tags, the axle reads I think G59 3255 ?
View attachment 14996
View attachment 14997
Your diff code is g255, the g denotes 8" diff, 25 is a 4.55 ratio and the last 5 means 4 pin l.s.d
Don't like the adverts? Click here to remove them
Thanks, so the front is just an open 8" diff? which means........I can put a Lokka in the front diff and transfer it to the rear axle? remove the rear LSD carrier, put a Harrop/Eaton e-locker in and transfer it to the front axle?
or are the front & rear diffs different to the how they are in a 40 & 60 series as they are the same housings, are they the same in the light weight RJ70 series?
or are the front & rear diffs different to the how they are in a 40 & 60 series as they are the same housings, are they the same in the light weight RJ70 series?
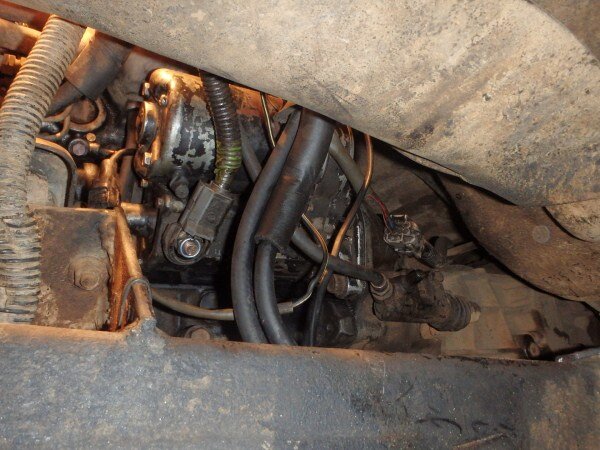
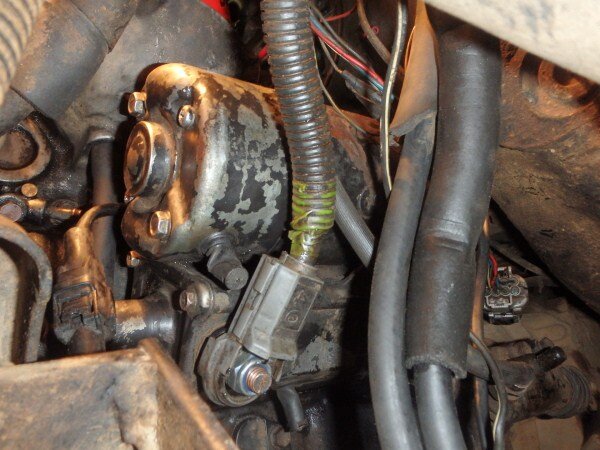
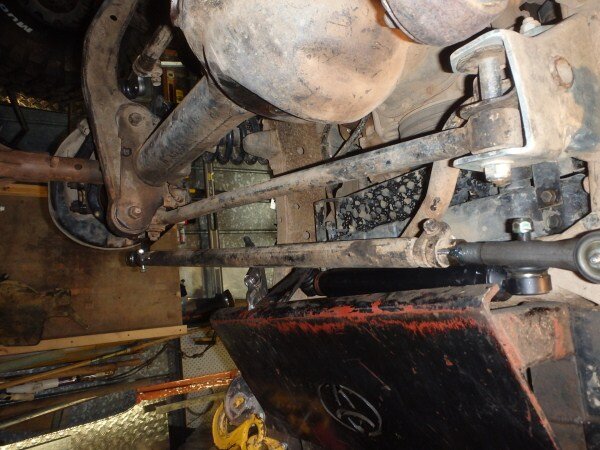
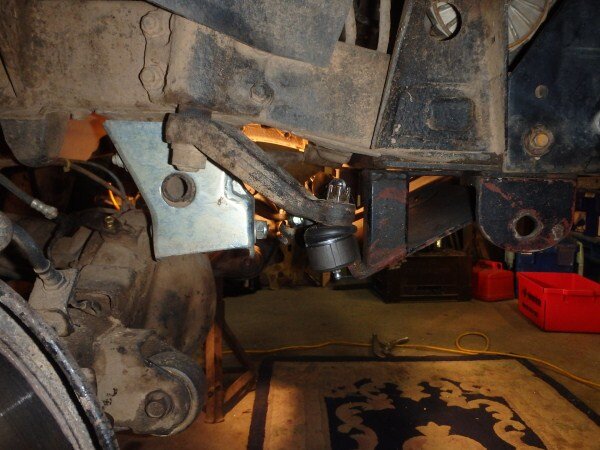
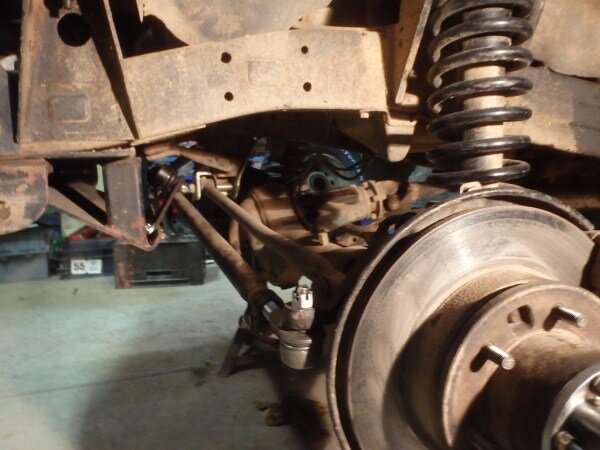
If the front is a high pinion diff it won't be transferable, easiest way to tell is if your steering tie rod is behind the axle it will be high pinion
These two photos are of the front & rear diffs?


Yep that's a high pinion front so not interchangeable with the rear diff
Ok, so I cannot put the front diff in the rear but I can put the rear diff in the front? so I need to get another rear open diff to install a Lokka?
Ok, so I cannot put the front diff in the rear but I can put the rear diff in the front? so I need to get another rear open diff to install a Lokka?
Can't do that either unfortunately, where the tie rod goes behind the axle the diff has to be a high pinion to clear it, a low pinion rear won't fit
- Joined
- Oct 13, 2010
- Messages
- 6,055
- Country Flag
what's going on ben! lol its not like you not upgrading while its apart!........hint hint some of these....http://www.google.com.au/url?sa=t&r...M4rAViqX0T_U7yolw&sig2=gRUJfbkJP46129LCdyUXQw
or these!
Now they do look good!
I will go to chromoly at some point if/when my others break!
Don't give him too many ideas, RJ70, he's on a deadline of one weekend left to get it ready, then road test! ;-)

Yes lots still to do and I've thought of a load more jobs that still need doing that wernt on my list.

I've been away for the last 3 days so havent made any progress on LJ but back now and getting stuck straight in!
- Joined
- Oct 13, 2010
- Messages
- 6,055
- Country Flag
OK guys bit of an update on how the build/trip prep is going.......................
Today I worked on LJ 4pm-9.30pm and knocked a load of jobs over.
The rear bumper has been shot blast, electro plated and powder coated. I brought it home tonight and got the LED lights fitted to it and then got it fitted on LJ.
The starter motor has been rebuilt by the auto electrician at work and thats now fitted and working well.
The new 80 series alternator came and on closer inspection the casing looks identical to my old 1KZ-T one (apart from the position of the tensioner mount , so rather than make a new adjuster bracket I'm going to take the new one and old one to work tomorrow and see if the guys will swap the internals out of the new one into my old casing.
I picked up an 80 series tie rod end to connect to the steering box with a mount for a steering damper on it, this fitted the LJ70 steering bar perfectly and using an 80 series steering damper bolt on chassis mount that I got from Karl, I was able to bolt a 105 series steering damper straight on and it fits and works beautifully. So its got all new tie rod ends now and is ready for a wheel alignment which I'm hoping to get done on Friday.
I made another press tool today and pressed all the new rear wheel bearings onto my spare half shafts.
Tomorrow after work I can use the workshop 4pm-9pm so the plan is to get LJ on the hoist and pull the rear half shafts out and fit the new ones that have got the new bearings fitted, swap all the newish brake shoes over, bleed the rear brakes and adjust the handbrake. While its on the hoist I will check the oil level of all the diffs, gearbox and transferbox and top up if necessary. I will grease all the UJ's on the prop shafts and fit new breather tubes on everything using the proper breather tube to replace the cheap, clear poly tube thats currently fitted.
Then its off the hoist and I will use the forklift to lift various wheels so I can measure how long the rear shocks need to be, then they can be ordered and bottom shock mount adapters can also be made.
After that I need to drill and weld the exhaust gas temp sensor bung into the exhaust down pipe.
This weekend I need to finish the drawer system and rear side panel/storage boxes.
Fit the EGT and boost gauges and pod on top of the dash.
Strip out all the interior to make it as easy as possible for the auto electrician who is having LJ next weekend to get everything wired up.
When I get it back from him I can put the interior back together, fit the drawer system, swing away wheel carrier to the rear bar and fit the roof rack and awning.
Then I want to get LJ polished and loaded for the trip.
I did want to get LJ put on a dyno and tuned as its a bit smokey since the fuel pump was wound up and I'm sure theres more power to be had if the boost is increased a bit, but I dont think I'm going to have time.
BTW I feel totally exhausted, the amount of energy I've been putting into getting LJ ready for the trip is ridiculous!
But hopefully it will pay off and result in an incident free trip for LJ with no break downs.
Will get some pics up this weekend all being well.
50mm x 50mm mate.
Today I worked on LJ 4pm-9.30pm and knocked a load of jobs over.
The rear bumper has been shot blast, electro plated and powder coated. I brought it home tonight and got the LED lights fitted to it and then got it fitted on LJ.
The starter motor has been rebuilt by the auto electrician at work and thats now fitted and working well.
The new 80 series alternator came and on closer inspection the casing looks identical to my old 1KZ-T one (apart from the position of the tensioner mount , so rather than make a new adjuster bracket I'm going to take the new one and old one to work tomorrow and see if the guys will swap the internals out of the new one into my old casing.
I picked up an 80 series tie rod end to connect to the steering box with a mount for a steering damper on it, this fitted the LJ70 steering bar perfectly and using an 80 series steering damper bolt on chassis mount that I got from Karl, I was able to bolt a 105 series steering damper straight on and it fits and works beautifully. So its got all new tie rod ends now and is ready for a wheel alignment which I'm hoping to get done on Friday.
I made another press tool today and pressed all the new rear wheel bearings onto my spare half shafts.
Tomorrow after work I can use the workshop 4pm-9pm so the plan is to get LJ on the hoist and pull the rear half shafts out and fit the new ones that have got the new bearings fitted, swap all the newish brake shoes over, bleed the rear brakes and adjust the handbrake. While its on the hoist I will check the oil level of all the diffs, gearbox and transferbox and top up if necessary. I will grease all the UJ's on the prop shafts and fit new breather tubes on everything using the proper breather tube to replace the cheap, clear poly tube thats currently fitted.
Then its off the hoist and I will use the forklift to lift various wheels so I can measure how long the rear shocks need to be, then they can be ordered and bottom shock mount adapters can also be made.
After that I need to drill and weld the exhaust gas temp sensor bung into the exhaust down pipe.
This weekend I need to finish the drawer system and rear side panel/storage boxes.
Fit the EGT and boost gauges and pod on top of the dash.
Strip out all the interior to make it as easy as possible for the auto electrician who is having LJ next weekend to get everything wired up.
When I get it back from him I can put the interior back together, fit the drawer system, swing away wheel carrier to the rear bar and fit the roof rack and awning.
Then I want to get LJ polished and loaded for the trip.
I did want to get LJ put on a dyno and tuned as its a bit smokey since the fuel pump was wound up and I'm sure theres more power to be had if the boost is increased a bit, but I dont think I'm going to have time.
BTW I feel totally exhausted, the amount of energy I've been putting into getting LJ ready for the trip is ridiculous!
But hopefully it will pay off and result in an incident free trip for LJ with no break downs.
Will get some pics up this weekend all being well.
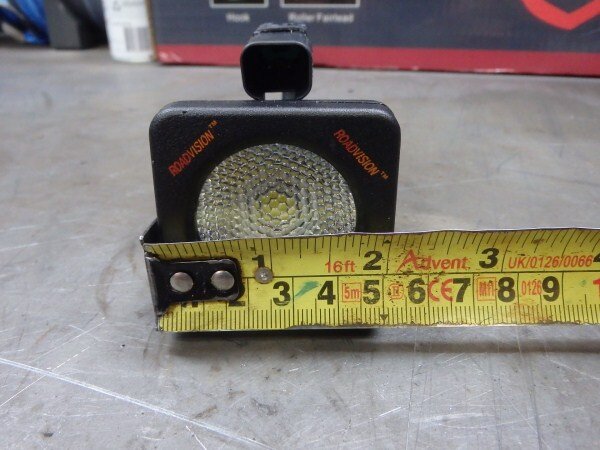
Hi Ben, would you be able to give me these measurements, I have a new ARB bulbar for my 40 that has two square holes in it and I am wondering if these will fit?
View attachment 14948
50mm x 50mm mate.
Last edited:
- Joined
- Oct 13, 2010
- Messages
- 6,055
- Country Flag
OK super quick update then I've got to go gym.
Last night after work I got to use the workshop till 9pm.
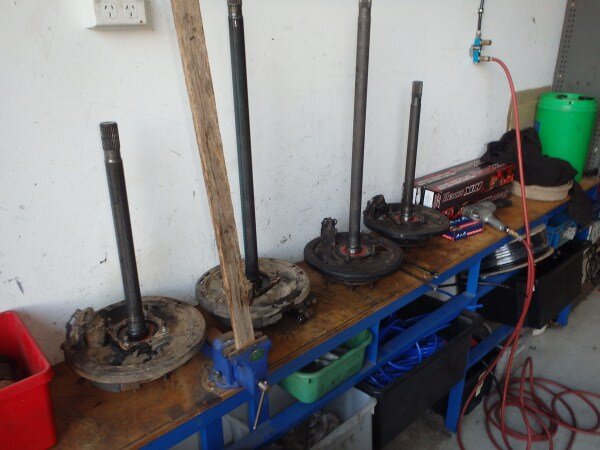
The mechanic helped me and between us we pulled the rear half shafts out and discovered one of the oil seals had let go allowing diff oil into the wheel bearing and both wheel bearings had a lot of movement and so probably wouldn't have lasted the trip.
Spare half shafts fitted with new wheel bearings and genuine seals.
Next came the rear brakes............
One of the wheel cylinders was seized solid so I must have only had working brakes on one side. A quick 5.15pm dash to the local brake place and I had 2 new wheel cylinders for $35.
He then discovered that 2 of the brake shoes were on the wrong side, I never realised that they have a leading edge on each shoe which has to be the correct way round and is set biased to forward travel.
The guy is a total wiz when it comes to adjusting handbrakes!
He adjusted my handbrake which has never worked so well before then bled the brakes which are now better than ever!
I then fitted the 80 series alternator and fabricated a tensioner bracket and refitted my modified airbox.
I'm going to use the hoist again on Monday to finish a few more little jobs and I need to get the shock adapters made and rear shocks ordered.
This weekend will be another busy one but I'm hoping to get a load more jobs ticked off.
Last night after work I got to use the workshop till 9pm.
The mechanic helped me and between us we pulled the rear half shafts out and discovered one of the oil seals had let go allowing diff oil into the wheel bearing and both wheel bearings had a lot of movement and so probably wouldn't have lasted the trip.
Spare half shafts fitted with new wheel bearings and genuine seals.
Next came the rear brakes............
One of the wheel cylinders was seized solid so I must have only had working brakes on one side. A quick 5.15pm dash to the local brake place and I had 2 new wheel cylinders for $35.
He then discovered that 2 of the brake shoes were on the wrong side, I never realised that they have a leading edge on each shoe which has to be the correct way round and is set biased to forward travel.
The guy is a total wiz when it comes to adjusting handbrakes!
He adjusted my handbrake which has never worked so well before then bled the brakes which are now better than ever!
I then fitted the 80 series alternator and fabricated a tensioner bracket and refitted my modified airbox.
I'm going to use the hoist again on Monday to finish a few more little jobs and I need to get the shock adapters made and rear shocks ordered.
This weekend will be another busy one but I'm hoping to get a load more jobs ticked off.

- Joined
- Oct 13, 2010
- Messages
- 6,055
- Country Flag
Thanks Pat.
Lots to do on the build this weekend but I'm really hoping everything will come together.
I fabricated one of the rear shock adapters today so I can see how well it will fit on LJ this weekend. I've also borrowed the TIG welder from work so I can weld the EGT bung into my stainless steel exhaust down pipe.
Just waiting for my laundry now, as soon as thats done its straight home to get stuck into some of the jobs.
tonytoyota
Well-Known Member
- Joined
- Sep 9, 2010
- Messages
- 1,799
- Country Flag

Hi Ben get on with it it will be a top job Tony .
- Joined
- Oct 13, 2010
- Messages
- 6,055
- Country Flag
Update Time...............
Thanks Tony.
Update time....................
I've got too many pics to post and not enough time.
So I'm going to have to split this update up a bit as like yesterday I want to make an 8am start on LJ so I can get a full 12 hour day in!
OK here goes...........................
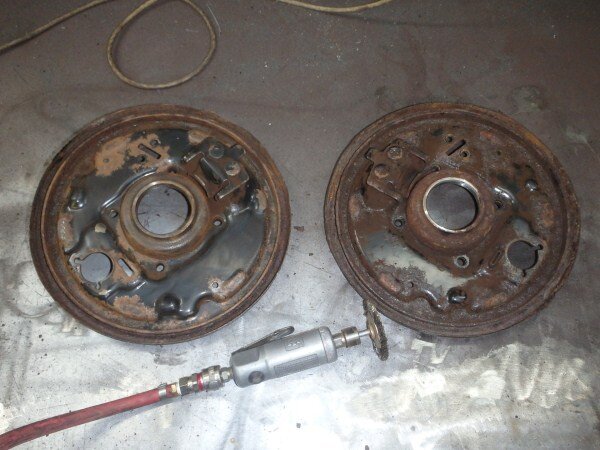
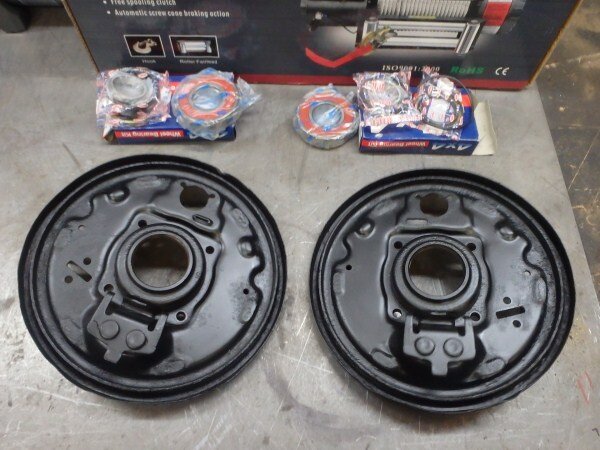
I was thinking of getting the rusty rear drum brake backing plates shot blast and electro plated but decided against this idea as I want to convert the rear to discs soon anyway.
So I wire brushed them using the die grinder.


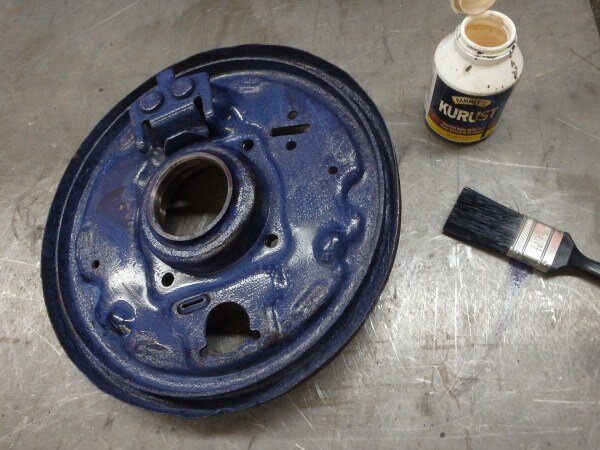
Rust killed.

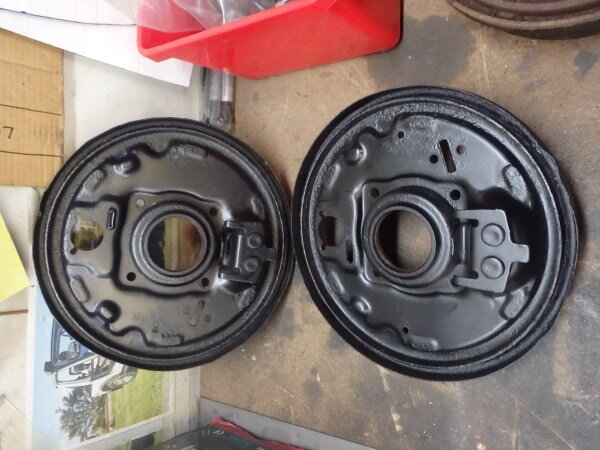
And painted.

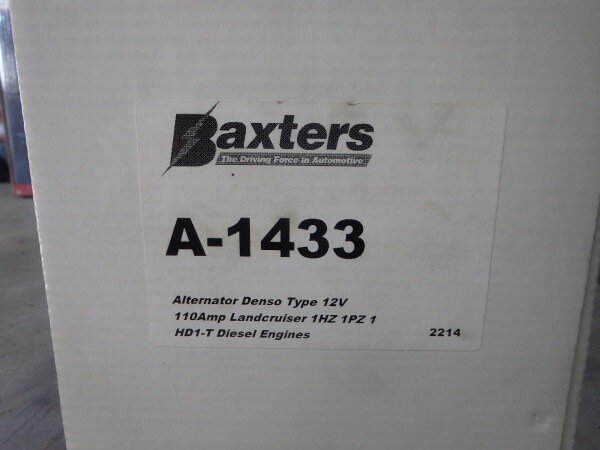
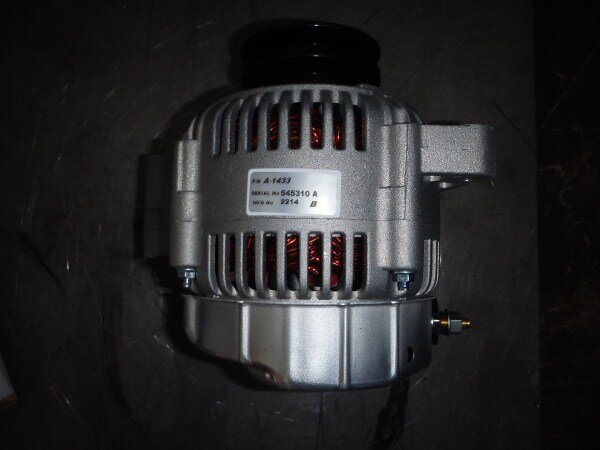
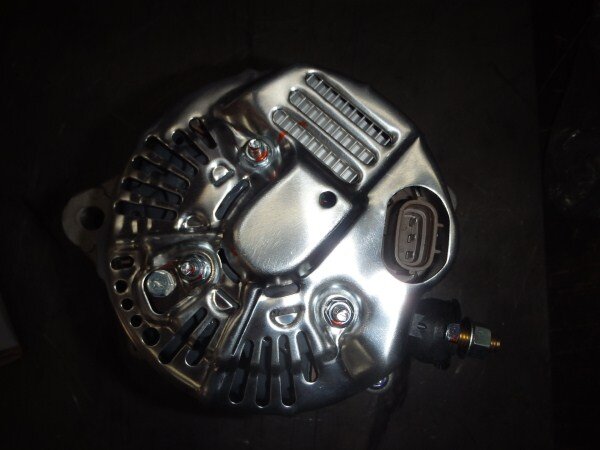
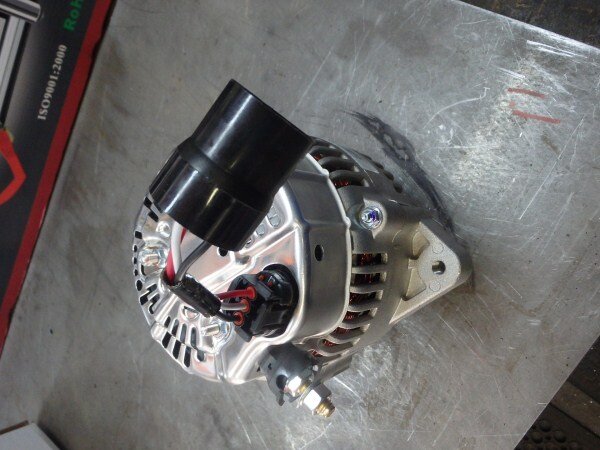
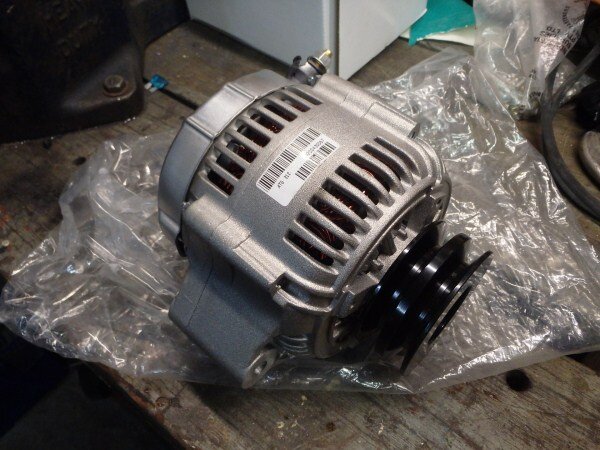
New 80 series alternator arrived.


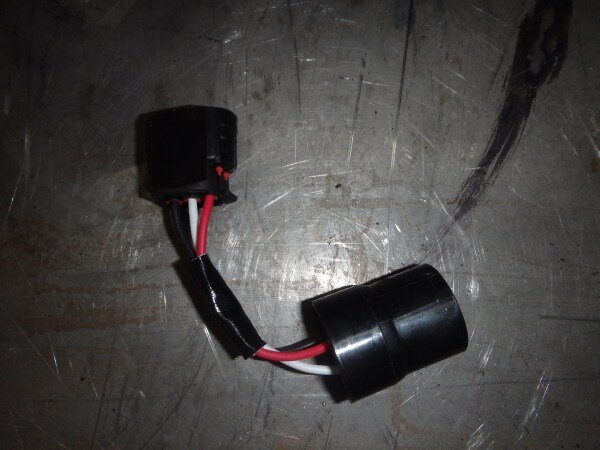
Interestingly it came with the right connector on it for the 1KZ-T loom.

And also with an adapter presumably for the 80 series loom.


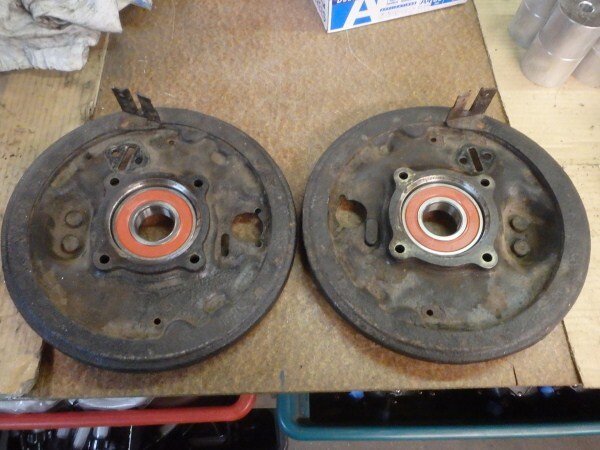
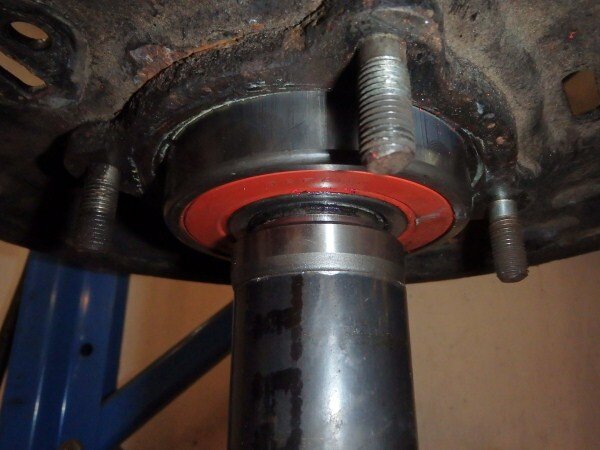
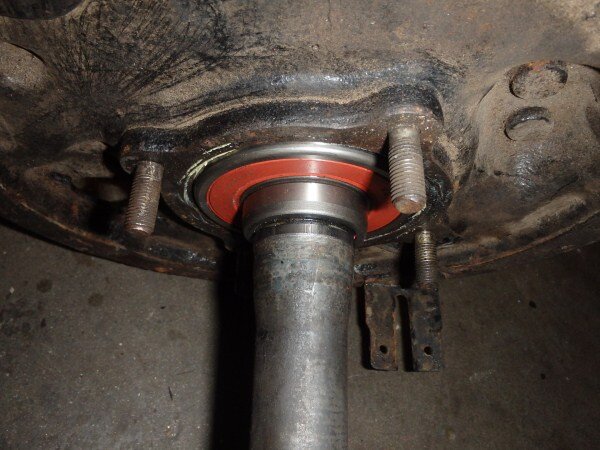
My next job was fitting the new wheel bearings into the freshly painted backing plates, ready to then press onto the half shafts.

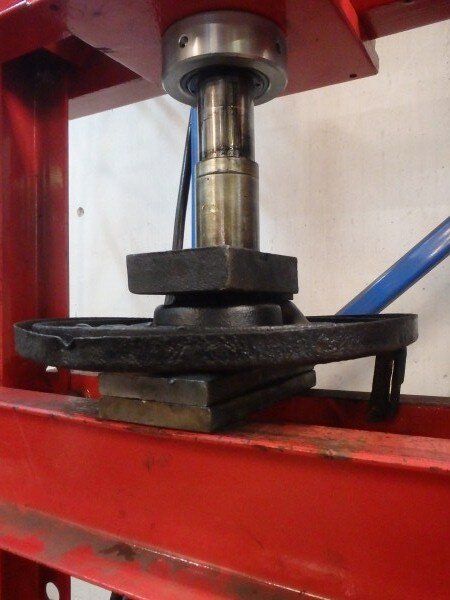
They pushed in very easily on the press.


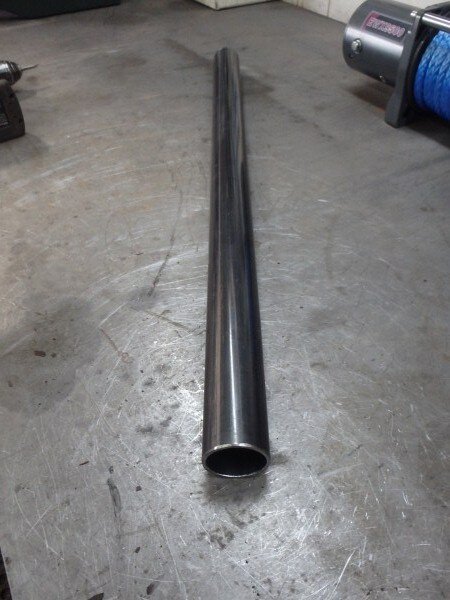
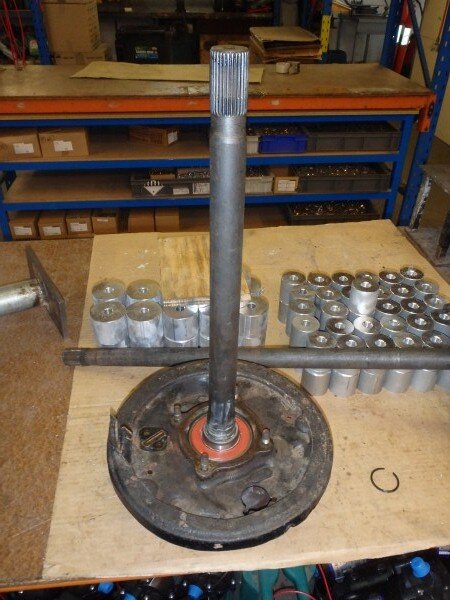
Next I cut a piece of 50mm pipe with the intention of using this on the press to press the bearings onto the half shafts.


Only because the machine wasnt tall enough/the half shaft was so long I couldnt get it to work as there was nothing to press off and pressing off the floor just lifted the machine up.


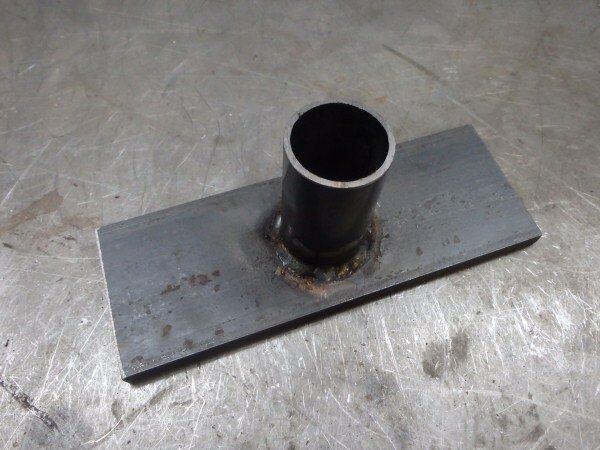
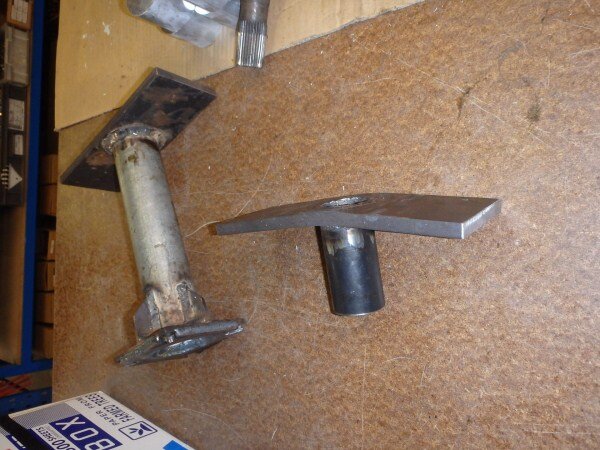
So I decided to get creative again!
Cut some steel, more 50mm tube and some 10mm flat.

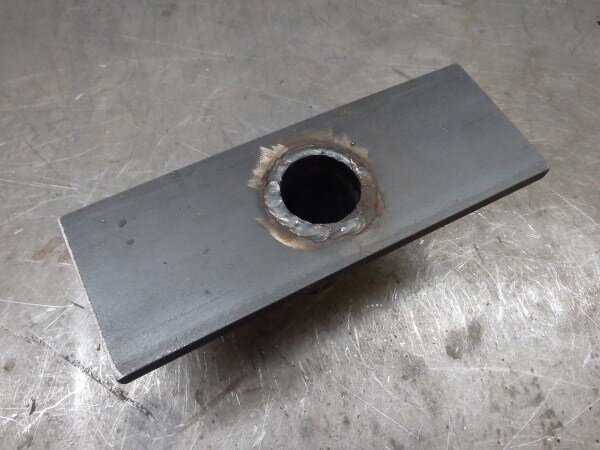
Drilled a 50mm hole in the 10mm plate using a hole saw and the drill press.

Positioned the tube.

And welded it.


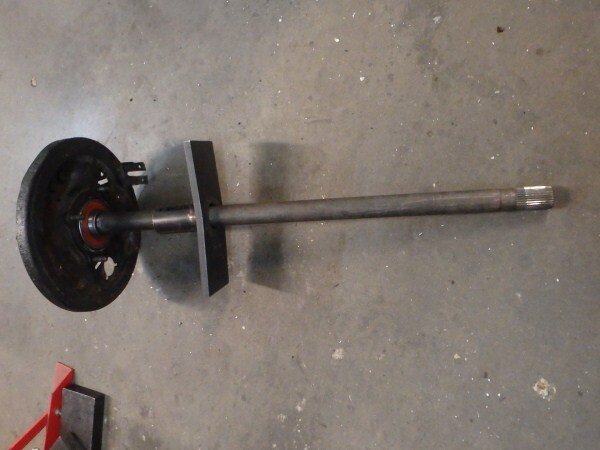
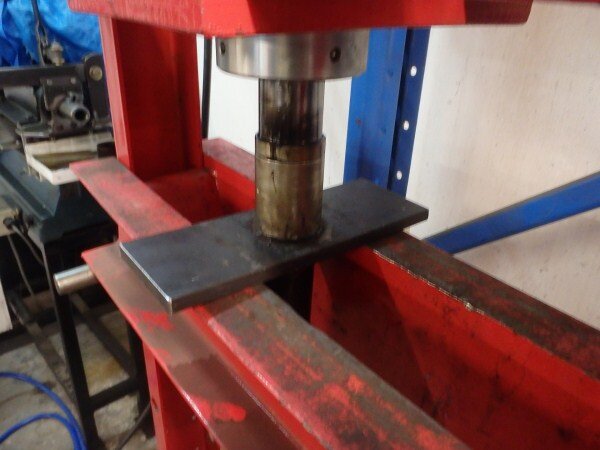
Now I could press the bearings and locking rings onto the half shafts.


Worked well but it did bend the 10mm plate.


Once the 2nd press tool has been straightened and strengthened I will get them electro plated and keep them for future wheel bearing changes.


I used the press to straighten my new press tool.

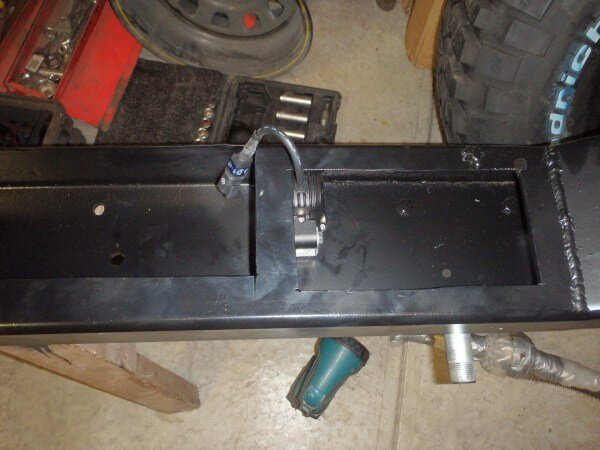
My rear bumper came back from shot blasting, electro plating and powder coating.

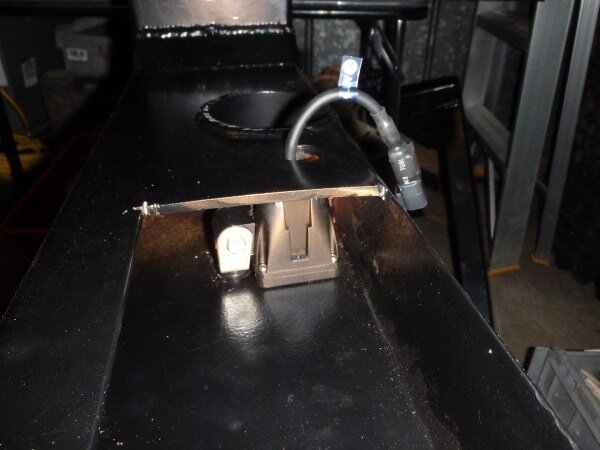
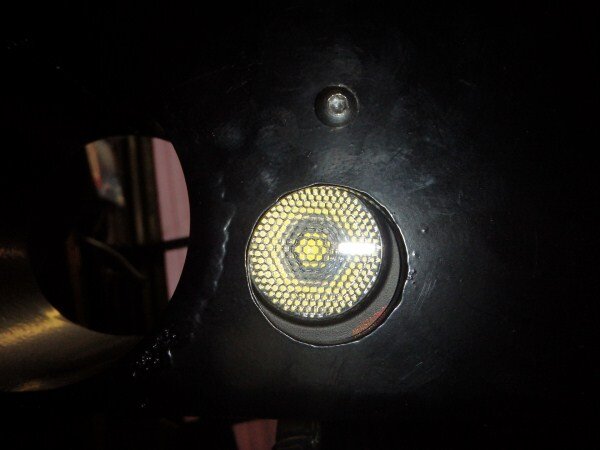
My next job was to mount the new super bright lights.

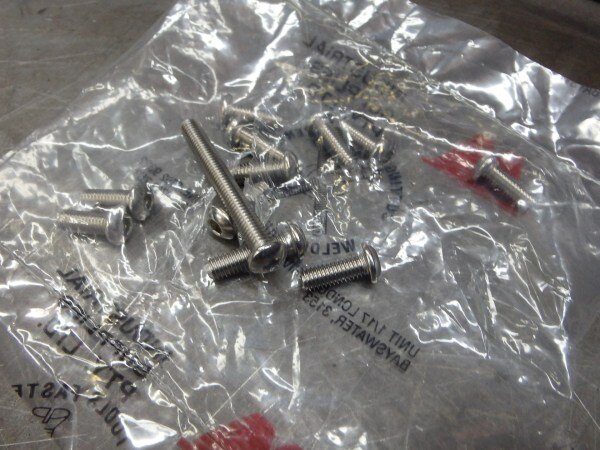
Using some stainless steel bolts I'd picked up.

I ran out of time at work so I brought it all home and carried on with it in my garage.

The passenger side one was really fiddly to get into to.


But the drivers side was much easier.

All done.

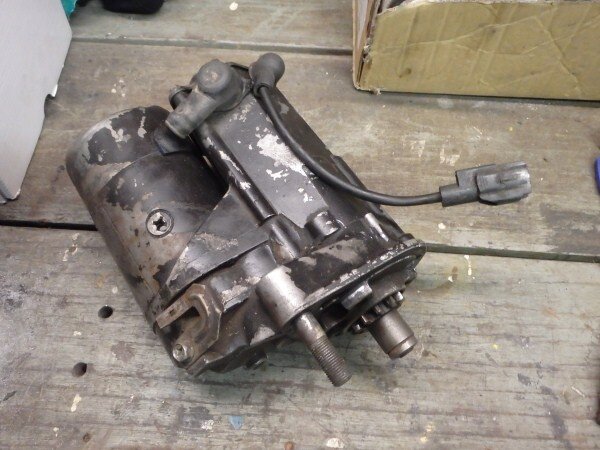
Starter motor next which had been freshly rebuilt by the auto electrician at work.


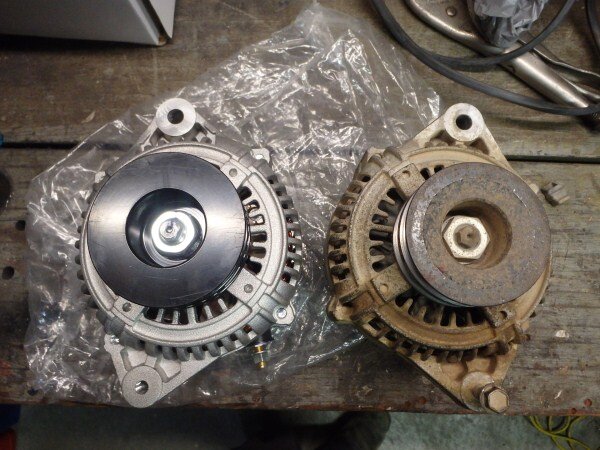
I had a proper look at the new alternator and compared it to my old 1KZ-T one.

It was then that I discovered that the casings were almost identical apart from the position of the threaded hole for the tensioner bracket.

So I had the idea of swapping the internals out of the new one into my old casing. But after speaking to the 2 auto electricians at work they both said it wasnt a good idea as certain parts inside are very tricky to get back in without breaking them on these alternators. I'd also loose my warranty on the new alternator. So it was decided it would be better for me to make a new tensioner bracket and make the 80 series one fit, more on that later.
I needed to drive LJ to work on Thursday so I could use the workshop after work so I left the old 80 series alternator on that I had been playing around with and used a huge cable tie to tension the belts.


I then realised I'd left my airbox at work as I had been TIG welding up the 2 drain holes in the bottom.
I didnt want to drive without any filter and looking round the garage I spotted something that might do, a respirator.


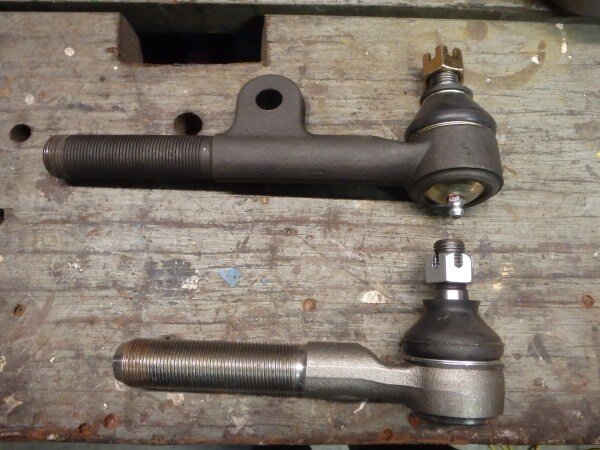
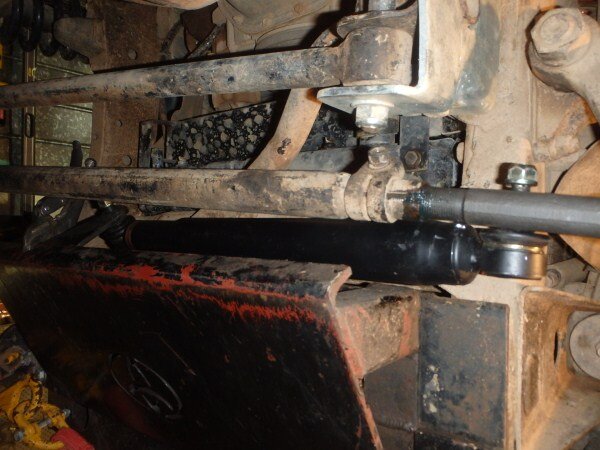
My next job was to try and fit an 80 series tie rod end onto my steering box to give me some where to mount the steering damper as I wanted to move it to in front of the axle like on the 80 series.
New tie rod end.


Comparing it to the new LJ70 one that I bought the thread looked the same size and direction.
(What I didnt notice at the time, but has just become glaringly obvious now looking at this pic is that I'm going to have much less adjustment on my steering bar as the thread doesnt go anywhere near as close to the steering box as the standard setup.)

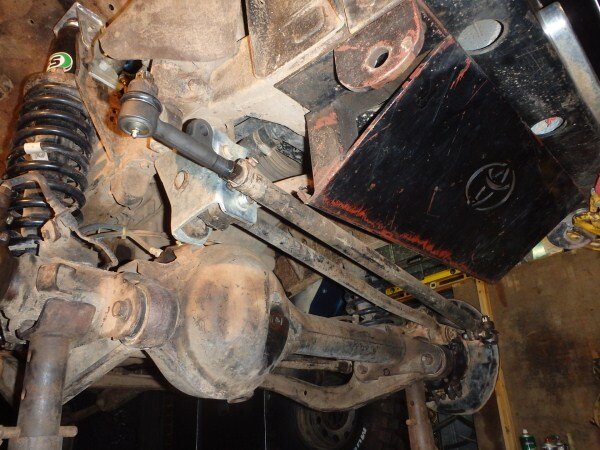
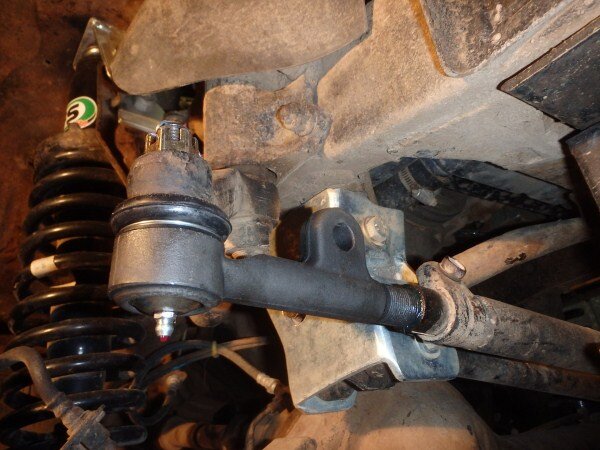
Fitted perfectly.


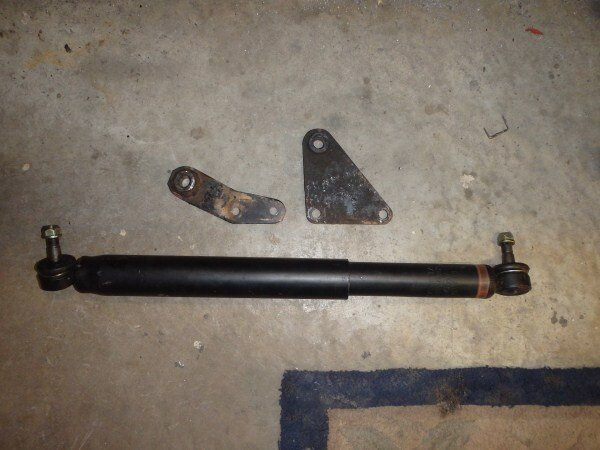
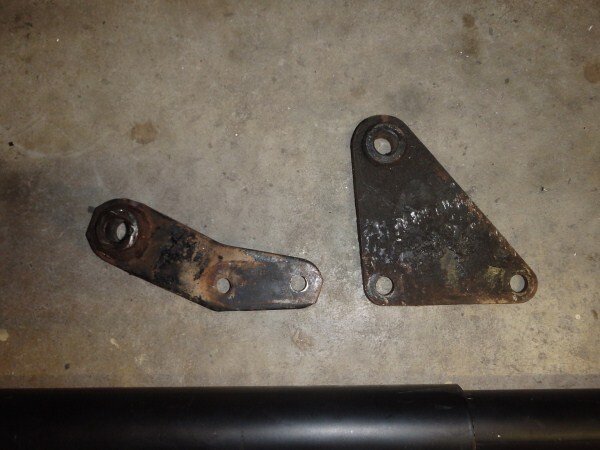
The next job was to mount a steering damper.

The bracket on the left is an LJ70 steering damper bracket that normally bolts to the axle and on the right an 80 series steering damper chassis mount.


I decided the 80 series one would work best so I worked out how to mount it and then did some experimenting to make sure where I positioned it would give me full steering in both directions.


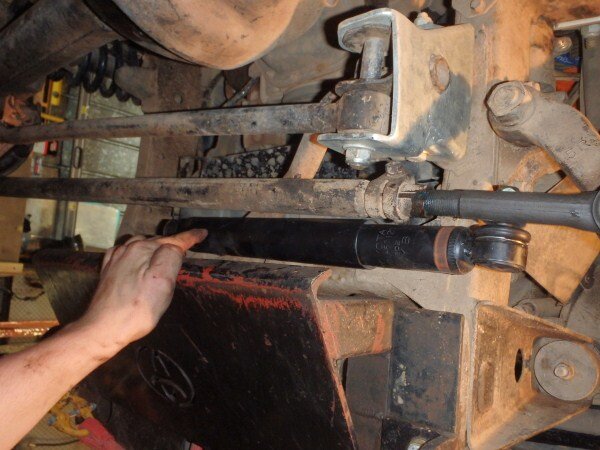
Drilled and bolted in position.


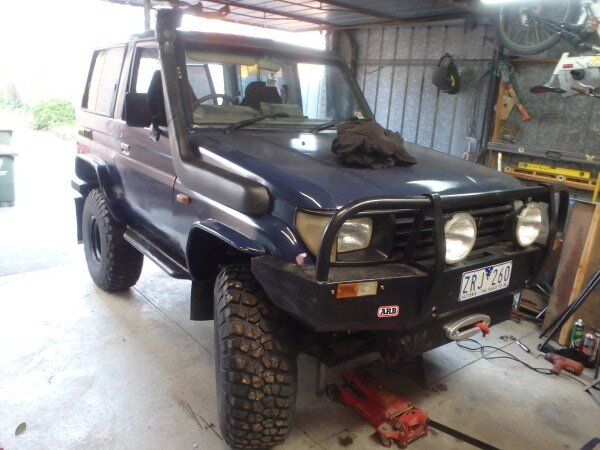
Wheels back on and ready to drive to work Thursday morning. Or so I thought..............................

Pulled LJ out of the garage, went to reverse onto the front lawn to turn around and bugger cant turn right!
I must have left the front steering bar too long.
So after a quick phone call to the boss to say I'd be late is was back in the garage to start adjusting things.

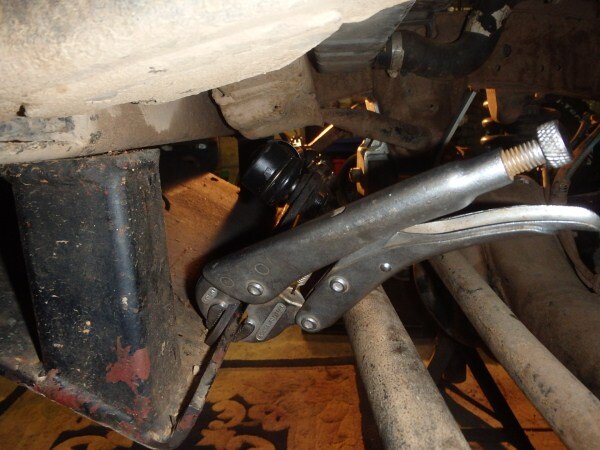
I couldnt just turn the center of the steering bar with some stilsons as it was winding one tie rod end in and one out meaning the bar wasnt getting any shorter.
So had to take a wheel off, split one of the ball joints and then turn the steering bar with some stilsons and a piece of scaffold tube.


That done I set off on my journey to work.....................
Pulled out onto the street and as I started trying to get up to speed it became apparant I had no power at all, a quick look in the mirror revealed clouds of black smoke!
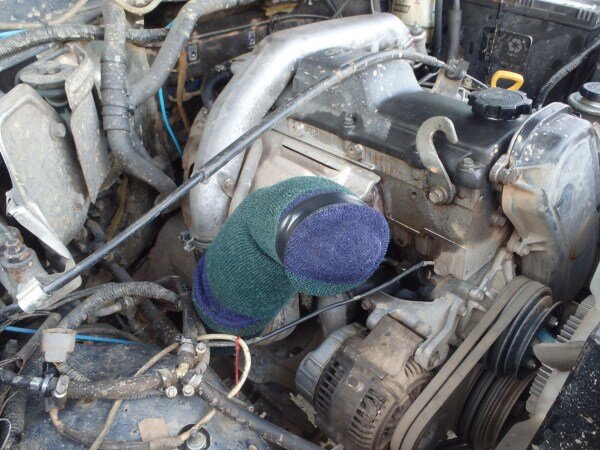
I pulled over and as I suspected the respirator air filter was restricting the engine far too much, so I needed something else........................
Now it just so happened that in my busy schedule I'd found time to sort out my sock drawer.
So what to do with all the odd socks whos twins had long since been gobbled by the washing machine or stolen from the washing line or wherever socks seem to vanish to.
The obvious choice was to use them all as rags in the garage and I just happened to have a few in LJ for that very purpose.
Bush mechanics in the middle of the city!

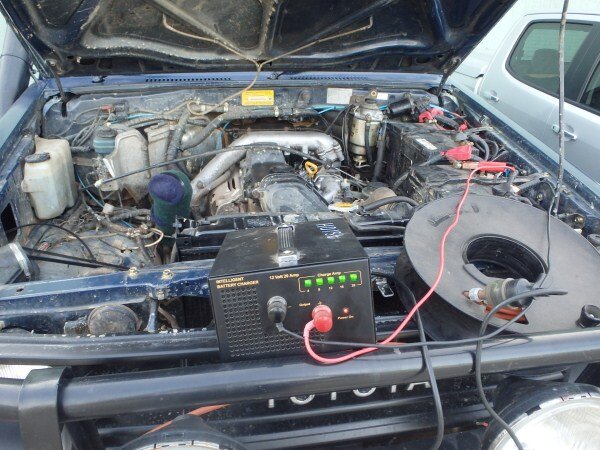
I got to work 30 mins late and put LJ on charge as having no alternator connected had obviously drained the batteries a bit.

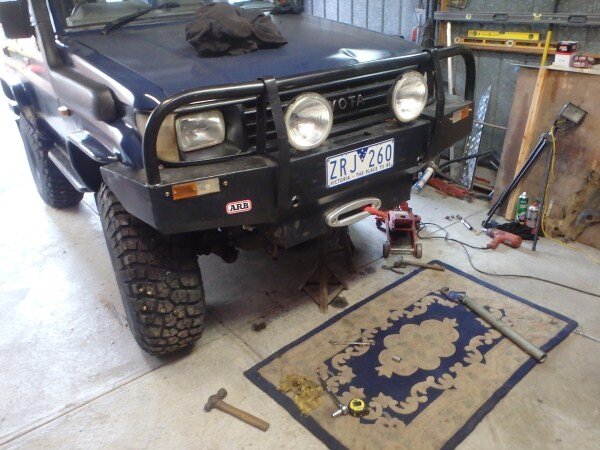
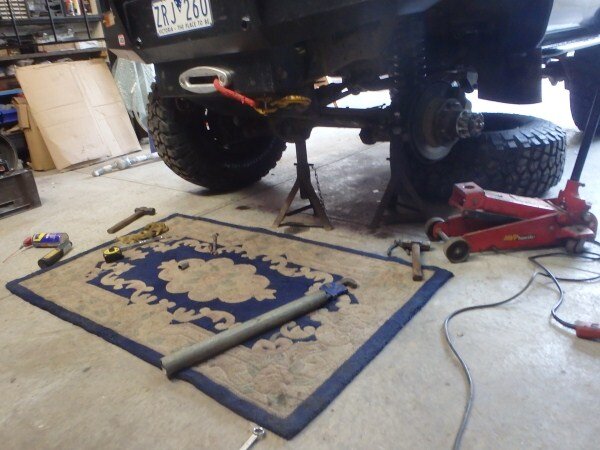
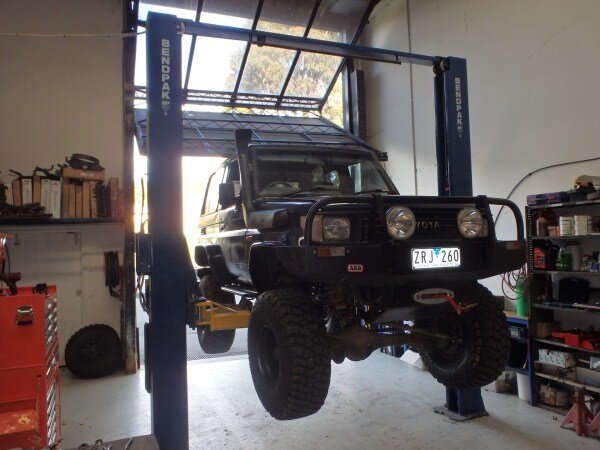
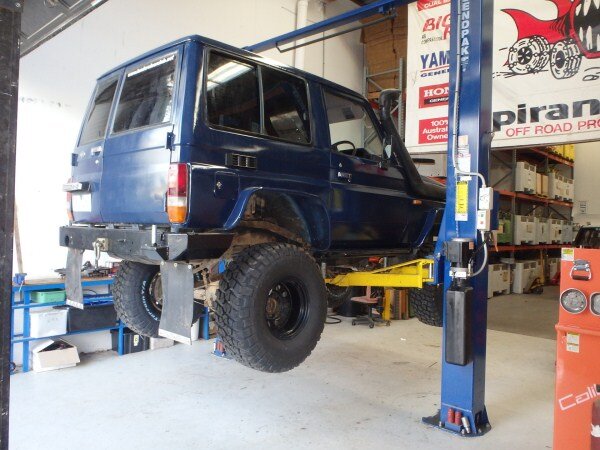
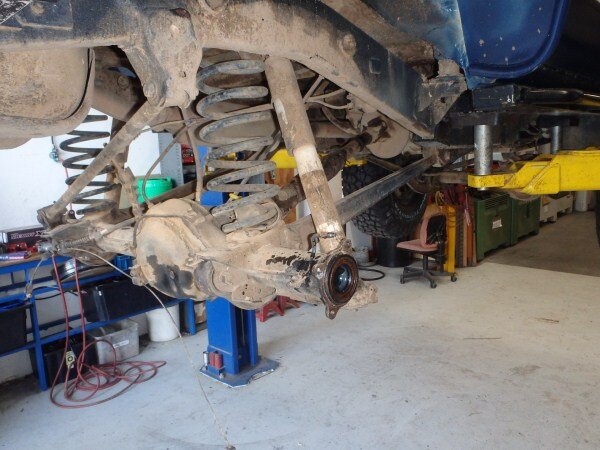
After work I got LJ on the hoist.


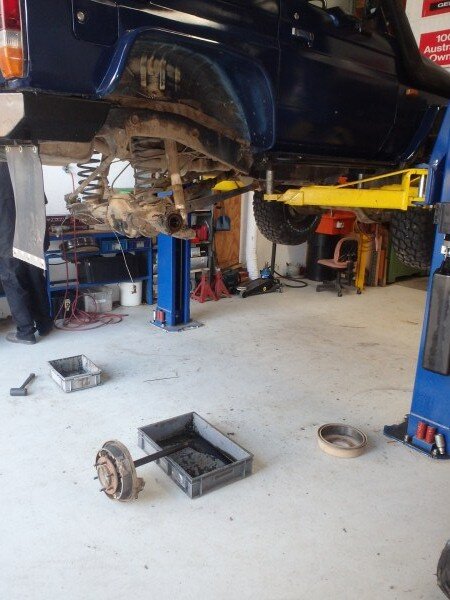
Half shafts out.


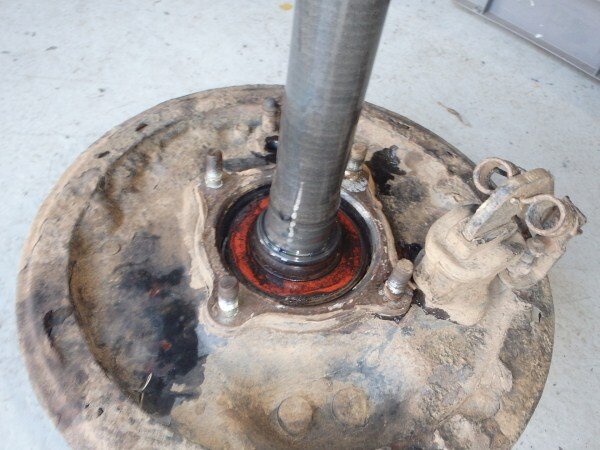
New seals as I dont trust the ones in the bearing kits.

Passenger side seal had clearly let go at some point since they were last changed a couple of years ago.

Comparing the genuine seals with the non genuine and they were definitely different and looked like the milner ones that failed on me prematurely, everytime I fitted them.

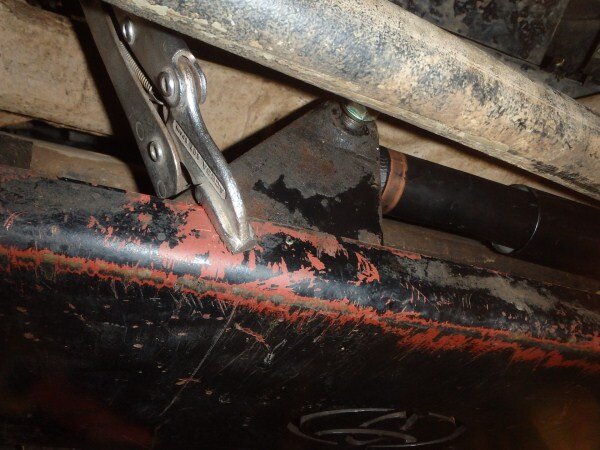
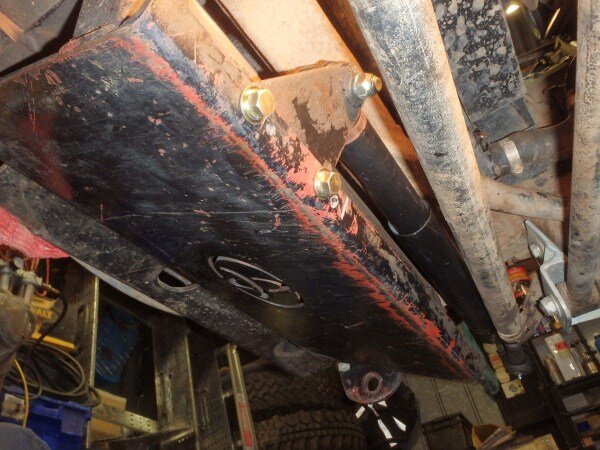
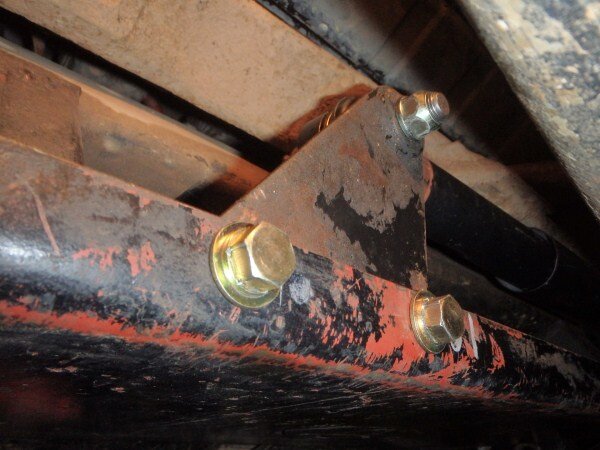
Found some bad rust on one of the bottom shock mounts.
Hopefully it will survive the trip as no time to fix it before.


This does some what make it harder for me to order new shocks as ultimately I will cut those mounts off completely and make my own and change from a pin to eye mount.
Anyway back to the rear half shaft/wheel bearing change...................
The mechanic who was helping me discovered one of my wheel cylinders was seized so I shot out and picked up 2 new ones.

He also discovered 2 of my shoes were on the wrong sides, this is how they are meant to be fitted:

Its all to do with leading edges and is biased towards forward travel braking.


We bled the brakes and adjusted the handbrake.

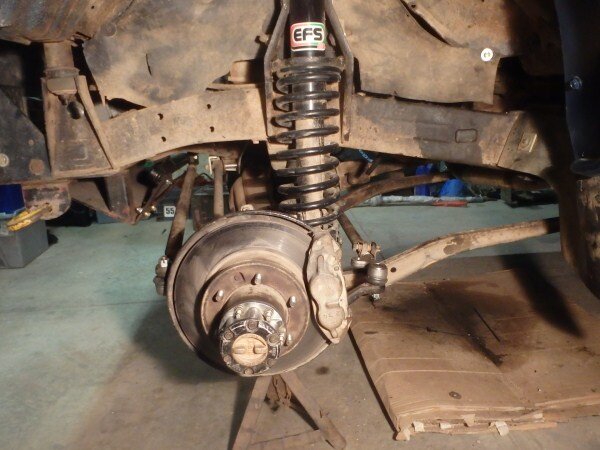
I was meant to be measuring up for new rear shocks but I didnt have enough time to do it properly by disconnecting one of the shock mounts each side and then measuring how long the new ones needed to be at full articulation. I'm pleased with how well the front end now flexes now I've removed the flex restricting castor correction bushes and fitted longer springs and shocks.


Ok...........enough messing around I was running out of time and still had the new alternator to fit and bracket to make.

I had a selection of tensioner brackets to choose from.
On the left an 80 series one, then my old 1KZ-T one then a bare steel laser cut one out of 6mm steel.

I decided to use the bare steel one as it was twice the thickness of the others and I liked the idea of not butchering my old one so I could always refit a 1KZ-T alternator in the future if I ever wish.


I cut the bent end off.

Cut a piece of 25mm x 6mm flat and clamped it firmly in place ready to weld onto the bracket.

To ensure maximum root penetration (strength) I prepared the weld joint in a double V configuration.


Welded together and hole drilled in the other end.

I notched a bit out to provide more clearance around the bottom rad hose and welded the bent piece I cut off onto the other end.

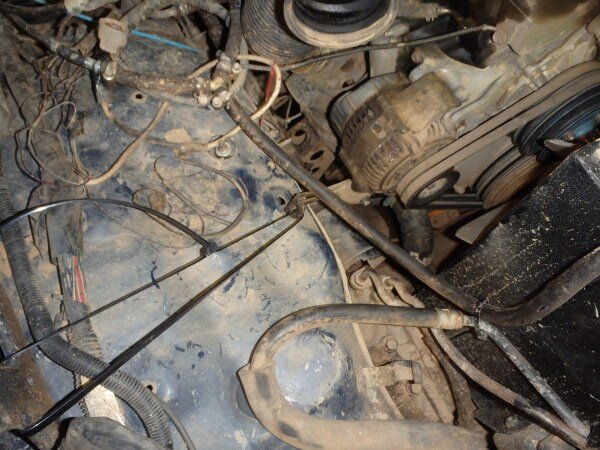
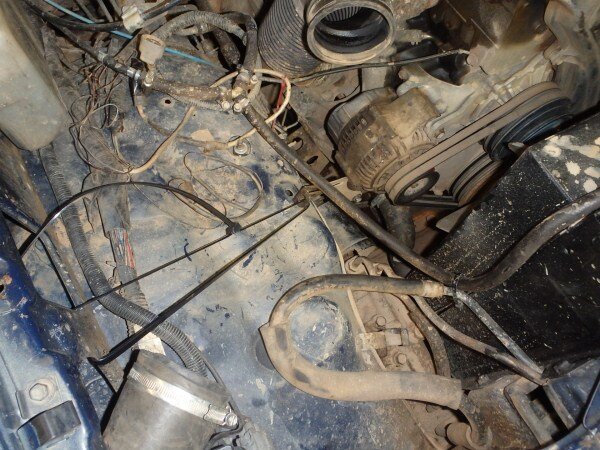
And bolted it on.


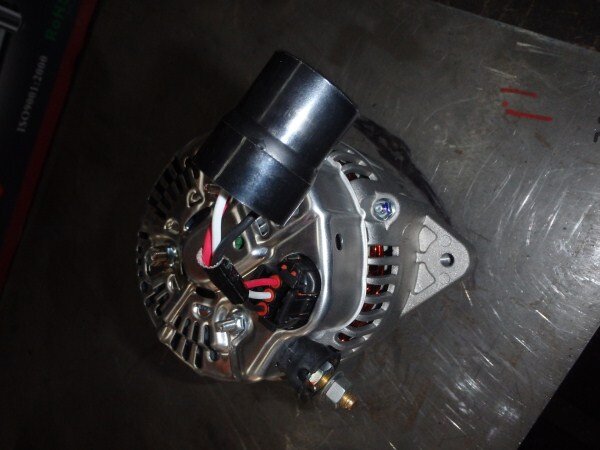
With that working so well I could finally fit the new alternator.

I decided to paint the bracket as I'm short on time before the trip, it would have been nice to electro plate it.


With that all done I was able to drive home with all my lights on and my batteries being getting charge.
OK guys I'm out of time as I need to be out working on LJ as its almost 8am now.
Will hopefully get another update up later time depending.
Need to show you what I got up to yesterday, I spent the whole day getting really creative with LJ!
Thanks Tony.
Update time....................
I've got too many pics to post and not enough time.
So I'm going to have to split this update up a bit as like yesterday I want to make an 8am start on LJ so I can get a full 12 hour day in!
OK here goes...........................
I was thinking of getting the rusty rear drum brake backing plates shot blast and electro plated but decided against this idea as I want to convert the rear to discs soon anyway.
So I wire brushed them using the die grinder.


Rust killed.

And painted.

New 80 series alternator arrived.


Interestingly it came with the right connector on it for the 1KZ-T loom.

And also with an adapter presumably for the 80 series loom.


My next job was fitting the new wheel bearings into the freshly painted backing plates, ready to then press onto the half shafts.

They pushed in very easily on the press.


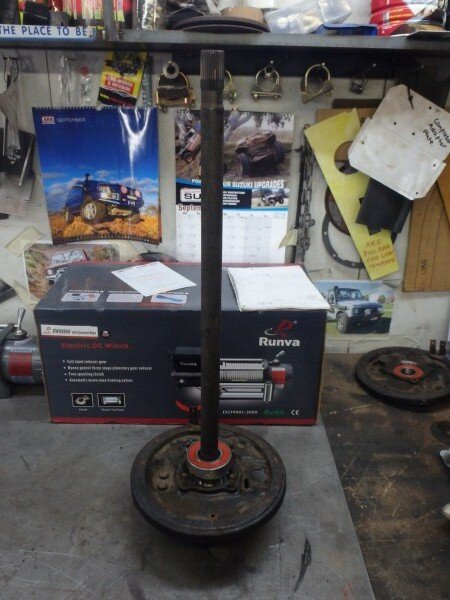
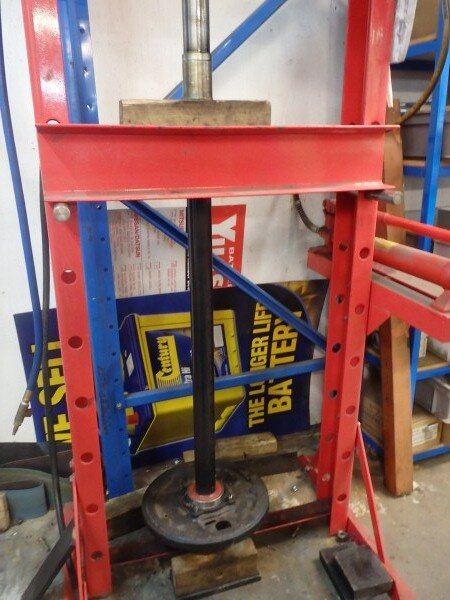
Next I cut a piece of 50mm pipe with the intention of using this on the press to press the bearings onto the half shafts.


Only because the machine wasnt tall enough/the half shaft was so long I couldnt get it to work as there was nothing to press off and pressing off the floor just lifted the machine up.


So I decided to get creative again!
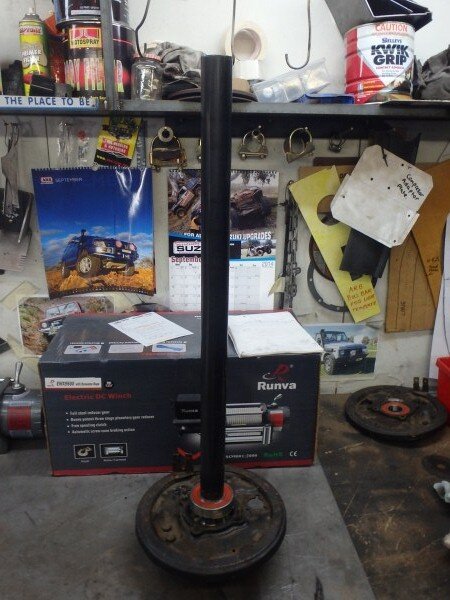
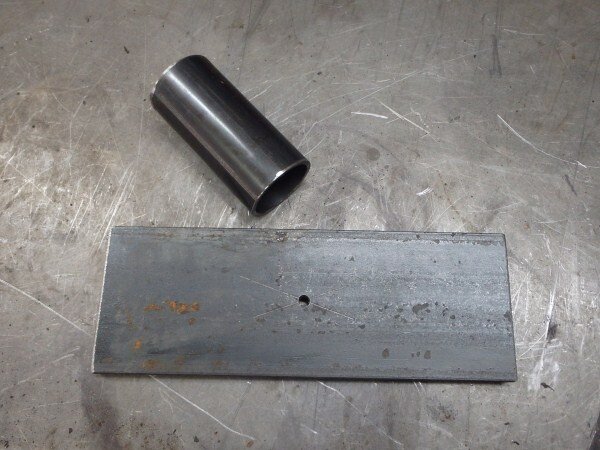
Cut some steel, more 50mm tube and some 10mm flat.

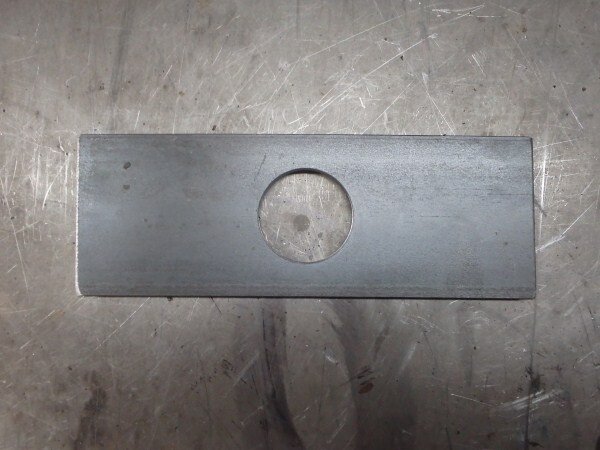
Drilled a 50mm hole in the 10mm plate using a hole saw and the drill press.

Positioned the tube.

And welded it.


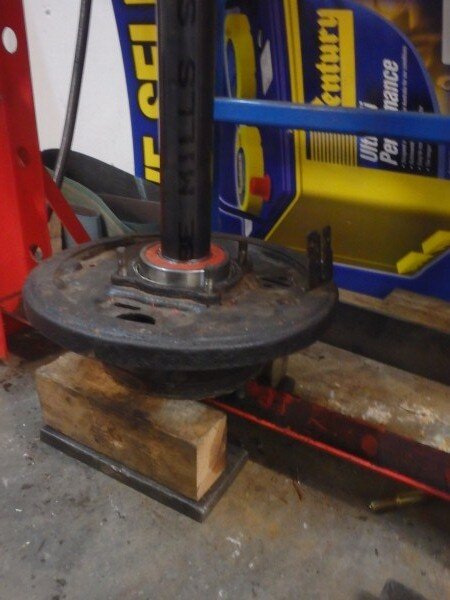
Now I could press the bearings and locking rings onto the half shafts.


Worked well but it did bend the 10mm plate.


Once the 2nd press tool has been straightened and strengthened I will get them electro plated and keep them for future wheel bearing changes.


I used the press to straighten my new press tool.

My rear bumper came back from shot blasting, electro plating and powder coating.

My next job was to mount the new super bright lights.

Using some stainless steel bolts I'd picked up.

I ran out of time at work so I brought it all home and carried on with it in my garage.

The passenger side one was really fiddly to get into to.


But the drivers side was much easier.

All done.

Starter motor next which had been freshly rebuilt by the auto electrician at work.


I had a proper look at the new alternator and compared it to my old 1KZ-T one.

It was then that I discovered that the casings were almost identical apart from the position of the threaded hole for the tensioner bracket.

So I had the idea of swapping the internals out of the new one into my old casing. But after speaking to the 2 auto electricians at work they both said it wasnt a good idea as certain parts inside are very tricky to get back in without breaking them on these alternators. I'd also loose my warranty on the new alternator. So it was decided it would be better for me to make a new tensioner bracket and make the 80 series one fit, more on that later.
I needed to drive LJ to work on Thursday so I could use the workshop after work so I left the old 80 series alternator on that I had been playing around with and used a huge cable tie to tension the belts.


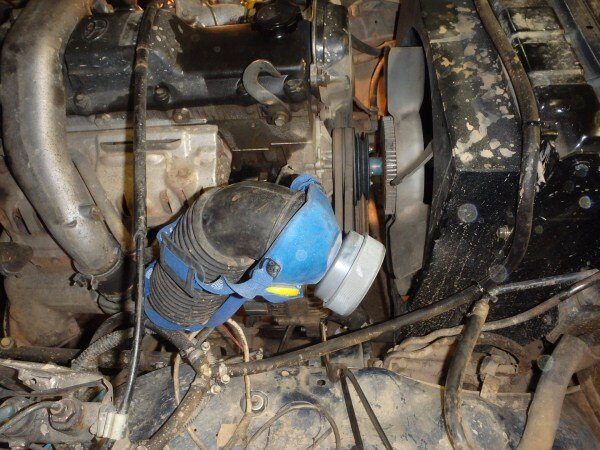
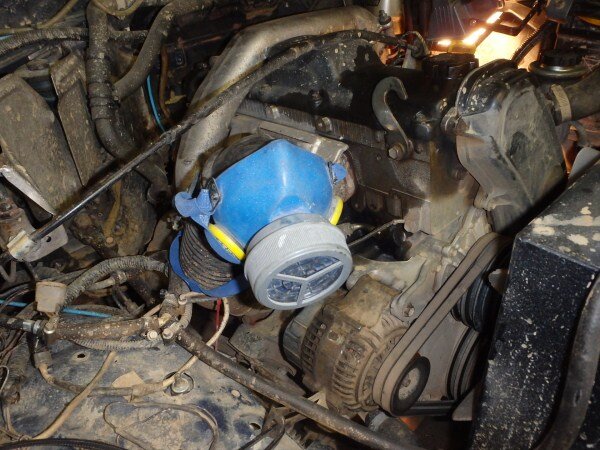
I then realised I'd left my airbox at work as I had been TIG welding up the 2 drain holes in the bottom.
I didnt want to drive without any filter and looking round the garage I spotted something that might do, a respirator.


My next job was to try and fit an 80 series tie rod end onto my steering box to give me some where to mount the steering damper as I wanted to move it to in front of the axle like on the 80 series.
New tie rod end.


Comparing it to the new LJ70 one that I bought the thread looked the same size and direction.
(What I didnt notice at the time, but has just become glaringly obvious now looking at this pic is that I'm going to have much less adjustment on my steering bar as the thread doesnt go anywhere near as close to the steering box as the standard setup.
)
Fitted perfectly.


The next job was to mount a steering damper.

The bracket on the left is an LJ70 steering damper bracket that normally bolts to the axle and on the right an 80 series steering damper chassis mount.


I decided the 80 series one would work best so I worked out how to mount it and then did some experimenting to make sure where I positioned it would give me full steering in both directions.


Drilled and bolted in position.


Wheels back on and ready to drive to work Thursday morning. Or so I thought..............................

Pulled LJ out of the garage, went to reverse onto the front lawn to turn around and bugger cant turn right!
I must have left the front steering bar too long.
So after a quick phone call to the boss to say I'd be late is was back in the garage to start adjusting things.

I couldnt just turn the center of the steering bar with some stilsons as it was winding one tie rod end in and one out meaning the bar wasnt getting any shorter.
So had to take a wheel off, split one of the ball joints and then turn the steering bar with some stilsons and a piece of scaffold tube.


That done I set off on my journey to work.....................
Pulled out onto the street and as I started trying to get up to speed it became apparant I had no power at all, a quick look in the mirror revealed clouds of black smoke!
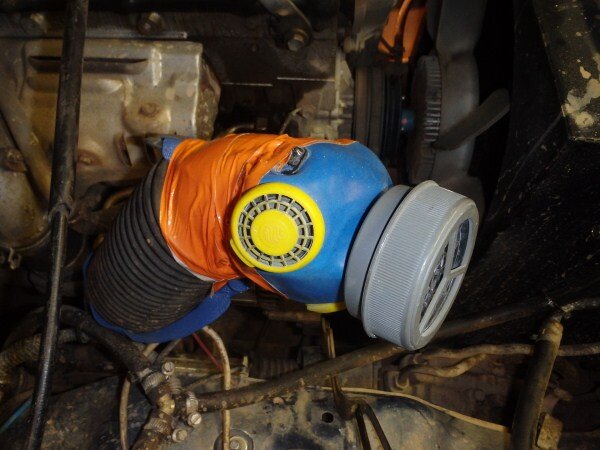
I pulled over and as I suspected the respirator air filter was restricting the engine far too much, so I needed something else........................
Now it just so happened that in my busy schedule I'd found time to sort out my sock drawer.
So what to do with all the odd socks whos twins had long since been gobbled by the washing machine or stolen from the washing line or wherever socks seem to vanish to.
The obvious choice was to use them all as rags in the garage and I just happened to have a few in LJ for that very purpose.
Bush mechanics in the middle of the city!

I got to work 30 mins late and put LJ on charge as having no alternator connected had obviously drained the batteries a bit.

After work I got LJ on the hoist.


Half shafts out.


New seals as I dont trust the ones in the bearing kits.

Passenger side seal had clearly let go at some point since they were last changed a couple of years ago.

Comparing the genuine seals with the non genuine and they were definitely different and looked like the milner ones that failed on me prematurely, everytime I fitted them.

Found some bad rust on one of the bottom shock mounts.
Hopefully it will survive the trip as no time to fix it before.


This does some what make it harder for me to order new shocks as ultimately I will cut those mounts off completely and make my own and change from a pin to eye mount.
Anyway back to the rear half shaft/wheel bearing change...................
The mechanic who was helping me discovered one of my wheel cylinders was seized so I shot out and picked up 2 new ones.

He also discovered 2 of my shoes were on the wrong sides, this is how they are meant to be fitted:

Its all to do with leading edges and is biased towards forward travel braking.


We bled the brakes and adjusted the handbrake.

I was meant to be measuring up for new rear shocks but I didnt have enough time to do it properly by disconnecting one of the shock mounts each side and then measuring how long the new ones needed to be at full articulation. I'm pleased with how well the front end now flexes now I've removed the flex restricting castor correction bushes and fitted longer springs and shocks.


Ok...........enough messing around I was running out of time and still had the new alternator to fit and bracket to make.

I had a selection of tensioner brackets to choose from.
On the left an 80 series one, then my old 1KZ-T one then a bare steel laser cut one out of 6mm steel.

I decided to use the bare steel one as it was twice the thickness of the others and I liked the idea of not butchering my old one so I could always refit a 1KZ-T alternator in the future if I ever wish.


I cut the bent end off.

Cut a piece of 25mm x 6mm flat and clamped it firmly in place ready to weld onto the bracket.

To ensure maximum root penetration (strength) I prepared the weld joint in a double V configuration.


Welded together and hole drilled in the other end.

I notched a bit out to provide more clearance around the bottom rad hose and welded the bent piece I cut off onto the other end.

And bolted it on.


With that working so well I could finally fit the new alternator.

I decided to paint the bracket as I'm short on time before the trip, it would have been nice to electro plate it.


With that all done I was able to drive home with all my lights on and my batteries being getting charge.
OK guys I'm out of time as I need to be out working on LJ as its almost 8am now.
Will hopefully get another update up later time depending.
Need to show you what I got up to yesterday, I spent the whole day getting really creative with LJ!
Attachments
-
 P9020005_zpsdd9b2bd4.jpg67.7 KB · Views: 57
 -
 P9020006_zps2d089857.jpg67.2 KB · Views: 44
 -
 P9020007_zpsbb4aa494.jpg77.3 KB · Views: 53
 -
 P9020008_zpsc7be6aeb.jpg72.4 KB · Views: 74
 -
 P9020009_zps7f265d8d.jpg35.5 KB · Views: 54
 -
 P9020010_zps6e7fced1.jpg42.6 KB · Views: 50
 -
 P9020011_zpsbc273d07.jpg42 KB · Views: 57
 -
 P9020012_zpsa7446e11.jpg53.9 KB · Views: 55
 -
 P9020013_zps37d5898d.jpg48.9 KB · Views: 49
 -
 P9020014_zps4bd52c17.jpg64.1 KB · Views: 57
 -
 P9020015_zps90c9ad04.jpg85.3 KB · Views: 43
 -
 P9020016_zps337bdfb8.jpg73.5 KB · Views: 142
 -
 P9020018_zps3c8891f6.jpg69.8 KB · Views: 44
 -
 P9020019_zps2c519c8d.jpg67.2 KB · Views: 43
 -
 P9030020_zps4d5b363e.jpg90.1 KB · Views: 39
 -
 P9030021_zps82468aab.jpg78.8 KB · Views: 44
 -
 P9030022_zpsab9042a4.jpg95.3 KB · Views: 46
 -
 P9030023_zps9fab60af.jpg91.4 KB · Views: 39
 -
 P9030024_zps9cd9464d.jpg90.9 KB · Views: 47
 -
 P9030025_zps139bedf0.jpg73.3 KB · Views: 67
 -
 P9030026_zps37c9704b.jpg66.5 KB · Views: 48
 -
 P9030029_zps5170bf3c.jpg56.1 KB · Views: 53
 -
 P9030027_zpscd404c64.jpg54.6 KB · Views: 51
 -
 P9030030_zps7ae50fbf.jpg60.6 KB · Views: 44
 -
 P9030031_zpscddd7e9c.jpg61.2 KB · Views: 51
 -
 P9030032_zps27399d9d.jpg79.4 KB · Views: 43
 -
 P9030033_zpsdb425bfd.jpg51.3 KB · Views: 45
 -
 P9030035_zpse7b7e307.jpg46.5 KB · Views: 53
 -
 P9030034_zps2856a506.jpg53.2 KB · Views: 44
 -
 P9030036_zps596ee59a.jpg59 KB · Views: 45
 -
 P9030038_zpsd5929c4e.jpg71.1 KB · Views: 52
 -
 P9030039_zps145f3737.jpg78.6 KB · Views: 45
 -
 P9030040_zps0a05cbe1.jpg95.3 KB · Views: 49
 -
 P9030044_zpsf2e8288b.jpg50.9 KB · Views: 49
 -
 P9030045_zps878989a1.jpg62.1 KB · Views: 48
 -
 P9030028_zps472dcd67.jpg68.9 KB · Views: 49
 -
 P9030047_zps8b81eb6f.jpg79.8 KB · Views: 41
 -
 P9030048_zpsdd190f55.jpg74.6 KB · Views: 45
 -
 P9030049_zps8e8a0f16.jpg49.1 KB · Views: 44
 -
 P9030051_zps2c57a298.jpg35 KB · Views: 52
 -
 P9030053_zps5d5b793e.jpg59 KB · Views: 53
 -
 P9030056_zps7588e495.jpg54.7 KB · Views: 59
 -
 P9030058_zpsedc0f2d3.jpg70.2 KB · Views: 46
 -
 P9030059_zps56f2fbcf.jpg80.4 KB · Views: 46
 -
 P9030060_zps0b105561.jpg77.1 KB · Views: 41
 -
 P9030062_zps8a99a06e.jpg77.1 KB · Views: 45
 -
 P9030064_zps6a81cc27.jpg83.7 KB · Views: 52
 -
 P9030065_zpsce665c22.jpg89.9 KB · Views: 43
 -
 P9030066_zpsdedfcba2.jpg98.8 KB · Views: 49
 -
 P9030067_zps3cdef9b3.jpg91.4 KB · Views: 46
 -
 P9030068_zps93884ff2.jpg90.2 KB · Views: 52
 -
 P9030069_zps25499a56.jpg63.9 KB · Views: 43
 -
 P9030070_zps6dac579d.jpg73.2 KB · Views: 62
 -
 P9030071_zpsaa842be0.jpg73 KB · Views: 60
 -
 P9030072_zps4addc759.jpg74.8 KB · Views: 57
 -
 P9030073_zpsbe20951f.jpg85.1 KB · Views: 115
 -
 P9030074_zps06c6ce69.jpg73 KB · Views: 49
 -
 P9030076_zpse51d4a24.jpg69.8 KB · Views: 47
 -
 P9030077_zpsed38ad0f.jpg56 KB · Views: 43
 -
 P9030078_zpse0b2b8eb.jpg55.7 KB · Views: 48
 -
 P9030079_zpsd25cf9cb.jpg69 KB · Views: 48
 -
 P9030080_zpse48e5b42.jpg74.6 KB · Views: 51
 -
 P9030083_zps908c5225.jpg80.7 KB · Views: 48
 -
 P9030085_zpsbd388d79.jpg68.8 KB · Views: 55
 -
 P9030087_zpse9036bbe.jpg85.2 KB · Views: 76
 -
 P9030088_zps9e63eacf.jpg66.1 KB · Views: 75
 -
 P9030091_zpsc1c04d47.jpg71.5 KB · Views: 59
 -
 P9030093_zpsd1dd3023.jpg66.6 KB · Views: 48
 -
 P9030094_zpsb1c25f62.jpg64.3 KB · Views: 53
 -
 P9030095_zps24abd46f.jpg59.4 KB · Views: 48
 -
 P9040096_zps32e825b7.jpg75.9 KB · Views: 49
 -
 P9040097_zpsba66d024.jpg65.7 KB · Views: 37
 -
 P9040098_zps0808800e.jpg66.2 KB · Views: 52
 -
 P9040099_zps763a0844.jpg91.3 KB · Views: 44
 -
 P9040100_zps913dd337.jpg91.4 KB · Views: 43
 -
 P9040107_zps4871e53e.jpg63.9 KB · Views: 41
 -
 P9040108_zps99c6277f.jpg76.4 KB · Views: 52
 -
 P9040109_zps0d9dff49.jpg86.4 KB · Views: 48
 -
 P9040110_zps1659bb3d.jpg75 KB · Views: 57
 -
 P9040111_zpsce696988.jpg68.1 KB · Views: 47
 -
 P9040112_zpsdb9d69d5.jpg56.2 KB · Views: 48
Last edited:

Similar threads
- Replies
- 0
- Views
- 171