Its been a busy week for me with work and the fuel tank project!
Work first...............................
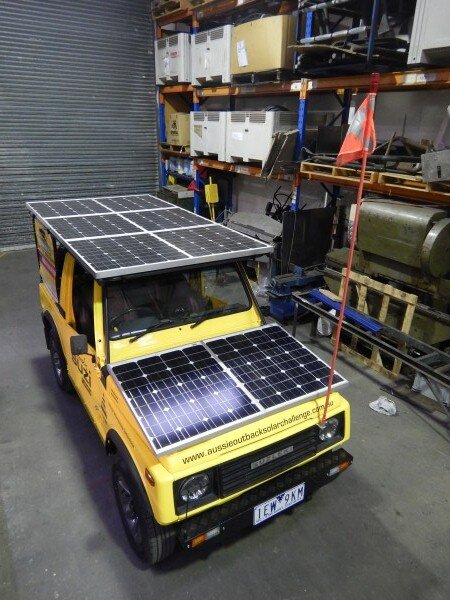
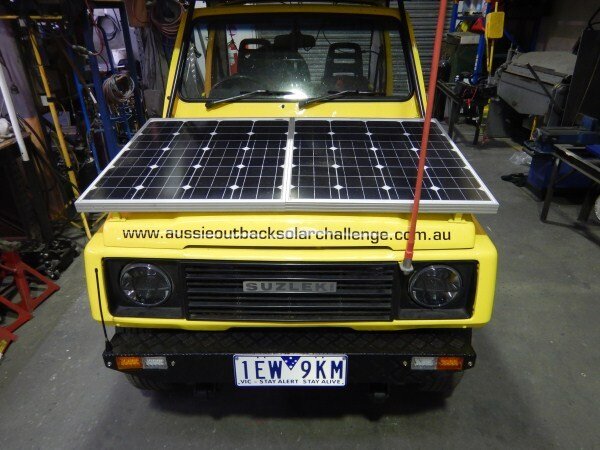
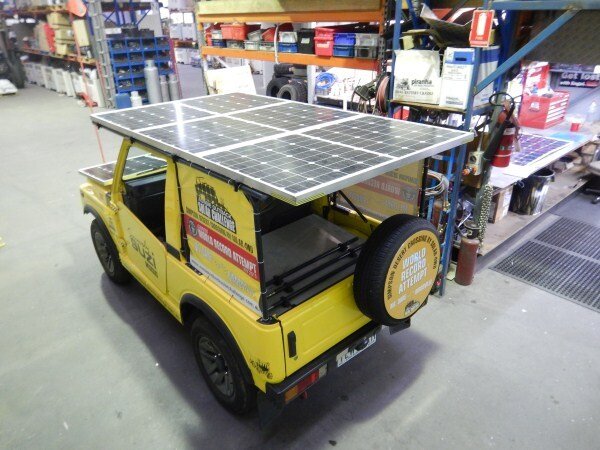
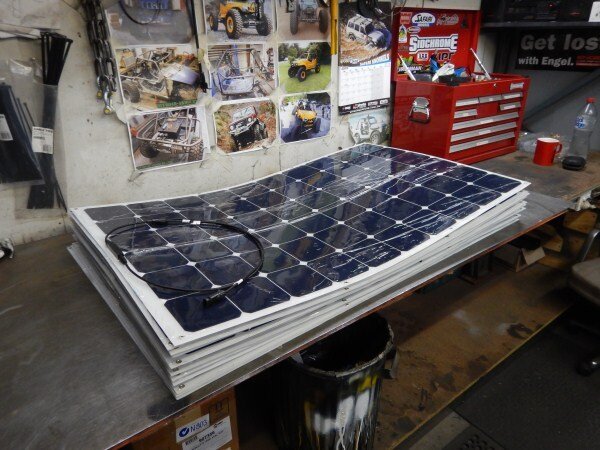
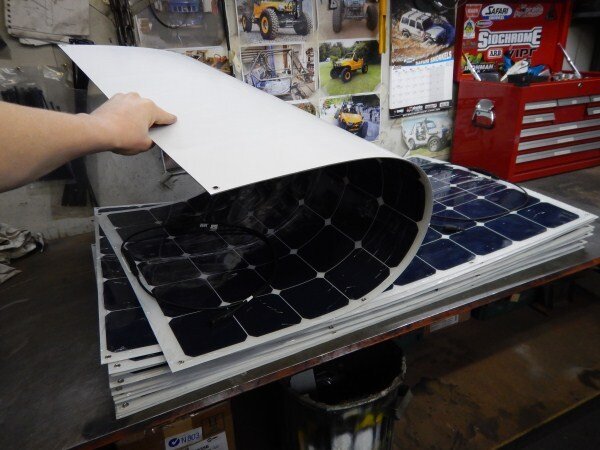
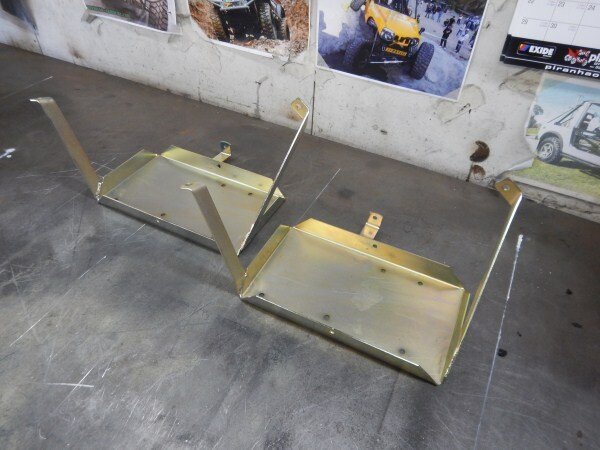
I re-fitted all the bonnet and roof solar panels on the electric car.
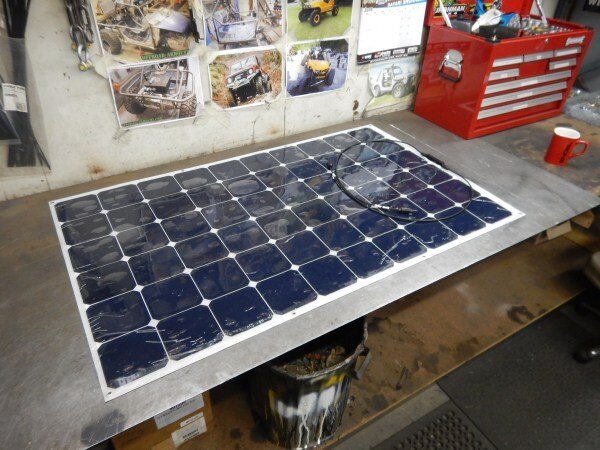
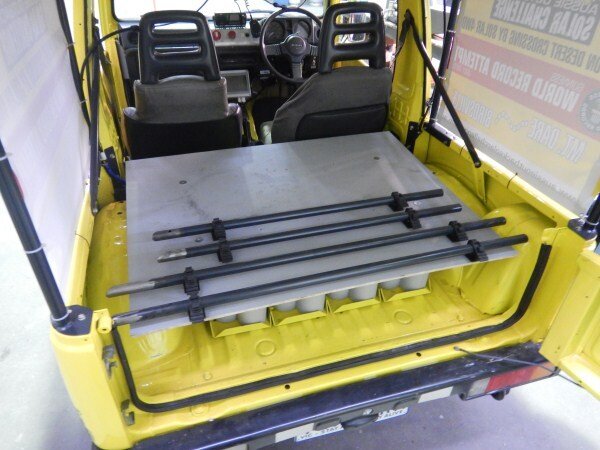
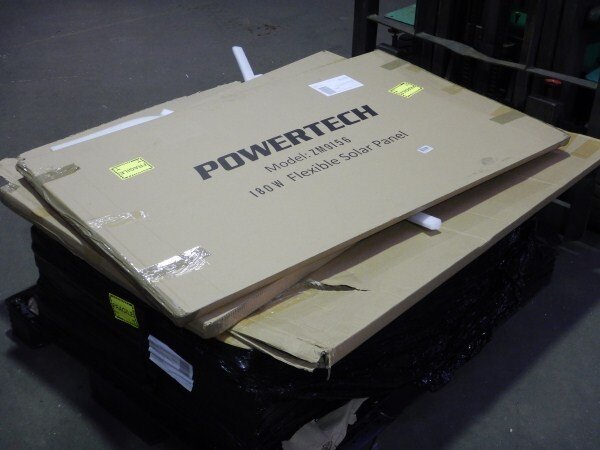
I needed to work out a way of storing 12 of these flexi panels in/on the car.
So we decided they will go in the back of the car.
Opened all the boxes and removed the panels.
So I could measure how deep the storage tray needs to be.
They are very flexible.
But sadly
just too wide to fit in the back neatly.
So the tray will have to sit on a slight angle which wont look visually as good as I'd have liked, but it will work OK.
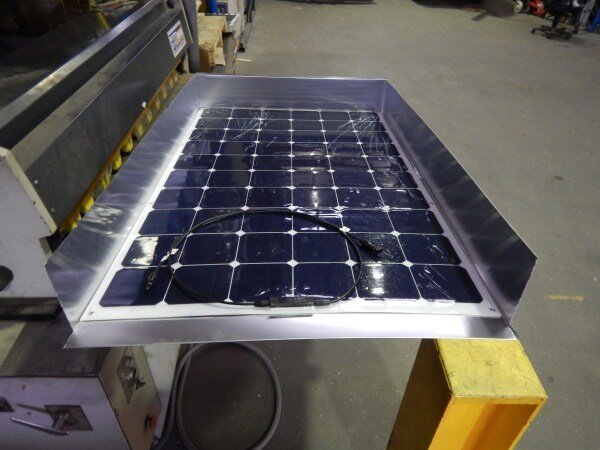
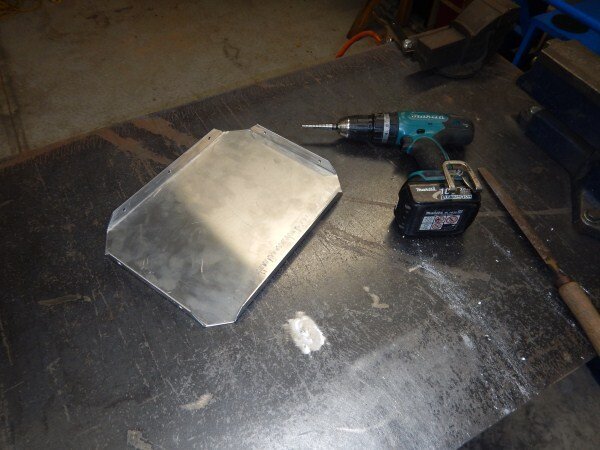
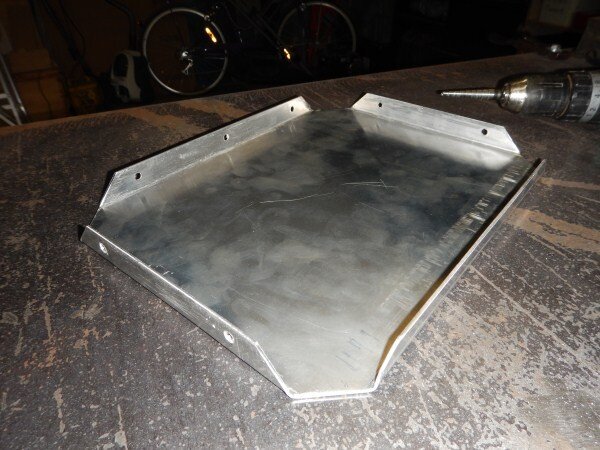
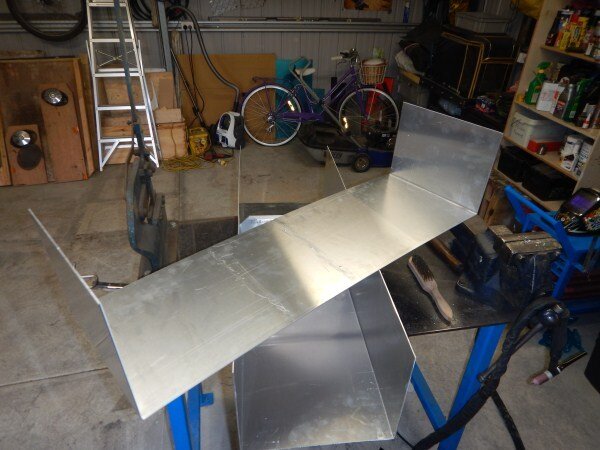
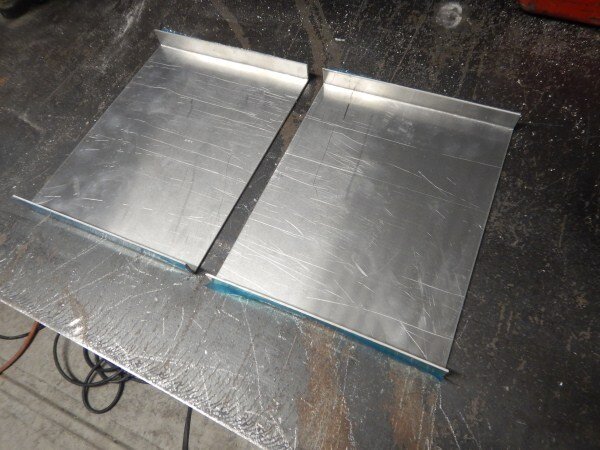
Folded up some 3mm alluminium.
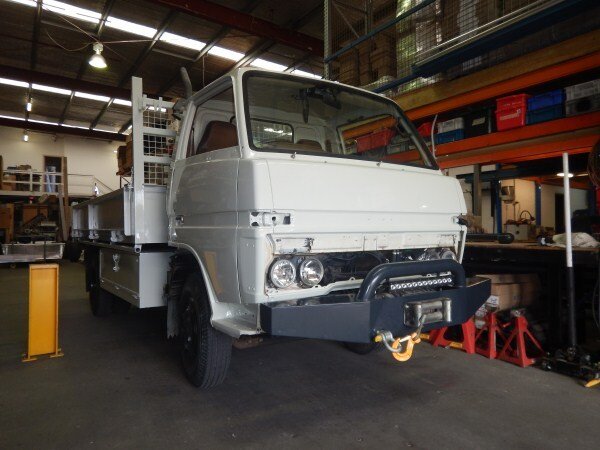
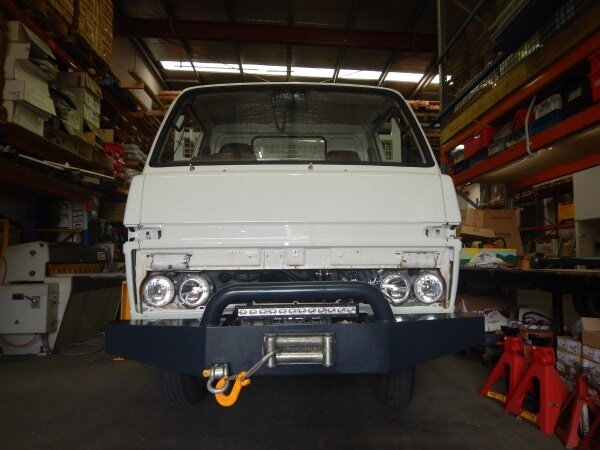
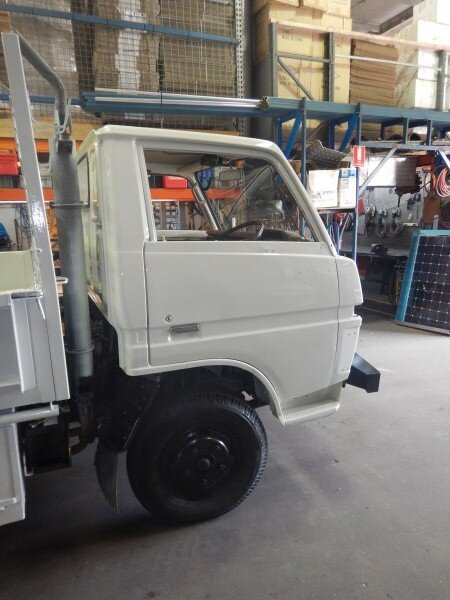
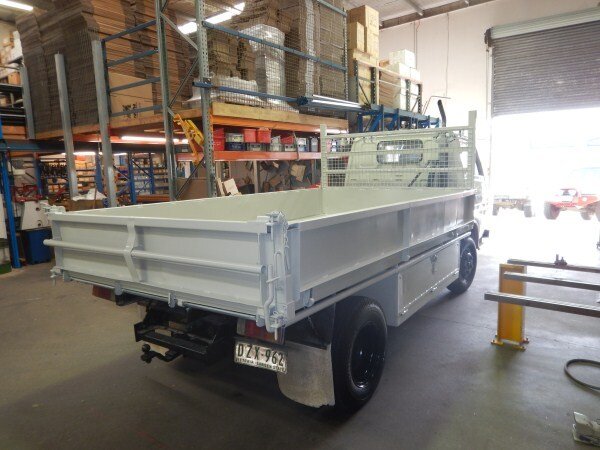
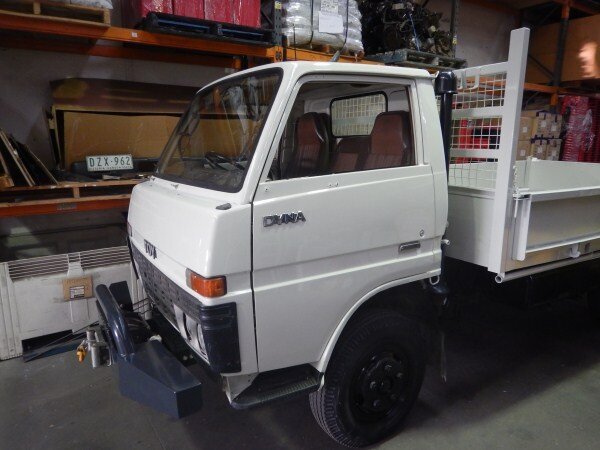
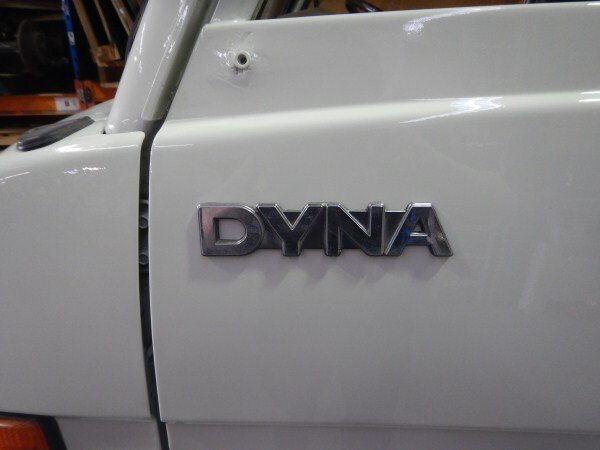
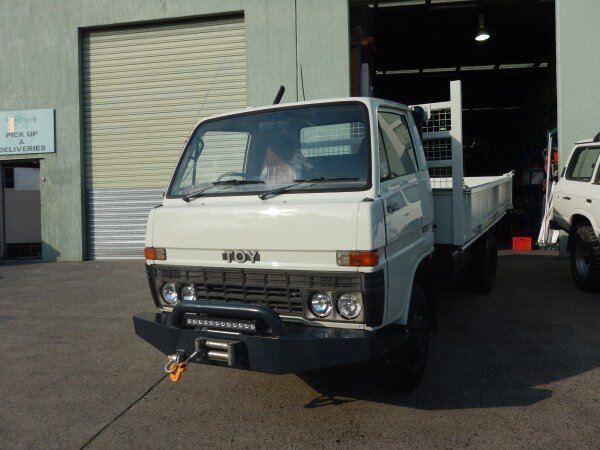
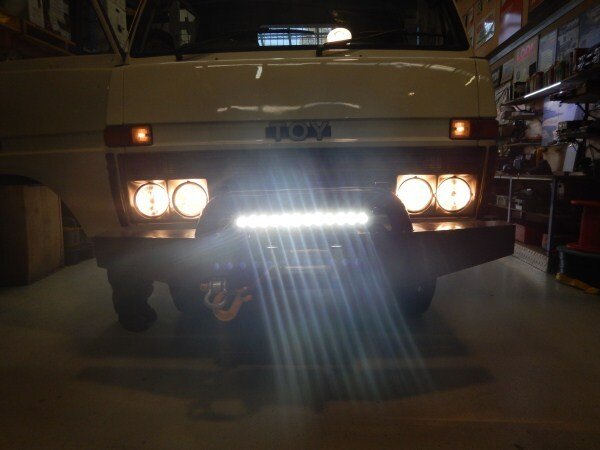
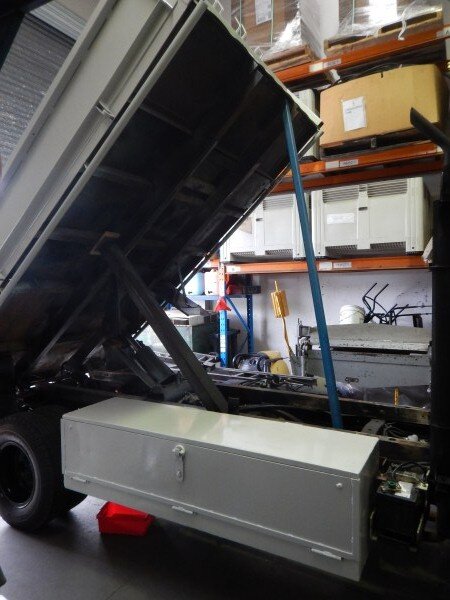
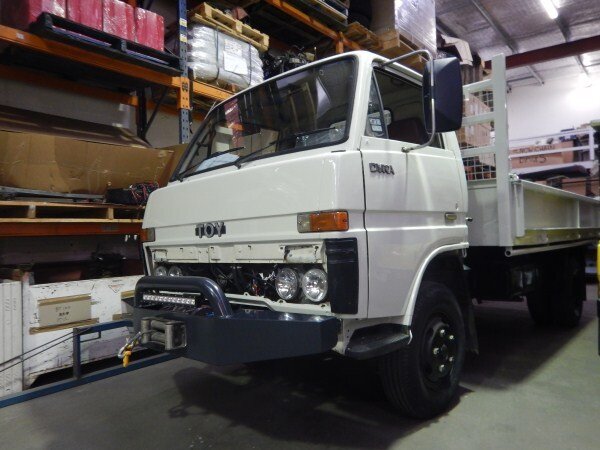
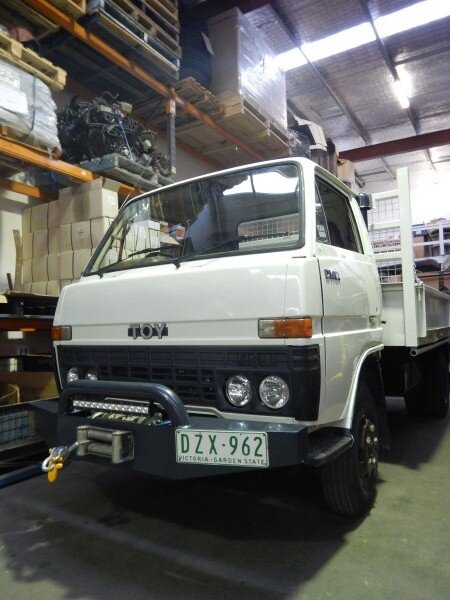
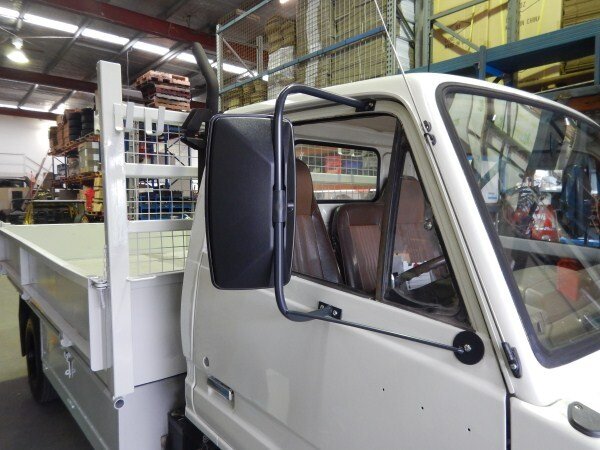
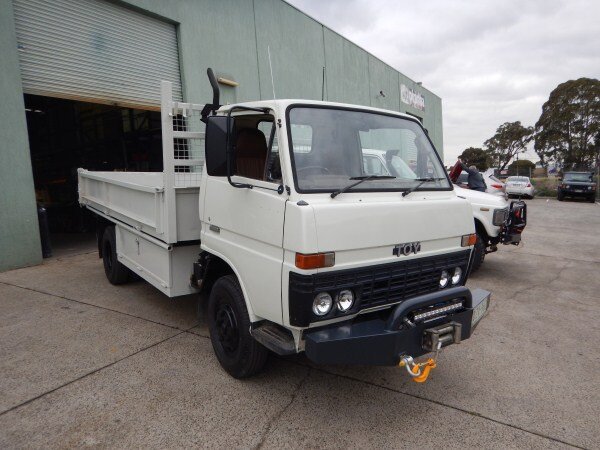
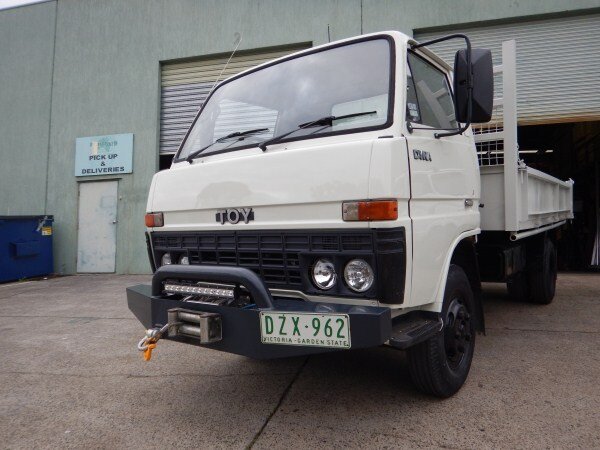
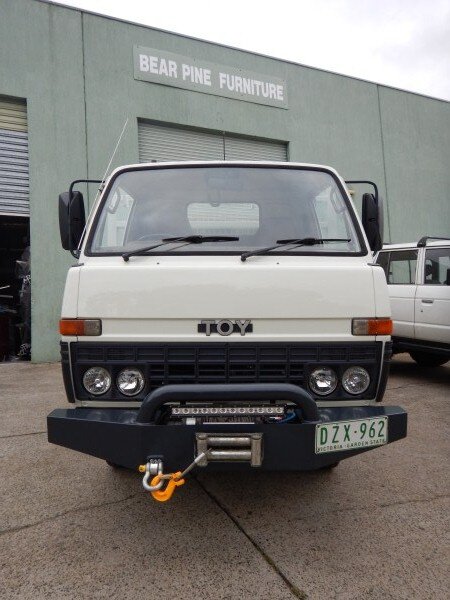
The tip truck came back from the paint shop and I wasted no time getting it all put back together.
We need to source another badge for the drivers side as one was missing.
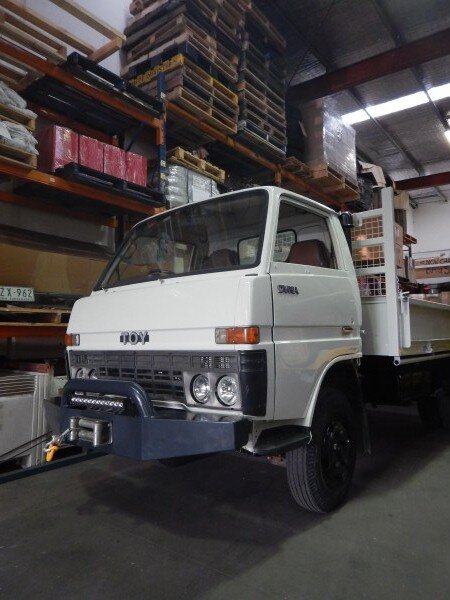
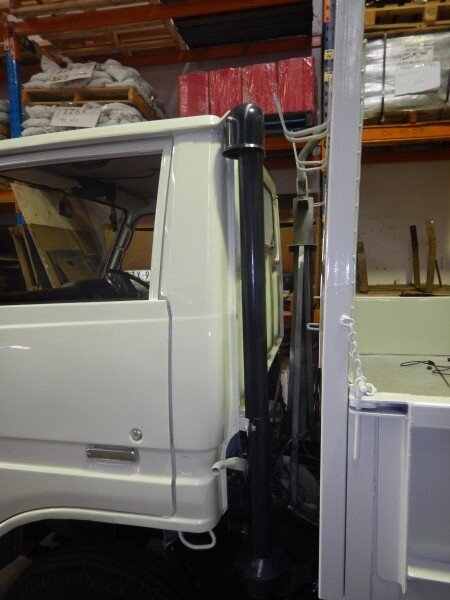
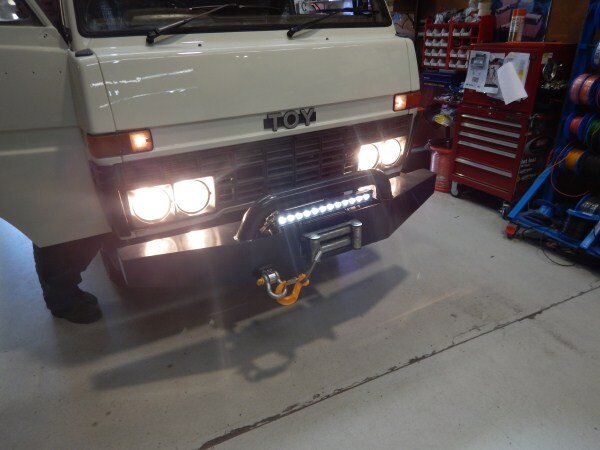
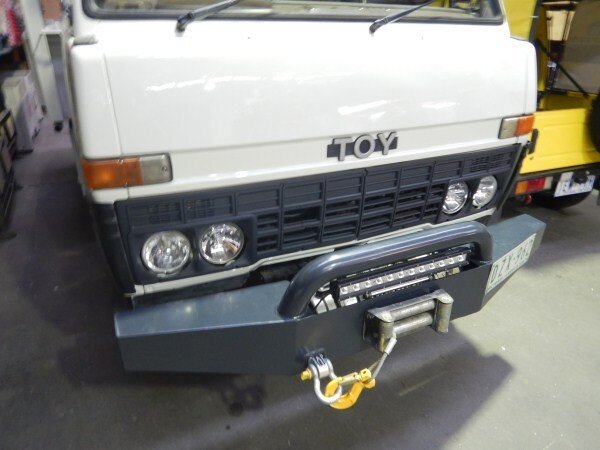
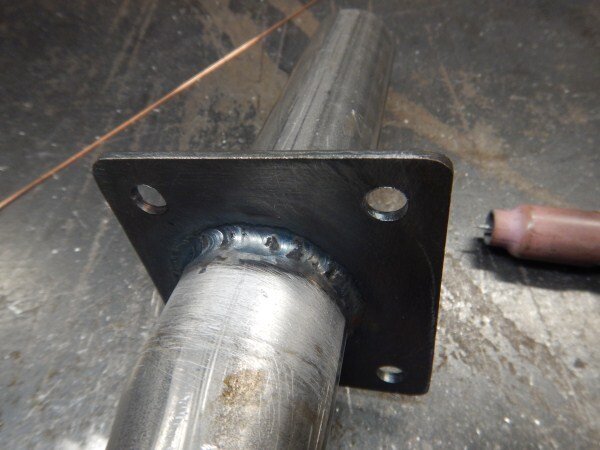
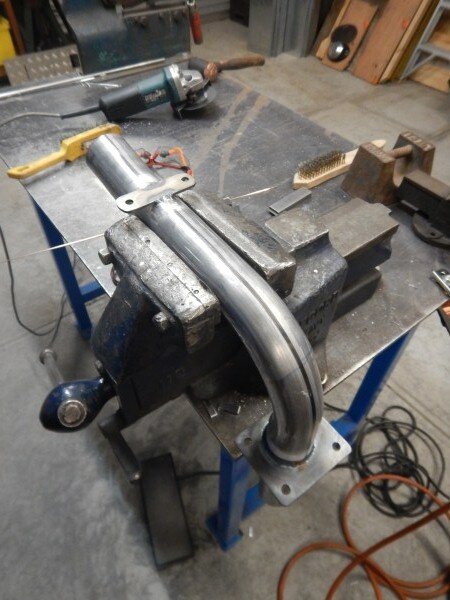
Fitted the snorkel.
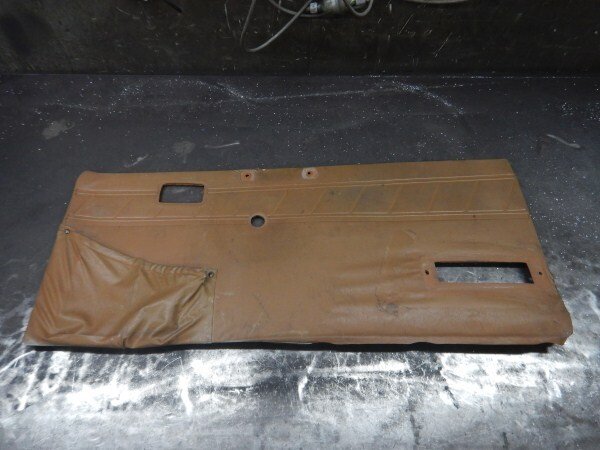
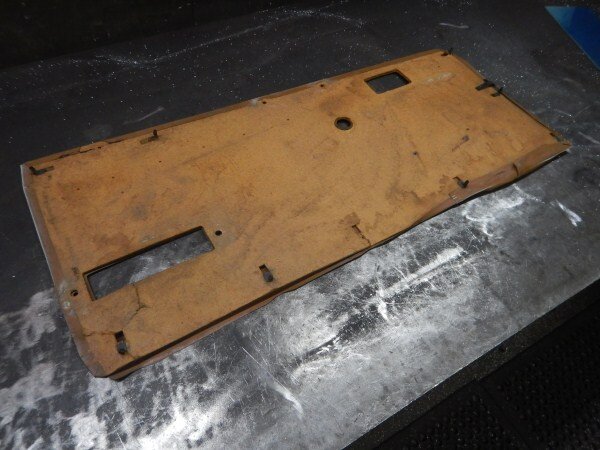
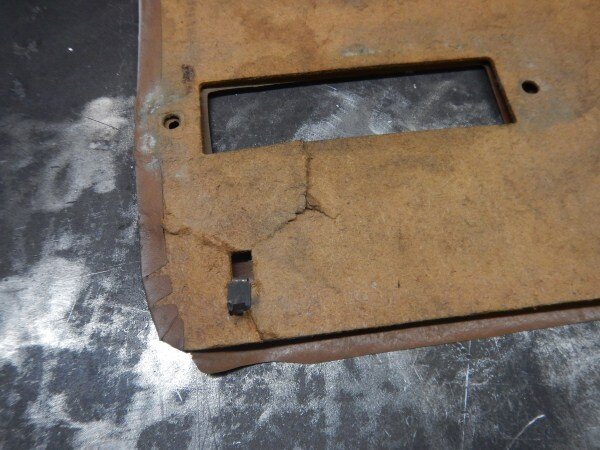
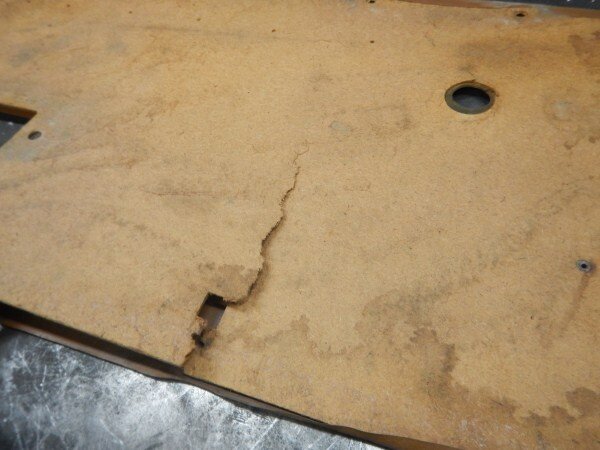
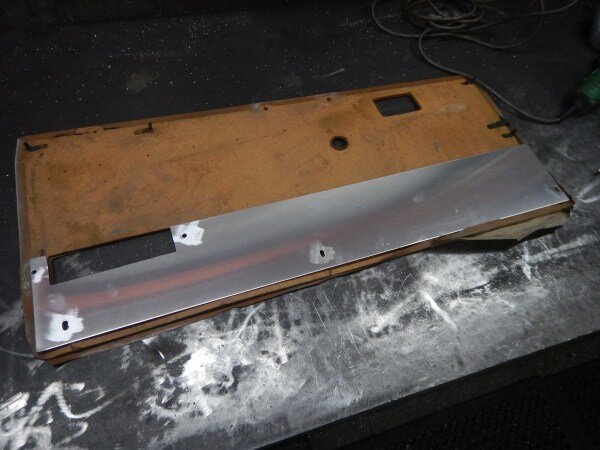
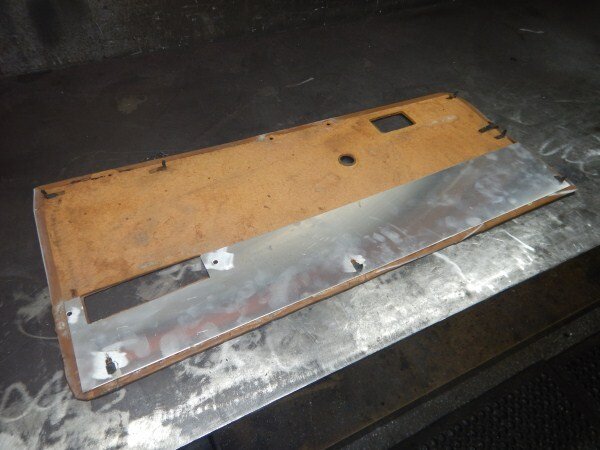
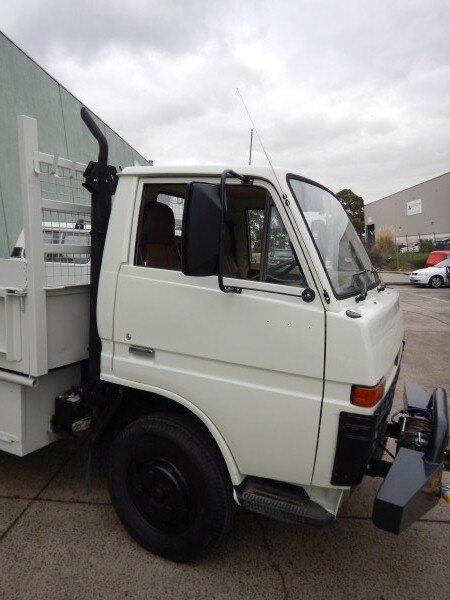
The door trim off the drivers door was pretty damaged.
I cut a piece of 1mm alluminium and glued it to the door card using contact adhesive and left it over night clamped to the bench.
The truck was at this point really starting to take shape.
It went next door for the auto electricians to do their bit.
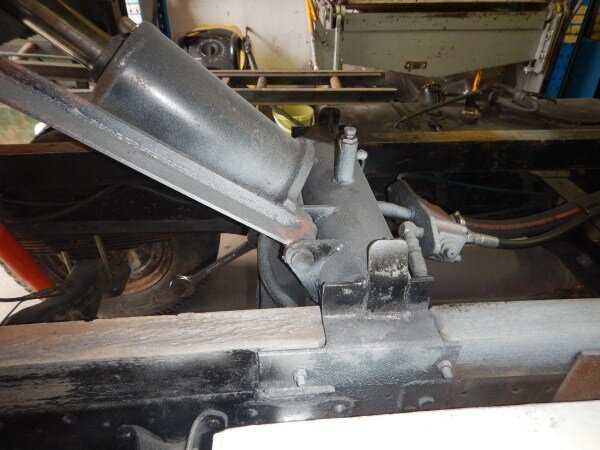
It came back and I had to change a leaking hydraulic hose.
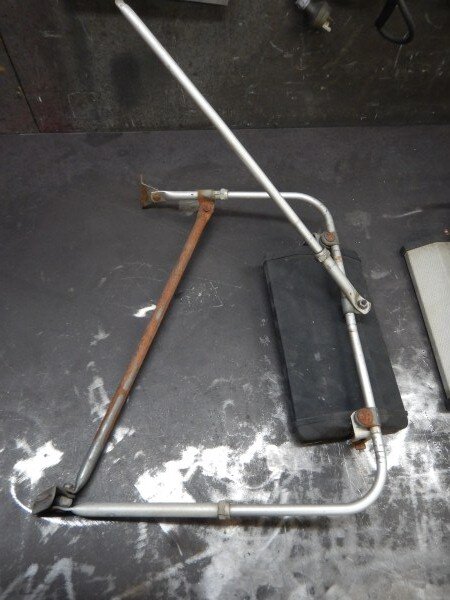
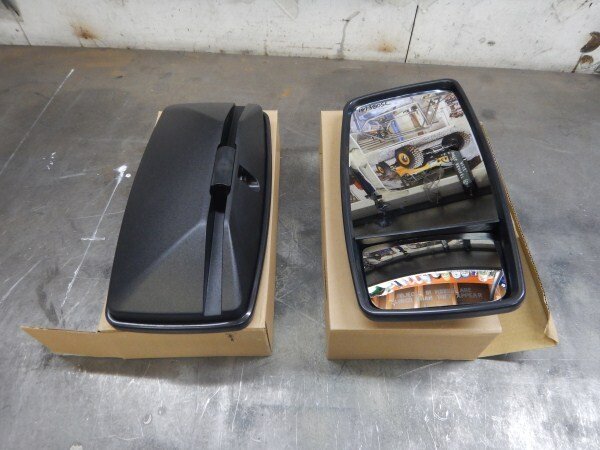
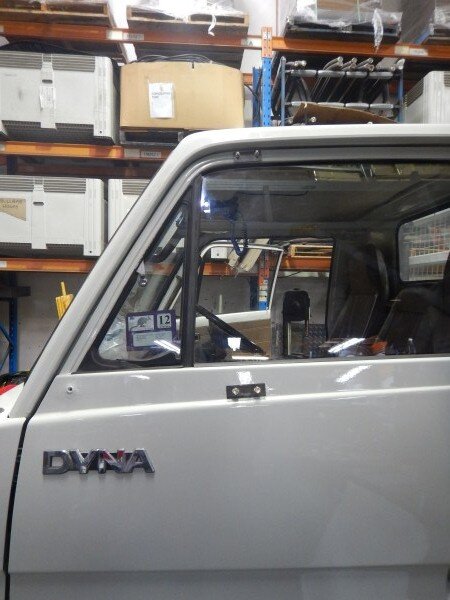
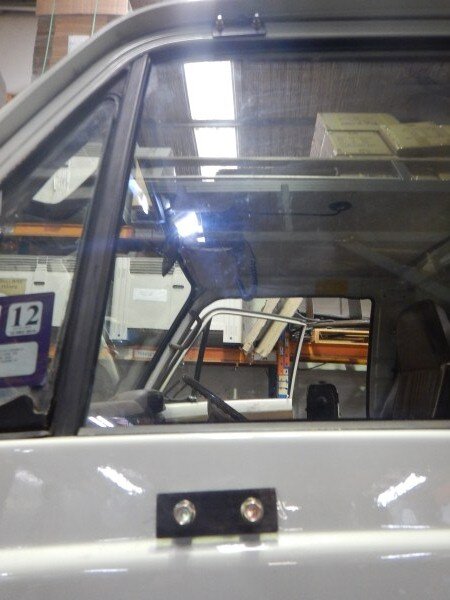
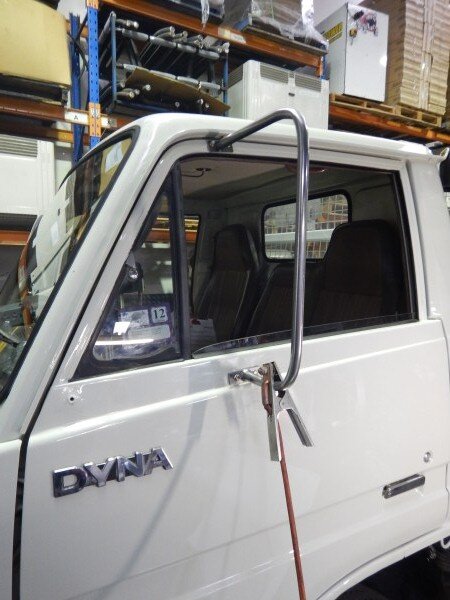
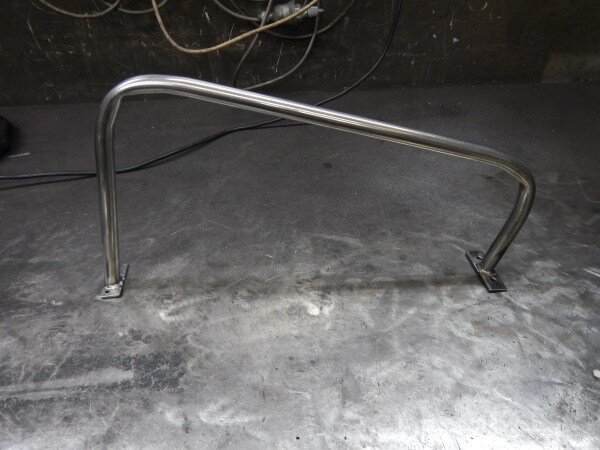
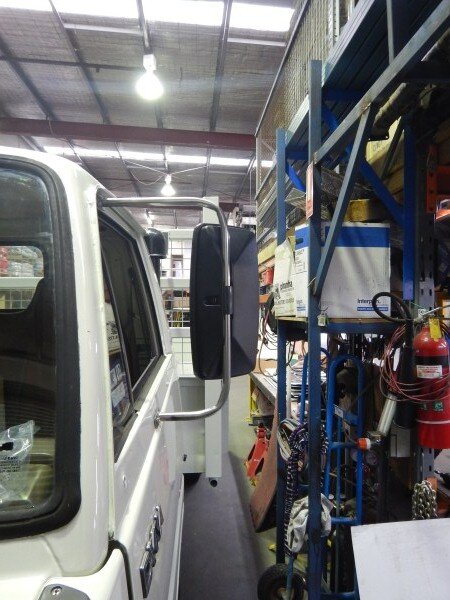
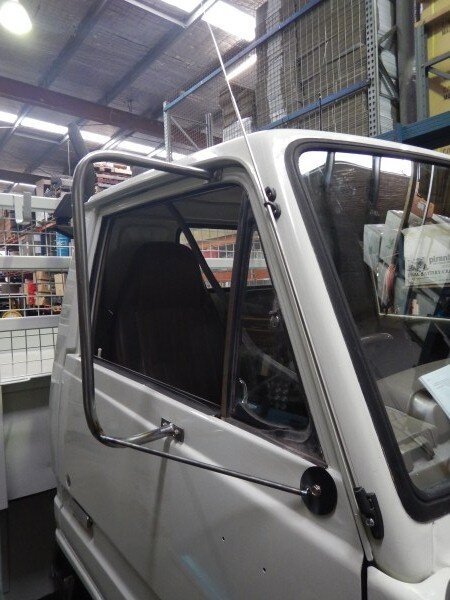
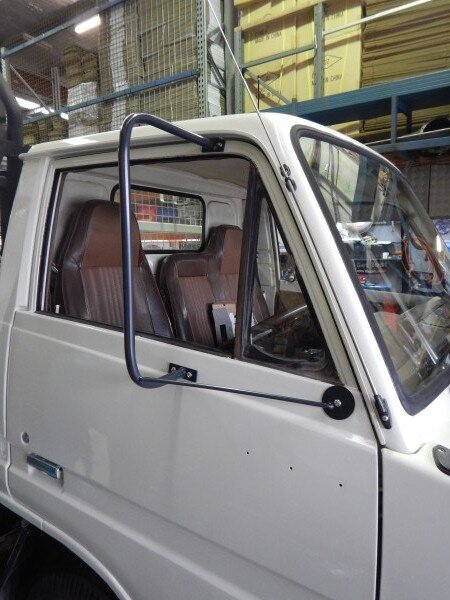
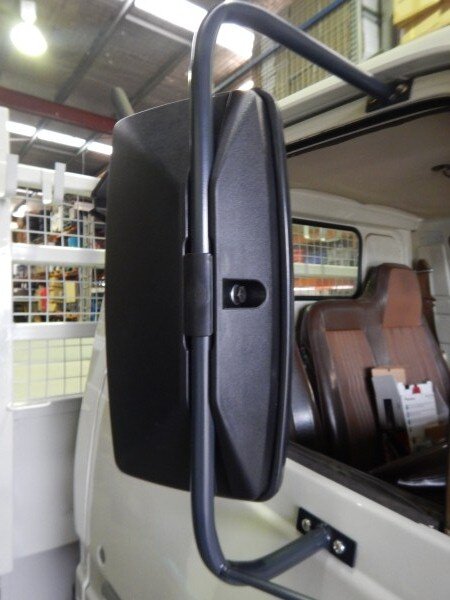
The original mirrors looked really tatty.
So I asked my boss to order me the mirror sections and I would make the frames to mount them.
New mirrors.
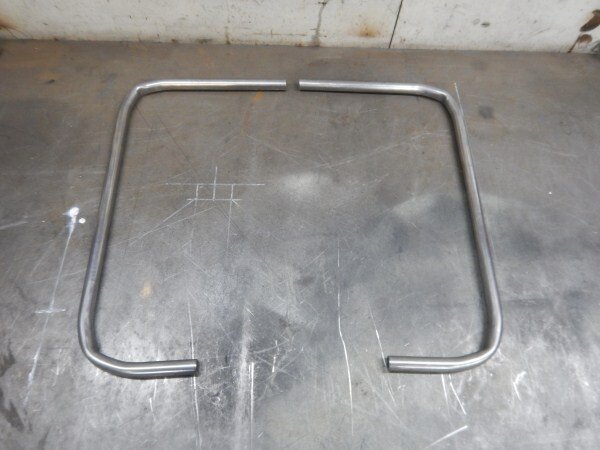
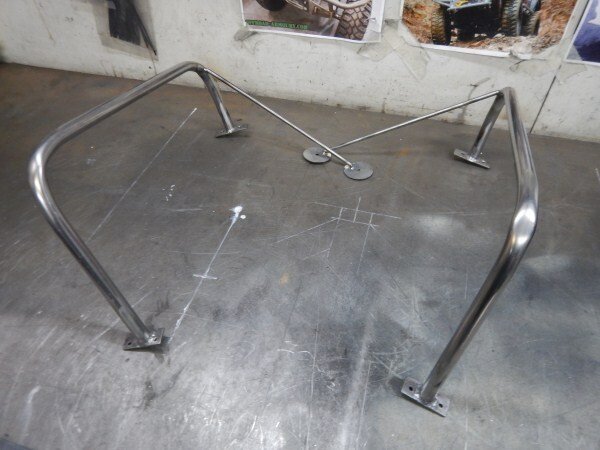
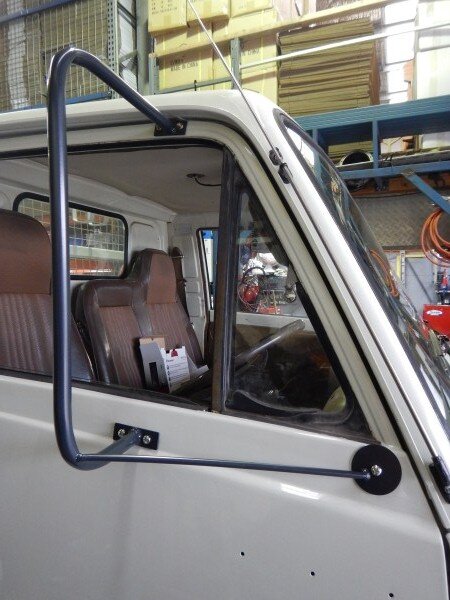
Bent some 20mm tube.
Made some plates out of 2mm steel and bolted it to the rivnuts I'd fitted in the doors in holes the old ones bolted through.
Tacked the tube on. Something that wouldn't have been possible with MIG because the splatter and sparks would have destroyed the new paint job, but with TIG there is no spatter, just precise neat welding.

Removed it and fully welded it.
Re-fitted it and checked to make sure it would work with the mirror.
Added some bottom braces.
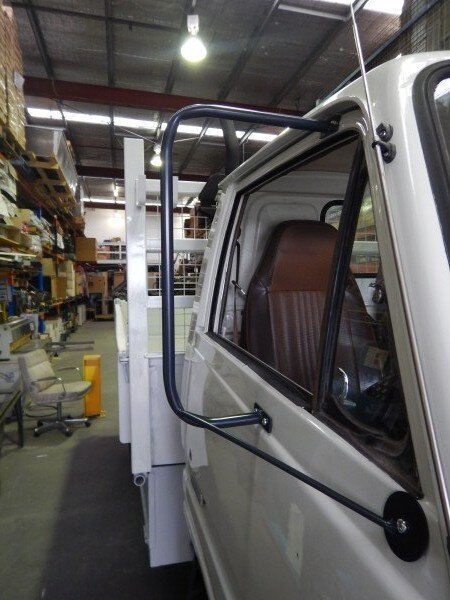
Drivers side.
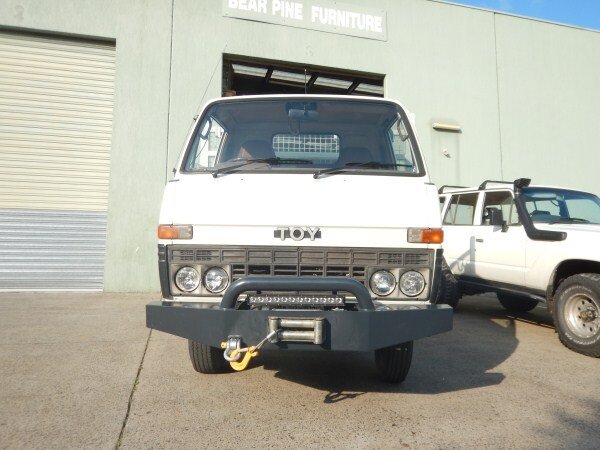
Ready for powder coating.
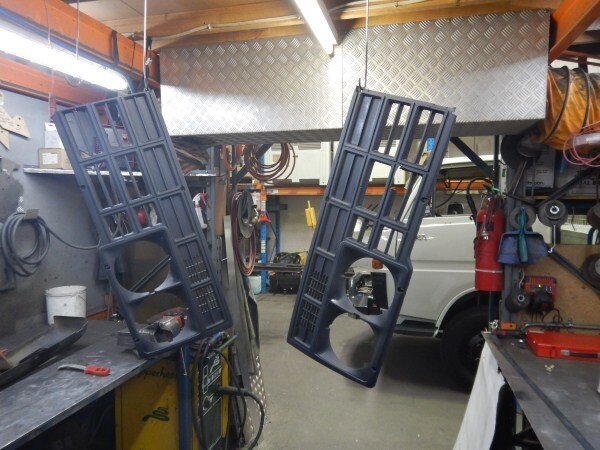
Decided to spray the grill grey as it was looking a bit tatty.
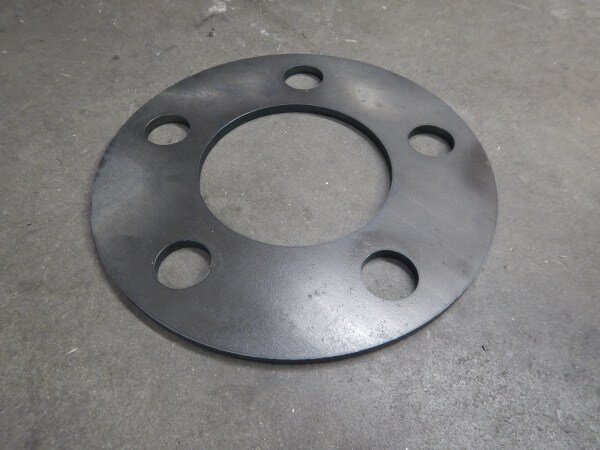
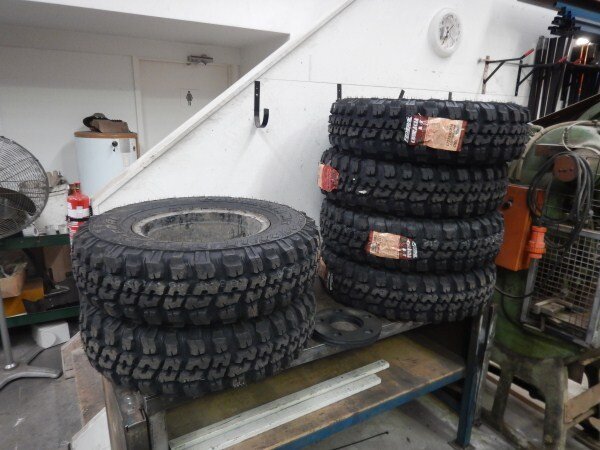
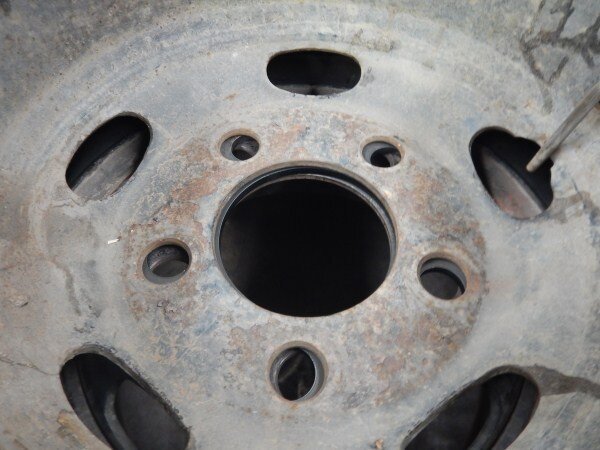
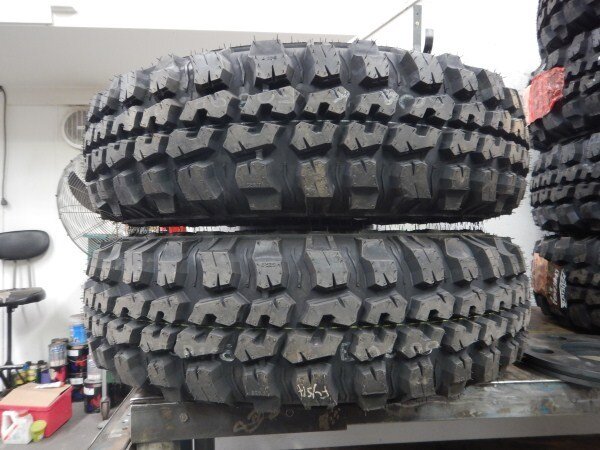
I got some wheel spacers laser cut out of 8mm steel.
This is to hopefully give enough clearance between the double wheels on the back of the truck as the mud tyres that are going on are much wider than the standard tyres.
With a spacer in place the tyres now have clearance between them.
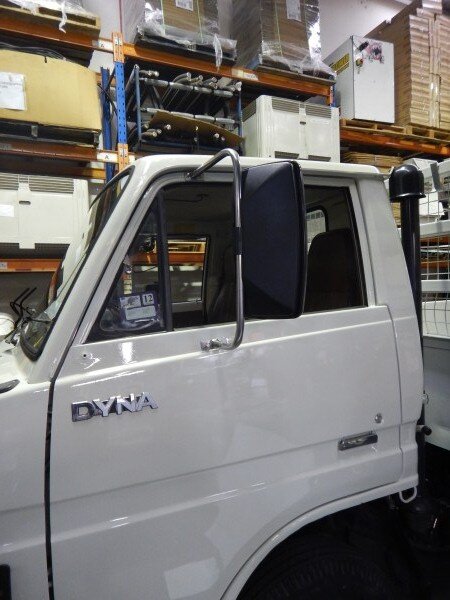
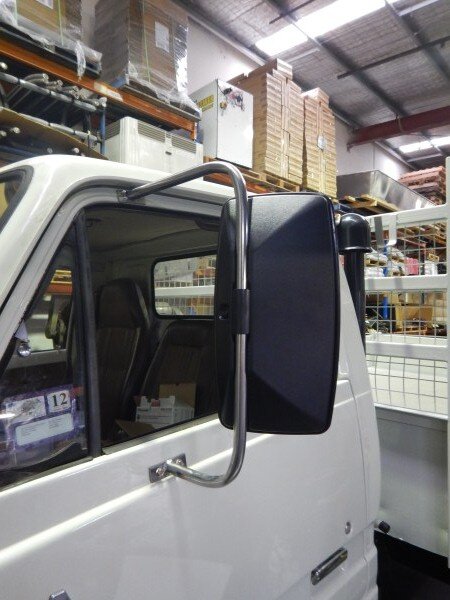
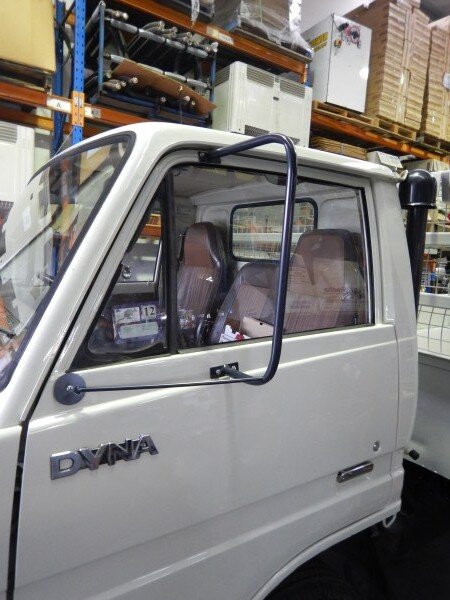
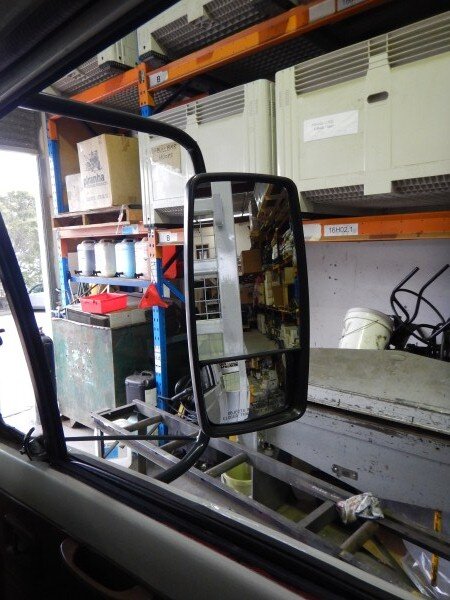
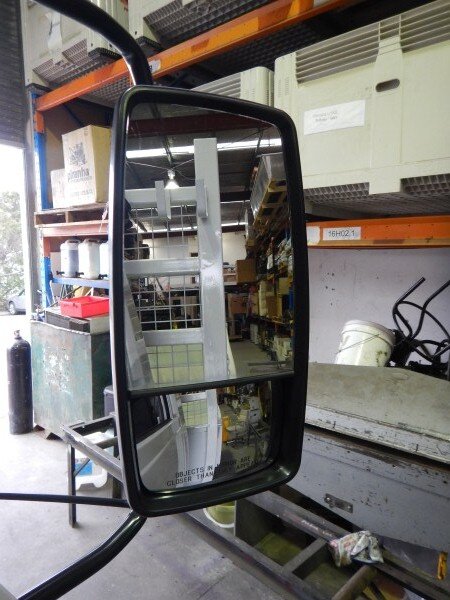
Got the mirror frames back from the powder coaters.
Got them fitted.
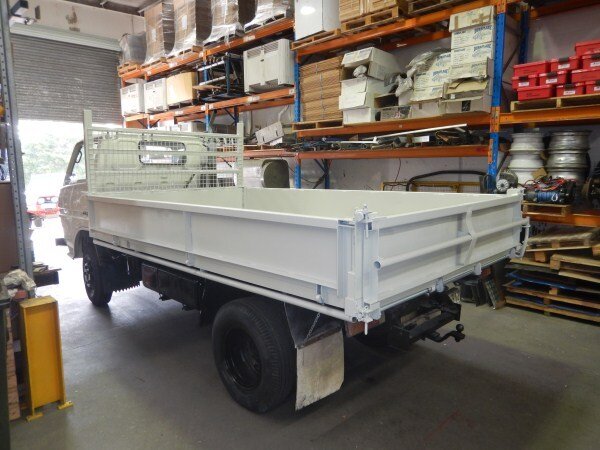
My boss is really pleased with how the old truck has come up!
So all that is left now is to get the wheels shot blast and powder coated and the mud tyres fitted then its ready to go to the farm.
It will be good to get the truck gone as currently my workshop is full with all the projects I'm building!
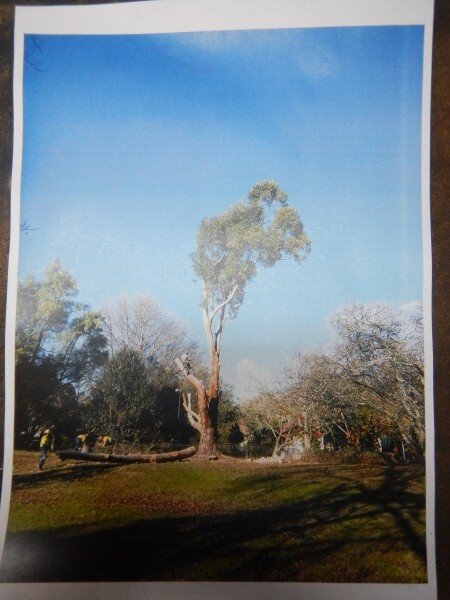
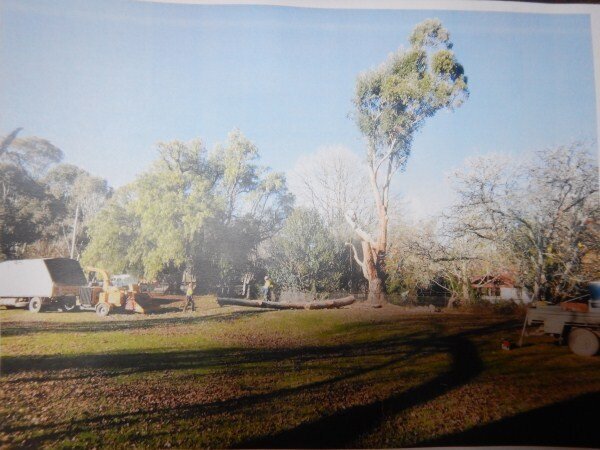
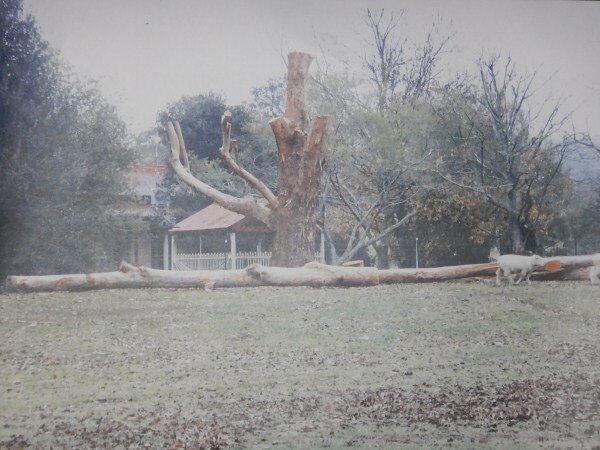
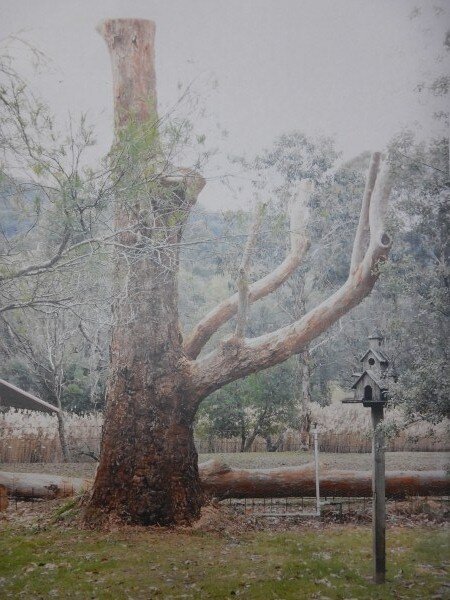
My boss brought me in some pics of his huge gum tree getting cut down.
I commented that they havent cut the tree low enough as he said previously the tree house was going to be about 2.5-3 meters off the ground. Apparently when he told the guys cutting the tree down of his plans for the 3 storey tree house complete with its own bell tower, they said you cant have a huge grand tree house like that so low to the ground!
So the tree house is now going to be higher than the roof line of the house!

Work will start on that exciting project once I'm back from Europe and hes back from the world record attempt.
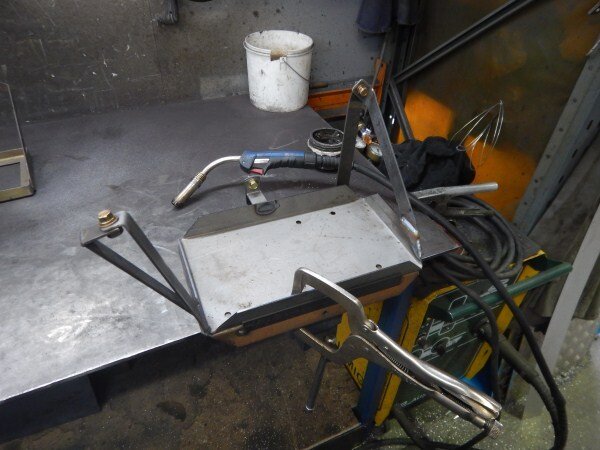
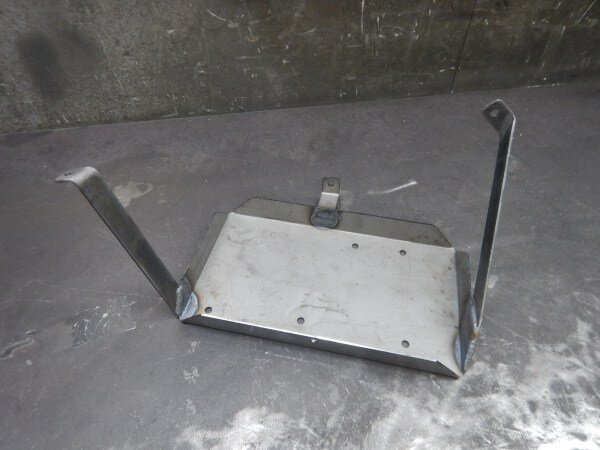
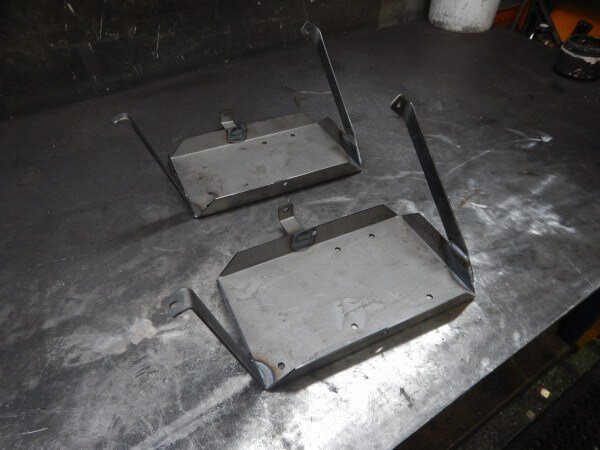
I had to make an LJ70/Bundera tray for a customer this week, the first one I've ever made as there isnt much demand for them anymore.
Made 2 so we have one for stock.
Got them plated.
And off it went to one of our distributors to fit to a customers car.
And finally home/LJ!

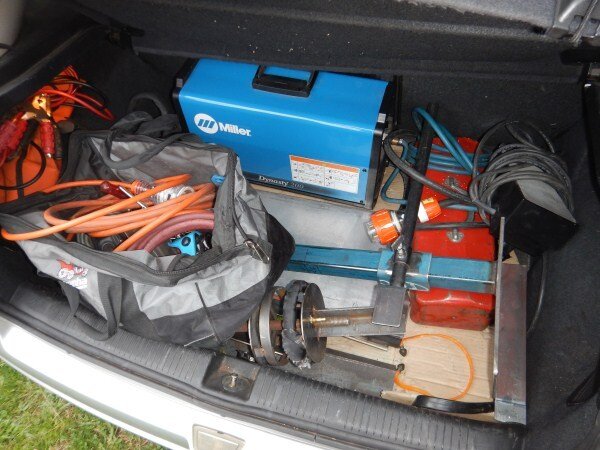
So rewind to last weekend and I took my own welder in for the test so my first job was to unload that and get it all setup again in my garage.
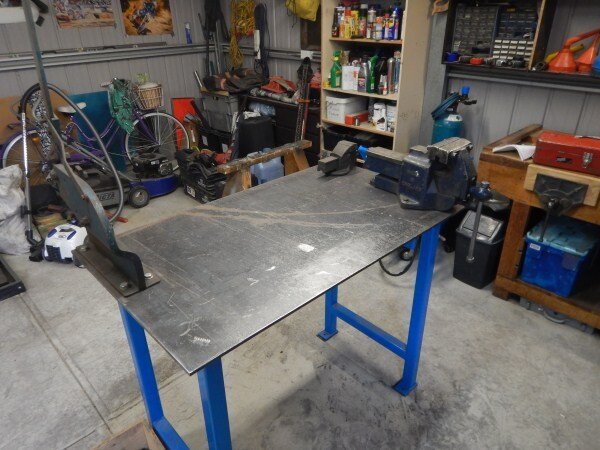
Its going to be great to finally have my work bench back and not have it taken over with TAFE practice!
All that was left to do was load all my bits of pipe into the boot of my car ready to go in the scrap bin at work!
OK............................
No more TAFE so LJ can once again take priority!
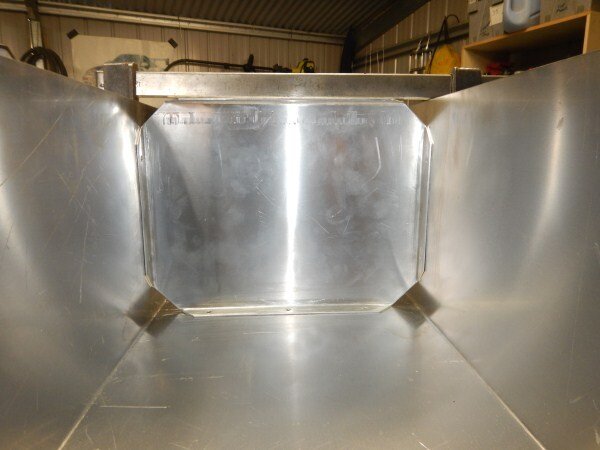
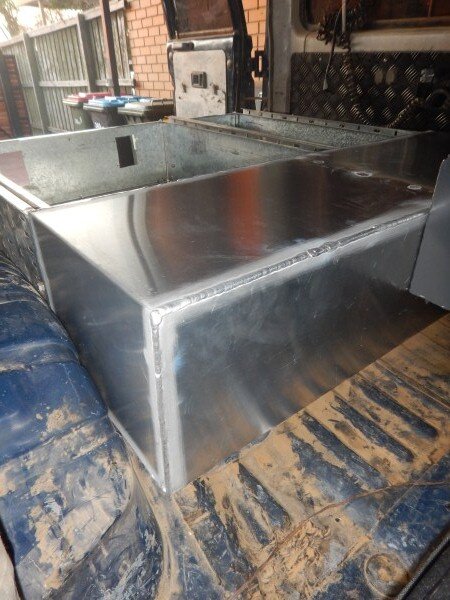
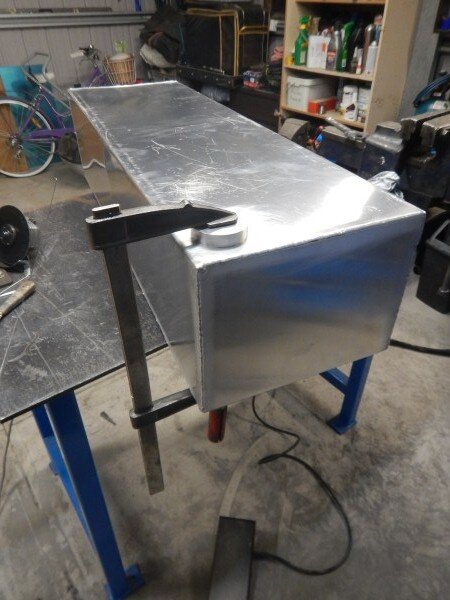
Tried the fuel tank in place to double check it fitted OK.
It fitted OK so I could carry on with the build.
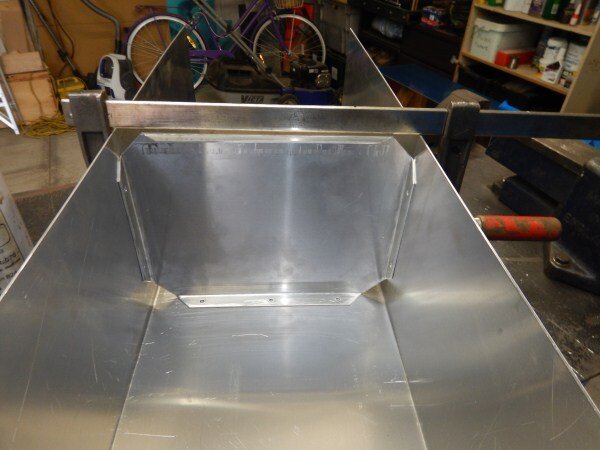
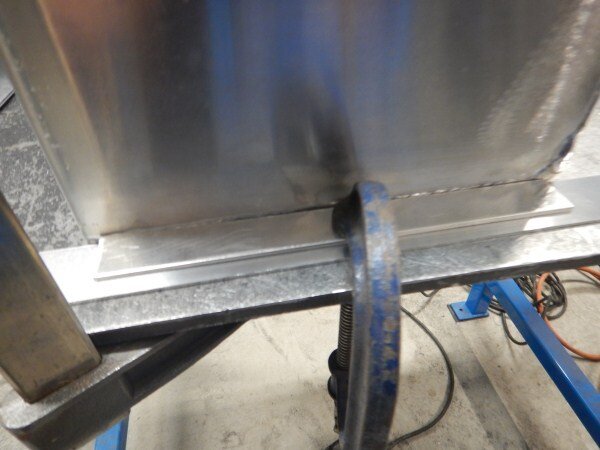
Drilled the baffle for the spot welds.
Cleaned the weld area with thinners and welded it in position.
The lid next.
Drilled it for spot welds on to the baffle.
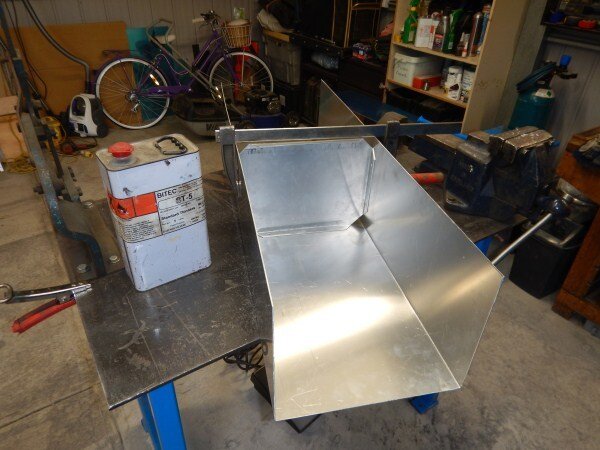
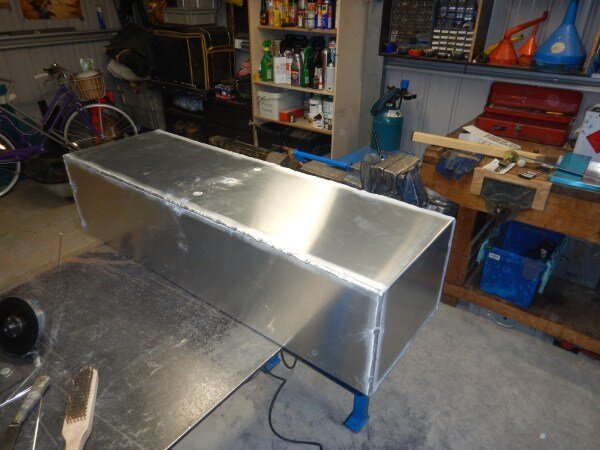
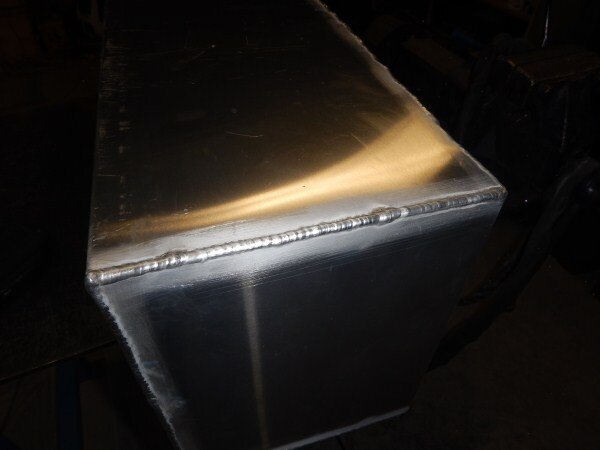
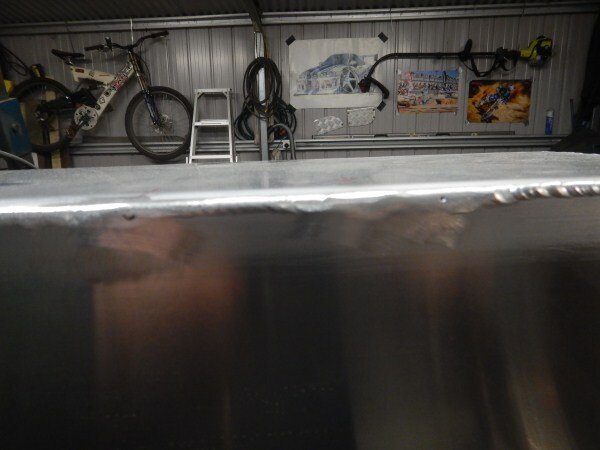
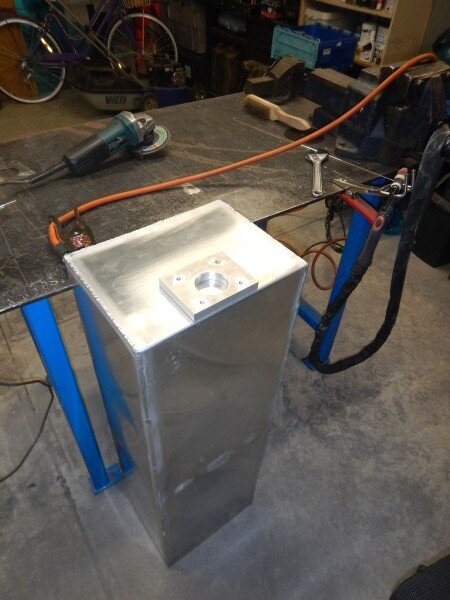
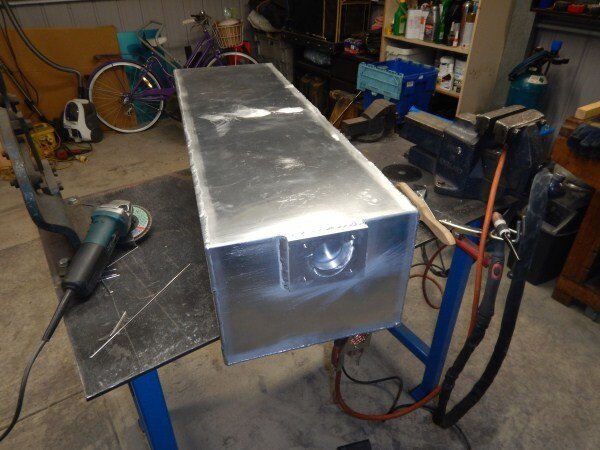
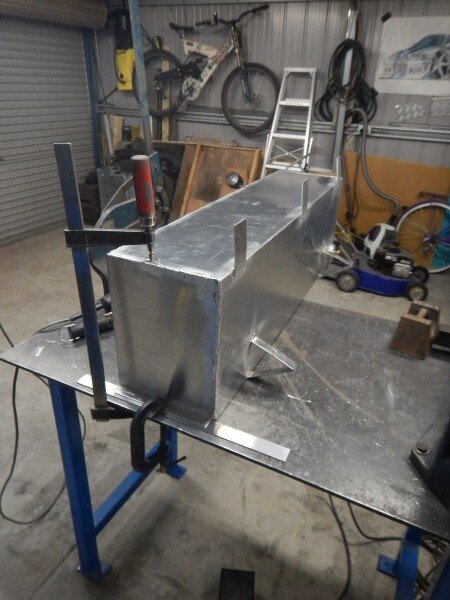
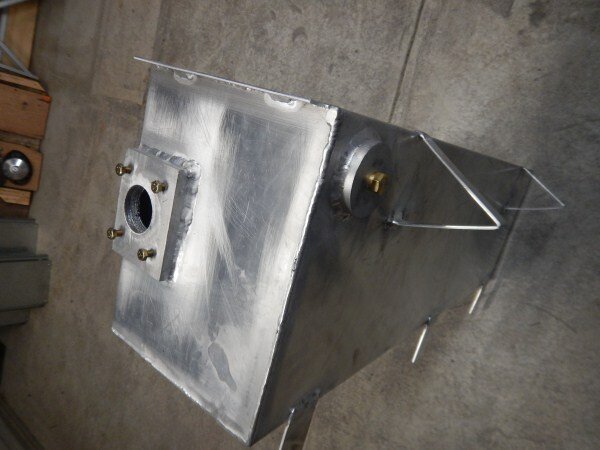
Got the 2 sections of tank welded together.
Test fitted it again.
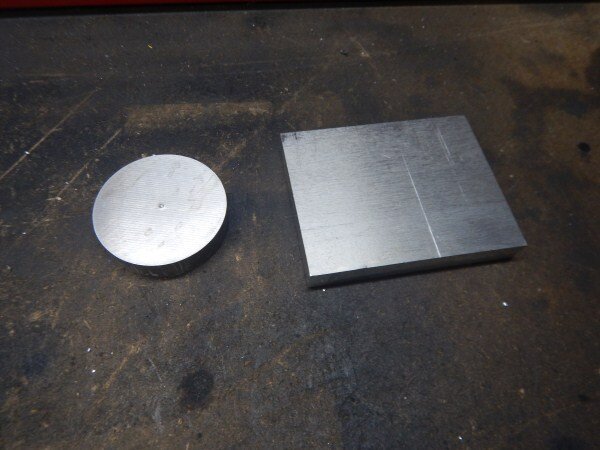
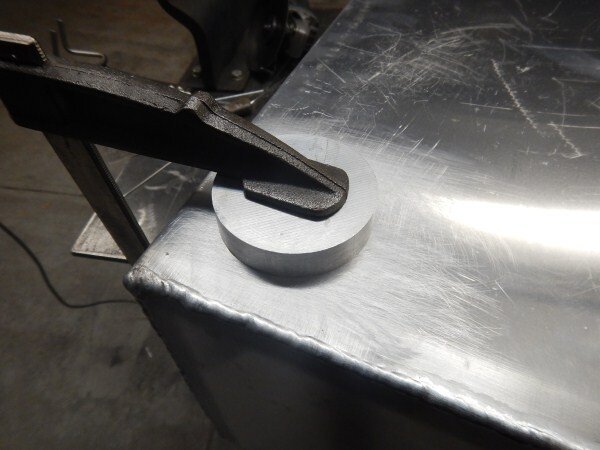
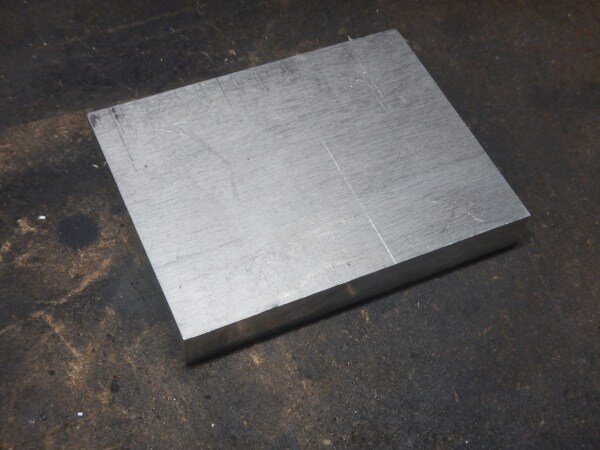
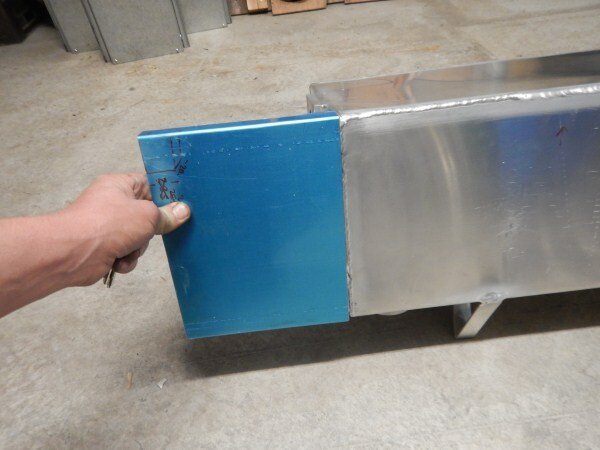
The local alluminium supplier has a huge selection of off cuts next to the counter that they sell for scrap value!
So I picked up some nice chunks for my tank.
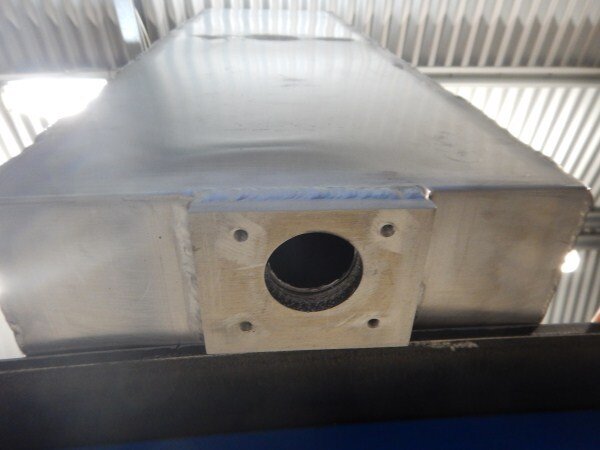
The circle is about 70mm diameter x 15mm thick and the square is about 120mm x 100mm x 20mm thick. So nice and thick to allow me to cut some good strong threads.
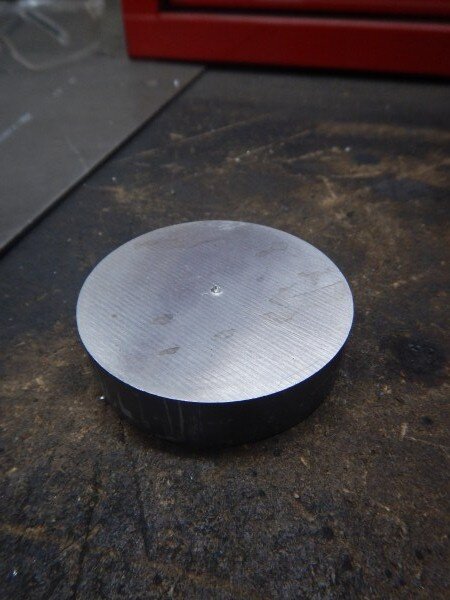
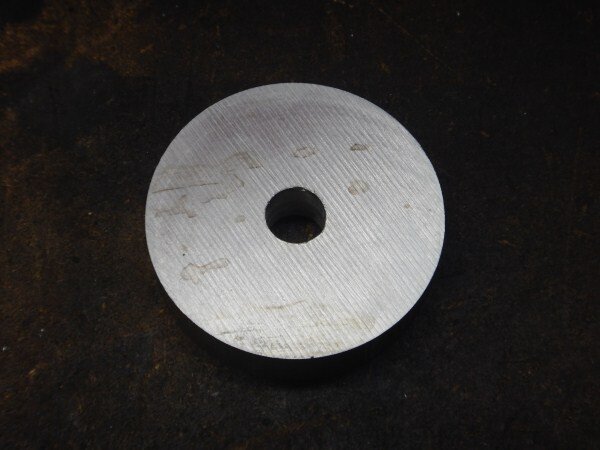
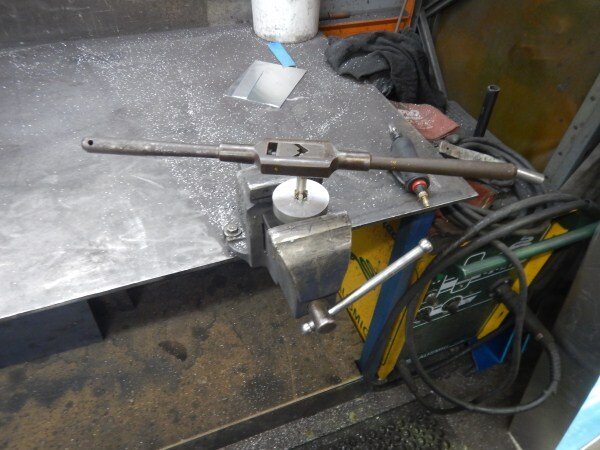
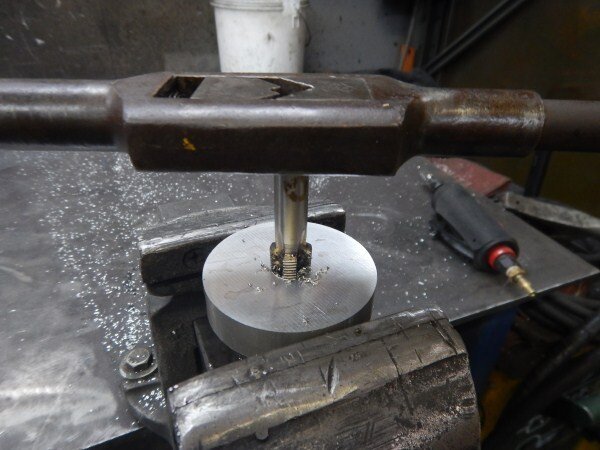
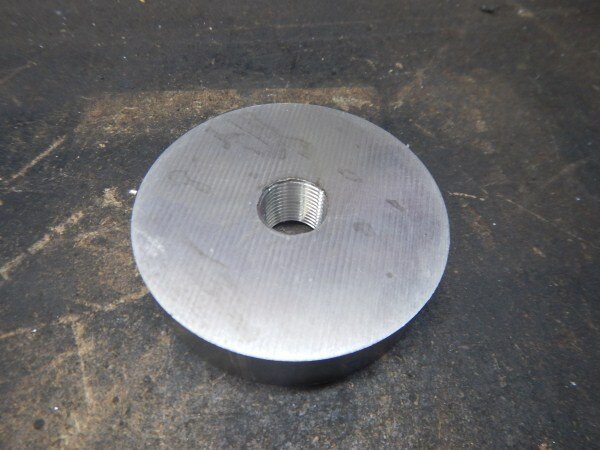
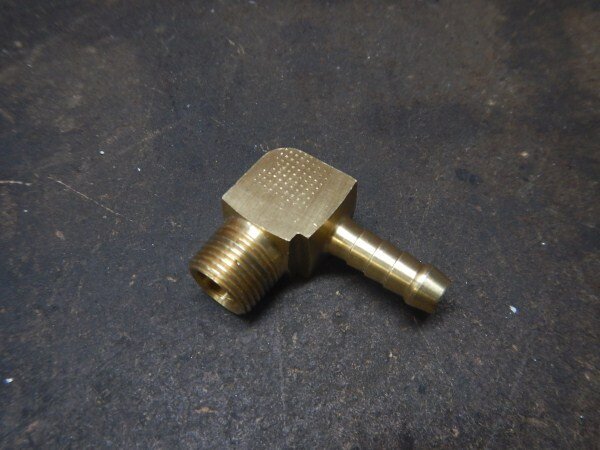
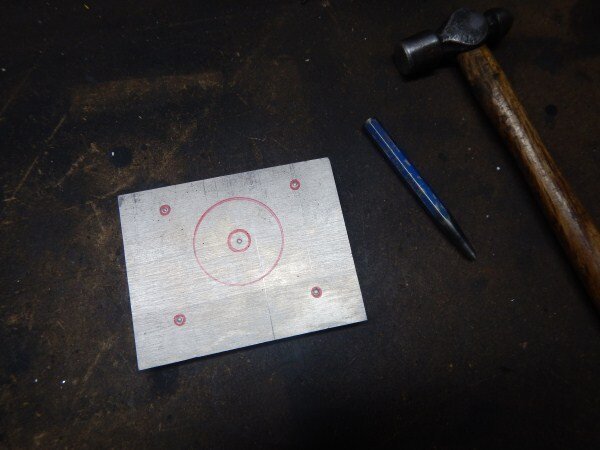
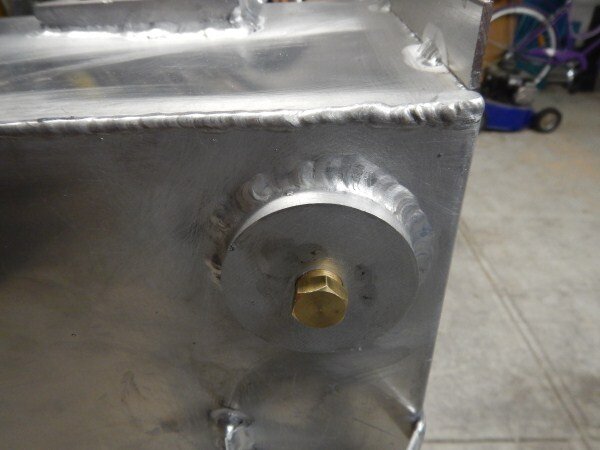
Drilled the center of the circle out.
And tapped a nice big thread in it.
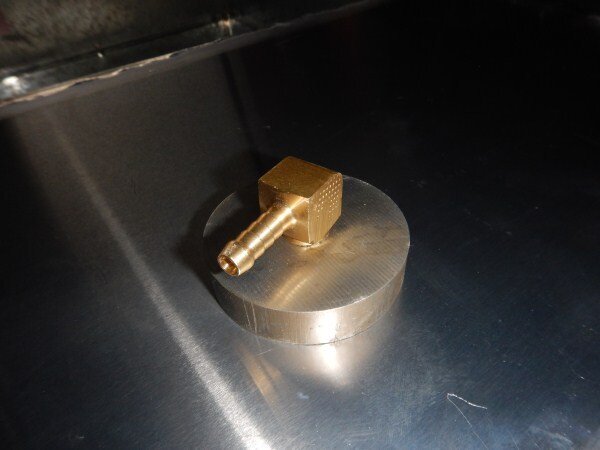
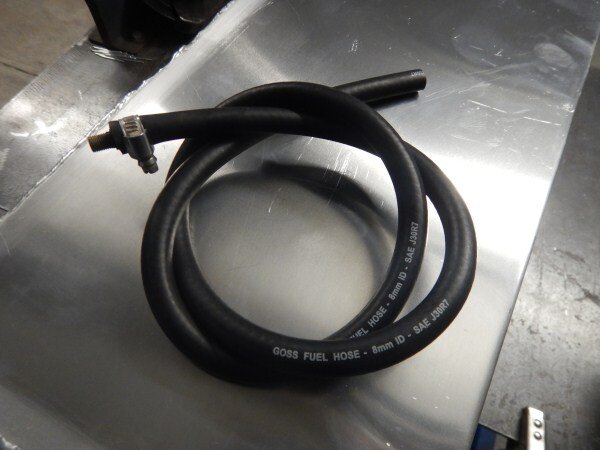
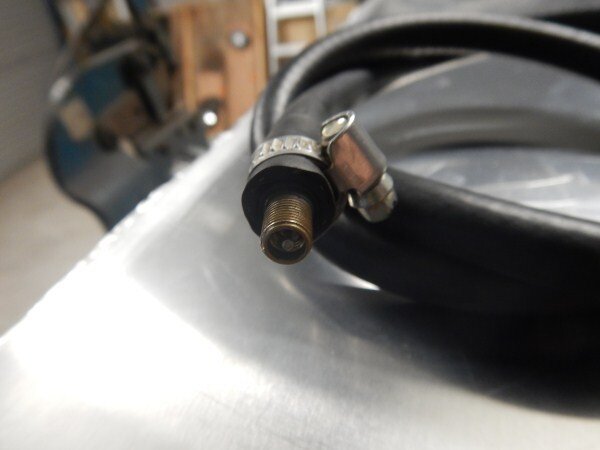
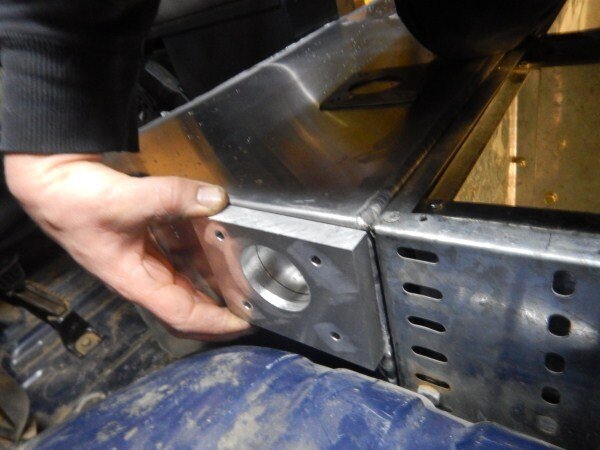
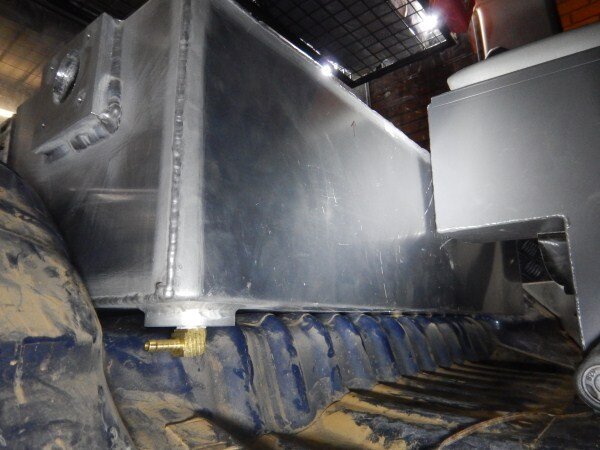
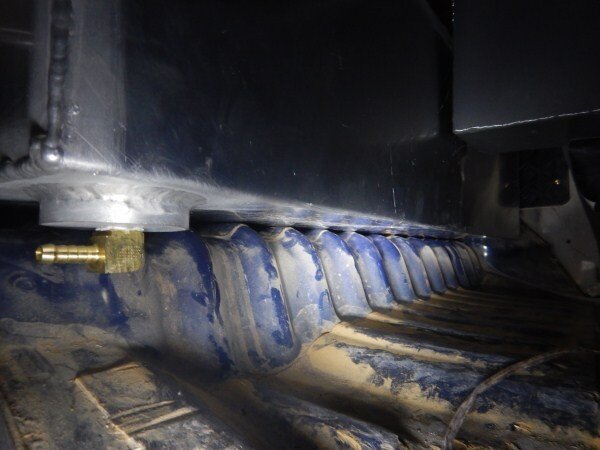
This will be the fuel outlet and will have an 8mm fuel hose on it.
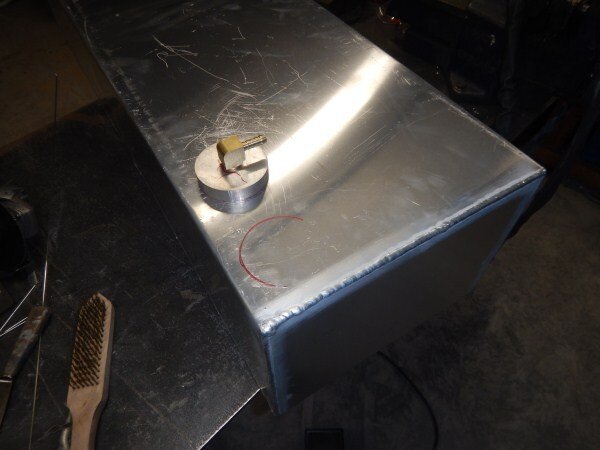
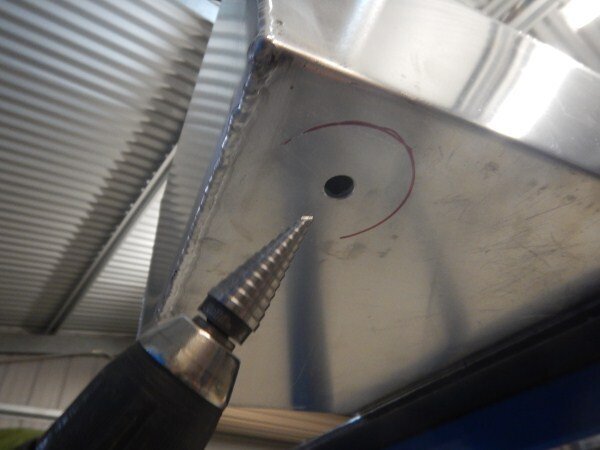
Decided on a location.
Marked the location.
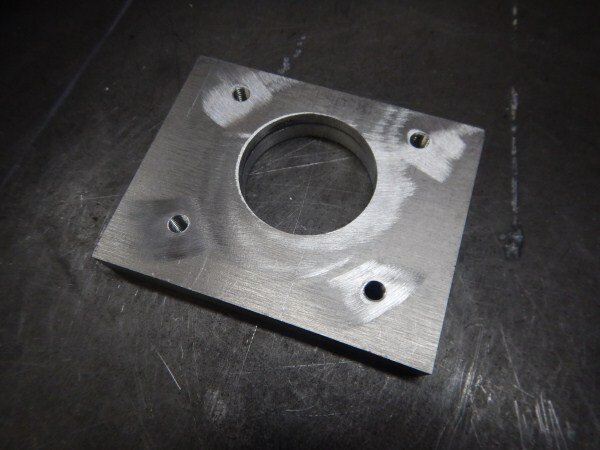
With the tank on the bench I drilled up in an effort to reduce the amount of swarf entering the tank.
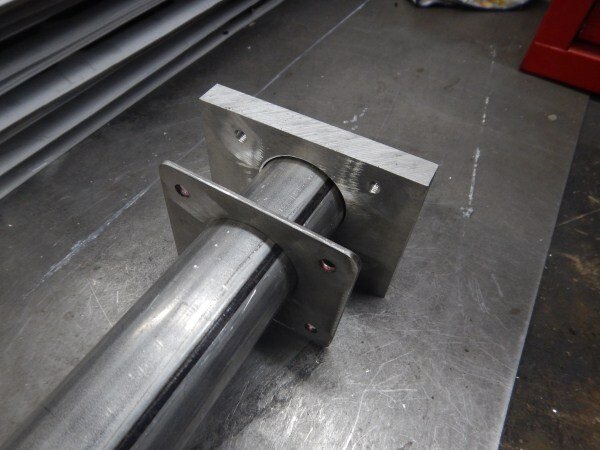
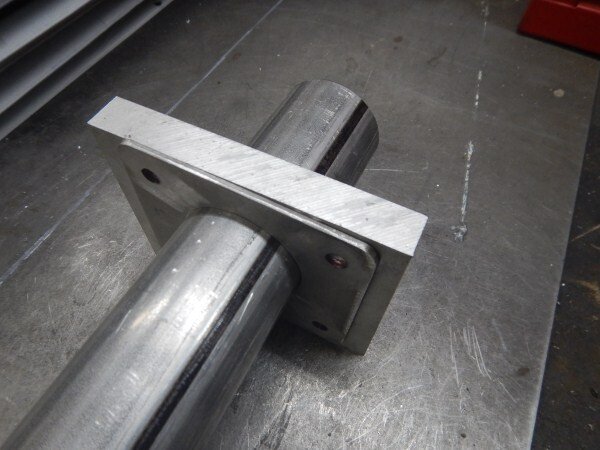
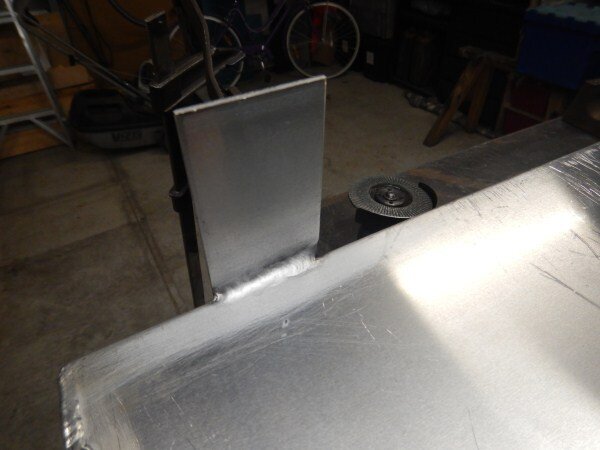
I then flipped the tank over and clamped the fuel outlet piece in position ready for welding.
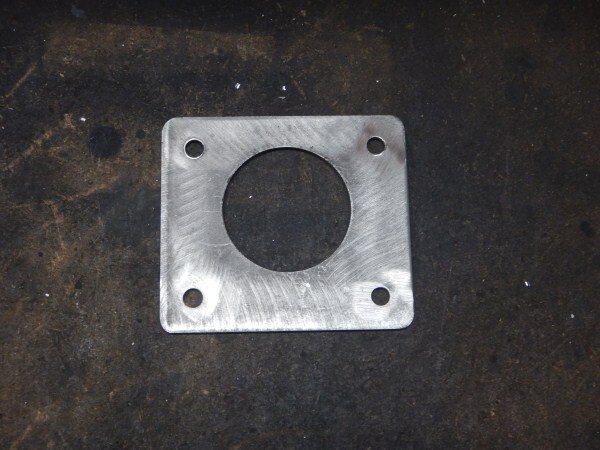
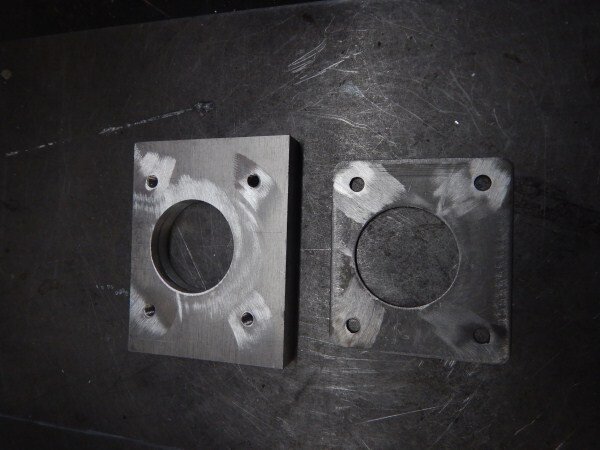
This is the flange I made for the first attempt at a fuel tank. Made from 3mm thick steel and designed to fit over the filler neck tube.
20mm thick alluminium square.
Marked.
Drilled and tapped.
Filler neck flange configuration.
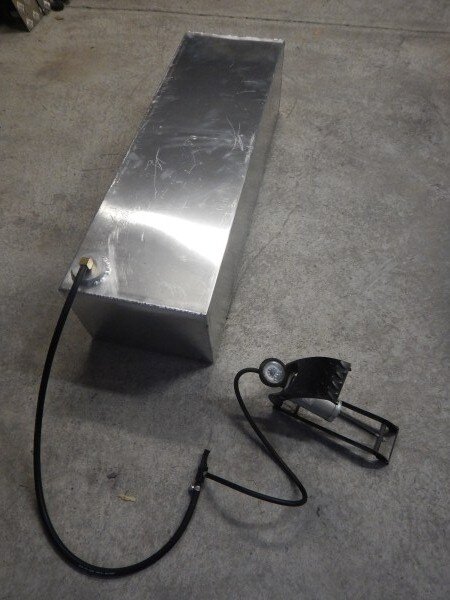
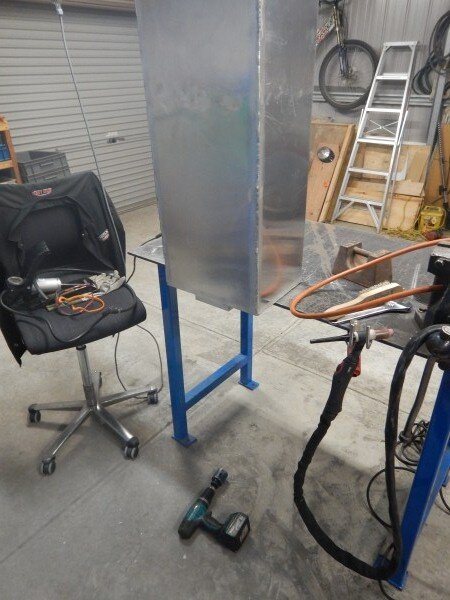
Next I was ready to pressure test the tank to check for leaks.
I fitted a tyre valve inside a piece of 8mm fuel hose.
A few psi from a foot pump.
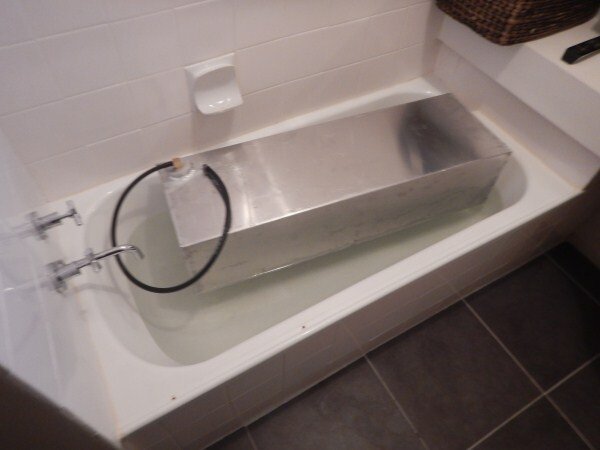
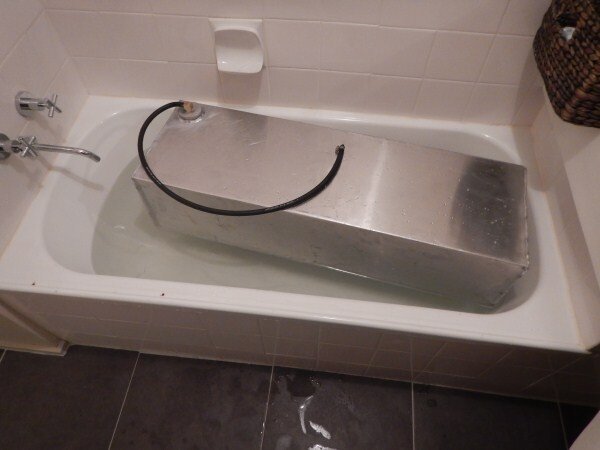
I then brought it in the house and tested it in the bath.
The boyancy was incredible! It took all my weight to hold it down in the bath!
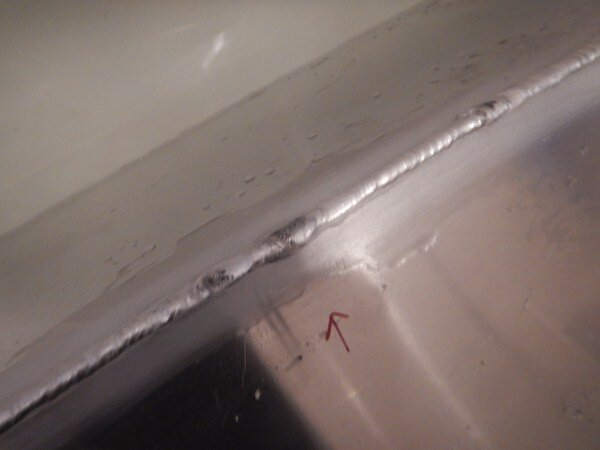
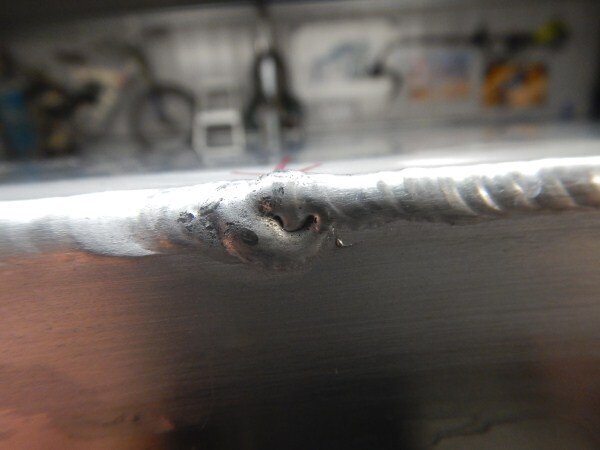
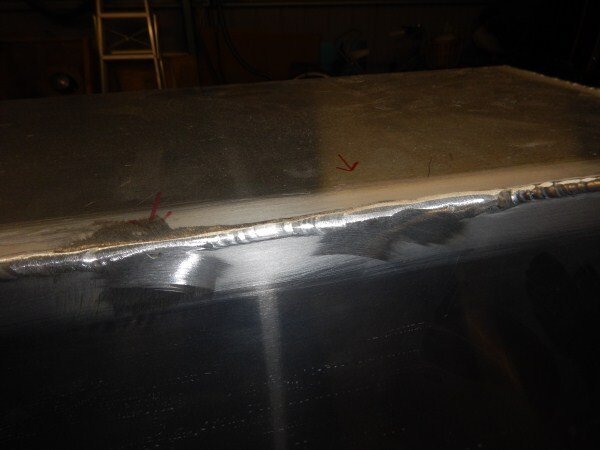
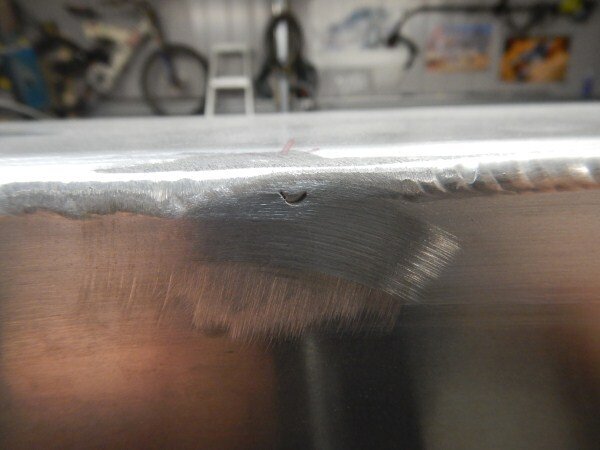
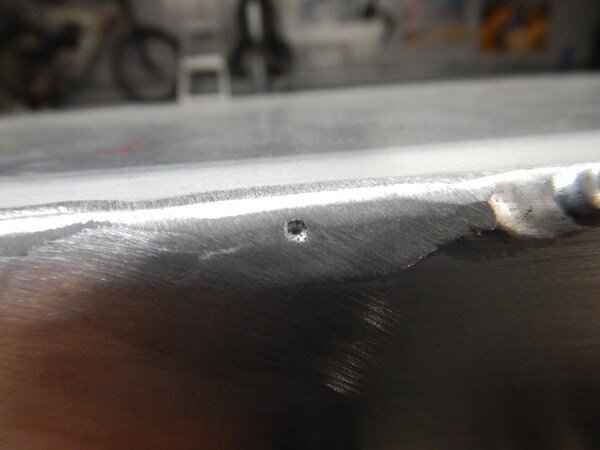
I located 2 tiny pin holes.
Ground the weld back.
Which revealed the pin holes quite clearly.
The beauty of TIG is you can just re-melt the weld and add more filler rod as required!
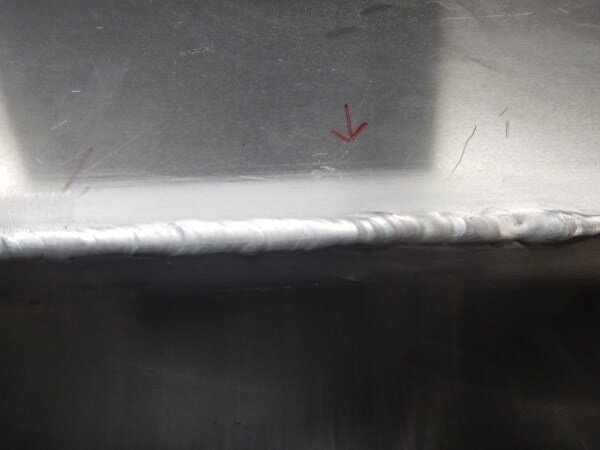
Back into the bath for another test.
With that test passed.
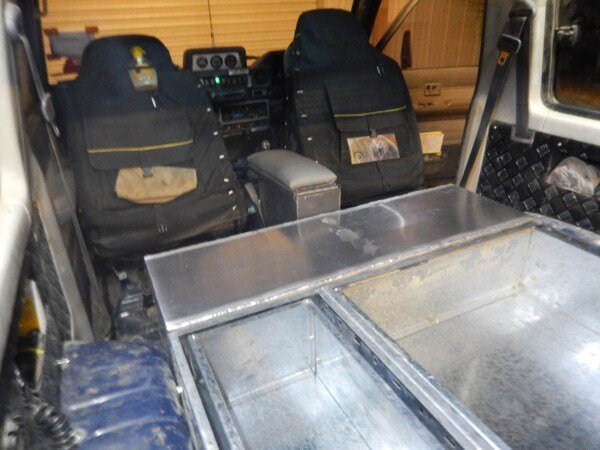
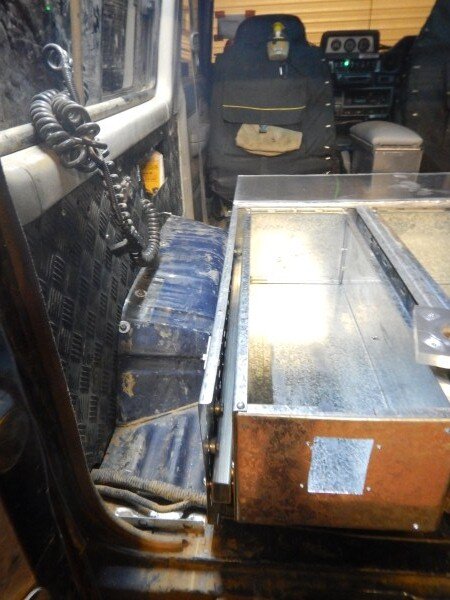
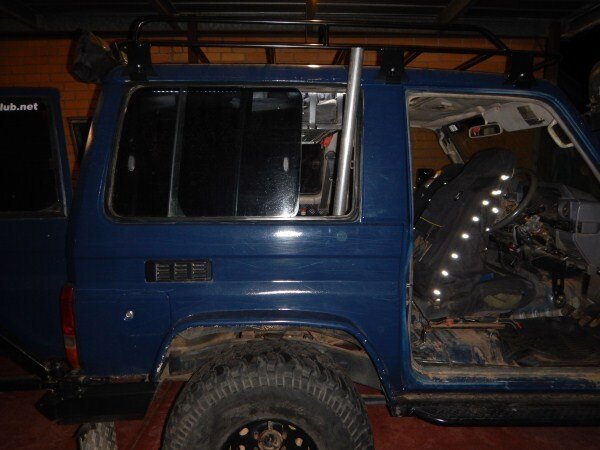
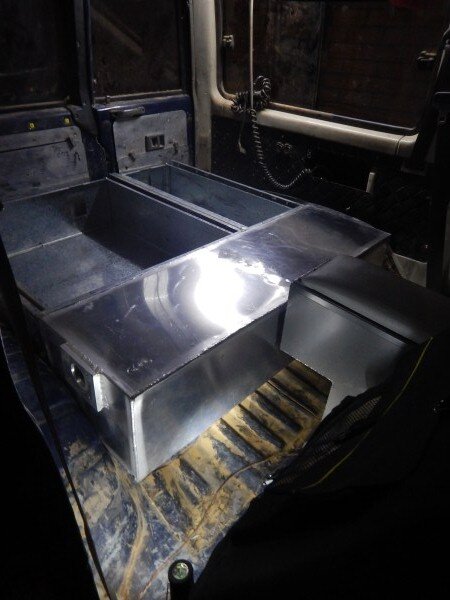
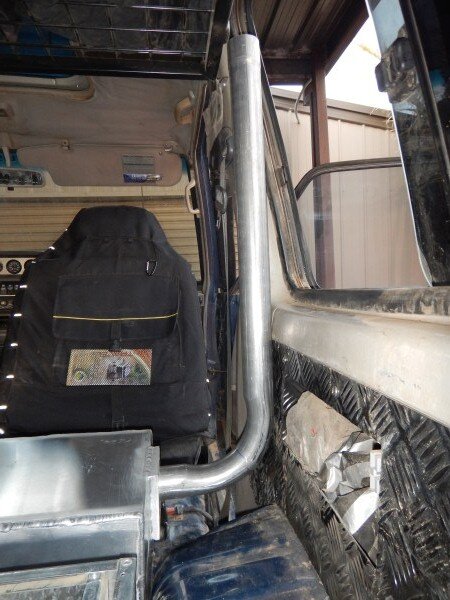
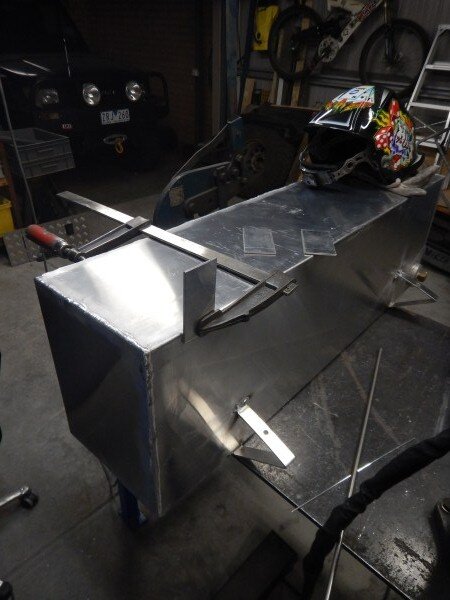
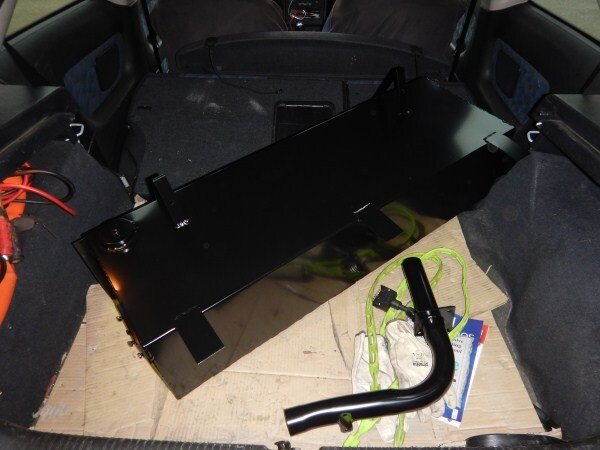
I got it back in LJ to decide where the filler neck should go.
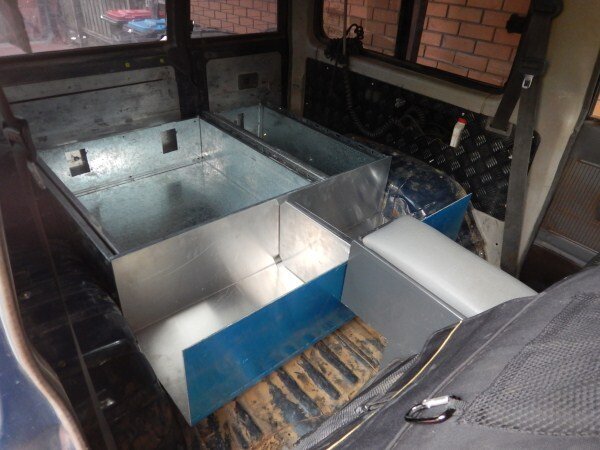
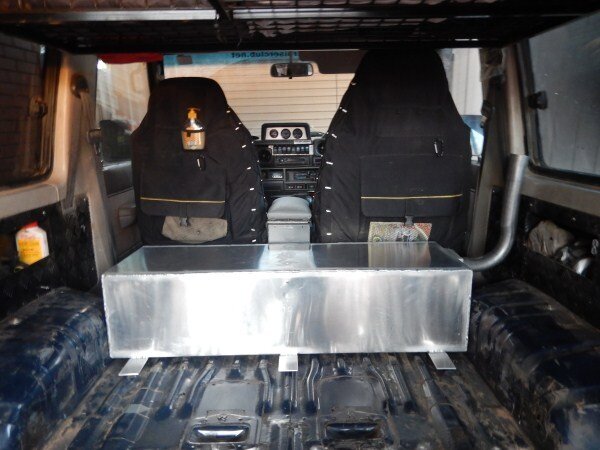
My original plan was to run the filler neck/tube along the passenger side wheel arch from the tank to the panel at the side of the drawer system at the back of LJ.
Now I need to mention a couple of things at this point.
Firstly I would never have chosen to locate the fuel tank inside LJ. But there is no room underneath so its kind of here or no where!
Had I had a 5 door LandCruiser or a 79 series ute/troopy then it would definitely have gone underneath.
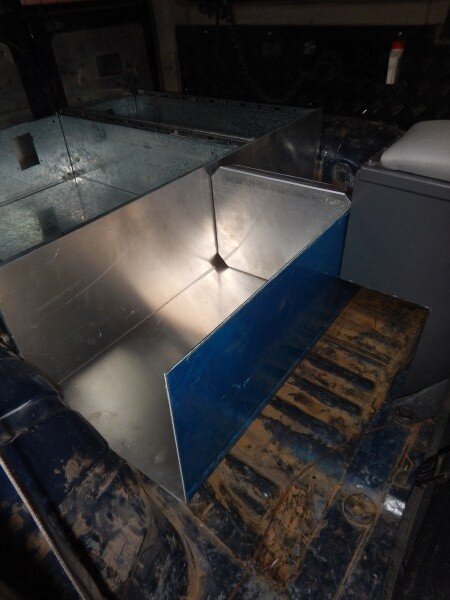
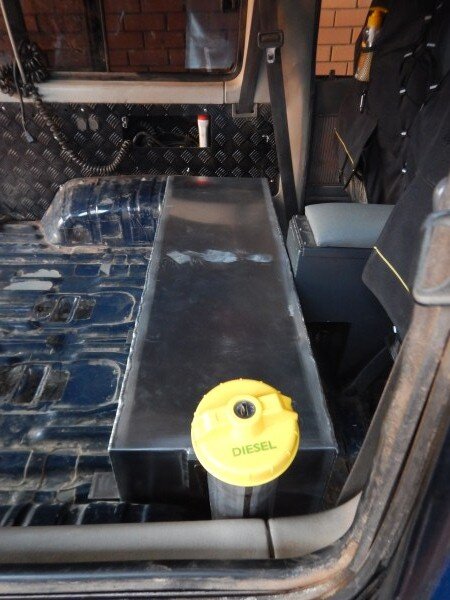
Secondly I decided to make this 2nd attempt at a tank the full height of the drawer system giving me a second 90 litre fuel tank. Rather than stopping 50mm below the drawer system with the intention of having a 50mm thick water tank above.
By bringing the fuel tank up to the full height of the drawer system it has sadly meant the fuel filler neck couldn't run above the wheel arch as originally intended.
Of course the neatest solution would have been to have used an 80 series filler neck for twin tanks which all 80's over here got, but that wouldn't work as my tank is above the height of the fuel flap/fuel cap.
So my solution........................
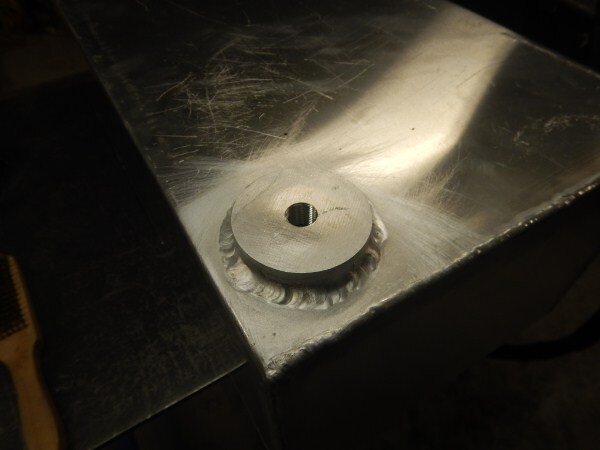
Welded it on.
Turned it over and drilled up, again to limit the amount of swarf entering the tank.
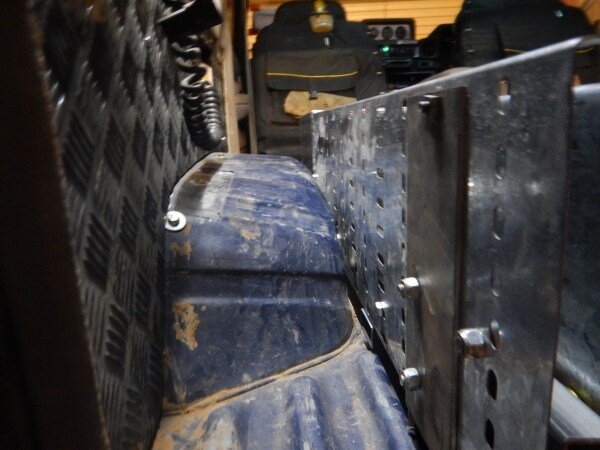
Back into LJ for another test fit.
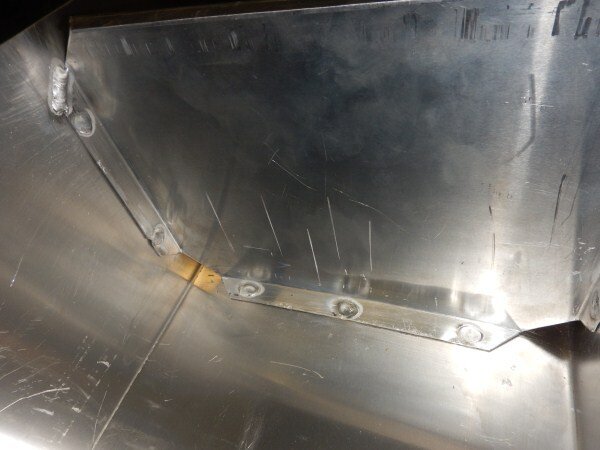
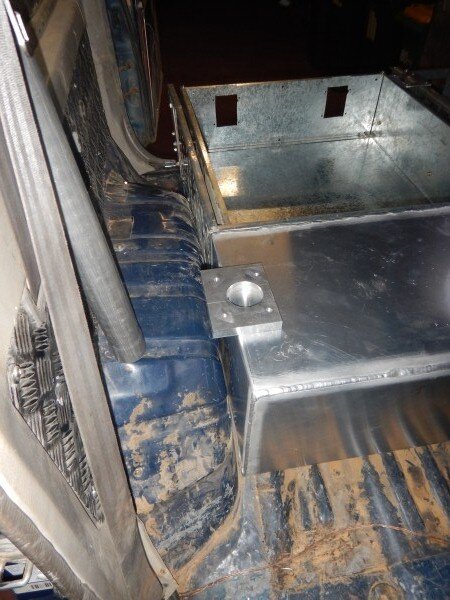
I measured up for the bottom mounts which will bolt the tank securely in position.
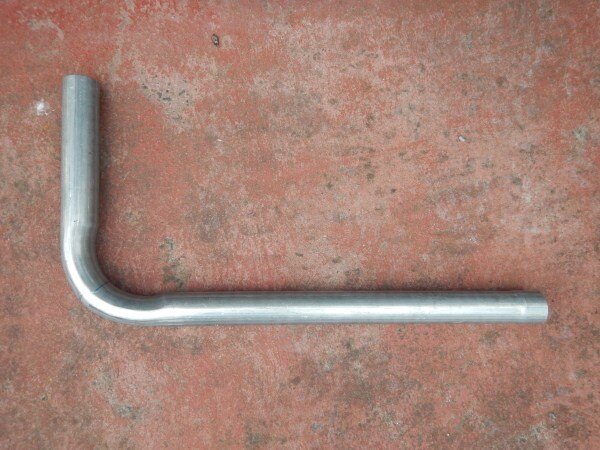
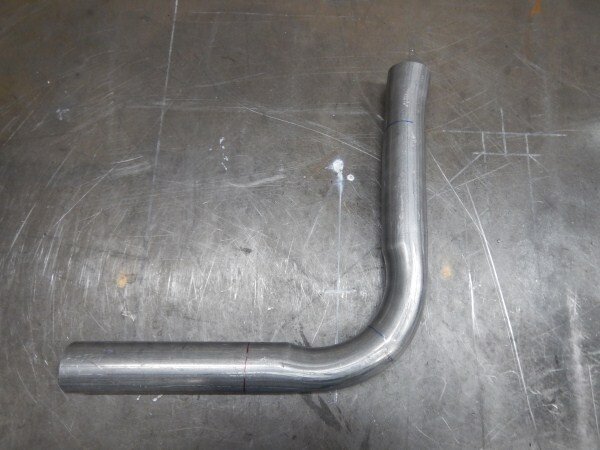
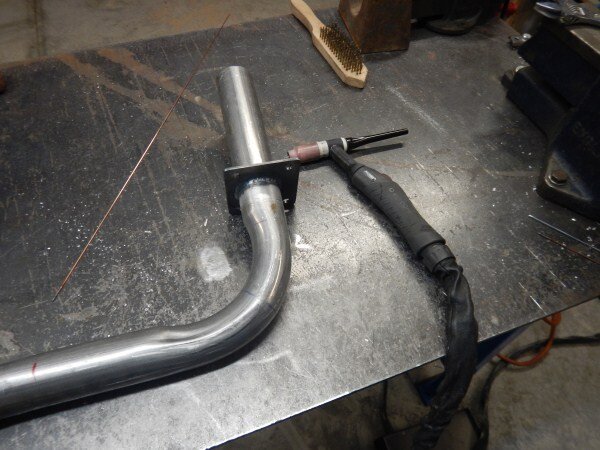
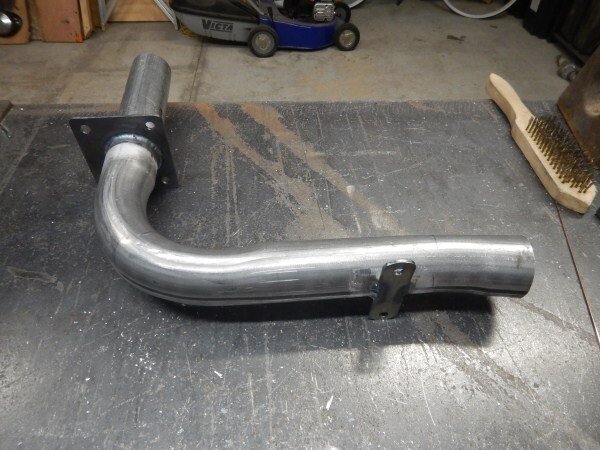
I took the alluminumised steel filler neck tube (which is effectively just exhaust tube) to our local friendly exhaust shop and got a 90 degree bend put in the tube.
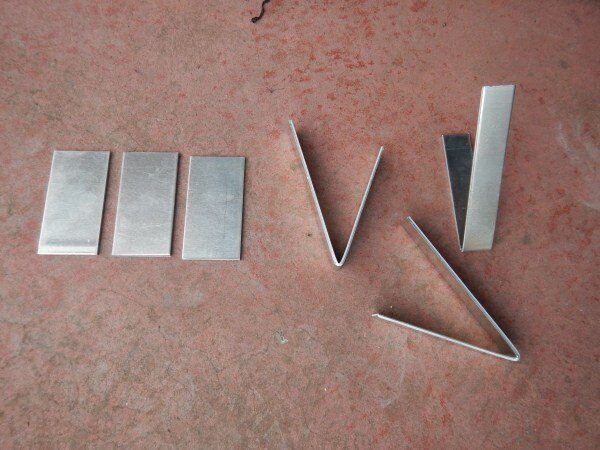
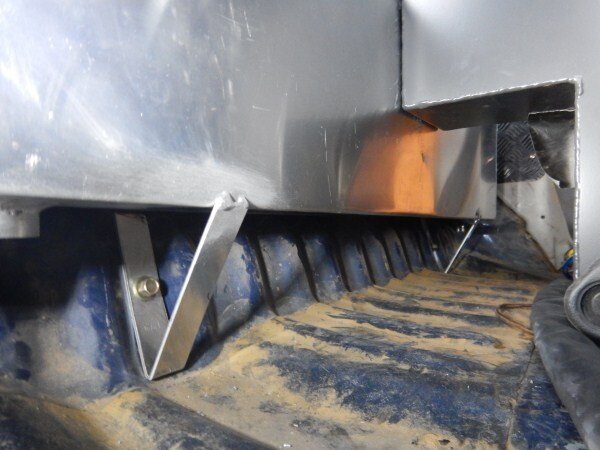
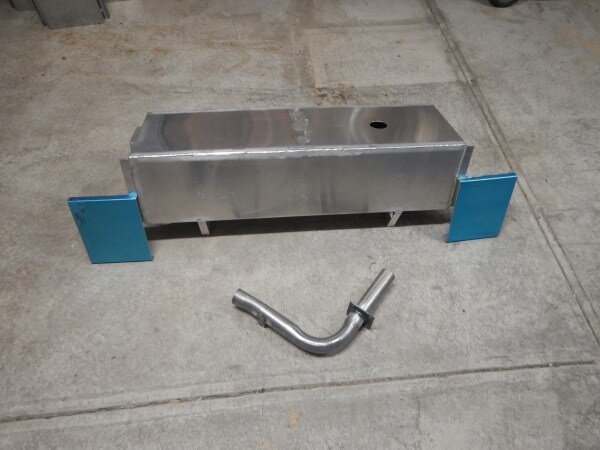
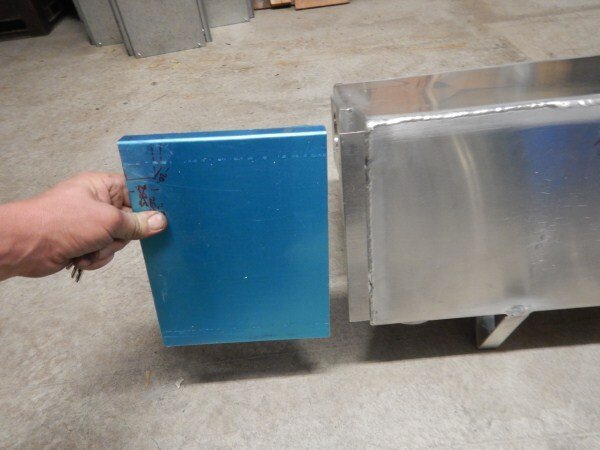
Tank mounting brackets, all 3mm alluminium.
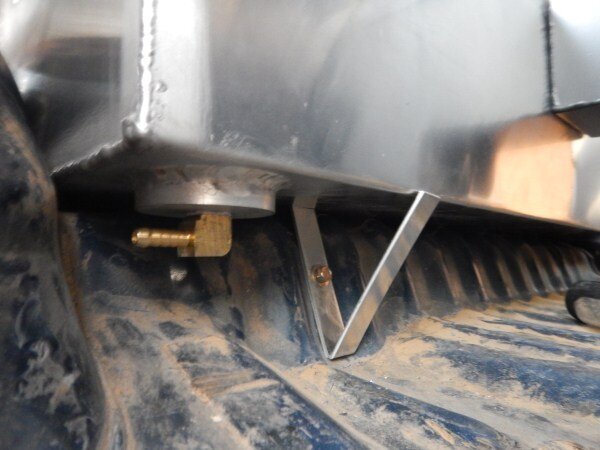
Drilled and bolted in position.
Tack welded to the tank.
Got the tank on the bench and clamped the brackets ready for fully welding.
Added the other brackets.
Added another slight bend/kink to the filler neck tube.
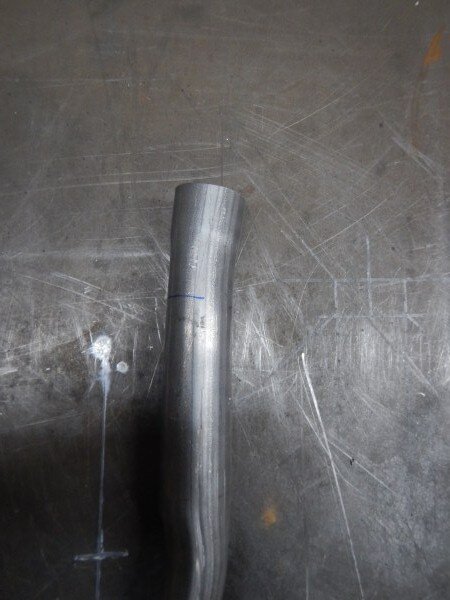
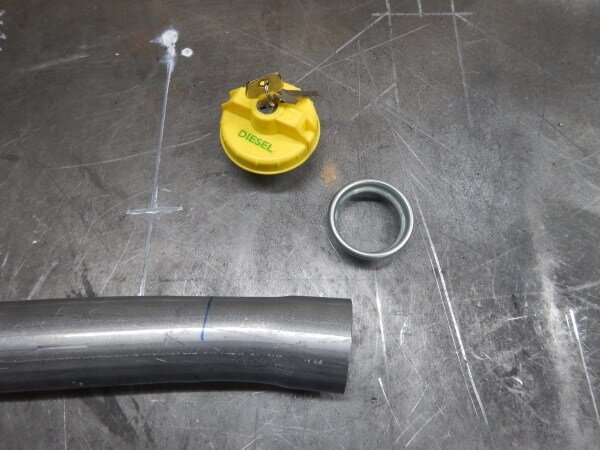
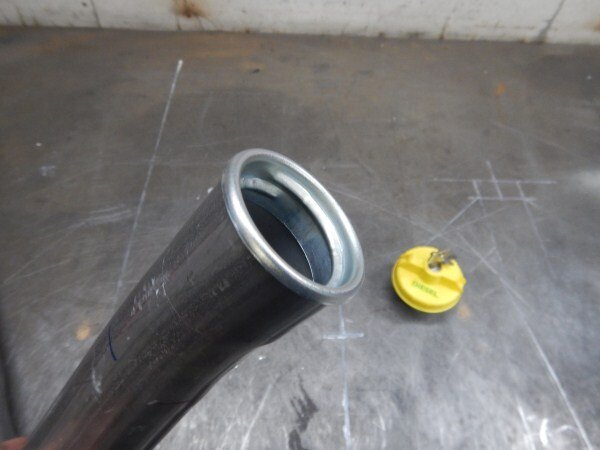
Got the exhaust guy to flare the end for me to fit the filler cap boss.
More test fitting.
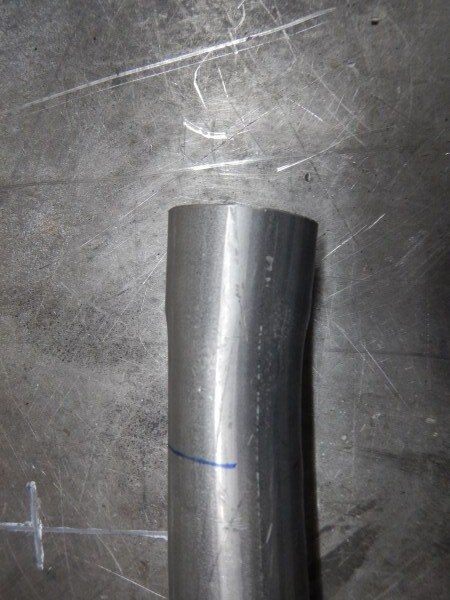
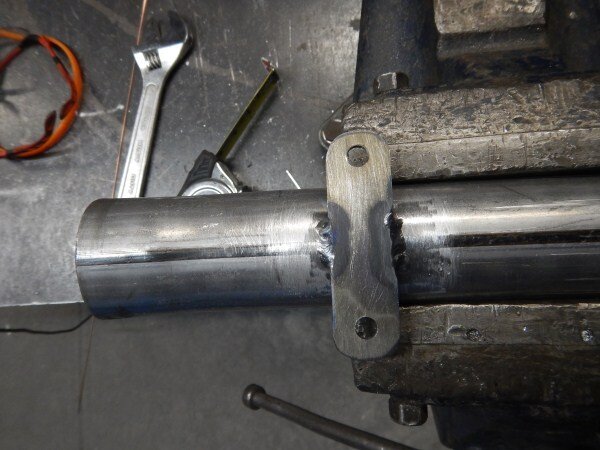
Marked where the flange needed welding on the filler neck and got it welded.
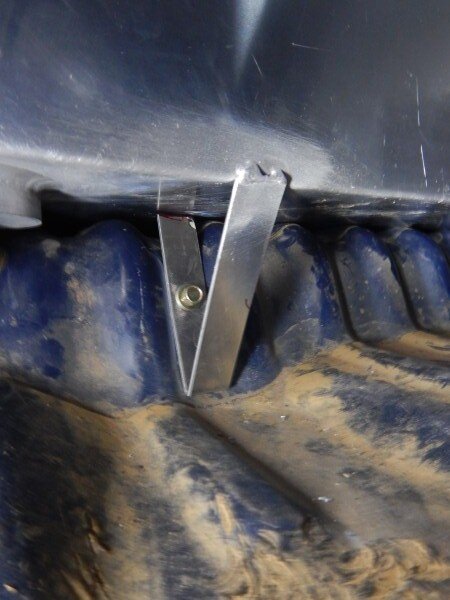
Added another bracket.
Added some strips to the sides of the tank.
Spaced up 2mm, the thickness of the alluminium I'm using for the tank and the side wings.
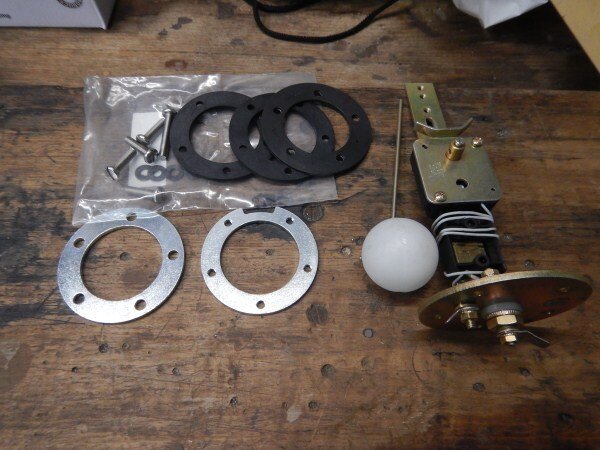
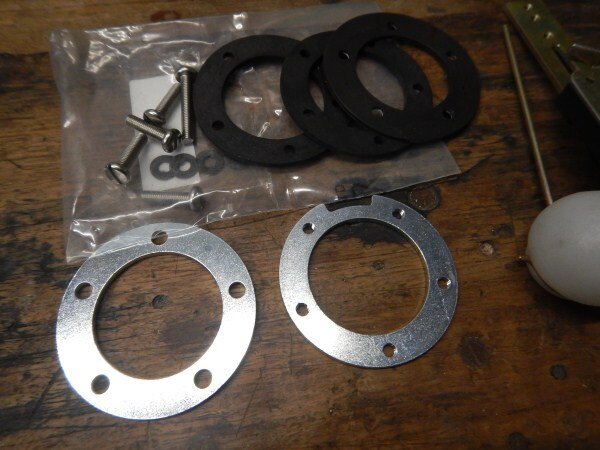
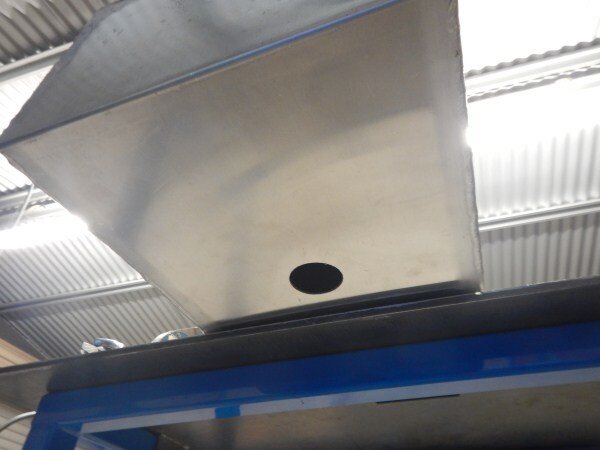
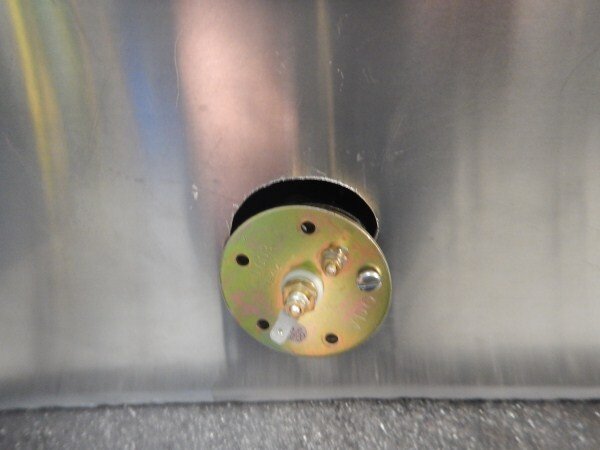
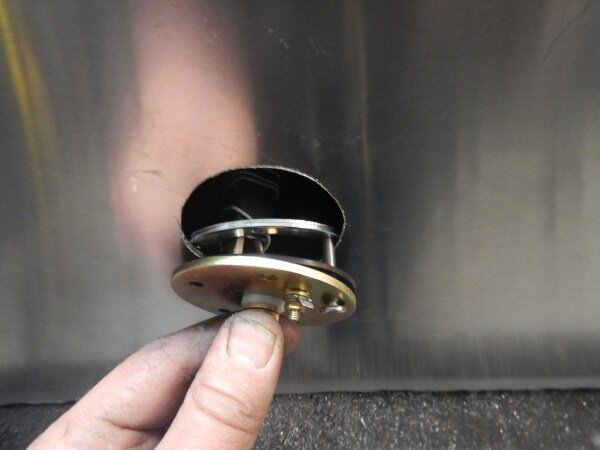
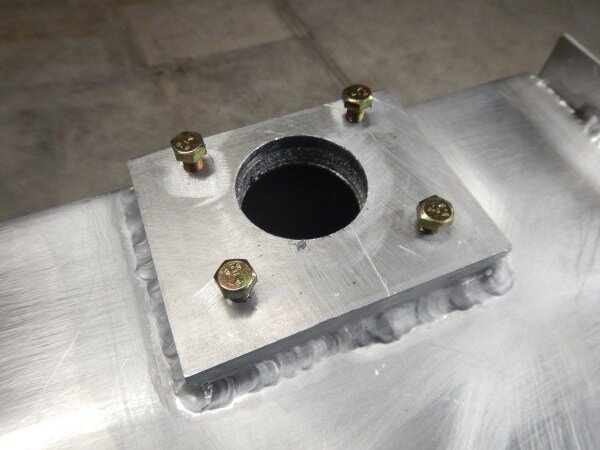
In order to make this tank quicker and simpler than the last one I ordered a mounting kit for the VDO fuel level sender. I dont particularly like it as it only leaves 3mm of metal around the hole for the sender to seal against.
Drilled the tank, again form underneath.
The instructions said it needed a 59mm hole.
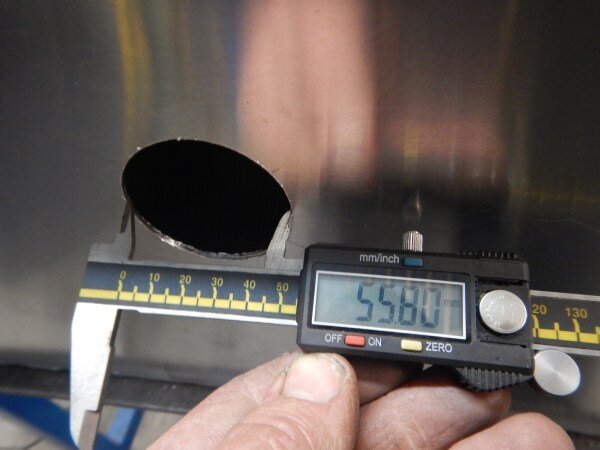
But I didn't have a hole saw that size and decided to chance it and use a 54mm one.
Because hole saws tend to jump around a little bit the actual hole came out bigger.
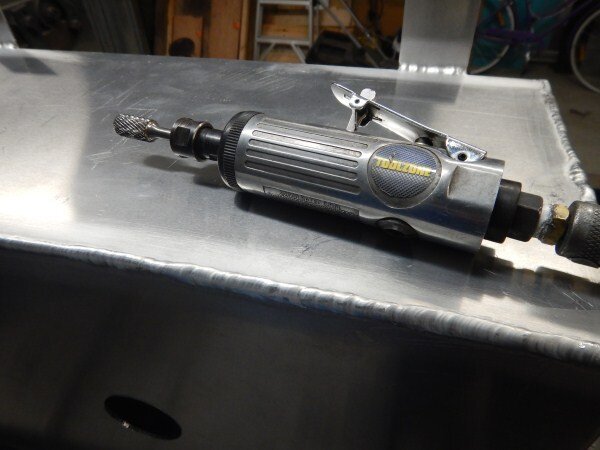
So I finished it off with the die grinder.
Perfect!
I cut and folded some 2mm.
These will bolt onto the sides of the tank into rivnuts in the strips I welded onto the sides.
I added some bolts to ensure no powder coating filled my threads up.
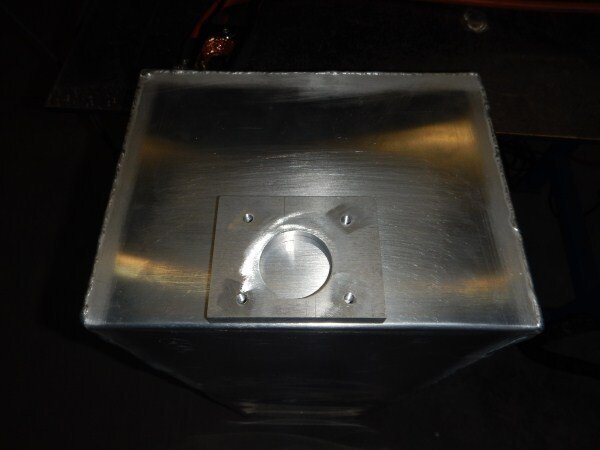
And a bung in the fuel outlet.
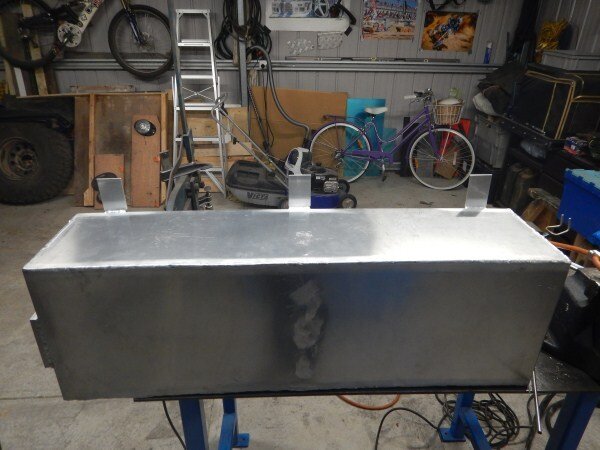
Dropped it off for powder coating this morning and 4 hours later it was ready!
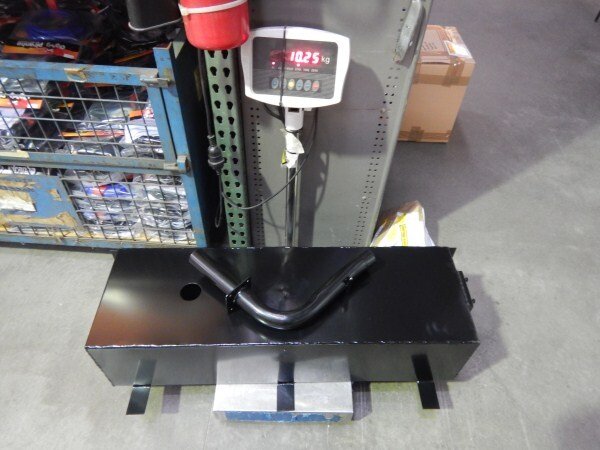
Couldnt resist seeing what it weighs.
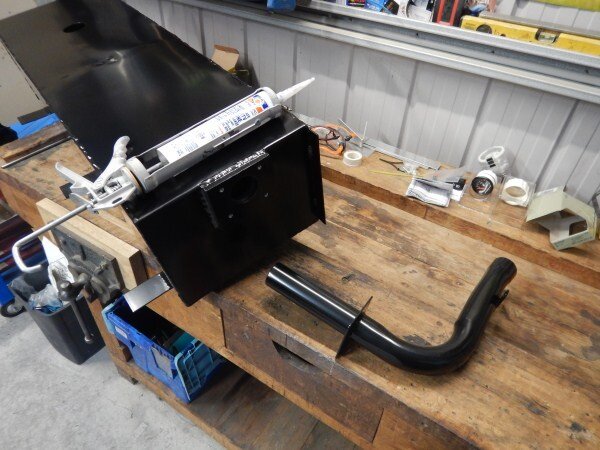
Brought it home and the first job was to bolt the filler neck on with a nice smear of sealant.
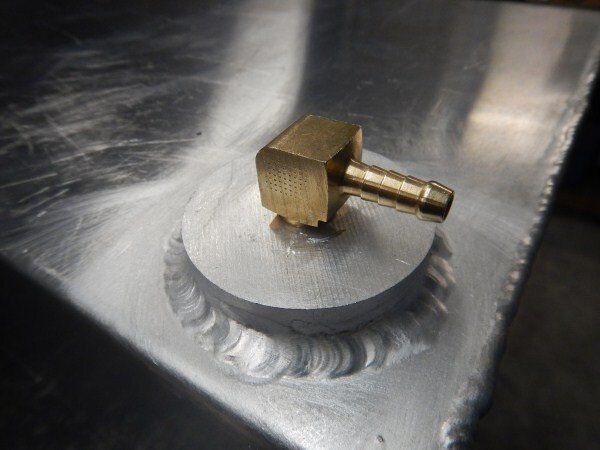
Fuel outlet next.
Screwed in with plenty of PTFE tape.
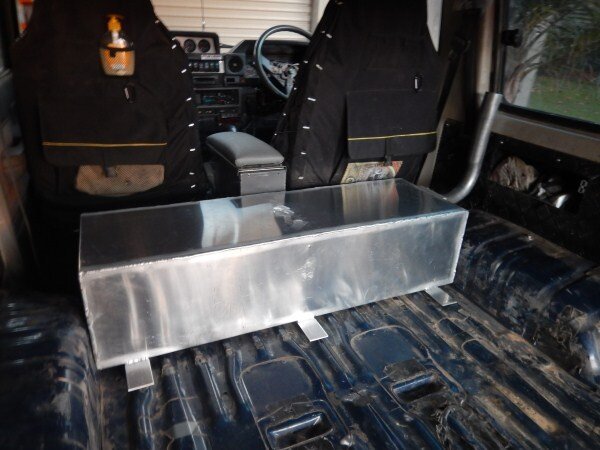
Tank back in LJ.
Marked where the rivnuts needed to be.
Rivnuts.
Bolted the tank in position with the bottom mounts.
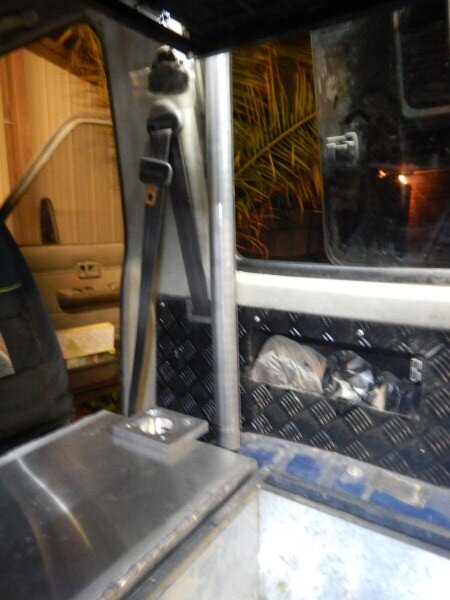
Used some nice stainless steel bolts to bolt the filler neck in places, to match all the other stainless steel bolts in the back of LJ.
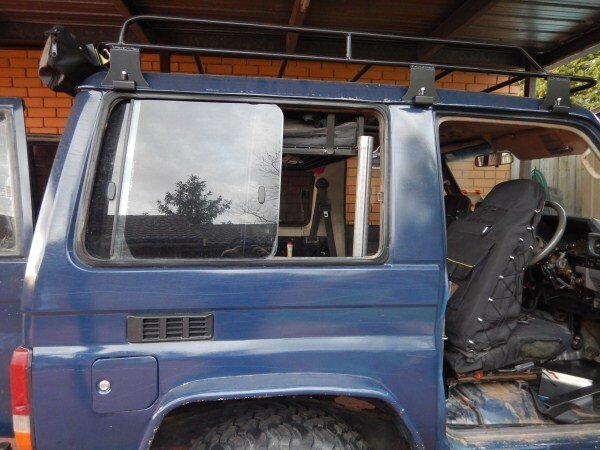
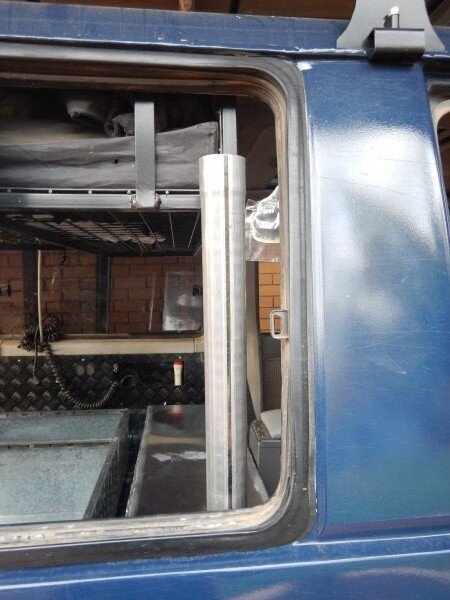
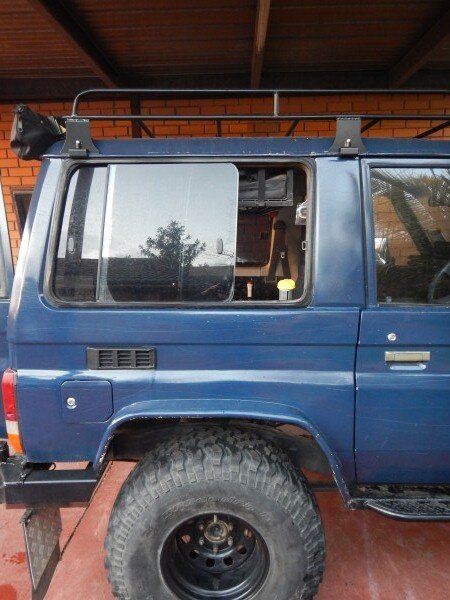
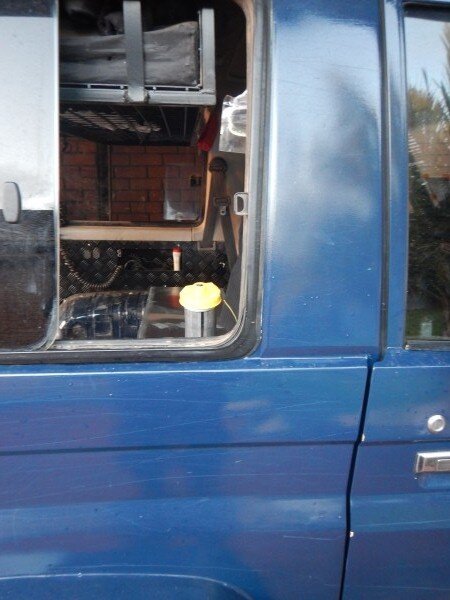
The filler cap is easily accesible with the window slid open.
The next job is drill through the back mounts, through the floor and bolt the tank down.
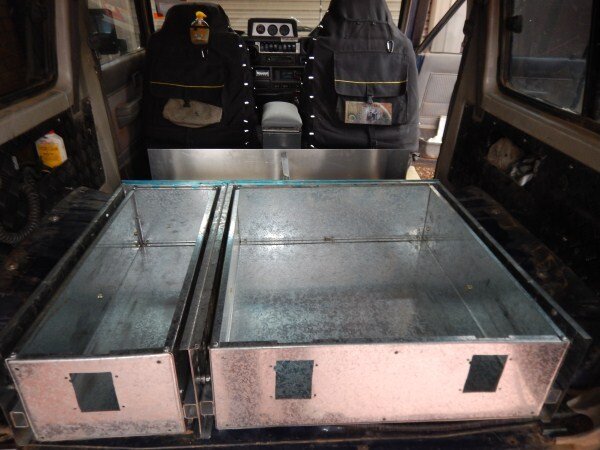
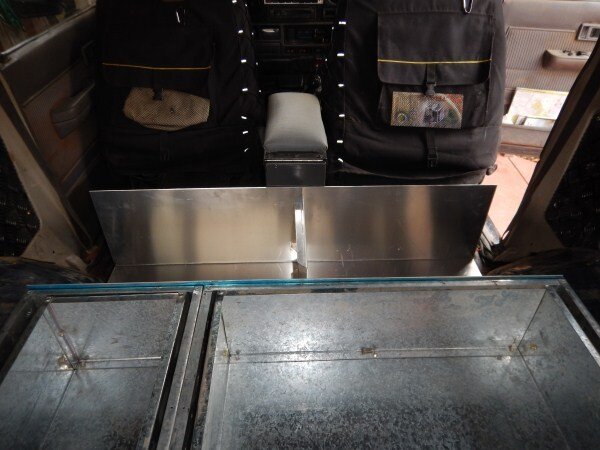
So the drawer system goes back in.
And I will drill down through the 50mm x 20mm box section the drawer system is mounted on, then through the fuel tank mounts and bolt it all together through the floor.
So lots to get done this weekend to get LJ back together ready for next weekends 4wd trip.
I've also got heaps of other stuff I need to get done, such as the garden and fish tank as this is my last weekend at home before our month holiday in Europe.