
Don't like the adverts? Click here to remove them
You are using an out of date browser. It may not display this or other websites correctly.
You should upgrade or use an alternative browser.
You should upgrade or use an alternative browser.
Oil leak on front diff.
- Thread starter wobbly
- Start date
wobbly
Well-Known Member
Replacement seal now ordered from Milners, advertsied as a genuine part and cheaper than Mr.T.
Will be done next week.
Used about 800ml of 80/90 diff oil over about 9 days, although a fair chunk of that ended up on me.....
Also broke my nose on day 1 of trip - garage had used loctite or superhuman torque on the fill nut - when I put a bar on it and applied much force, it released very suddenly and I hit myself in the face.
Shouldve checked it earlier, the law of unintended consequences coming in to play as it does!
Pete
wobbly
Well-Known Member
Not much luck today.
Fitted the new seal, leaks like me old nan.
Its in genuine part packaging, and has the right part number 90311-47013 but the old seal had a metal body, this was all rubber with a metal disc as support.
Think I will get one from Mr.T this time, cant blame Milners if its not right, but not getting another from them just in case.
Hate having to pay twice to get a job done right.
Pete
wobbly
Well-Known Member
As an afterthought....the old seal had a circular sprung collar within the body of the seal where it goes round the drive shaft, I guess this compresses the seal slightly and ensures a good seal.
I cant see it listed as a seperate part, but am not sure the new seal had one - wont know until I take it off!
Pete
I cant see it listed as a seperate part, but am not sure the new seal had one - wont know until I take it off!
Pete

Don't like the adverts? Click here to remove them
AndyCook
Well-Known Member
Maybe wrong part? Quick google shows thats part for 2006 4runner or 120 landcruiser?
They may have thicker Cv Axles
i quoted 90311-47010 or 90311-47011 on page 1 of tjis thread from toyo diy
lh and rh seem to have different part no's
They may have thicker Cv Axles
i quoted 90311-47010 or 90311-47011 on page 1 of tjis thread from toyo diy
lh and rh seem to have different part no's
Last edited:
wobbly
Well-Known Member
I took those part numbers to Toyota, but they no longer exist.
On the Toyota diagram (which is identical in all other parts!) they have revised the two seal numbers, 90311-47010 is now 90311-47013.
The Toyota garage did tell me it was a common part on several other vehicles.
When I did the nearside, the part number of 90311-47011 had been revised to 90311-47012, this was identical to the old seal and has been fine, so I suspect that its the individual seal I've fitted. I've ordered one from the dealer which will be here on Tuesday, and the car is going in on Wednesday. We're keeping all the seals so we can compare them.
The two seals are different thicknesses, maybe because the diff is offset and the rh has a longer housing unit attached so theyve designed a different seal for some reason.
Cheers
Pete
wobbly
Well-Known Member
Ok, hopefully problem solved.
When we took the Milners seal out, it had two tiny holes in the robber, only visible when you put pressure on the rubber part of the seal.
The new Toyota seal was ok, so replaced it and leak stopped.
Couple of points.....
The seal seems to have to push in way too far on the offside, guess cos off the housing on that side.
The Milners seal was absolutely identical to the Toyota one and is df a genuine Toyota part, but was £20.00 cheaper, so if you need a seal then the MIlners one will be fine - we think the holes happened during fitting not supplied damamged.
The part numbers are now:
nearside 90311-47012
offside 90311-47013
Cheers
Pete
wobbly
Well-Known Member
Im glad to hear that it only goes in a small distance, thats what we decided on - theres nothing in the Haynes manual about it.
Mechanic charged me £60 which I am more than happy with.
As a plus, I can now take off the skid plates, drop and refill the diff with fresh oil in about 10 minutes flat ! I reckon I could do it blindfolded.
Diff filled with mineral oil, rather than semi-synth., so will replace it annually as part of service.
Thanks for the help.
Pete
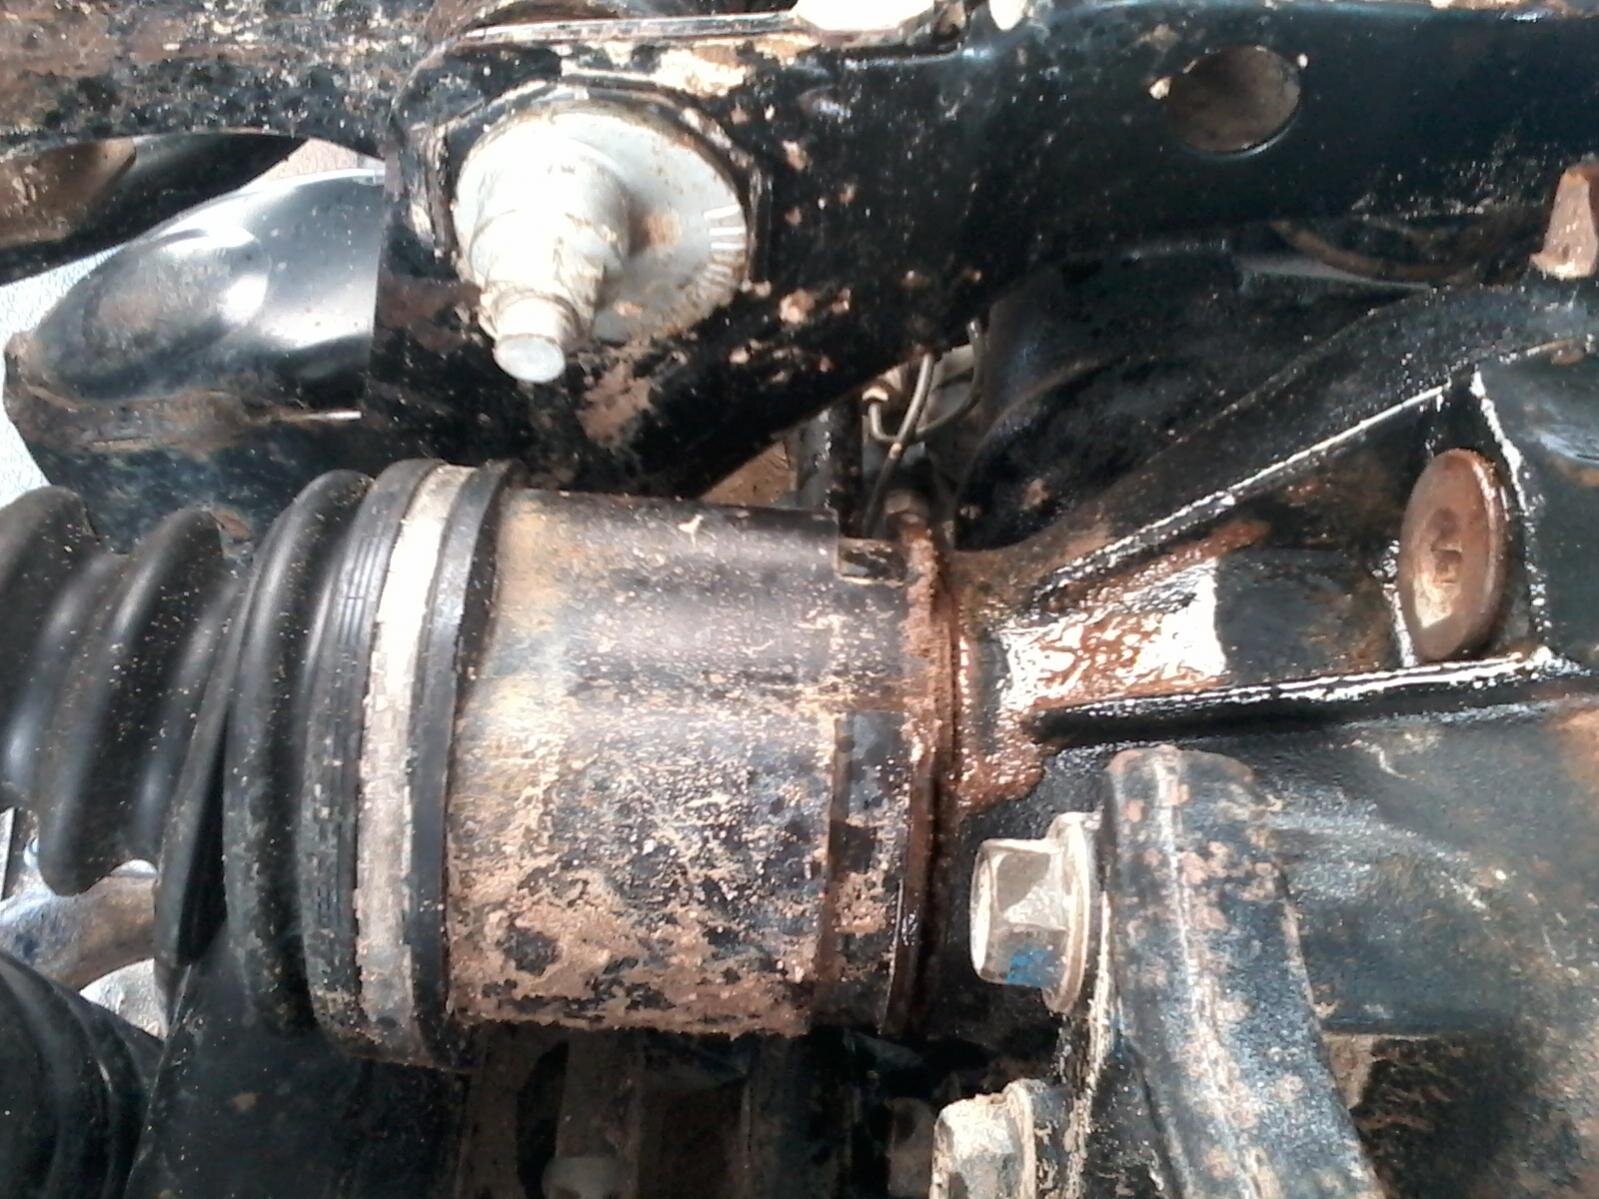
Oil leak on front diff
Will it be the same leaking seals as mine currently??? Would any of you that has changed these oil seals mind to share how this is to be done and how much blood/sweat/beer is required or any special tools, etc?


Will it be the same leaking seals as mine currently??? Would any of you that has changed these oil seals mind to share how this is to be done and how much blood/sweat/beer is required or any special tools, etc?
Attachments

Last edited:


Fitting the DS seal is a little tricky. There is no machined lip for it to sit in. There is a bevelled lip there which is essentially the seating mark but it's hard to get a tool to stay on the lip as you seat the seal so you end up pushing the thing in further. We did these seals at Lincomb this weekend on Chris' truck. Milner genuine Toyota and they worked perfectly. I think the trick with the seal in the extension housing it to use something like a paint can, tin of beans, large socket etc that will JUST fit inside the housing but won't go past the small bevel. This way the seal gets put in exactly square and not too far down the tube. We have found the best way to get the shaft out and clear of the seal is to undo the long bolt through the top of the wishbone and let the whole strut drop out of the wheel arch. Gives just enough to be able to pull the cv and get it clear.
Thanks Chris, you would'nt happen to have a few pic's of the process do you...? Everytime I've had to work on the CV's in the past I've removed the 4 bolts on the lower wishbone and tilt the strut out of the way which saves me to remove batteries, etc. It was a bit of a pain with those long bolts when we replaced all the bushes, but are you saying it is definitely easier this way compared to the lower wishbone bolts?
Similar threads
- Replies
- 3
- Views
- 519
- Replies
- 0
- Views
- 488
- Replies
- 9
- Views
- 254