Don't like the adverts? Click here to remove them
You are using an out of date browser. It may not display this or other websites correctly.
You should upgrade or use an alternative browser.
You should upgrade or use an alternative browser.
Project 80: Codename Grey Ghost
- Thread starter Chris
- Start date
Looking good Chris  I love the switch panel
  I really should update Swampy's thread as I've done loads to her. I feel your pain with regards the unplanned jobs going wrong. I had a very similar day last week consisting of poor method choices and sheared bolts trying to take short cuts to push things forwards, very frustrating! I sold my steel winch rope on the bay for a very reasonable price
Lorin
Well-Known Member
- Joined
- Mar 28, 2010
- Messages
- 1,532
This reminds me that I still need to get a mounting plate for my winch  I remember reading somewhere that the ARB was designed around Warn winches and required a mounting plate and longer bolts to fit other brands. I duly told this to the garage tasked with fitting my bumper and winch. Bearing in mind they are a '4x4 specialist' I was somewhat surprised to find they'd fitted the winch using spacers on the bolts
  Suffice to say I am unable to use my winch due to the load spread on the bumper being slightly concentrated! When I spotted it I was so dumbfounded I couldn't bring myself to take the truck back to them, so it still needs sorting.
 I remember reading somewhere that the ARB was designed around Warn winches and required a mounting plate and longer bolts to fit other brands. I duly told this to the garage tasked with fitting my bumper and winch. Bearing in mind they are a '4x4 specialist' I was somewhat surprised to find they'd fitted the winch using spacers on the bolts
 Seems I am not the only person suffering! Right, new day, new energy. Let's see what I can do.
BE, I may yet have this bumper blasted and properly finished. I'll have a load of stuff to go for coating eventually - sliders, bash plates, wheel carrier etc so this may get tossed into the trailer as well.
BE, I may yet have this bumper blasted and properly finished. I'll have a load of stuff to go for coating eventually - sliders, bash plates, wheel carrier etc so this may get tossed into the trailer as well.
Don't like the adverts? Click here to remove them
Right, a better day today. No F ups.
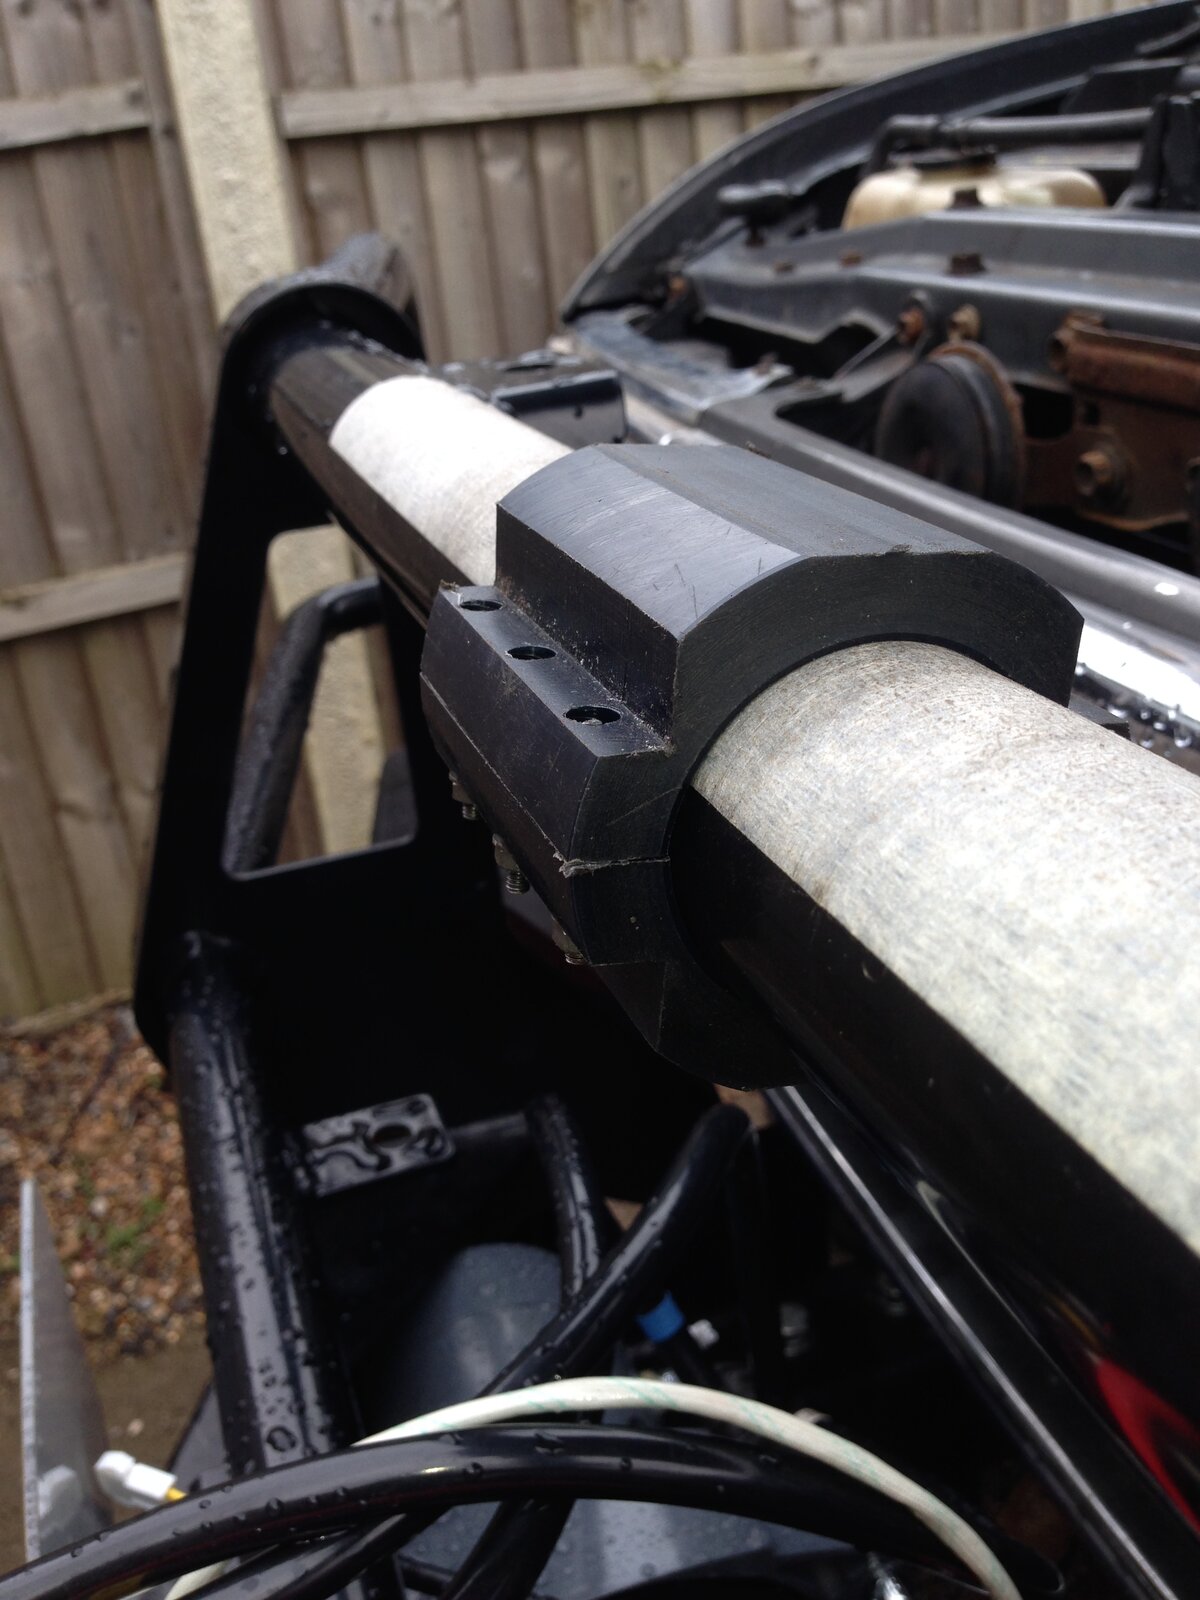
Started by milling a bracket out of a piece of solid something or other. It's like a very hard nylon stuff. Bored to fit the rail, then cut the sides back to form the clamp then cut the whole thing in two to make two halves.
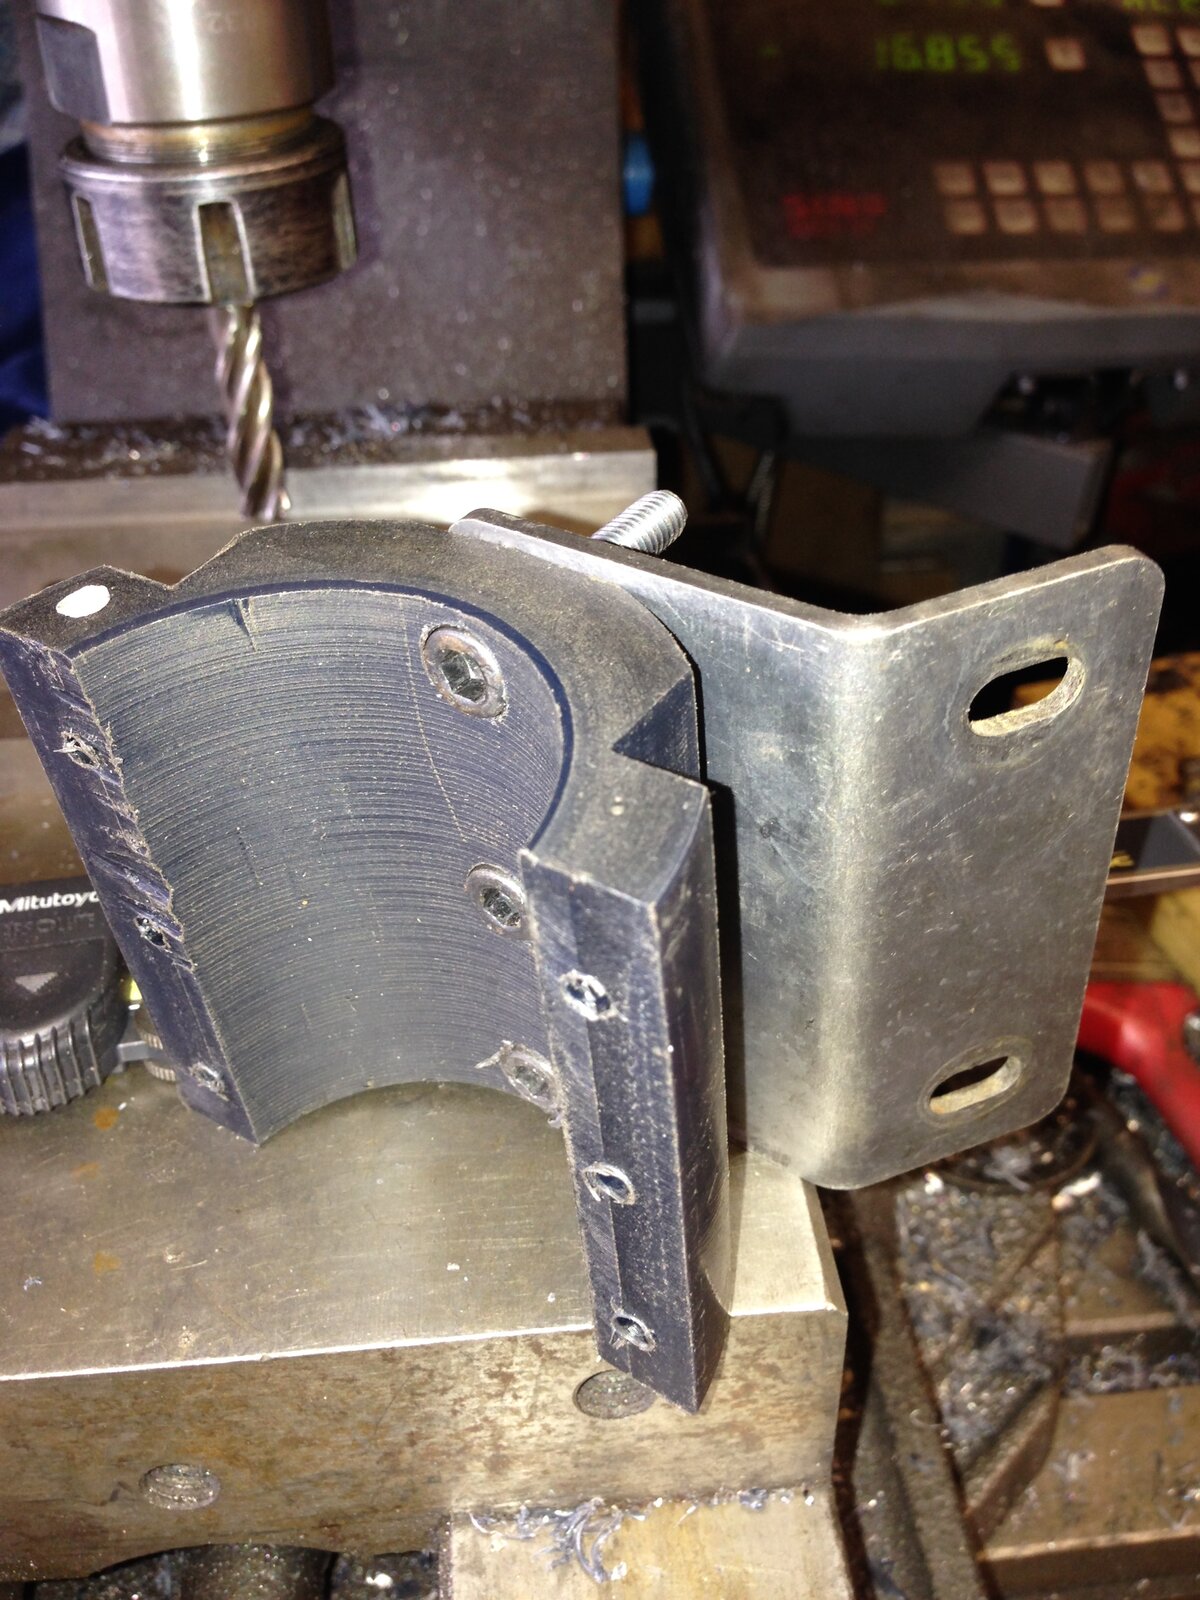
Found a bracket (prize for spotting what the bracket is off)
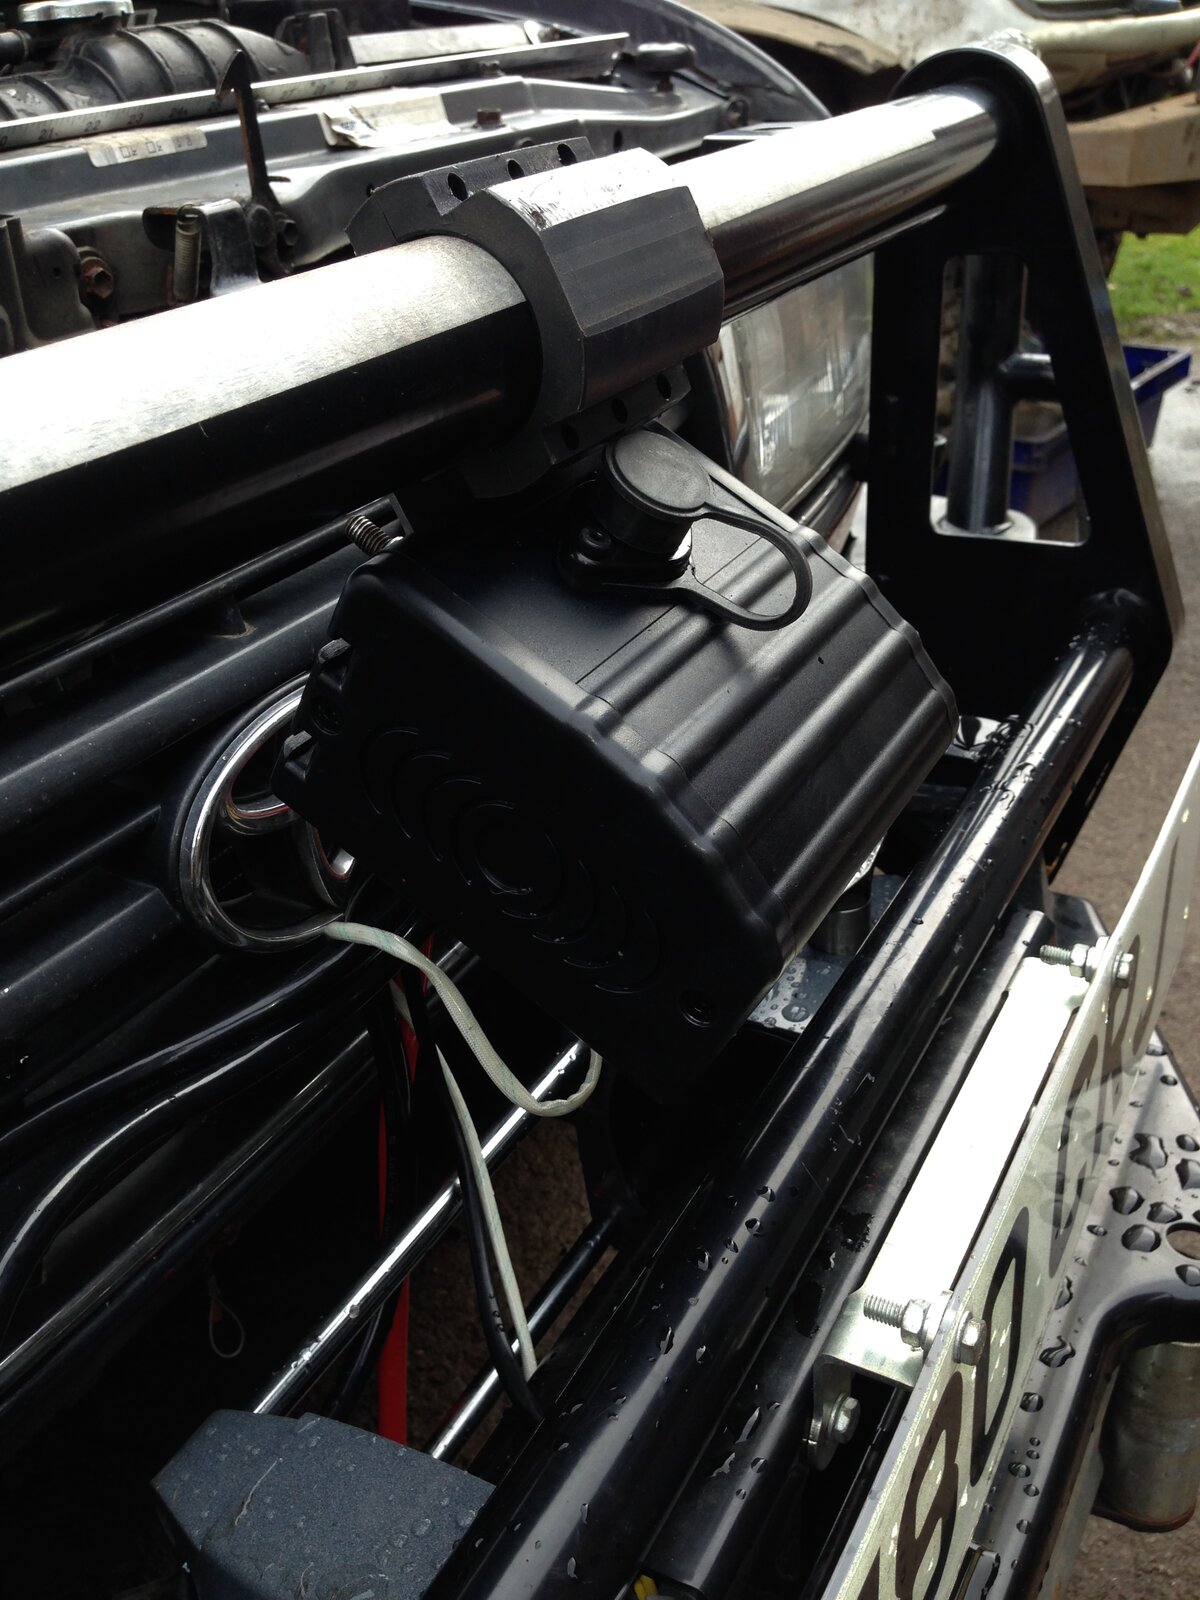
Then mounted the solenoid pack onto the top rail of the bumper. Actually don't mind it there. it's rock solid and easily accessible.
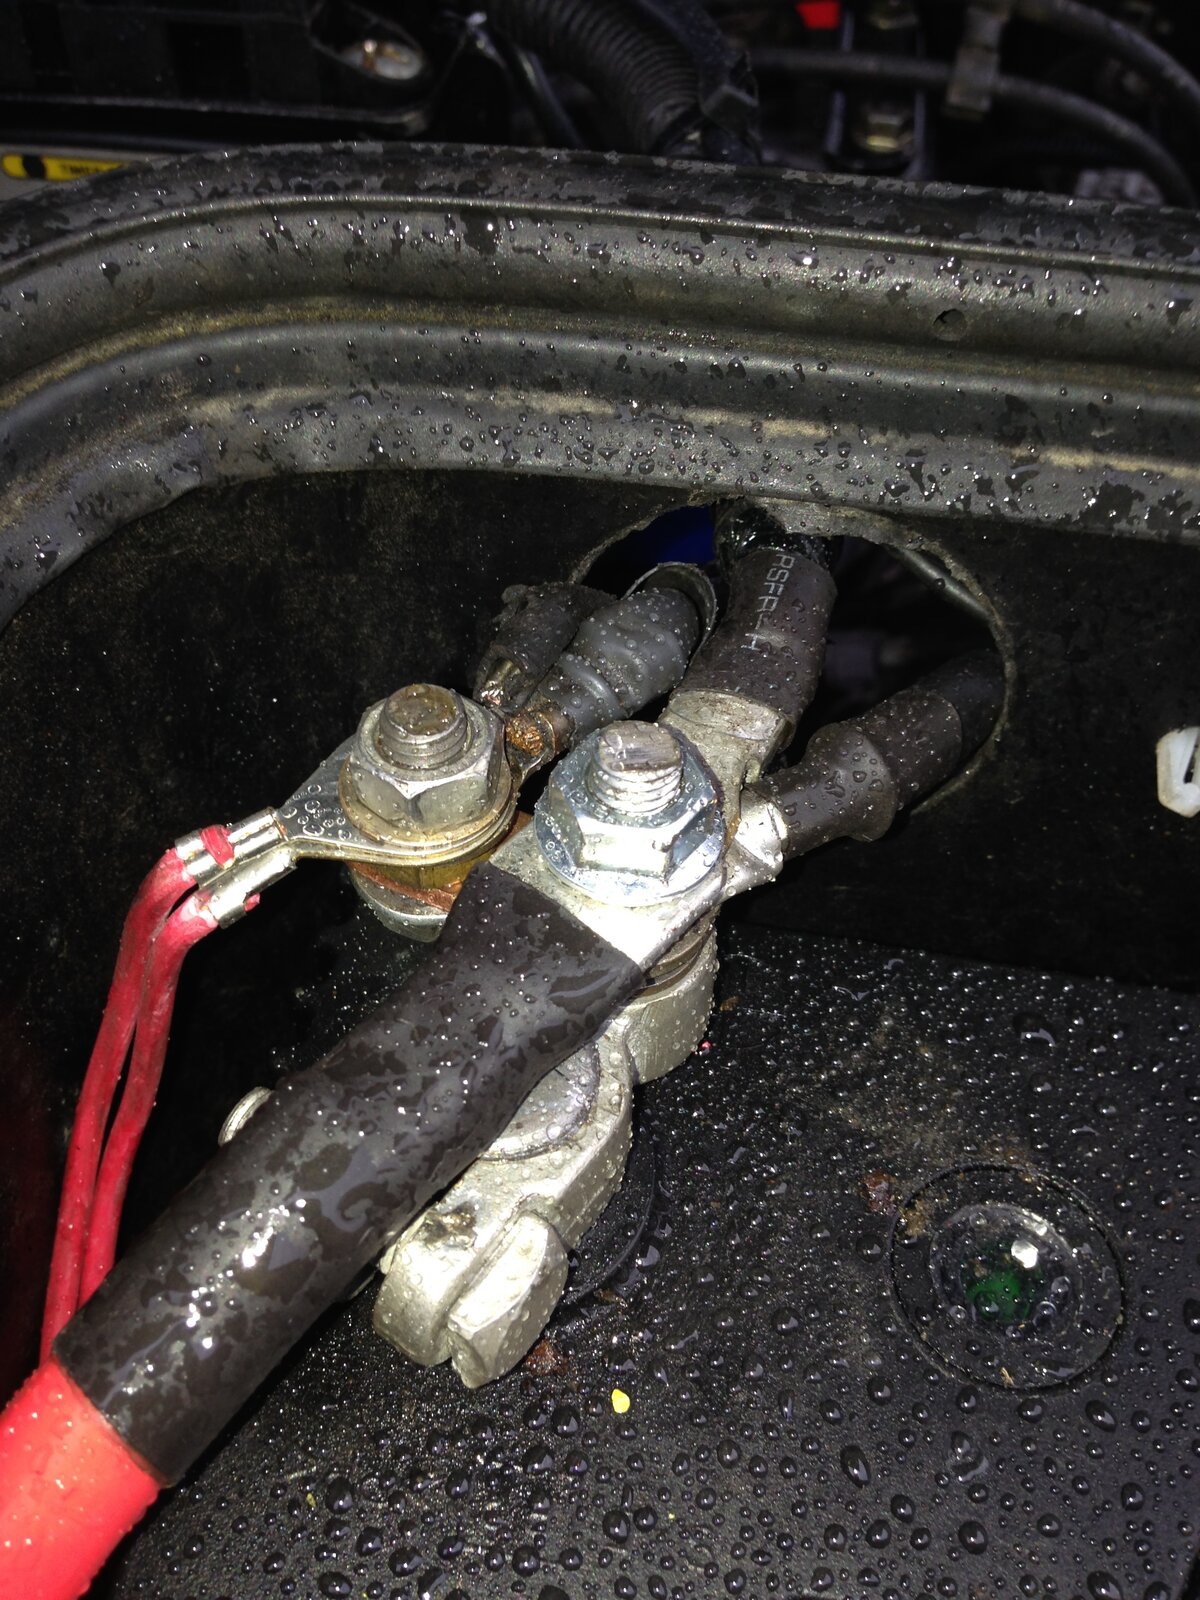
I took time to route the cables tidily. And I have to say that really are tidy this time. Not like SAE's maybe, but nice. On the battery clamps I have replaced the studs with longer posts. Machined to fit and knurled so that they don't spin in the clamp. I made a small copper extension to the main +ve post so that all the smaller tabs can go on their own dedicated connection leaving the big stuff on the main post.
I mounted the remote control unit on the side of the bumper. Seemed such a good fit it would have been rude not to put it there. Stainless bolts.
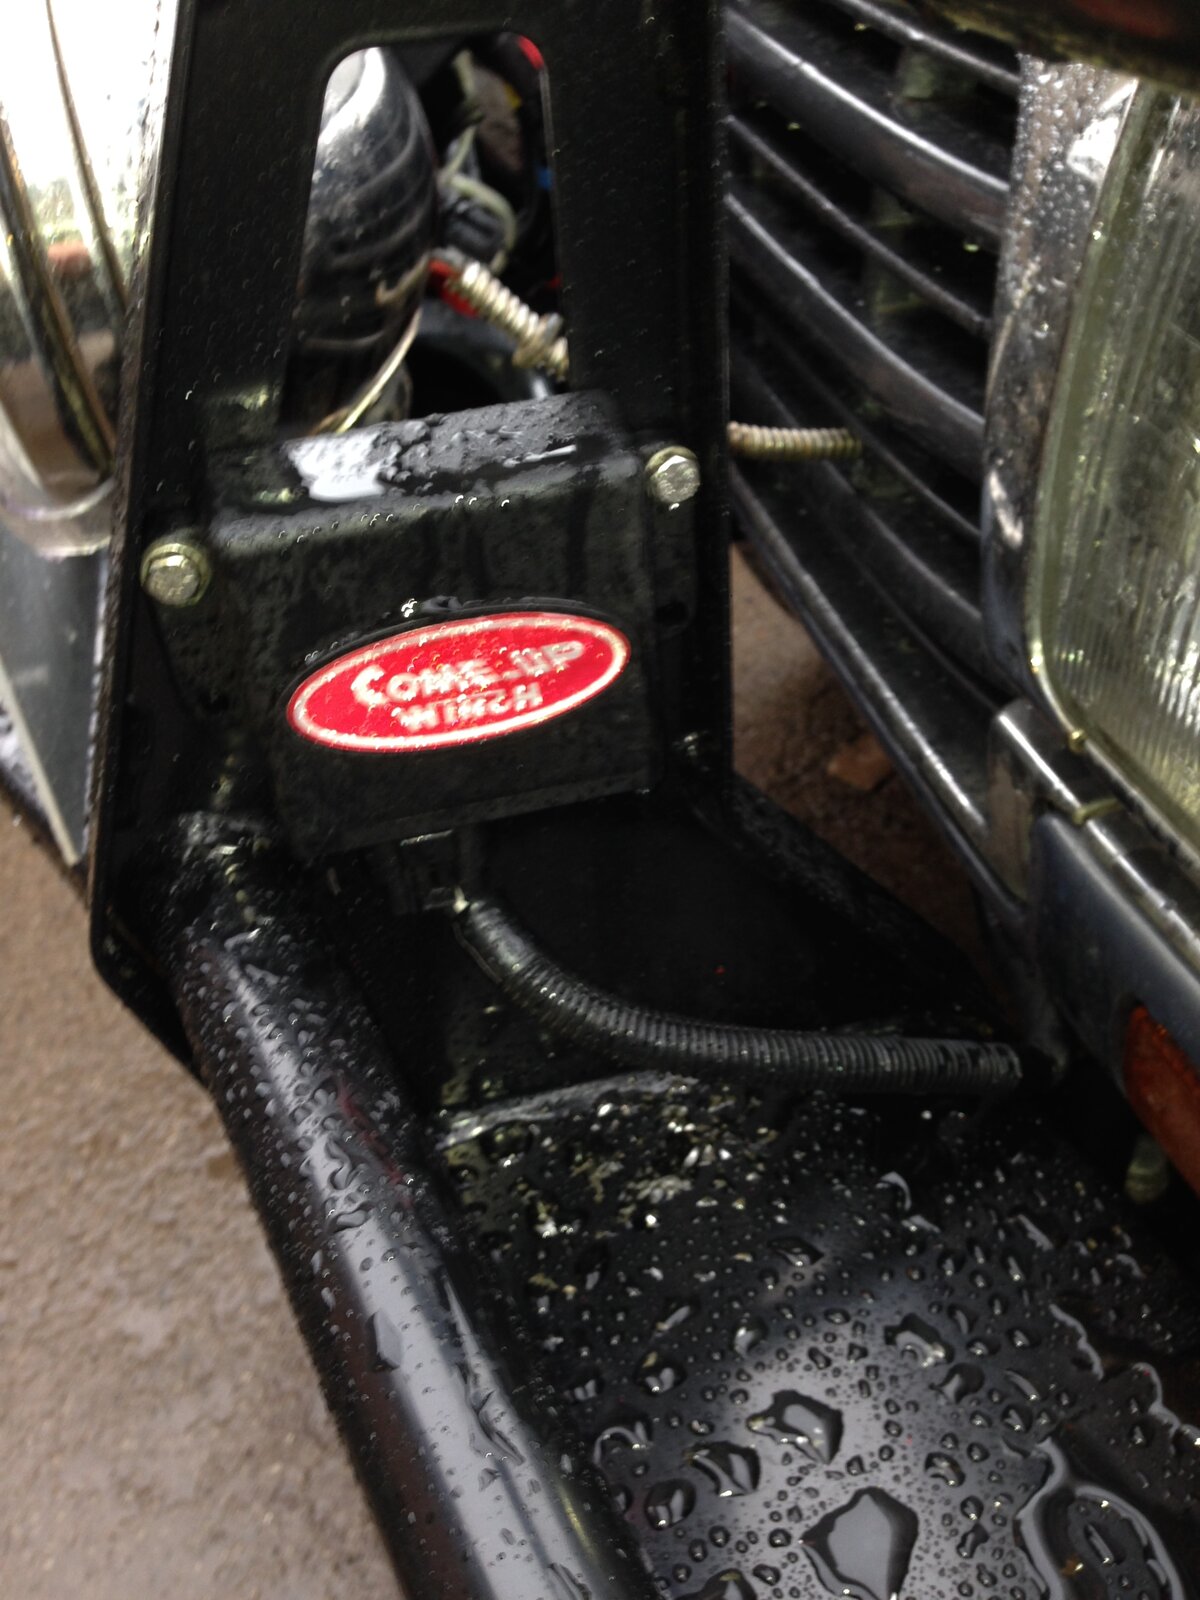
There was more wrestling with the winch and bumper to get to the cable terminals in the rain, but that's all done now. Here's the remote control handset.
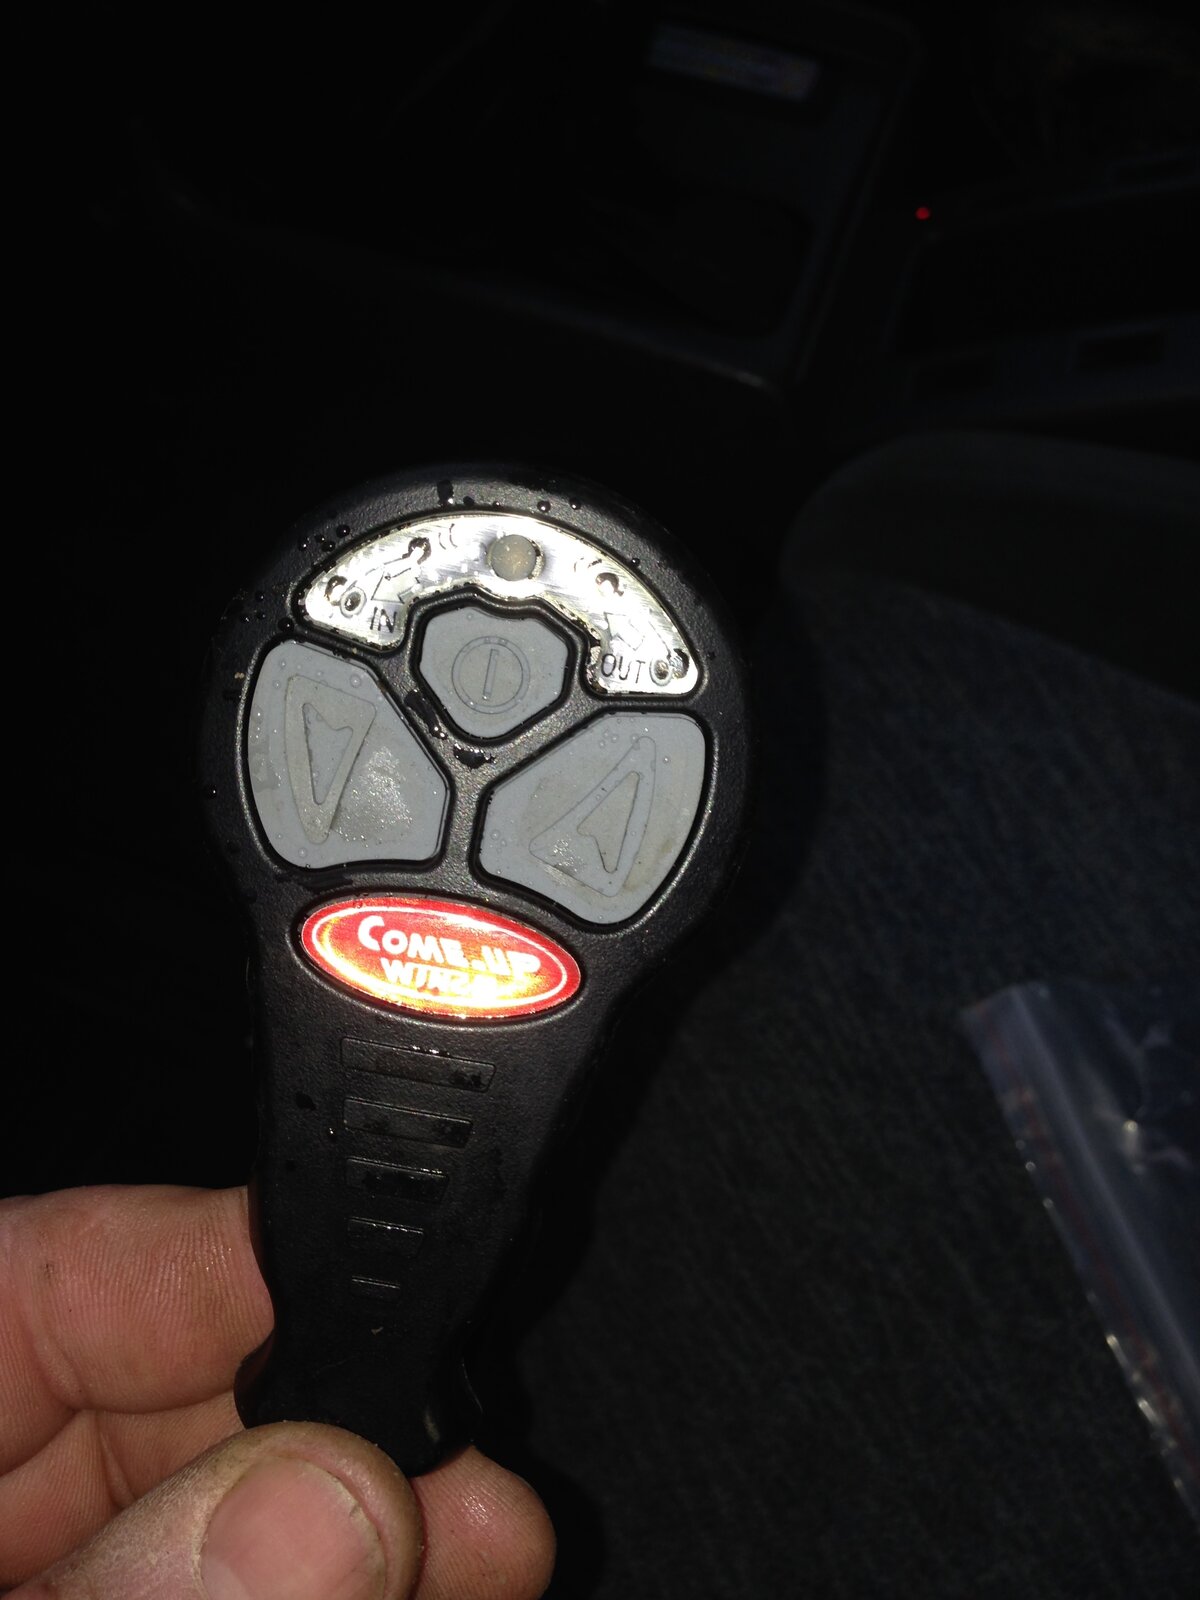
Slightly unusual as it requires a flying lead to be plugged into the solenoid pack. I suppose you could wire it in through the back, but I have the plug hidden down inside the grille. You pop the bonnet and just plug the end into the pack. it's fine. Of course I have the wander lead too.
I figured as I was soaked already and there was nothing on the telly, I'd put my new rope on. It's from English Braids and feels very high quality. In fact it feels more like steel than Dyneema.
I put one of the new alloy ends on.
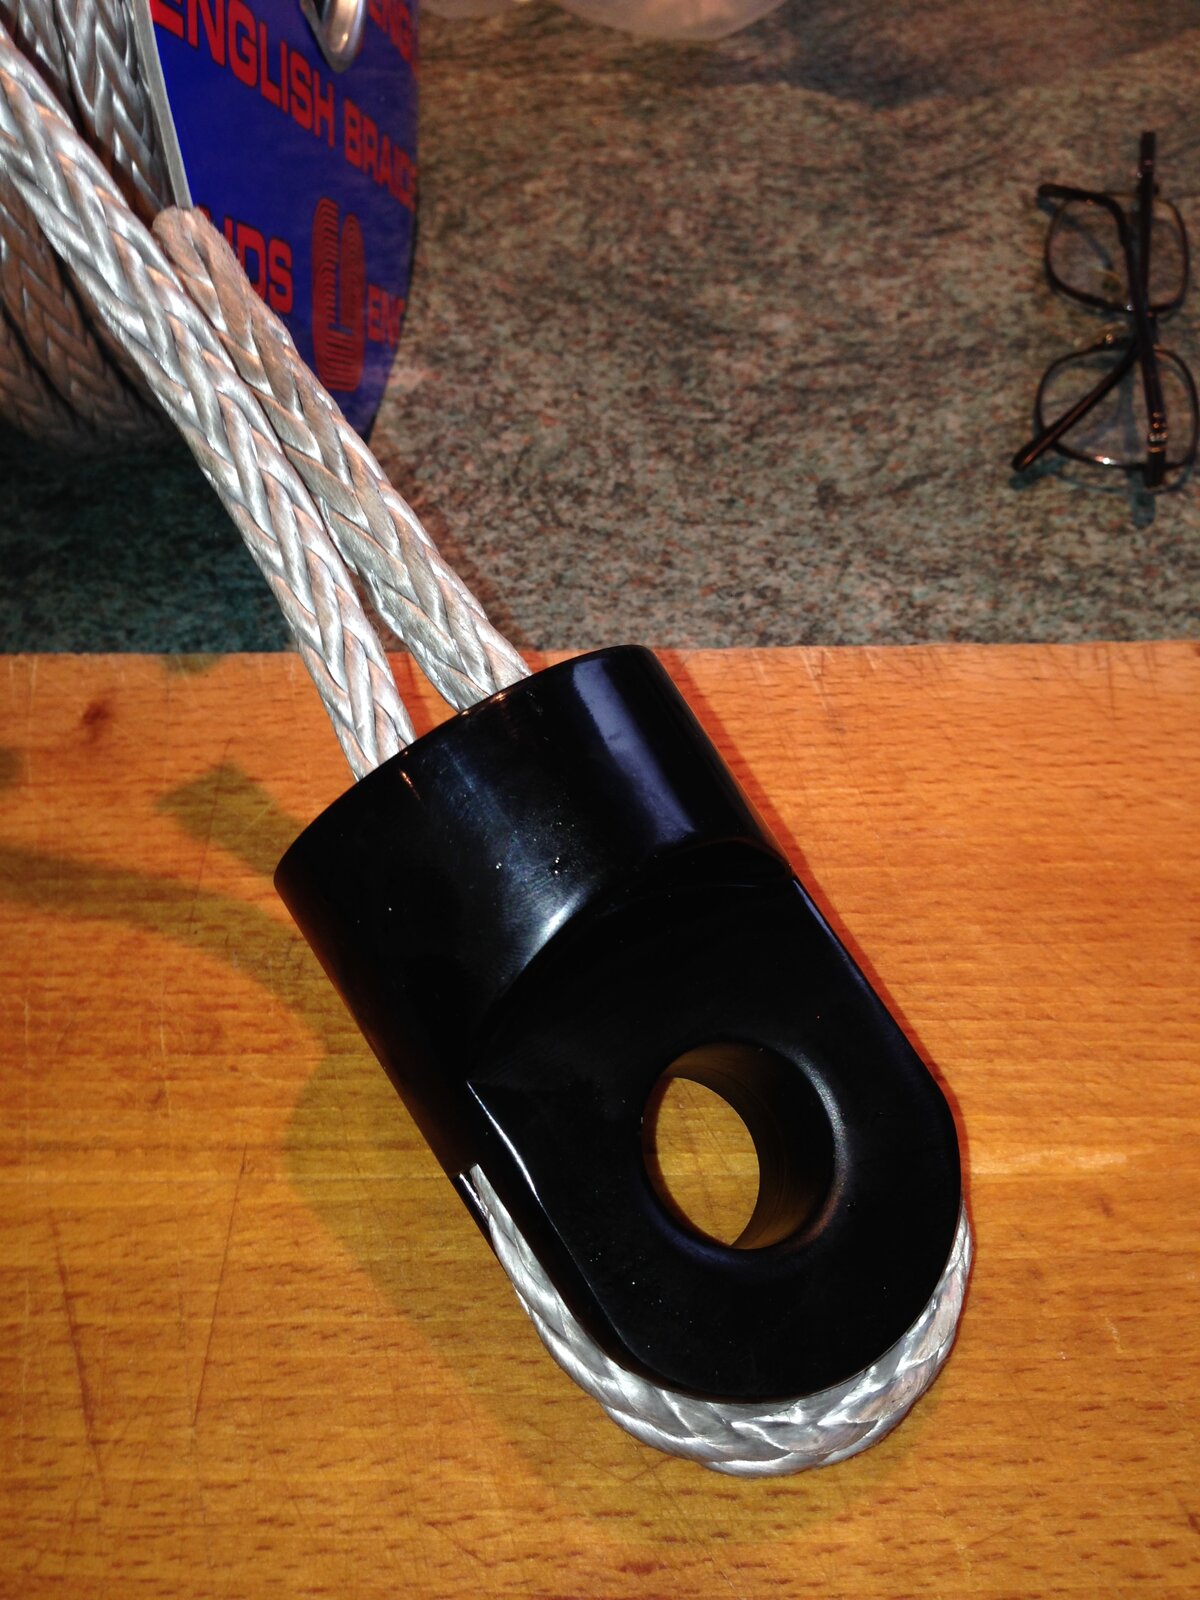
OK first make a hole in the short end part.

Then take the other end of the rope (100 ' away_ and pass it through the the hole and work it tight. This makes the lock.
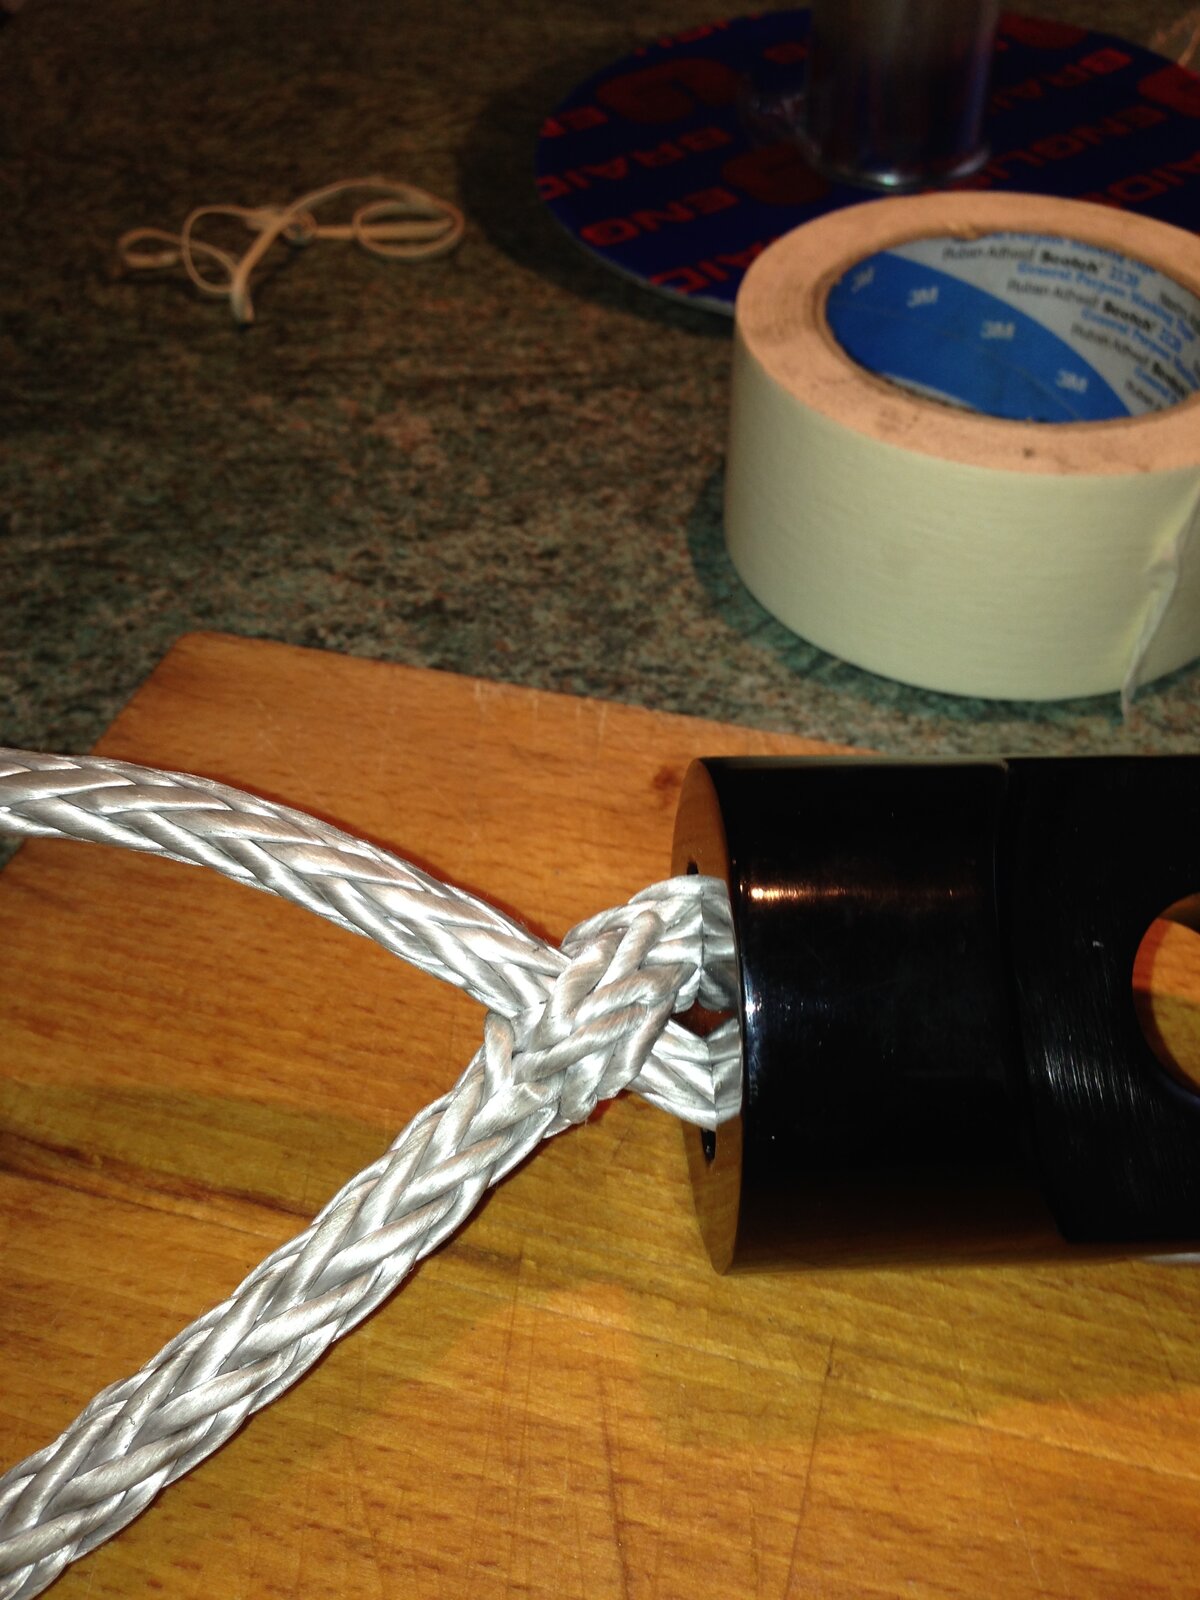
I made a thin alloy fid with a rounded end to make threading down the centre easier
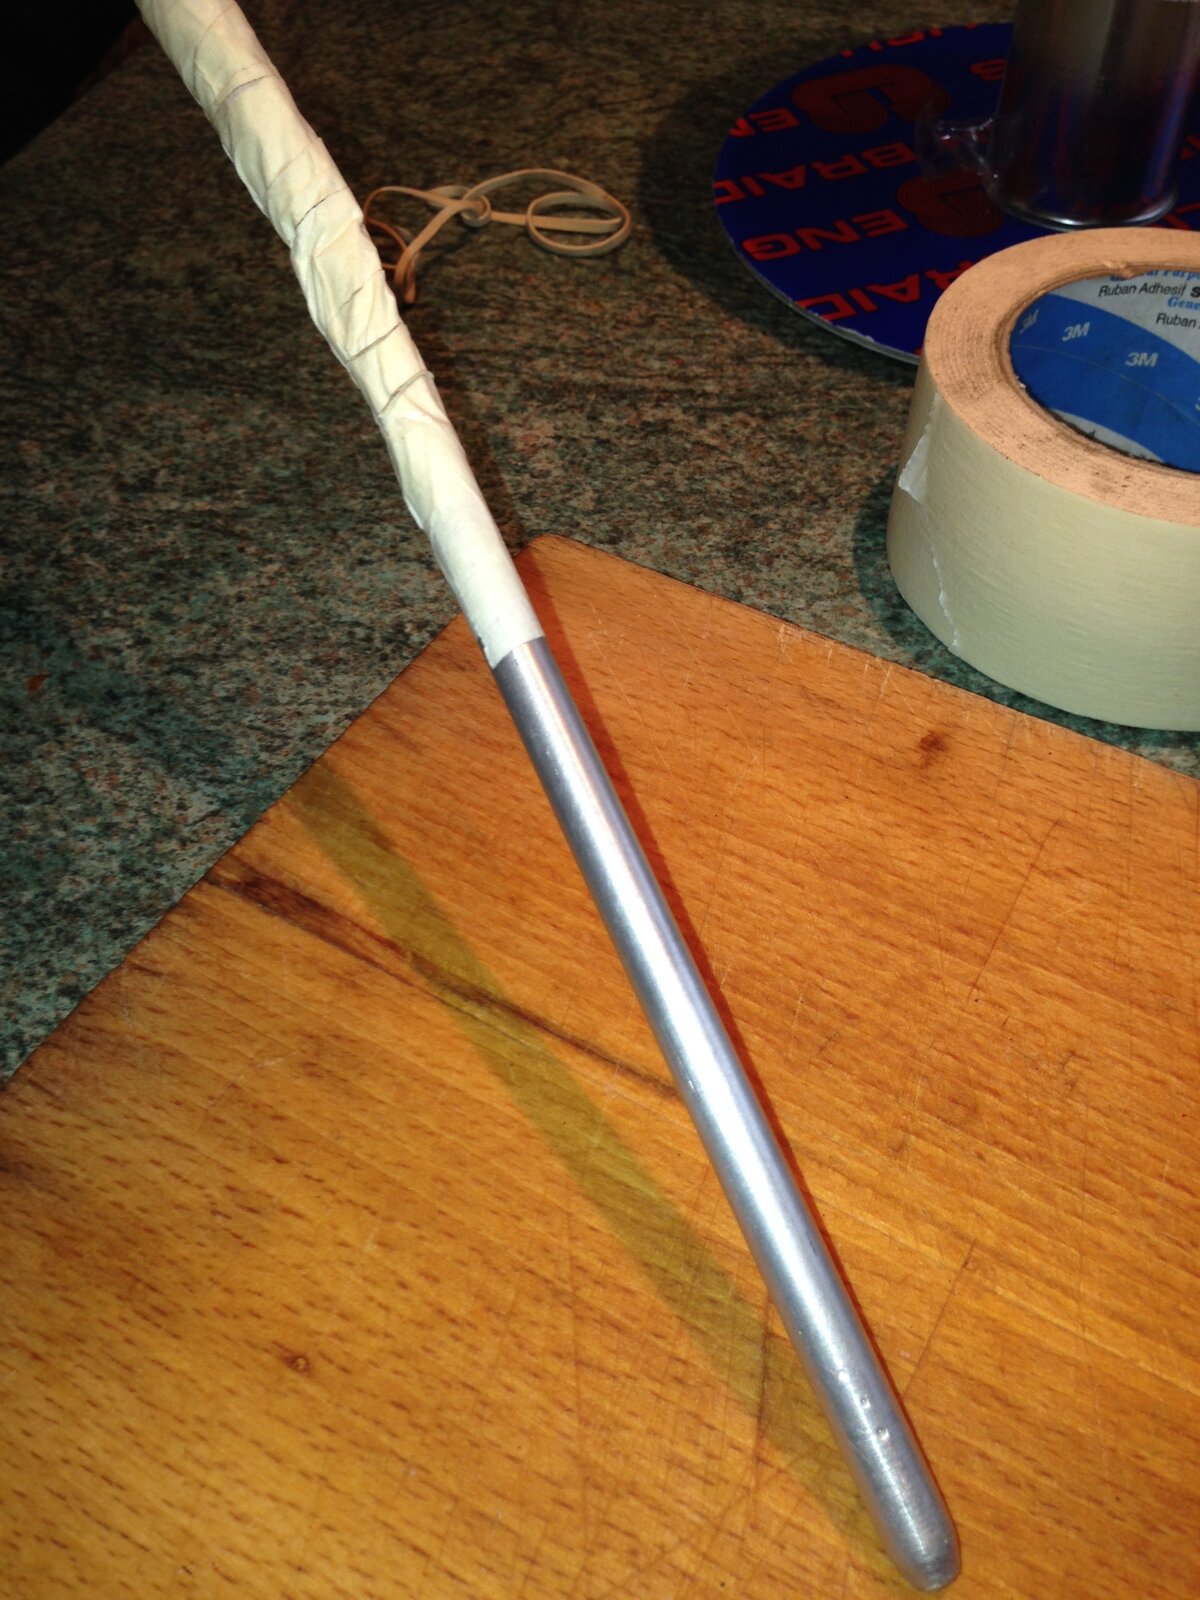
Difficult to feed the tail down the middle otherwise
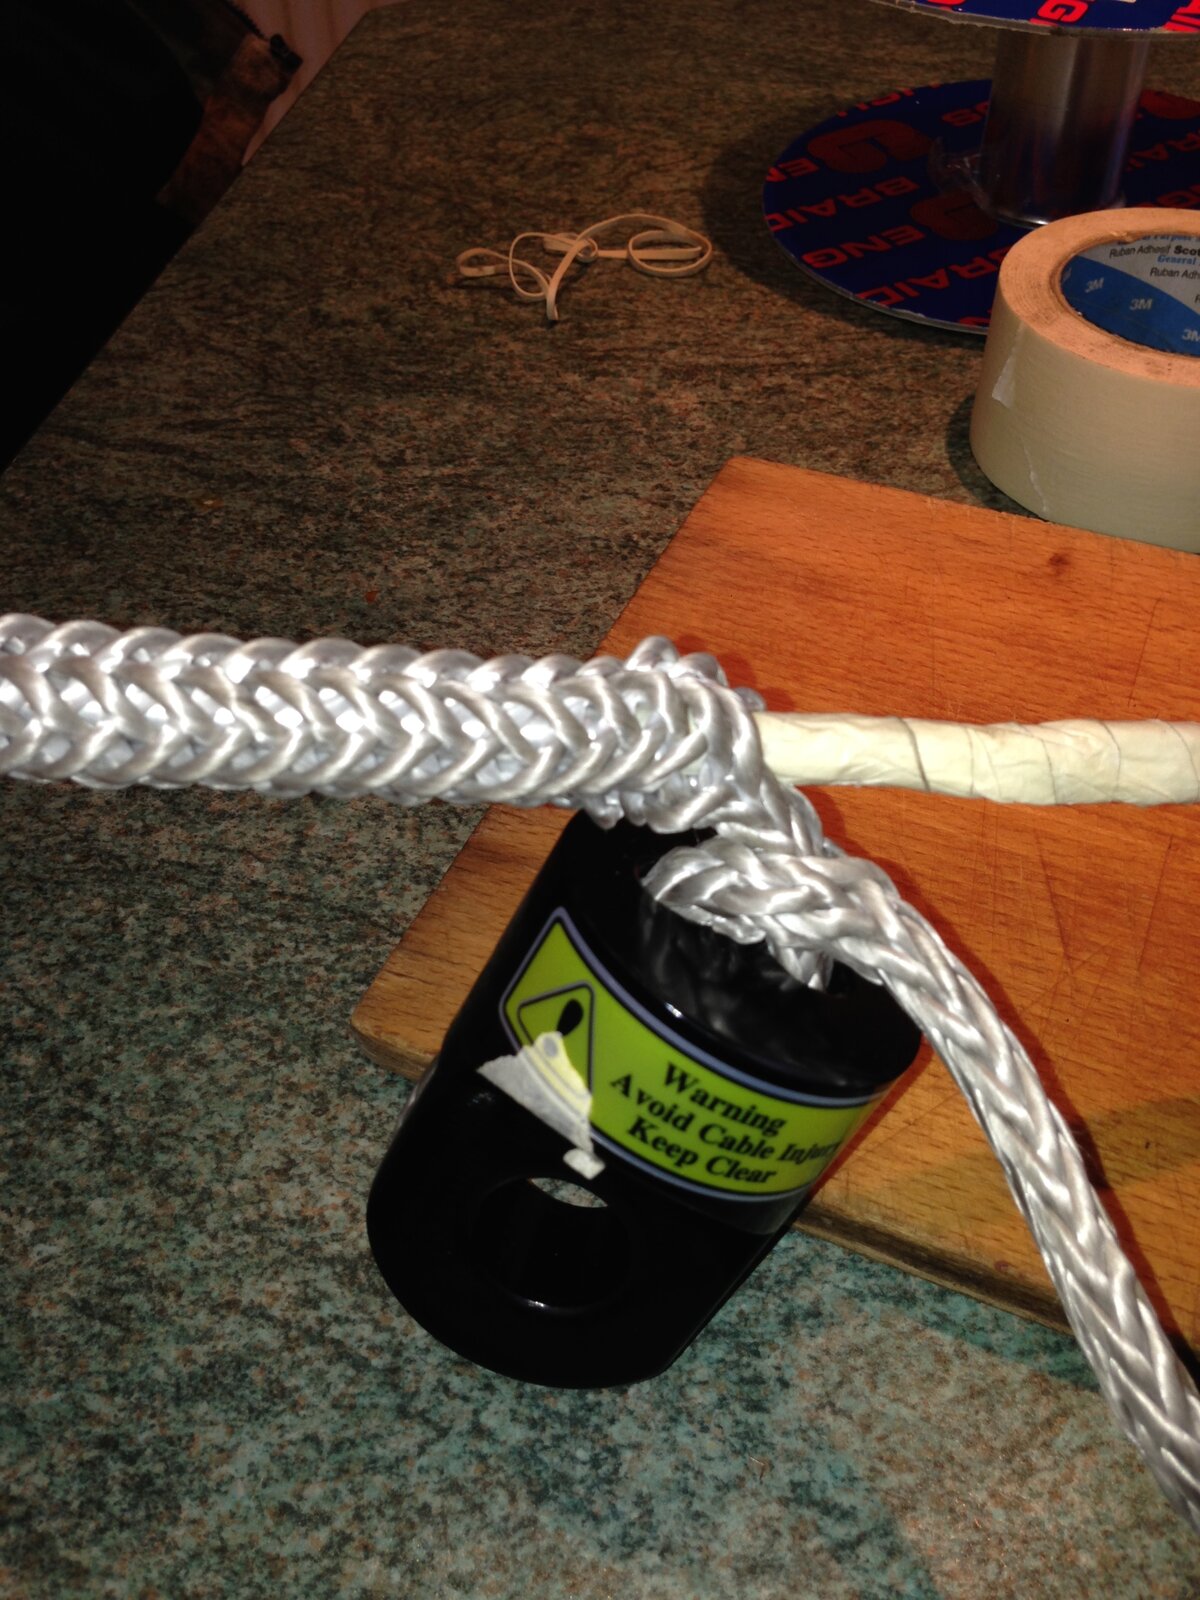
Feed through and come out of the standing part
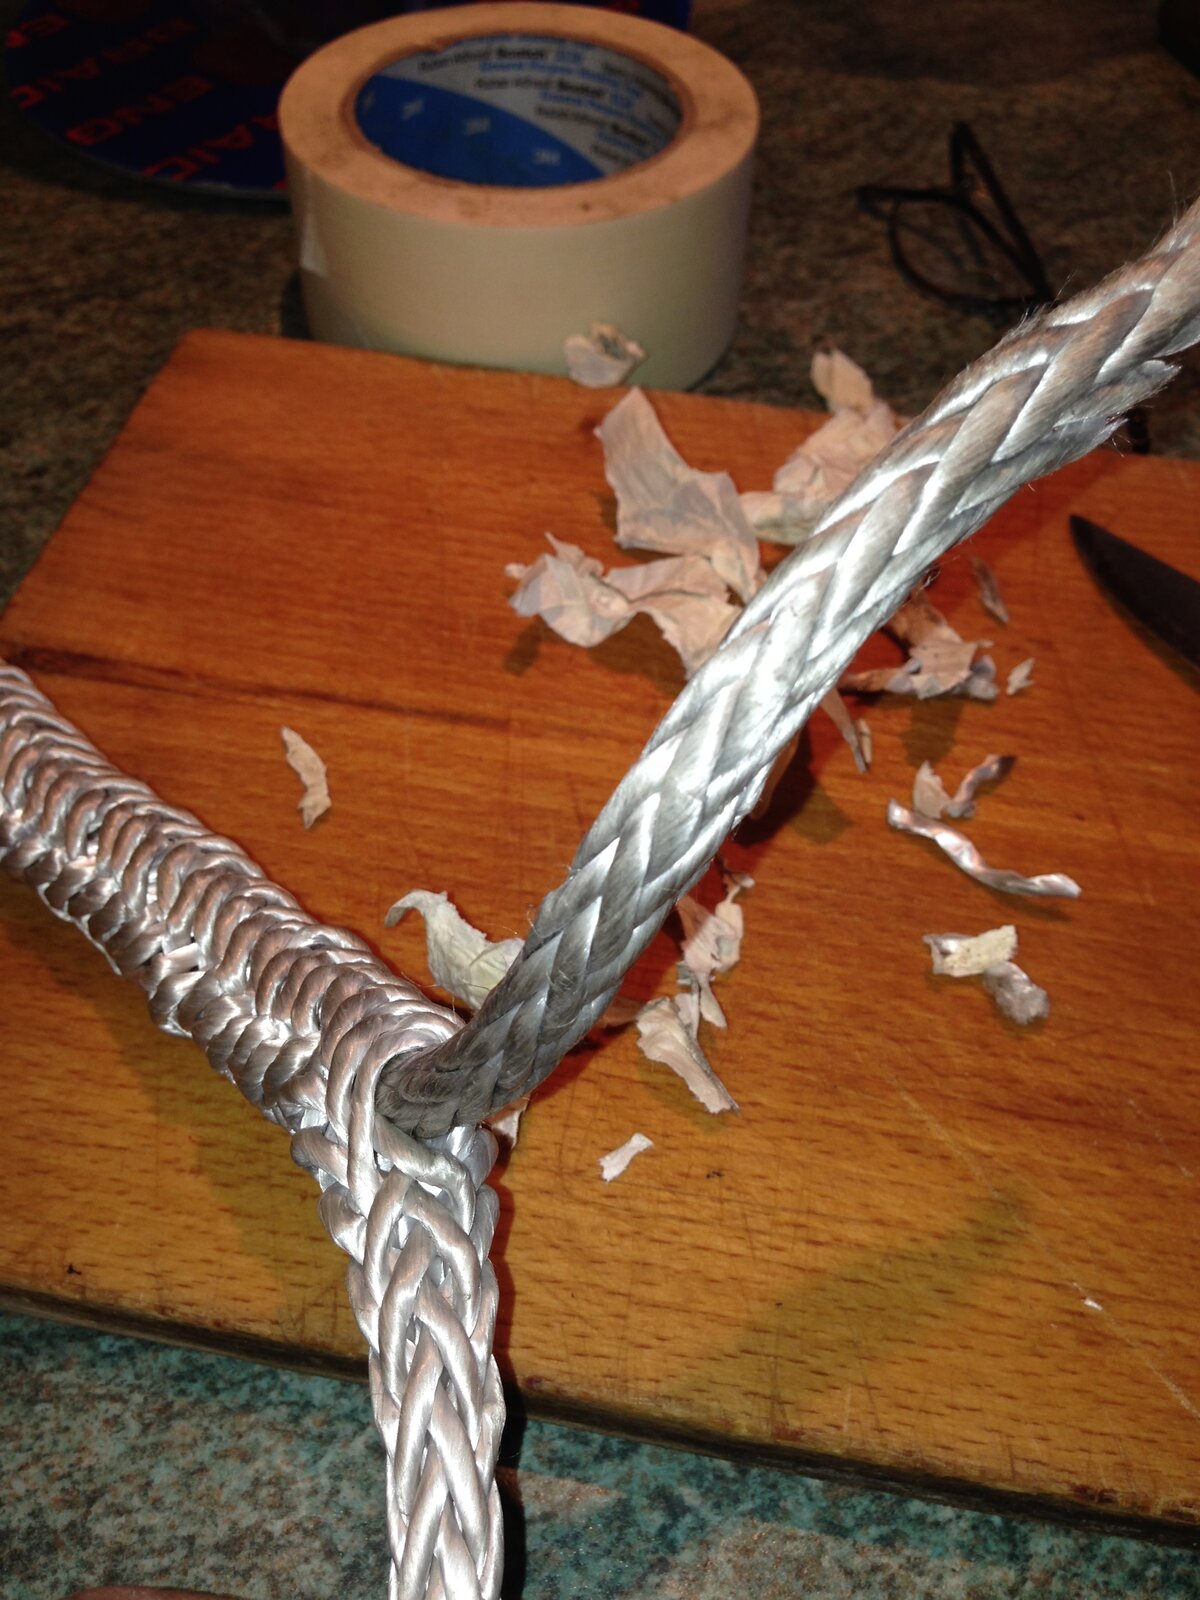
Then bury the tail down the main rope and pull it all tight.
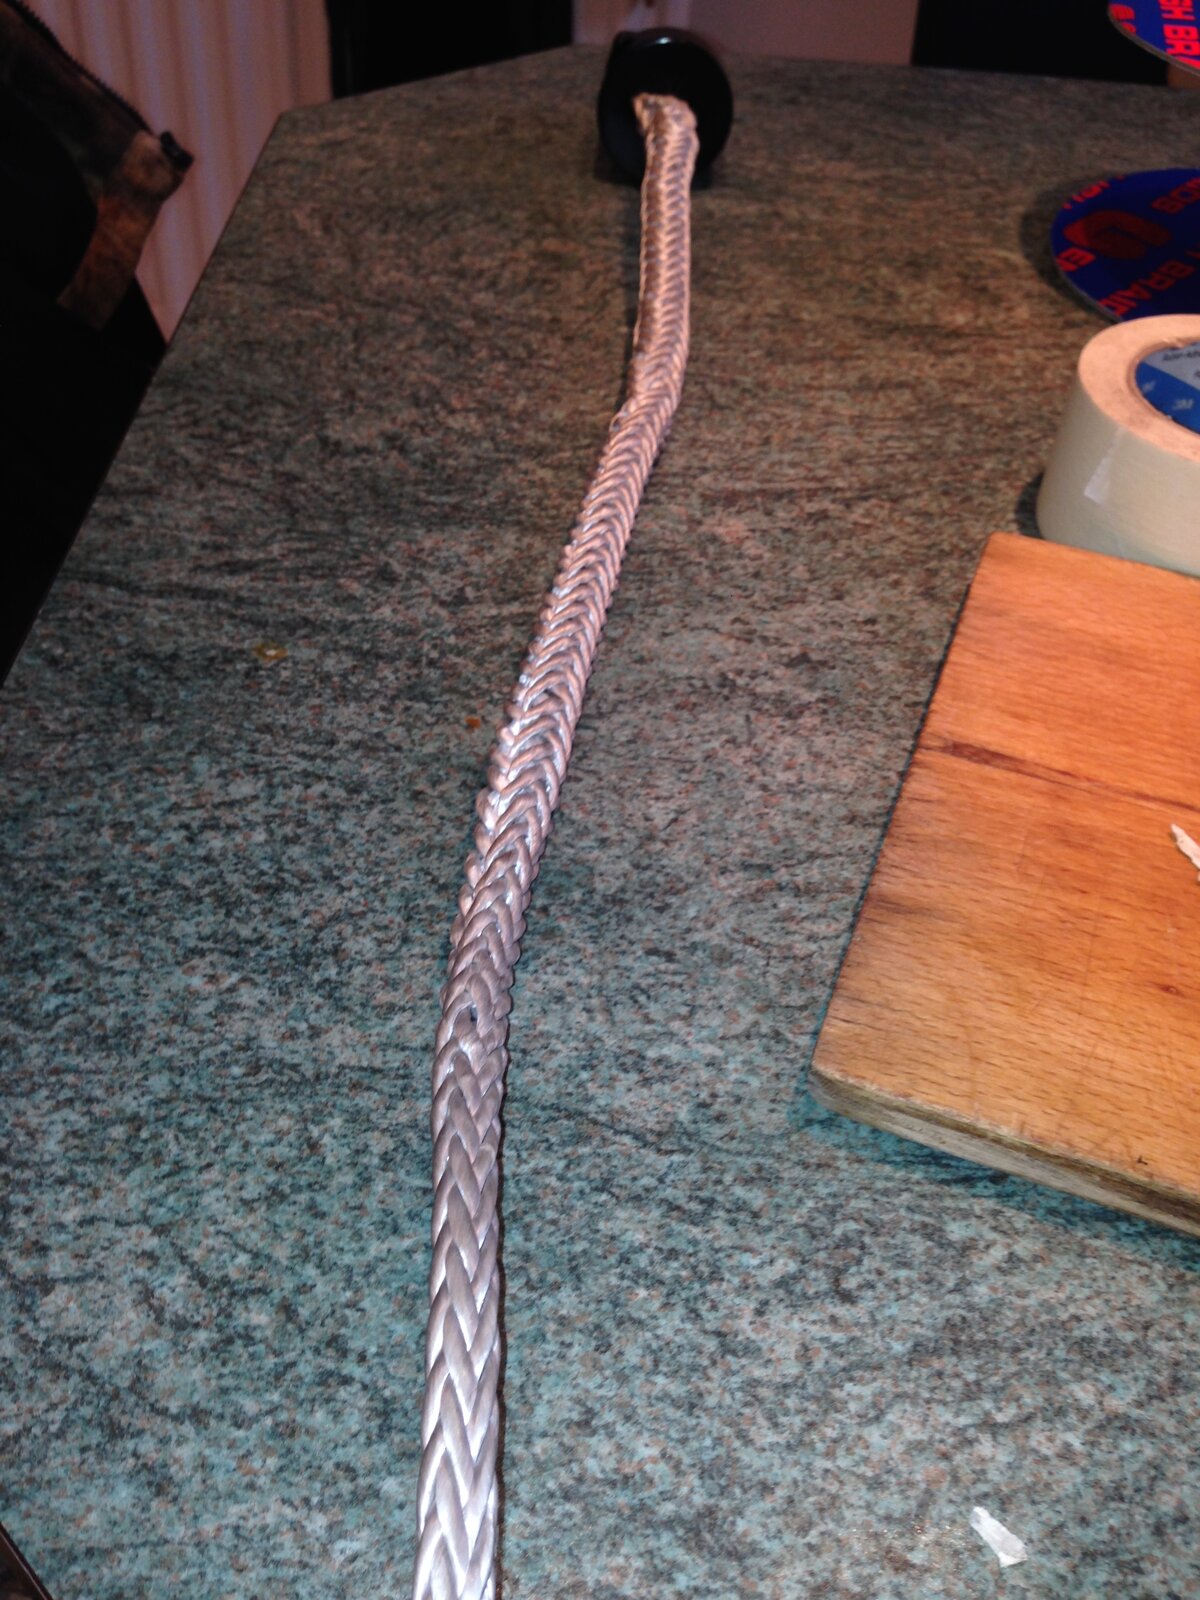
Put it on the winch and you're done!
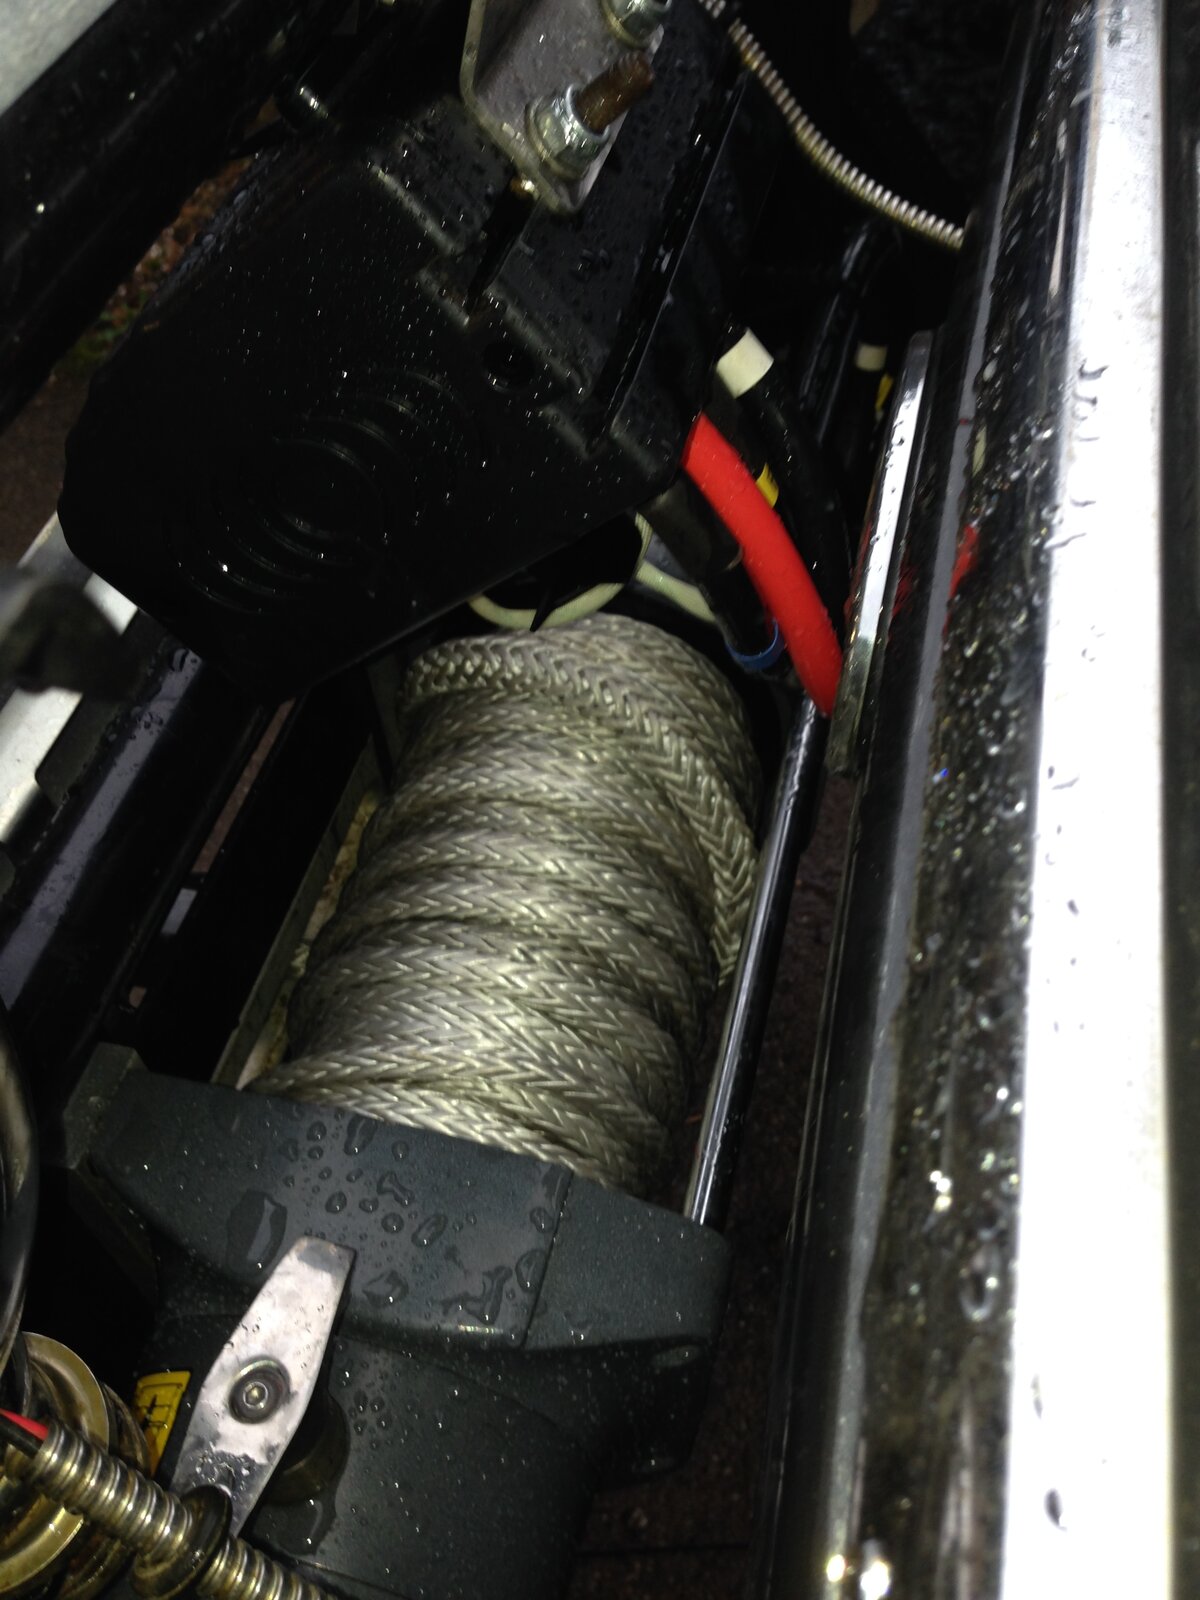
Time for a cuppa.
Started by milling a bracket out of a piece of solid something or other. It's like a very hard nylon stuff. Bored to fit the rail, then cut the sides back to form the clamp then cut the whole thing in two to make two halves.

Found a bracket (prize for spotting what the bracket is off)

Then mounted the solenoid pack onto the top rail of the bumper. Actually don't mind it there. it's rock solid and easily accessible.

I took time to route the cables tidily. And I have to say that really are tidy this time. Not like SAE's maybe, but nice. On the battery clamps I have replaced the studs with longer posts. Machined to fit and knurled so that they don't spin in the clamp. I made a small copper extension to the main +ve post so that all the smaller tabs can go on their own dedicated connection leaving the big stuff on the main post.

I mounted the remote control unit on the side of the bumper. Seemed such a good fit it would have been rude not to put it there. Stainless bolts.

There was more wrestling with the winch and bumper to get to the cable terminals in the rain, but that's all done now. Here's the remote control handset.

Slightly unusual as it requires a flying lead to be plugged into the solenoid pack. I suppose you could wire it in through the back, but I have the plug hidden down inside the grille. You pop the bonnet and just plug the end into the pack. it's fine. Of course I have the wander lead too.
I figured as I was soaked already and there was nothing on the telly, I'd put my new rope on. It's from English Braids and feels very high quality. In fact it feels more like steel than Dyneema.
I put one of the new alloy ends on.

OK first make a hole in the short end part.

Then take the other end of the rope (100 ' away_ and pass it through the the hole and work it tight. This makes the lock.

I made a thin alloy fid with a rounded end to make threading down the centre easier

Difficult to feed the tail down the middle otherwise

Feed through and come out of the standing part

Then bury the tail down the main rope and pull it all tight.

Put it on the winch and you're done!

Time for a cuppa.
Looking nice and neat with it mounted to the bumper.
What? Chris' ass?

It does look a nice job though Chris. I managed to leave my solenoid pack on the winch, but I had to move the remote socket onto the top of the casing instead of the side, it was almost impossible to reach before.
My winch drum is rusting badly. I took it back to the metal and Ku-Rusted it 2 years ago, but I had the rope off to wash it last week and the rust was back.
My winch drum is rusting badly. I took it back to the metal and Ku-Rusted it 2 years ago, but I had the rope off to wash it last week and the rust was back.
But that is on a Super winch, yes?
Not a chance I was going to get the pack mounted on the winch motor. Incidentally there were no Jubilee clips to mount it, so not sure what Come Up were expecting me to do there. Have to say it runs very very smooth. And quiet too. Better than a Goldfish for which I have great respect as I have said many times.
Not a chance I was going to get the pack mounted on the winch motor. Incidentally there were no Jubilee clips to mount it, so not sure what Come Up were expecting me to do there. Have to say it runs very very smooth. And quiet too. Better than a Goldfish for which I have great respect as I have said many times.
Yep, Superwinch.
The case just about squeezes in with about 3mm clearance to the body panel.
It's not pretty any more like yours is, I hope yours stays that way. All the paint came off mine after a few years.
It works well though, never let me down.
The case just about squeezes in with about 3mm clearance to the body panel.
It's not pretty any more like yours is, I hope yours stays that way. All the paint came off mine after a few years.
It works well though, never let me down.
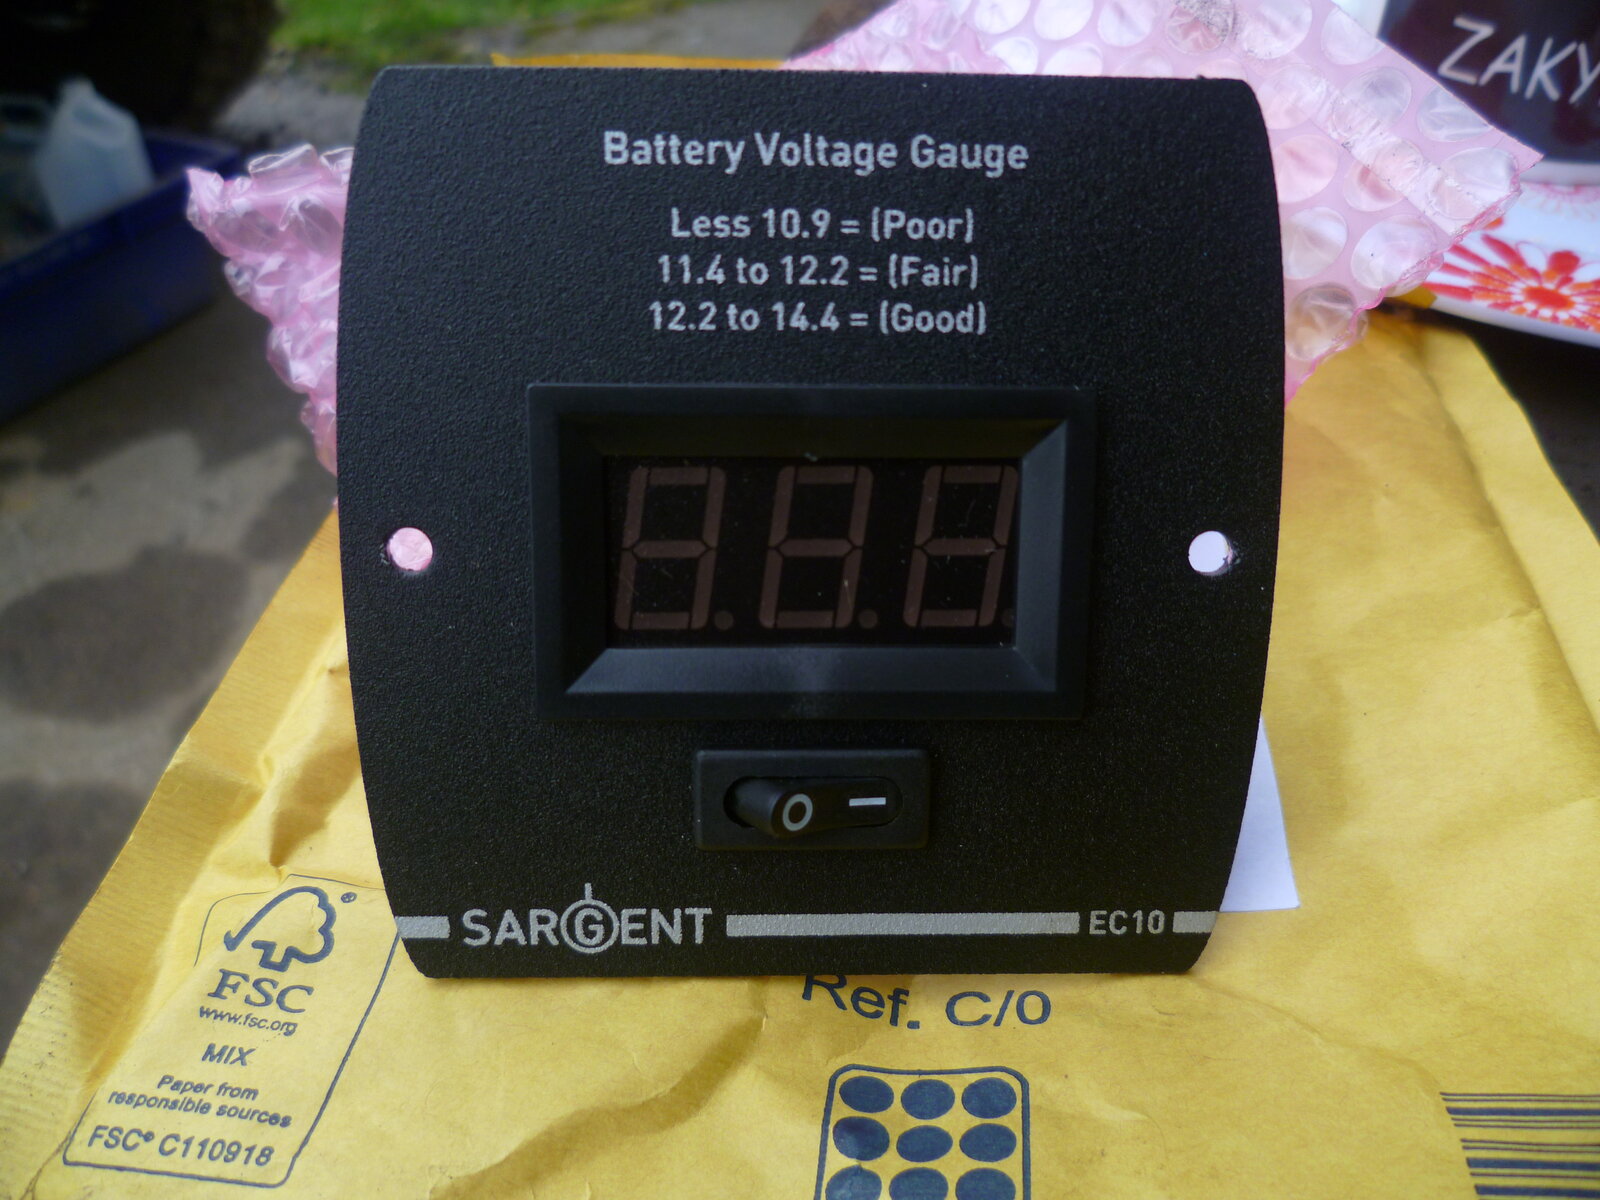
Little bit of work today. Took me all damn day though. First thing, postie arrives with this sexy little number. Nice. I have battery monitors and witches etc, but I really do want a factory finish look on some of this and I saw this and thought, hmm, that'll do nicely.
OK next job. These ridiculous 315 tyre with lunatic off set catch on the inner part of the mud flap. Not good. I don't want much more lift to be honest but I will go with stiffer spring at some point once I am all loaded up. So I needed to figure out a way to push the wheel forward. I had the idea that I could basically bring the bolt position of the front arm forward a little to push the axle out. Lengthening the wheel base in effect. I couldn't see any issue with this, done properly. But I consulted Landcruiser International Barmy Ideas Sense Checker only to find this was not an original thought and was even provided with pictures.
So first job, I made a drilling template to make a pilot hole.
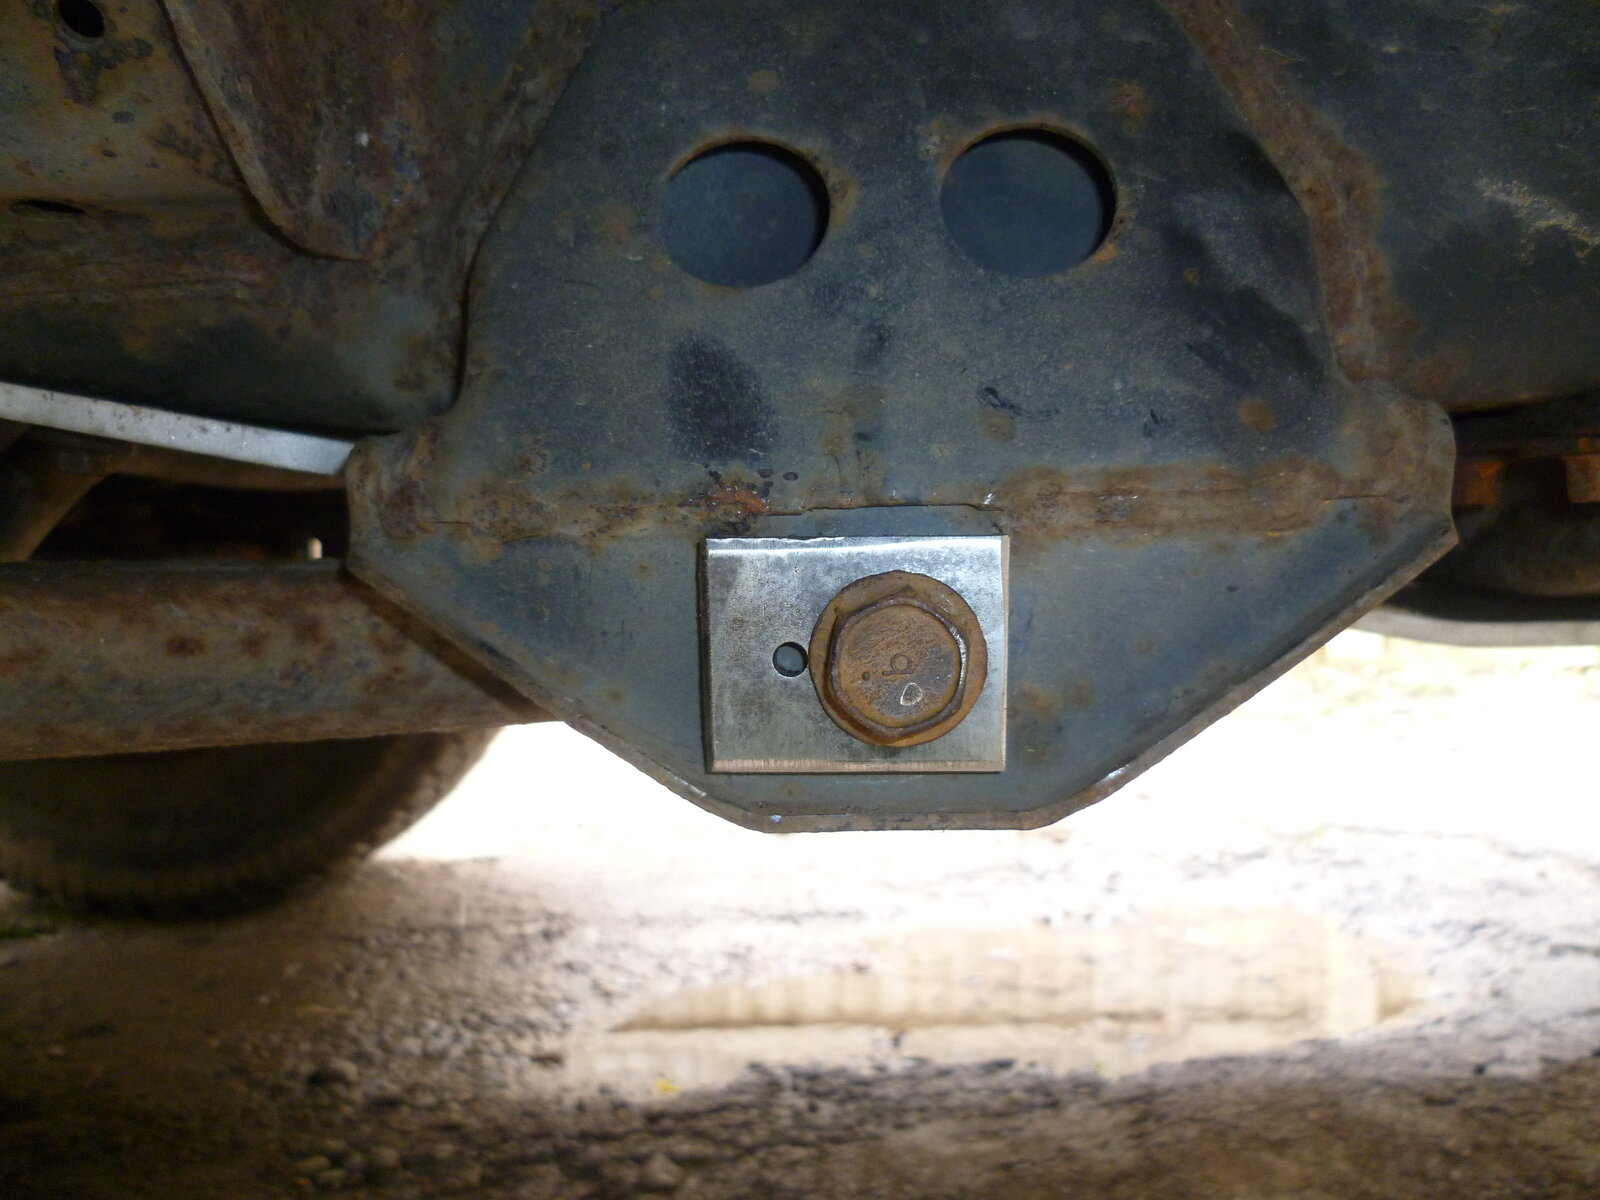
This gave me a precise centre. I drilled all four sides using the guide then progressively drilled them out to the bolt diameter. I made a set of quite thick repair washers to go on which I later welded into place once it was all bolted up
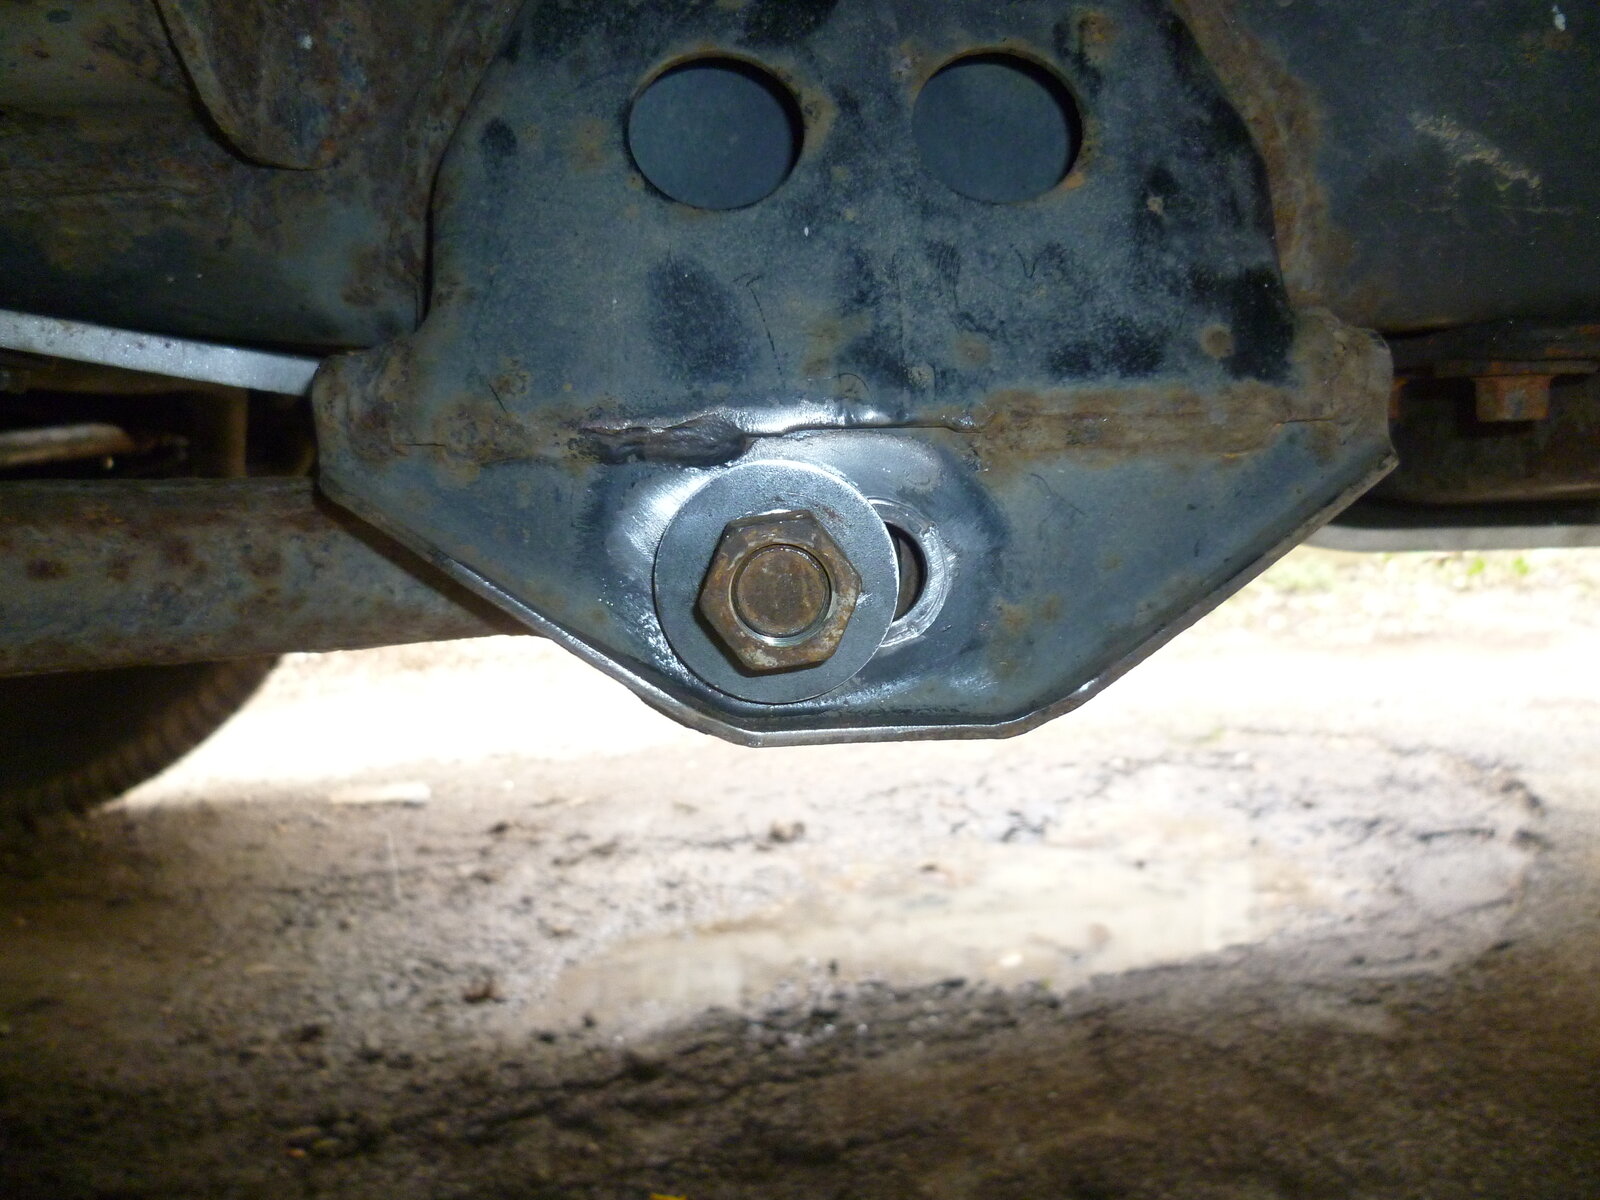
Result - I don't think it's going to catch any more.
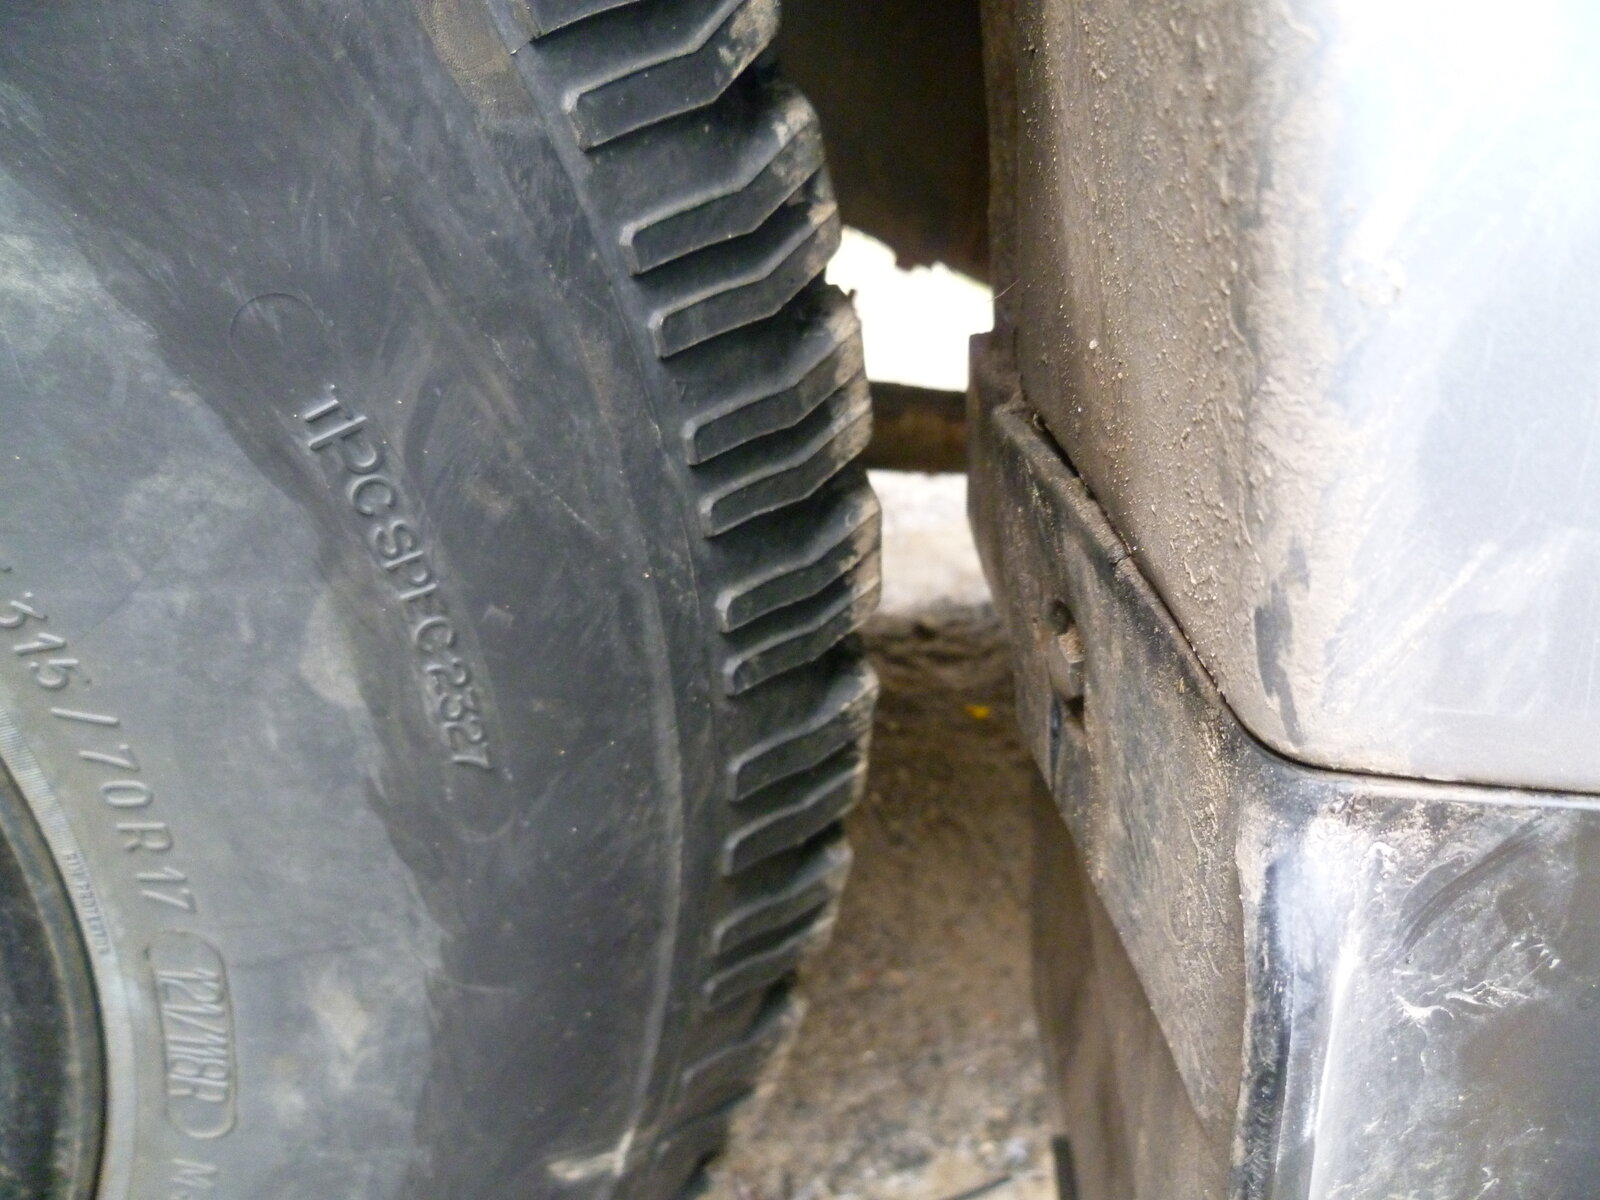

OK next job. These ridiculous 315 tyre with lunatic off set catch on the inner part of the mud flap. Not good. I don't want much more lift to be honest but I will go with stiffer spring at some point once I am all loaded up. So I needed to figure out a way to push the wheel forward. I had the idea that I could basically bring the bolt position of the front arm forward a little to push the axle out. Lengthening the wheel base in effect. I couldn't see any issue with this, done properly. But I consulted Landcruiser International Barmy Ideas Sense Checker only to find this was not an original thought and was even provided with pictures.
So first job, I made a drilling template to make a pilot hole.

This gave me a precise centre. I drilled all four sides using the guide then progressively drilled them out to the bolt diameter. I made a set of quite thick repair washers to go on which I later welded into place once it was all bolted up

Result - I don't think it's going to catch any more.

I like that idea Chris!
with 305s and an equally ridiculous offset and 10" rims, mine don't catch, but it's good to know if I decide to that little bit wider one day
You're re obviously confident those plates don't need welding? I would have thought you would need to weld a washer to the mounting bracket in the new position, to give the spacer tube a continuous "circle" to bear against.
Anyway, nice job. Nothing much more annoying than that tyre on body bits noise!
Clive put your glasses on and read it again there's a good chap
You'd be disappointed if I was to get it first time around Chris
Now I understand what you did. I should have looked at the pictures instead of reading the words


