Update time guys..........................
My first job on the project was to add the top links/A arm.

I decided to make it bolt on to the diff as per the original Vitara setup.

This is what the standard Vitara setup looks like which incorporates a ball joint.


Wanting maximum articulation on this build I wanted to use a rose joint.

I decided that the one I picked up was no where near big enough so I got 2 bigger ones.

Cut a piece of cardboard to the shape and size of the plate that I would need to make to mount to the diff.

Used some punches to push through and mark the bolt holes.


Cut a piece of 10mm thick steel.

Decided to use the biggest rose joint I had picked up.


But this had a 30mm hole in it and obviously I wouldn't be using a bolt that big to mount it.
So I picked up an M30 bolt.


Roughly cut the head off.

I could then put it in the Brobo saw and cut it to length with nice square cuts on each end.


I then put it in the lathe and put a 16mm hole through the center.

I cut some tube to use as misalignment spacers, these would ensure I would get maximum movement out of the joint.

So the machined M30 bolt section goes in first, then the tube spacers on each side, with the an M16 mounting bolt through the middle.


Bolted the 10mm plate onto the diff.

I went for allen key headed bolts as space was very limited for the big rose joint.


I cut some 8mm thick steel for the sides of the rose joint mount and clamped it all together to check I would indeed get full movement out of the joint with the misalignment spacers and that the whole lot would fit between the allen key headed bolts on top of the diff.


So with the misalignment spacers installed the joint reaches its maximum movement before it hits the sides of the mounting bracket.

Cut and drilled the sides.

I ground down the 8mm steel to ensure maximum root penetration to ensure a very strong weld.


Joint bolted in place and ready to be tack welded onto the plate.


I chose to TIG it of course.

And set the amps nice and high.


I tried not to put too much weld around where the bolts go as space was tight.

Sadly I did get a little bit of distortion from the shear amount of heat I put into it when welding.

But I was able to use the press to straighten it quite easily while it was still hot.


Cooled and bolted in place.


Bolts just cleared!


I could then work out the design of my A arm and I decided the easiest way to do this would be to mark it out on the bench.


Notched some tube.

Tacked it all together.


I pushed the bushes out of some old standard Vitara bottom links.

Cut the ends off and cleaned them up ready for welding.

Used a plumb bob to get the chassis and axle properly aligned, so I could accurately measure the length of my A frame.


Notched the ends at the correct length.


I clamped the A frame to a piece of nice thick angle to ensure I welded the ends on perfectly straight.


I welded the ends on and then fully TIG welded the whole A frame.


I cleaned the paint off the chassis where the A frame mounts will need to be.


Cut and bent some 3mm reinforcing plates which will be welded to the chassis.

They will have some nice big holes put in them with a hole saw to ensure I can get them fully welded to the chassis.

Pressed the old bushes back in the A frame. (new bushes have been ordered and will be fitted on the final assembly after its all been stripped down for fully welding and powder-coating)

Bolted the A frame in place.


To get the plates further forward I shaped the end to fit the existing chassis reinforcing plates.


Next job was to look at mounting the ends of the A frame to the chassis.


Mocked up some mounts in cardboard.


And that was as far as I got.
I told my boss that I'm going to need the seats for this project before I can design and build the roll cage. As my plan is to drawer it all out on the floor to scale in chalk.
So we went shopping to a factory where they import fast Japanese cars and strip them for parts. So all
Fast and the Furious type cars such as Skylines, S2000's, FTO's, Celicas, 350Z's etc.

We picked up a set of seats out of a Mitsubishi FT
O for a very reasonable price and we might get them re-trimmed in a nice waterproof material at our local boat re-upholstery place.


I cant wait to get the suspension finished and see how well it flexes with the forklift!
With Frankenzuke I was able to get a rear wheel on top of a 44 gallon oil drum and have all 3 wheels still on the ground. Well that was with a near standard setup with no real chassis modifications.
Where as this has got a longer wheel base and with the way I've designed the rear suspension and length of the links I'm hoping for really awesome articulation!

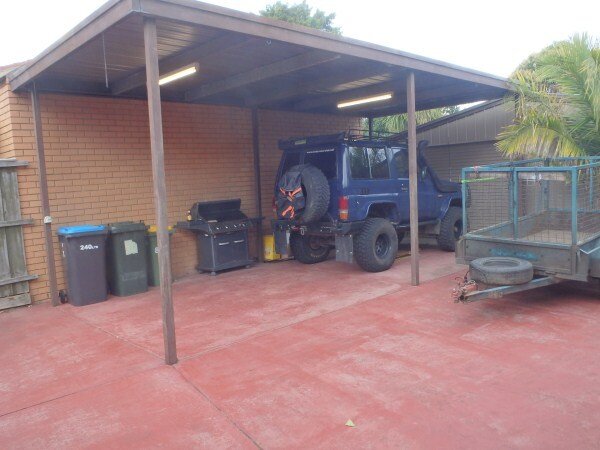
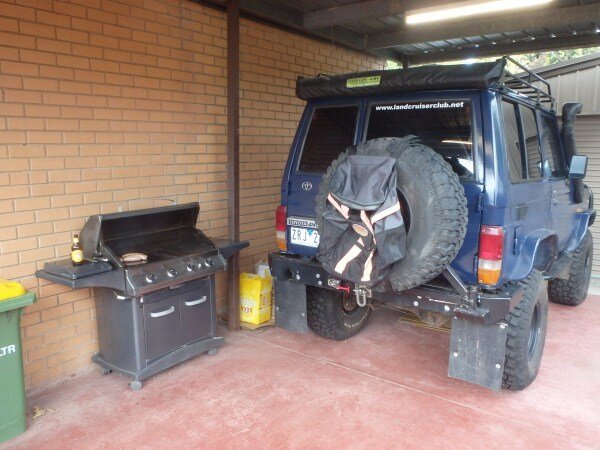
I did also have to do some work for customers this week.
I had to fit an oil catch can to my old house mates 80 series. Because hes running a ridiculous amount of boost (25psi) he keeps blowing hoses and belts and now hes found the engine breather tube is filling the air filter full of oil!
Just what you want in a vehicle built as an overlanding/ big distance tourer for remote travel!

The 80.

This was the oil catch can.


I designed and made a bracket out of 3mm steel, TIG welded it together and then got it electro-plated.


Space was pretty tight in the crowded engine bay and the only real place it could go was off the shock turret.


I got the top bolt in easy enough after removing the air box and drilling through a bracket.

But I had to unbolt the top of the shock and ratchet strap it down out of the way to get the other one in.


I could then mount the can and cut and attach the hose(s).


I also designed and built a load barrier for the rear and had it powder coated.


So that he can store things above the fridge and 30 second kitchen.


I also designed and started building a few other things but as they wont be finished till Monday I will post the pics next time as they will make more sense seeing the finished product.

I did make a start making the new metal work/mechanic bench for my garage!

This will be a bench for life and I want it to be very very strong!
I selected some really thick walled 50mm box and cut it to length on the Brobo saw and ground the primer off ready for welding.


I prepared the joints to ensure maximum root penetration and strength.

I chose to TIG weld the whole thing. Now TIG isnt really the right type of welding for this application, MIG is. But as time isnt really an issue and I want to get practice in on my TIG I decided to TIG it. It would also mean I would end up with every weld being beautiful, neat, super strong and no splatter to clean off.


With the square frame welded I could weld the legs on.

I actually found it more difficult to do it with TIG in terms of distortion from the heat of welding than I would have with MIG. With MIG I can weld it the side I need it to pull over/towards first and the metal will beautifully move in that direction but with TIG this didnt seem to be the case so I had to do a bit of welding then use a hammer to make the leg square in both direction before doing some more welding.


Legs done.

As this bench will have my big Record vice bolted to it I want to be able to bolt it down to the ground so I can really hammer and lever stuff in the vice when the need arises.
So I cut and drilled some metal for the feet.

I allowed 5mm all the way for weld and wanted the hole to still be centered.


I wanted to keep the bench open underneath so that I can sit on a stool and TIG weld and also to make it easier to clean underneath/around it. So I decided to just add rails on the 2 short sides to add some more strength.


I ordered a piece of 10mm thick steel for the top and picked it up in the 60 series.
I went for 10mm so that I hopefully dont get any distortion when welding on it with all the heat. It will also be nice and strong.

I laid the steel on a hop up.

And marked 75mm in on all the corners.
When I designed and built my big workbench in my welding bay at work I decided to have a 50mm overhang, but I've since realised this isnt always enough for clamping stuff in place.
So on my bench I've gone for a 75mm overhang and as my bench will be in the middle of the room/garage, I've gone for a 75mm overhang all the way around.

I then sat the upside down bench frame on the top and clamped it in place.

As I'm obviously going to have to move it a few times over the next few years before I eventually build my dream house with massive workshop, I want the top to be bolt on.
So I cut and drilled 4 pieces of 50mm flat.

Clamped them in place.

Drilled through and then put some rivnuts into the bench frame.

And bolted the pieces of flat in position.

The next job will be to weld the flat to the bench top and then separate the bench top from its frame.
The frame will then go for powder coating.
And that was my week at work!

I'm planning some more work on LJ soon. While sorting through all of LJ's spares and putting them in the shed I found a spare rear panhard rod.
So I'm thinking I will cut and modify it to be an adjustable one. Will probably sleeve it and make it much stronger at the same time. I can then get the rear axle properly centered and replace the badly worn trailing arm bushes.
I also need to design and make some proper rear spring mounts/adapters.
I'm also toying with the idea of dropping the suspension down a bit.


")


 coz I would like to see the 40 body conversion