Don't like the adverts?  Click here to remove them

LJ70 Build Thread!

I'm certain an electric motor won't work, not sure if a welder may be different.

What I meant in my Noddy way was if a single phase motor was wired to one of the phases on a 3 phase supply, then it would work (would it not?). The 4 pin plug would just be for the sake of continuity of plugs/sockets only.

I'm assuming that the welder is actually single-phase, meaning I see your point that no 3 phase equipment will work on a single phase supply, full-stop. (period as the Americans would say...)
 
I'm assuming that the welder is actually single-phase, meaning I see your point that no 3 phase equipment will work on a single phase supply, full-stop. (period as the Americans would say...)
The welder must be 3 phase why would it have a 3 phase plug fitted otherwise? unless of course it's only there to plug in at Bens workplace, in which case Ben didn't need to make an adapter he could just replace the 3 phase plug unless it would still be used at work. I'd like to know how Ben wired it to a three pin plug. You are right about the motor it would work tapped off one phase.
 
Last edited:
The welder is a very advanced piece of machinery that will run on any voltage!

Right from 110v in the USA to 500+ in Russia! :icon-cool:

Which was one of the major selling points as it means I can use it at work on 3 phase 415v and use all 200 amps of power!

Or I can bring it home and plug it in to single phase 240v and get maybe 120amps out of it.

I've only had it up to about 110amps so far and it worked great and the plug didnt get hot etc. :dance:

Its difficult to wire a 240v plug straight to the end as the cable is far too thick, so having a 3 phase plug then an adapter to bring it down to 240v single phase works well. :icon-smile:

More info here:

https://www.millerwelds.com/pdf/spec_sheets/AD4-8.pdf


Nice set up Ben, I like key-hole chain restraint and the locator/restraint at the base of the bottle and I'm surprised to see BOC, thought Australia would have had its own "AOC" or something:lol: :thumbup:

And, as well as a chair, I think you should have installed a bed so you can practice welding in your sleep :lol:

Thanks. :icon-smile:

BOC used to be called CIG (Commonwealth Industrial Gas) ASFAIK. :icon-ugeek:
 
The welder is a very advanced piece of machinery that will run on any voltage!

Right from 110v in the USA to 500+ in Russia! :icon-cool:

Which was one of the major selling points as it means I can use it at work on 3 phase 415v and use all 200 amps of power!

Or I can bring it home and plug it in to single phase 240v and get maybe 120amps out of it.

I've only had it up to about 110amps so far and it worked great and the plug didnt get hot etc. :dance:

Its difficult to wire a 240v plug straight to the end as the cable is far too thick, so having a 3 phase plug then an adapter to bring it down to 240v single phase works well. :icon-smile:

That sounds a great bit of kit, I had no idea something like that could be used on different phases. :icon-cool:
 
I started a big job on a customers Suzuki this week.
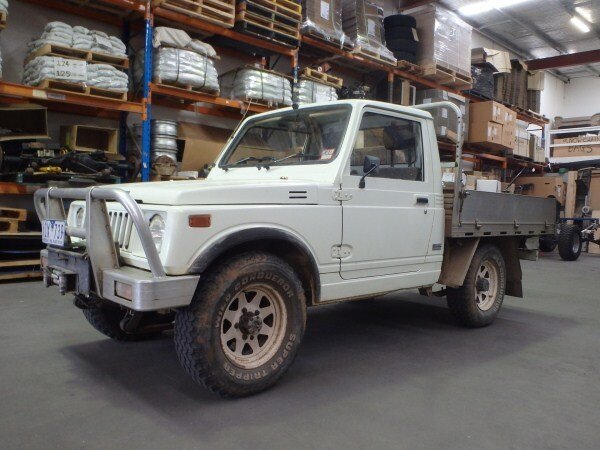
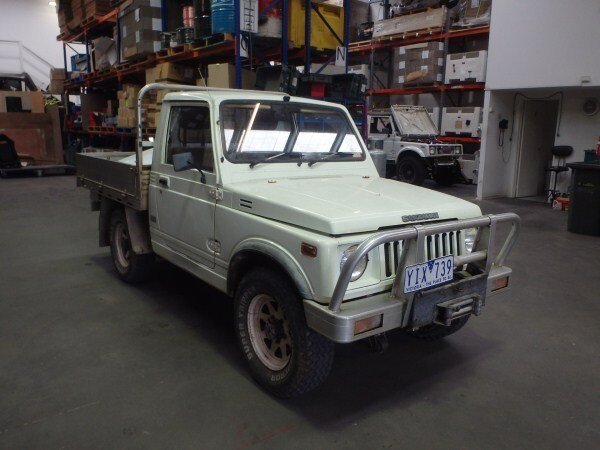
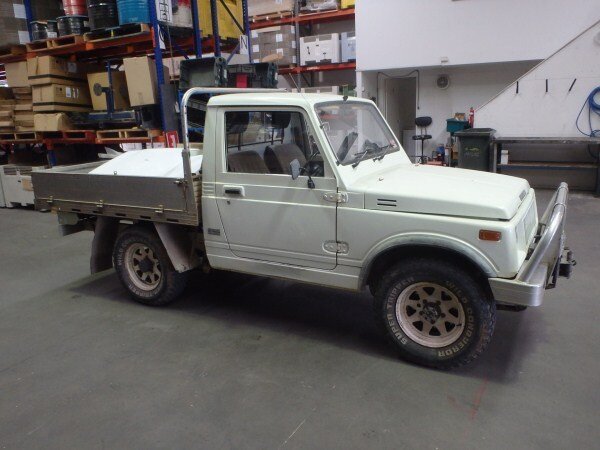
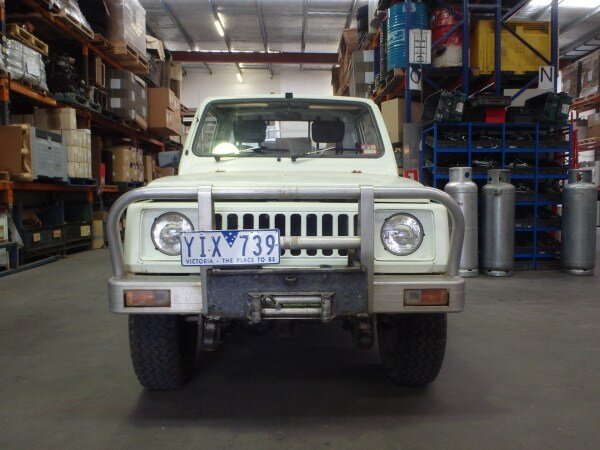
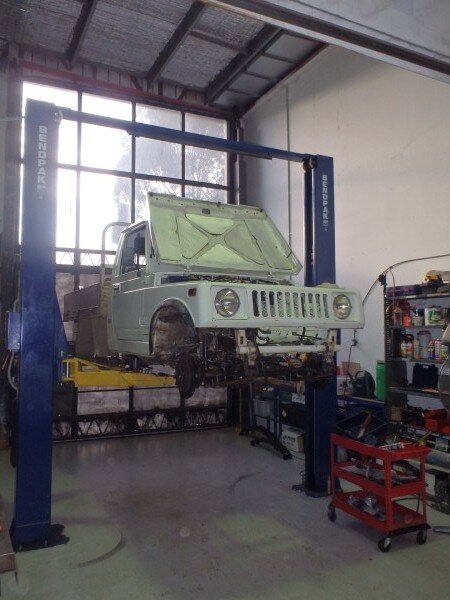
The car.

P1101466_zpsdtne5igu.jpg


P1101467_zpsojdpok1q.jpg


P1101468_zpscw1j2moj.jpg


P1101469_zps0dsik1fr.jpg


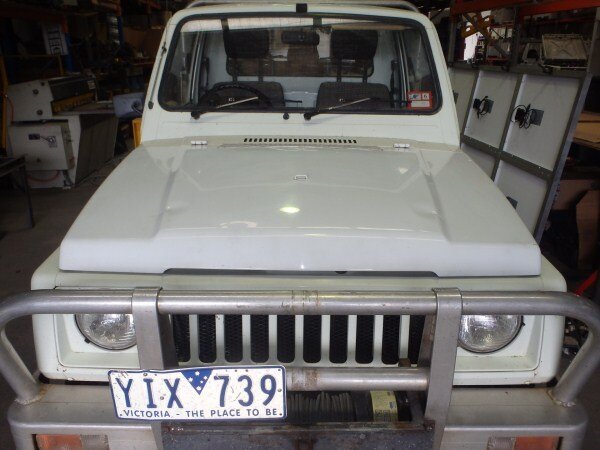
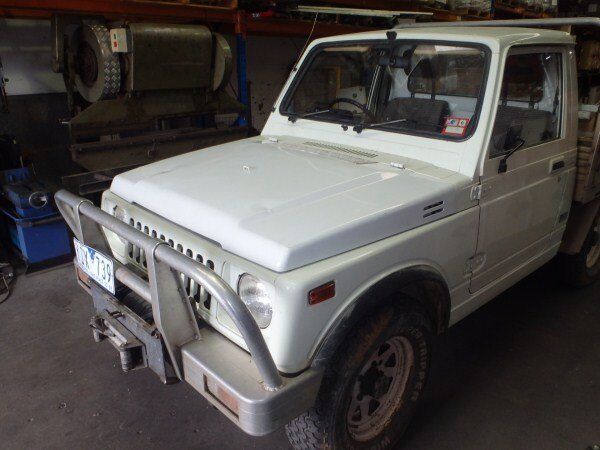
I've got to do an engine conversion to replace the tiny 1 litre with a slightly bigger 1.3. The first job was to fit a bonnet from a 1.3 which has a bulge to allow for the higher engine.

P1101470_zpskuvgcmks.jpg


P1101471_zps0o3ol1jy.jpg


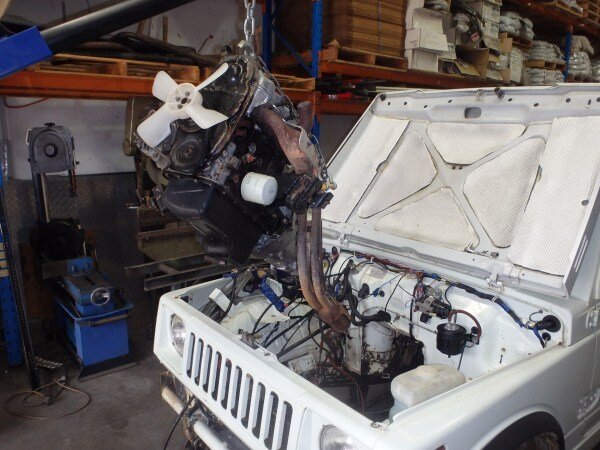
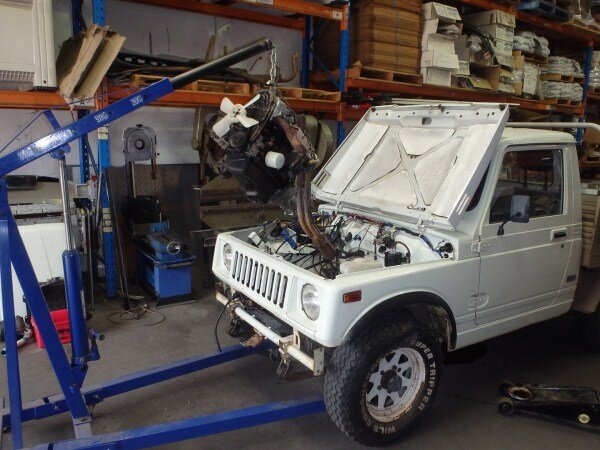
I pulled the old engine and gearbox out.

P1111474_zpsuukgyigw.jpg


P1111475_zpsr8tfgmzm.jpg


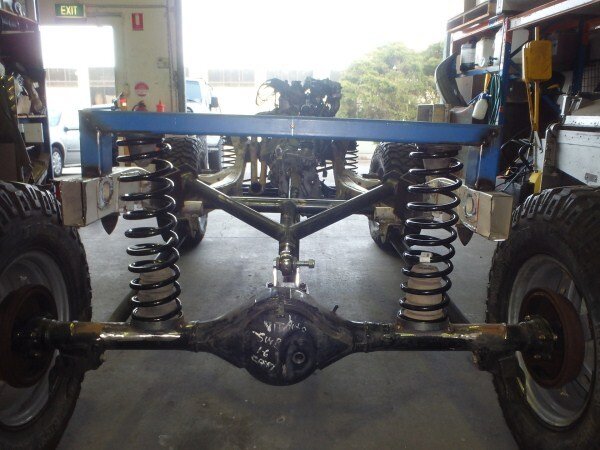
With that done I got it on the hoist for a full front end rebuild of the axle, with all new bearings and seals.

While on the hoist I've got to change all the suspension and remove and clean the fuel tank out.

P1121476_zps5toetlau.jpg


On Friday I finally got a day to work on the Jimny project.

P1121477_zpsau4omaji.jpg


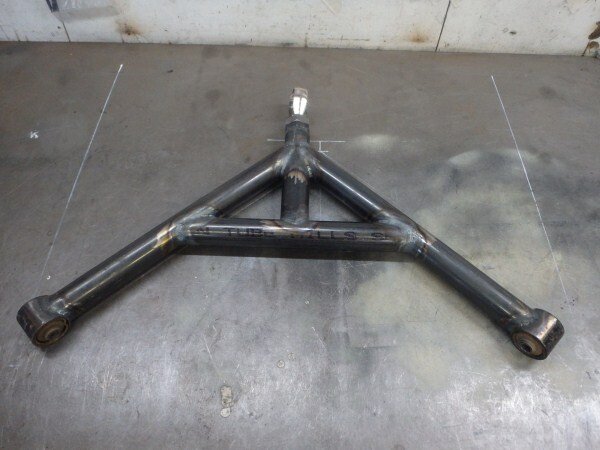
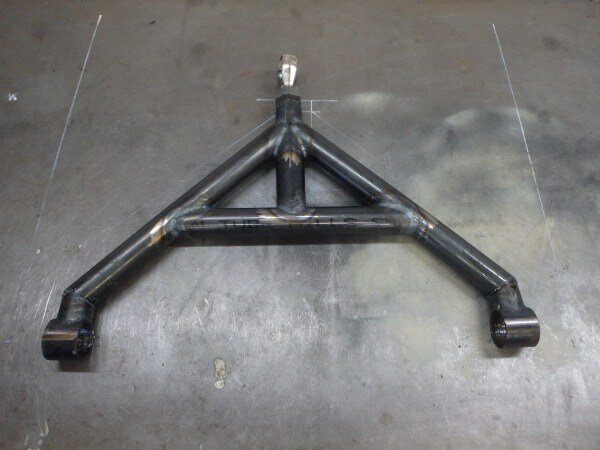
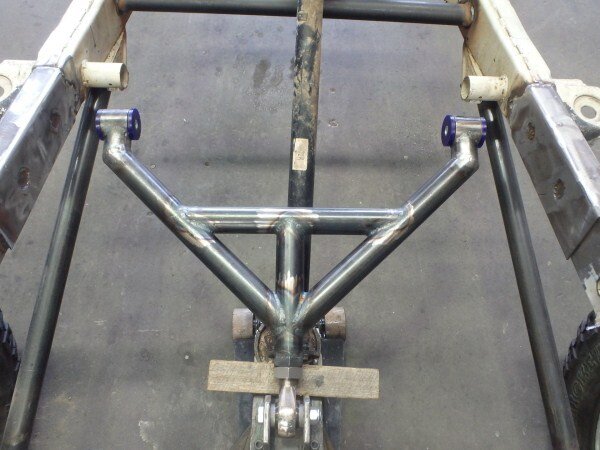
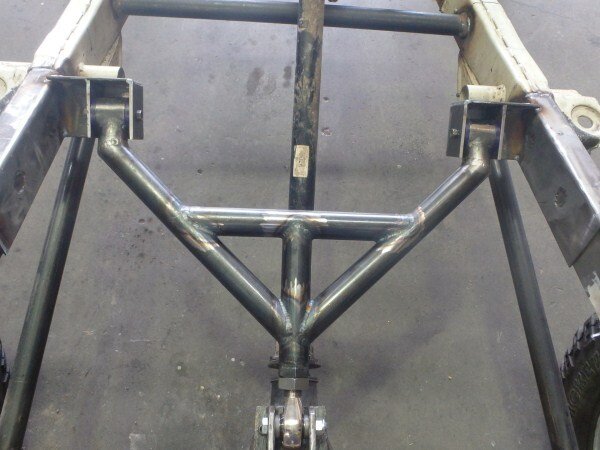
First job was to alter the A frame on the rear suspension setup.

P1121478_zpssvahgsqu.jpg


P1121479_zpsftmu4deo.jpg


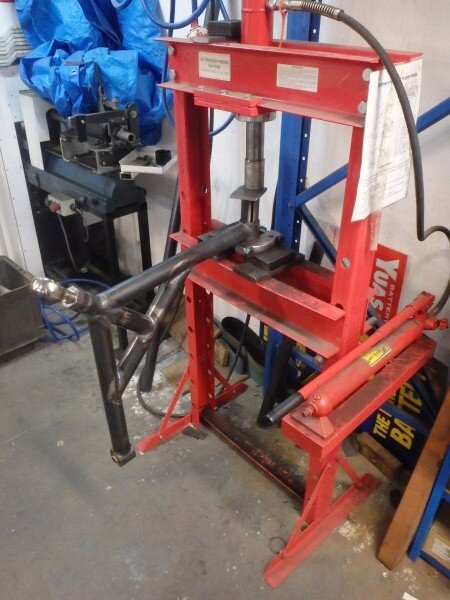
Removed the A frame.

P1121480_zpsoxtaahp4.jpg


Pressed the bushes out.

P1121481_zps7ebknrdv.jpg


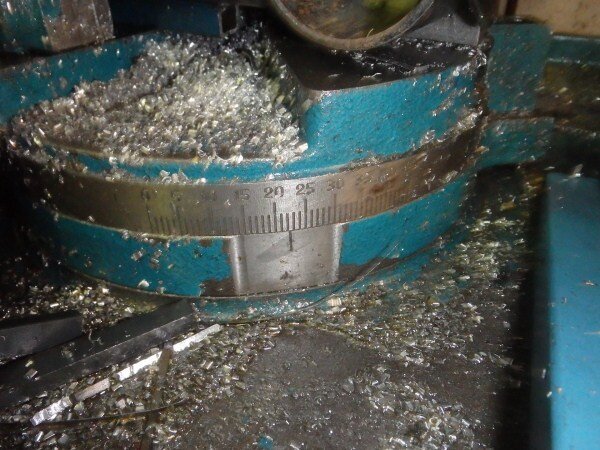
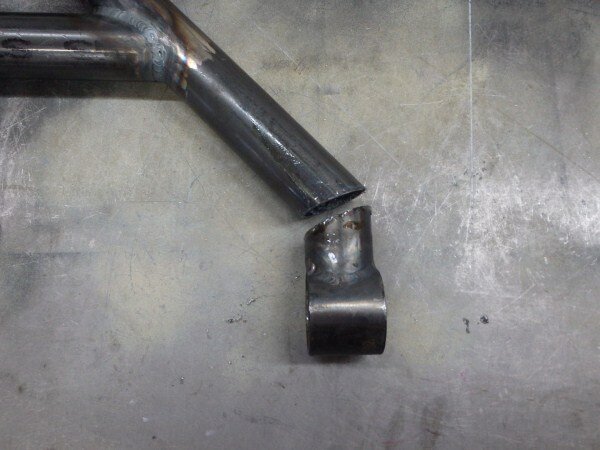
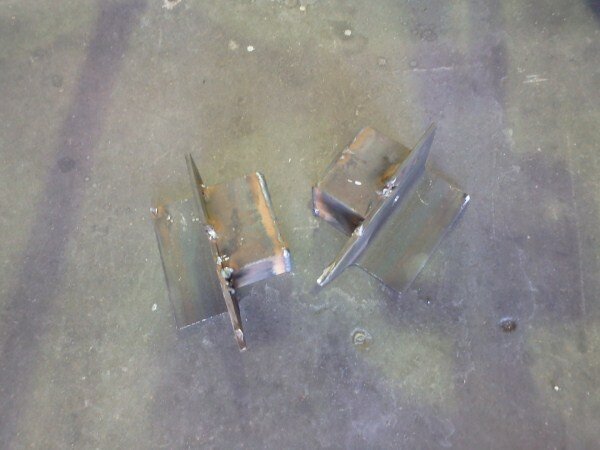
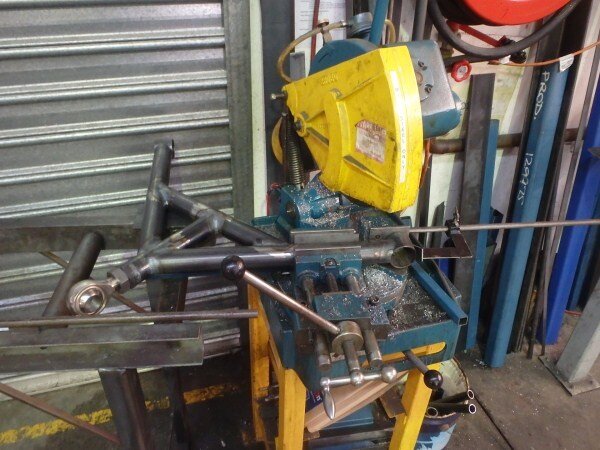
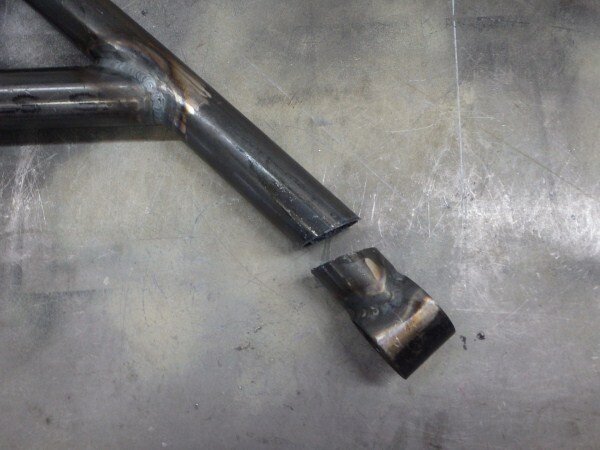
I could then put it on the Brobo saw to cut mounts off.

P1121482_zpsplyrstzp.jpg


22.5 degree cut in order to turn the mount 45 degrees.

P1121484_zpsqp4zfikj.jpg


P1121485_zpsx5vsmvgg.jpg


P1121486_zpsmvxjmupb.jpg


I could then turn the ends around.

P1121488_zpsbsr3dryw.jpg


P1121487_zpslhmldjug.jpg


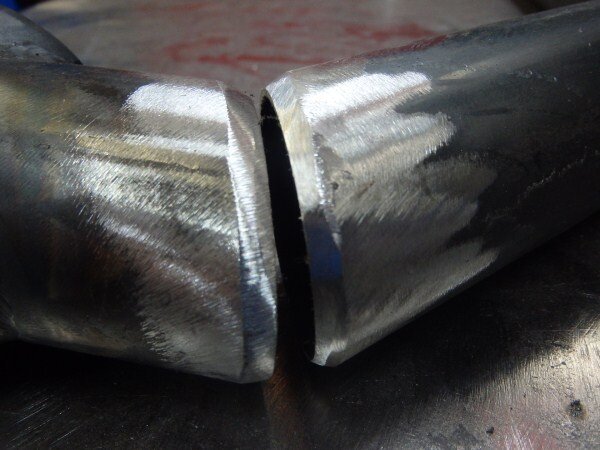
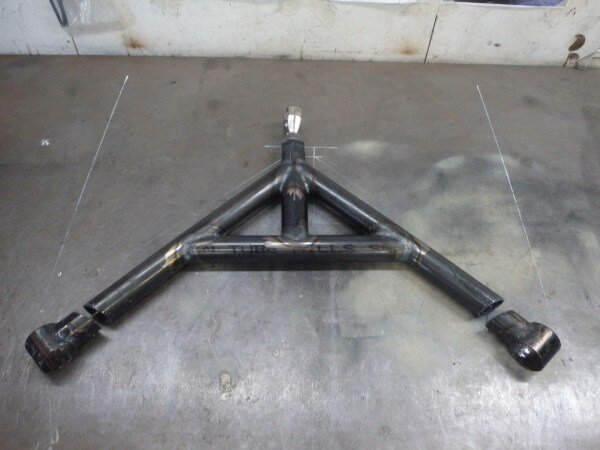
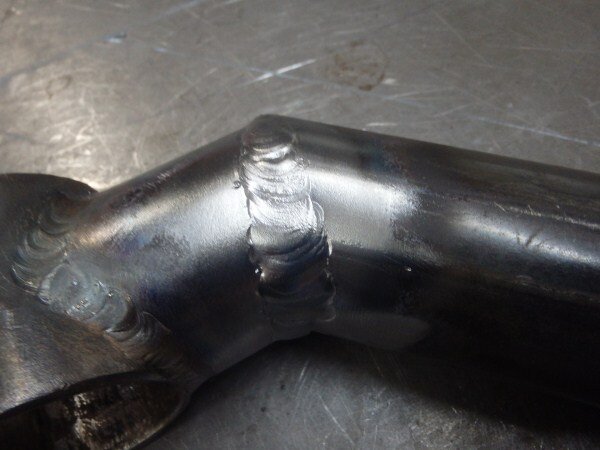
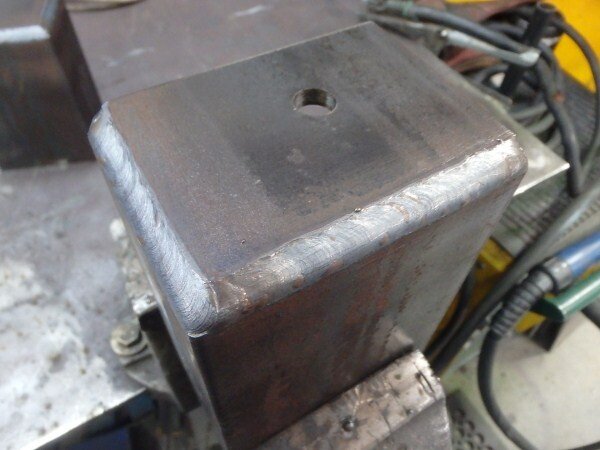
To ensure a really strong weld I ground the ends of the tube to ensure I would get full root penetration.
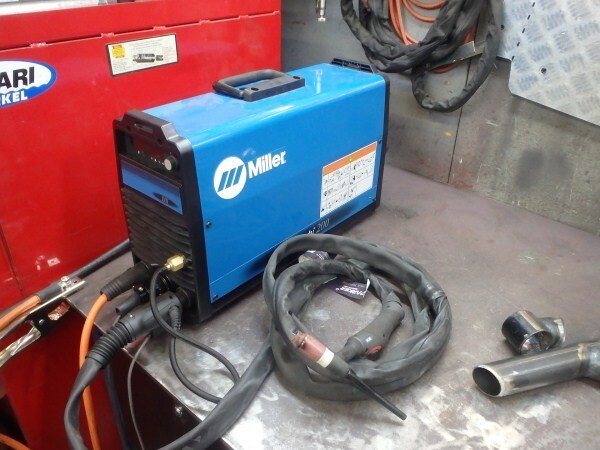
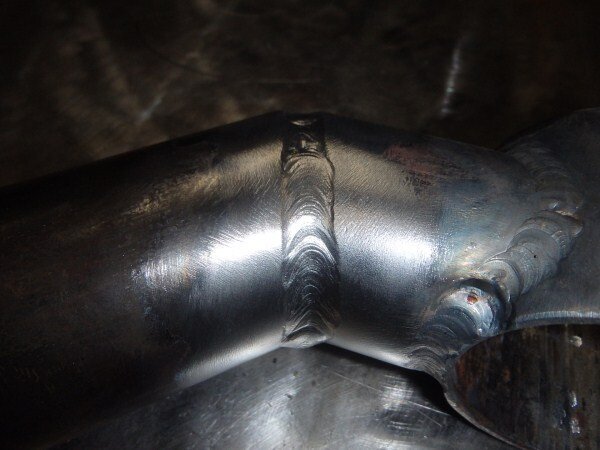
P1121494_zpslvzk77wc.jpg


Got my TIG setup.

P1121495_zps5squqyui.jpg


P1121496_zpswz2ysppi.jpg


Welded it in 2 passes, a root pass first.

P1121499_zpsswcjtzof.jpg


P1011500_zpsxppaa2wl.jpg


Followed by a capping run.

P1011502_zpsmxxhqrp6.jpg


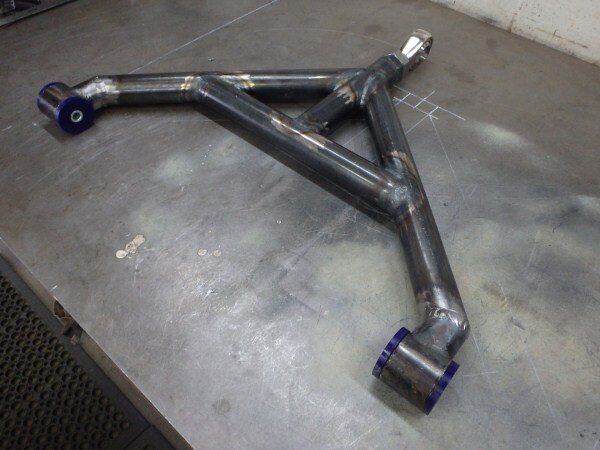
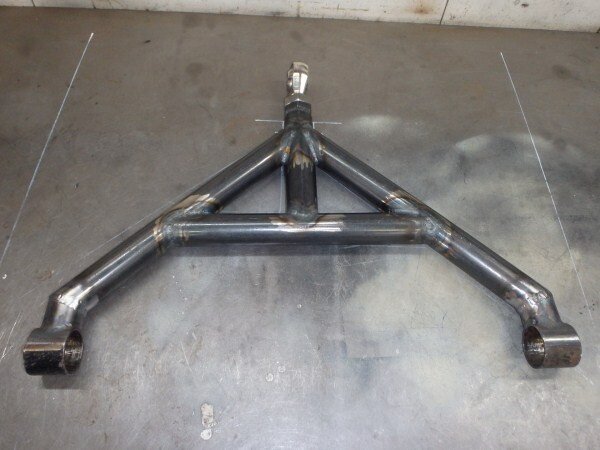
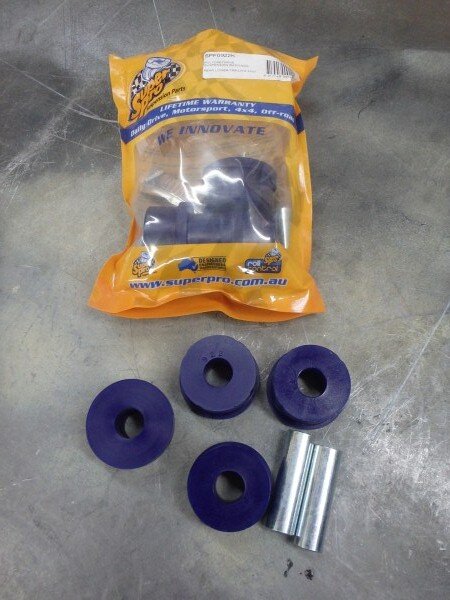
Got some new bushes.

P1011503_zpsxjsfza4c.jpg


P1011504_zpsewknnb5b.jpg


P1011505_zpsoeusmanm.jpg


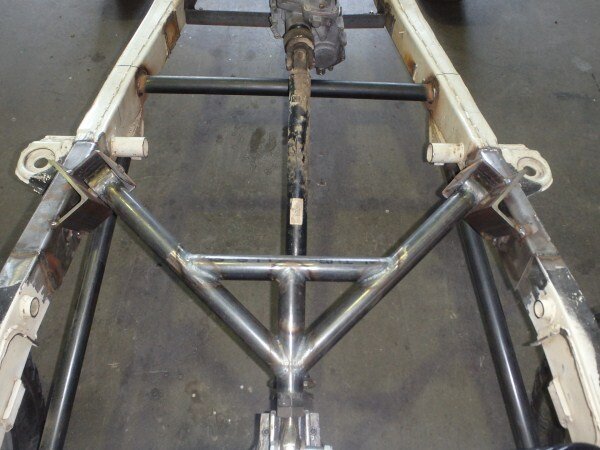
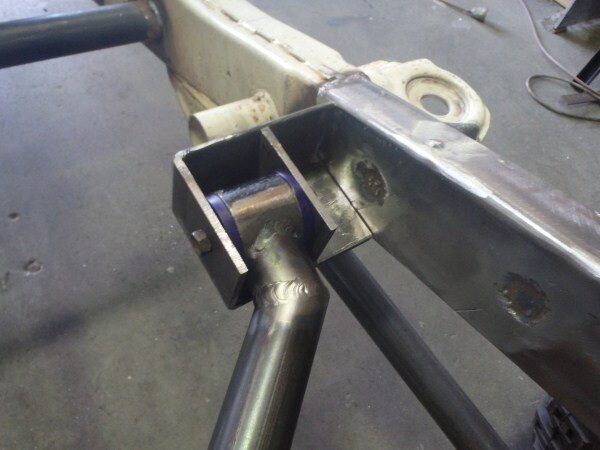
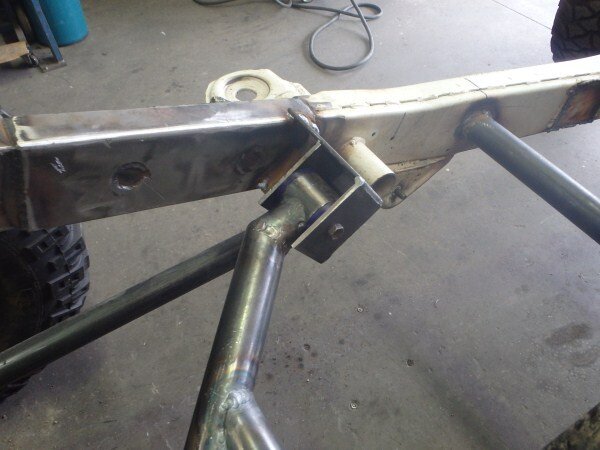
Cut the old mounts off the chassis.

P1121490_zps2fs2egts.jpg


P1121491_zpshyqcle5e.jpg


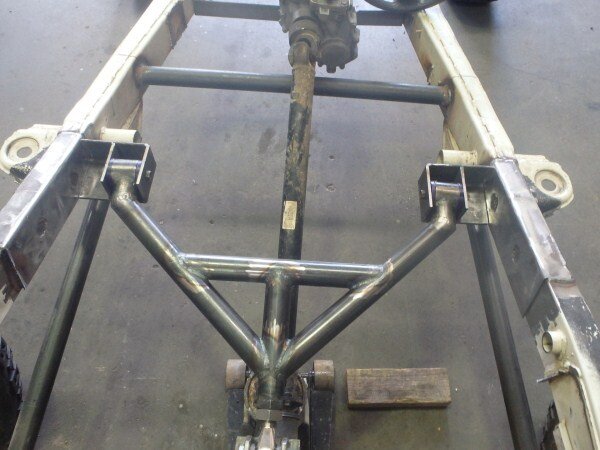
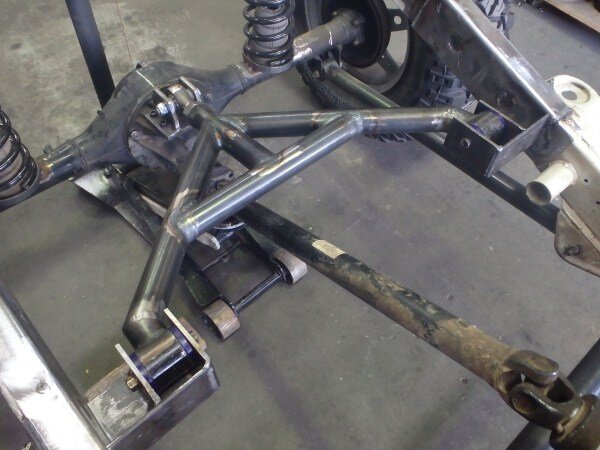
Bolted the A frame in position.

P1011506_zpsugdmrxop.jpg


P1011507_zpsi0gi1ord.jpg


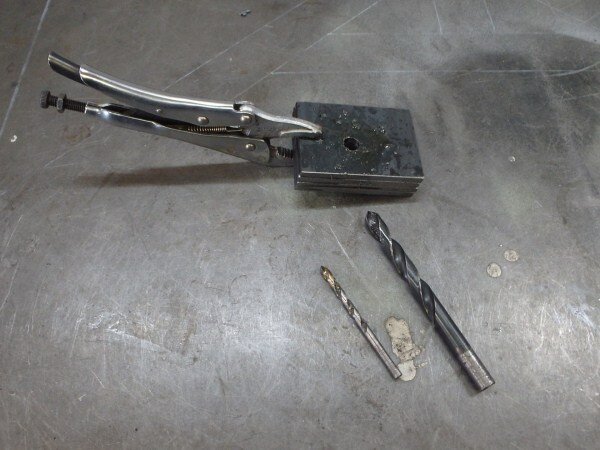
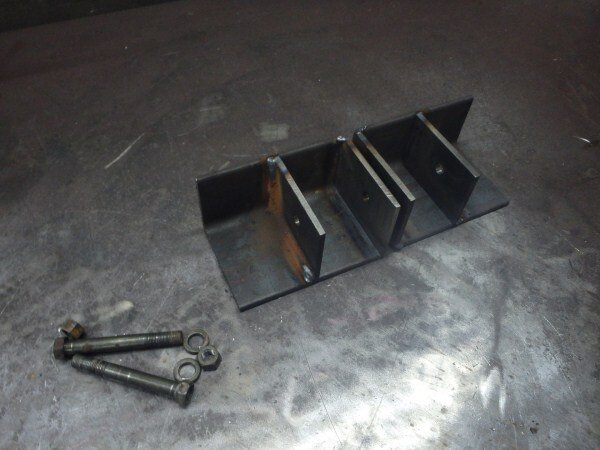
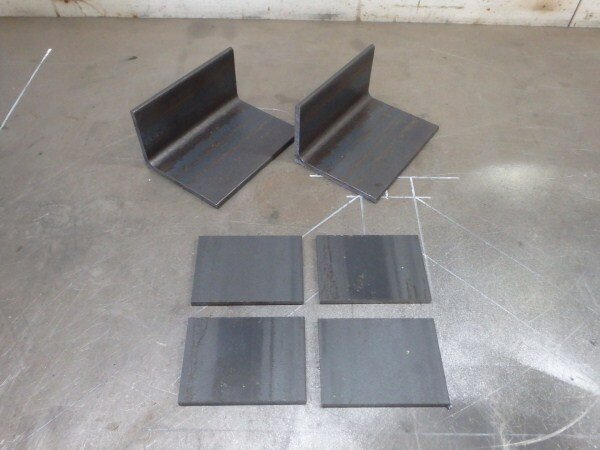
I cut some 6mm thick steel.

P1011508_zps3pclvlqp.jpg


Clamped the 6mm flat together and stack drilled it on the pillar drill.

P1011509_zpshzbcuhx7.jpg


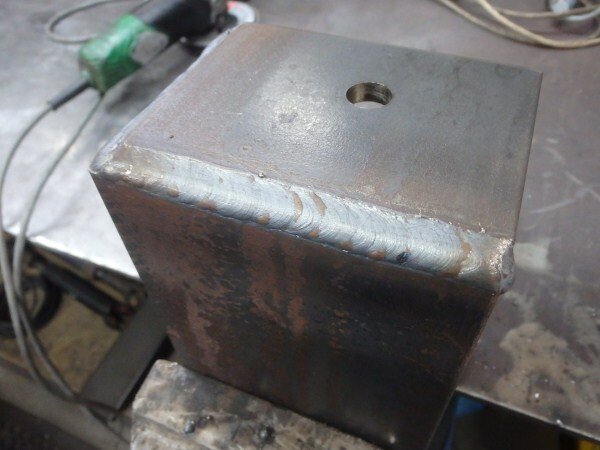
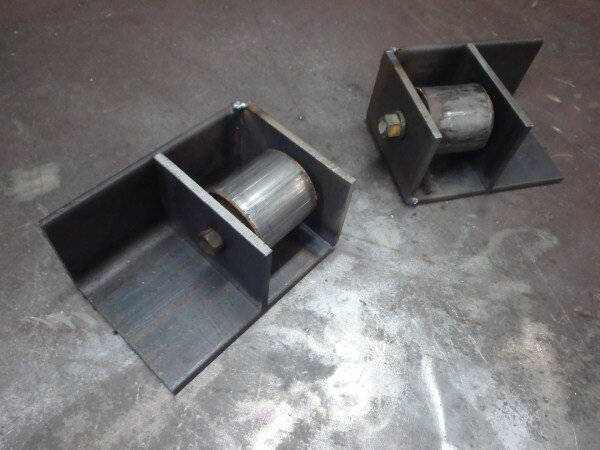
Welded a piece of flat on the end of each piece of angle.

P1011511_zpsyprvm2et.jpg


P1011513_zpsaeuz1blp.jpg


I bolted the other pieces of flat in position using the old bushes and welded the flat to the angle.

P1011514_zpsqfd2cxoq.jpg


P1011515_zpswdfhcrbk.jpg


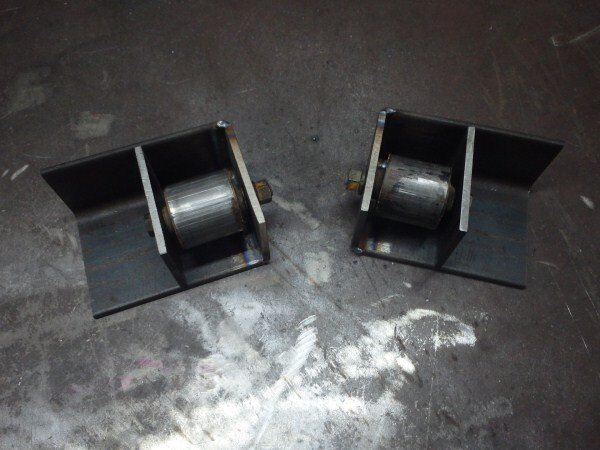
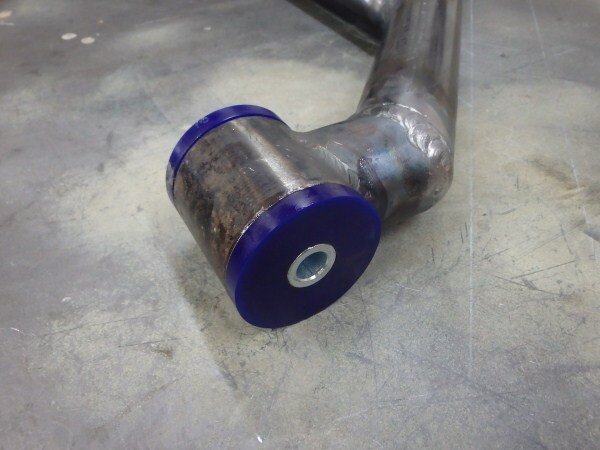
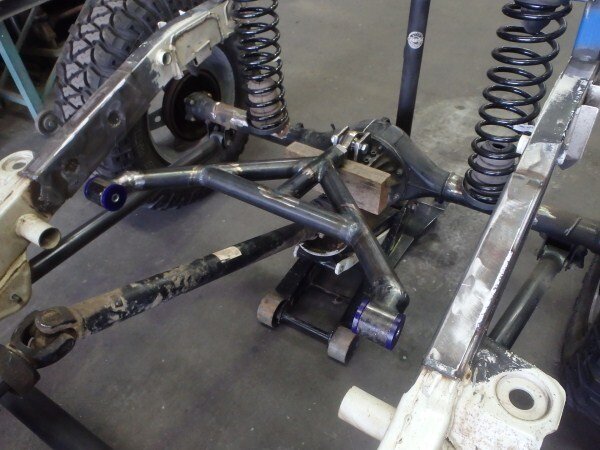
Bushes removed and ready to be welded to the chassis.

P1011516_zpsxzqv7qjv.jpg


P1011517_zpsc7csuvda.jpg


P1011518_zpspdf9dadi.jpg


P1011520_zpsnvigqvh6.jpg


P1011521_zpsxtgdwmim.jpg


P1011522_zpsrqlca8m2.jpg


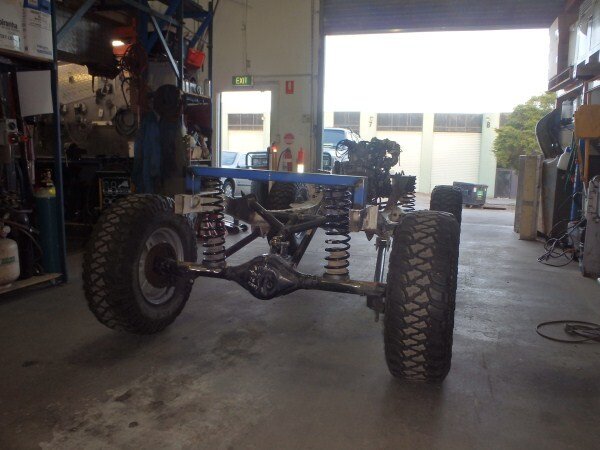
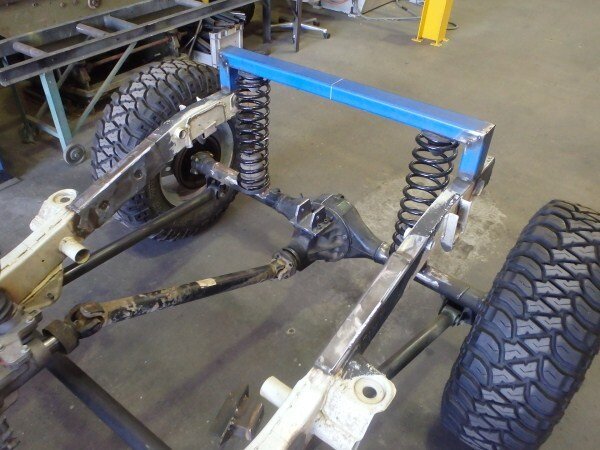
I could then test the articulation.

P1011523_zpsyuiwucm6.jpg


P1011524_zpszkq6dxp1.jpg


P1011525_zpskssfosdj.jpg


There isnt any weight above the rear springs so I think thats why their not compressing. With the cage, fuel tank, batteries, winch, seats etc. it should work better, if not we can source some softer springs.

P1011526_zpsre1r5oh9.jpg


P1011527_zpsb3s2stfq.jpg


P1011528_zpsxfr0q4e6.jpg


P1011529_zpsjzrg05xk.jpg


P1011530_zpsfedqkl2l.jpg


P1011531_zpsuewlawqx.jpg


P1011532_zpswptu02m2.jpg


The next major job is the roll cage but in order to design it I need to know the position and height of the drivers seat and steering wheel.

I fitted the steering column, steering wheel and dash board loosely in position.

P1011533_zps96xpaqmn.jpg


P1011534_zps0srwta5m.jpg


P1011535_zps51n78flb.jpg


I cut and welded some angle together.

P1011536_zpsjpc948y6.jpg


Tacked them to the chassis.

P1011537_zpsj14p6cip.jpg


And bolted the dash in position.

P1011538_zps5pjquq4u.jpg


I could then work out the height of the seat.

Clamped a small pallet to the chassis.

P1011539_zpshyuodzsr.jpg


That raised the seat up high enough.

P1011540_zpsqy4u2wp7.jpg


P1011541_zpshzympmii.jpg


And thats as far as I got.

P1011542_zpsajxcicsu.jpg


P1011543_zps5sqxovpe.jpg


I've started designing the cage and I want it be the exact shape and size of a Jimny body. So the front hoop will follow the angles and rake of the windscreen. :icon-biggrin:

And finally LJ............

The replacement instrument cluster I fitted and tried to connect, fried the oil pressure sender gauge on my engine as the instrument cluster was from a 24volt car and not 12v. Or atleast thats what the auto electrician thinks.

Removed the old one.

P1011545_zpspwerfeav.jpg


P1011546_zpsidxembvj.jpg


Ordered a new one.

I'm not convinced its exactly the right one, but I'm fairly certain it will work.

P1011547_zps5cvhtqyk.jpg


P1011548_zps99iifqht.jpg


P1011549_zpseolkveeo.jpg


I've not been happy with how high LJ is for a while now, its sitting far too high which compromises the handling and means I run the risk of getting stopped by the police.

P1011553_zpsofj7jbmu.jpg


P1011554_zpswmc5inkt.jpg


P1011555_zpstud9phqy.jpg


I've used springs which are readily available here (79 series fronts) but they are too high.

If I owned an 80 it would be easy with loads of companies making suspension, but LJ being a reasonably rare model and with 70's with this suspension setup only being sold for about 5 years and never in Australia, options are limited!

A few companies make springs and shocks for earlier LJ70's which have a different suspension setup but AFAIK only one Australian company make suspension for the later square headlight models like LJ.

Dobinsons!

http://www.dobinsonsprings.com/4x4-vehicles/toyota/landcruiser/70-series/bundera/toy-65-a/

My boss spoke to Mr Dobinson himself and got me a great one off price! :dance:

So hes ordered me the +60mm lift kit.

Hoping to get it all fitted before my Easter High Country trip. :icon-biggrin:
 

Attachments

  • P1101466_zpsdtne5igu.jpg
    P1101466_zpsdtne5igu.jpg
    57 KB · Views: 53
  • P1101467_zpsojdpok1q.jpg
    P1101467_zpsojdpok1q.jpg
    57.2 KB · Views: 67
  • P1101468_zpscw1j2moj.jpg
    P1101468_zpscw1j2moj.jpg
    65.6 KB · Views: 62
  • P1101469_zps0dsik1fr.jpg
    P1101469_zps0dsik1fr.jpg
    68 KB · Views: 66
  • P1101470_zpskuvgcmks.jpg
    P1101470_zpskuvgcmks.jpg
    55.3 KB · Views: 60
  • P1101471_zps0o3ol1jy.jpg
    P1101471_zps0o3ol1jy.jpg
    59.3 KB · Views: 51
  • P1111474_zpsuukgyigw.jpg
    P1111474_zpsuukgyigw.jpg
    78.2 KB · Views: 55
  • P1111475_zpsr8tfgmzm.jpg
    P1111475_zpsr8tfgmzm.jpg
    77.6 KB · Views: 64
  • P1121476_zps5toetlau.jpg
    P1121476_zps5toetlau.jpg
    80.3 KB · Views: 59
  • P1121477_zpsau4omaji.jpg
    P1121477_zpsau4omaji.jpg
    55.9 KB · Views: 85
  • P1121478_zpssvahgsqu.jpg
    P1121478_zpssvahgsqu.jpg
    67 KB · Views: 63
  • P1121479_zpsftmu4deo.jpg
    P1121479_zpsftmu4deo.jpg
    62 KB · Views: 54
  • P1121480_zpsoxtaahp4.jpg
    P1121480_zpsoxtaahp4.jpg
    51.8 KB · Views: 60
  • P1121481_zps7ebknrdv.jpg
    P1121481_zps7ebknrdv.jpg
    95.9 KB · Views: 47
  • P1121482_zpsplyrstzp.jpg
    P1121482_zpsplyrstzp.jpg
    78.5 KB · Views: 72
  • P1121484_zpsqp4zfikj.jpg
    P1121484_zpsqp4zfikj.jpg
    87.7 KB · Views: 68
  • P1121485_zpsx5vsmvgg.jpg
    P1121485_zpsx5vsmvgg.jpg
    49.8 KB · Views: 67
  • P1121486_zpsmvxjmupb.jpg
    P1121486_zpsmvxjmupb.jpg
    52.9 KB · Views: 57
  • P1121488_zpsbsr3dryw.jpg
    P1121488_zpsbsr3dryw.jpg
    51.4 KB · Views: 63
  • P1121487_zpslhmldjug.jpg
    P1121487_zpslhmldjug.jpg
    52.9 KB · Views: 78
  • P1121494_zpslvzk77wc.jpg
    P1121494_zpslvzk77wc.jpg
    56.1 KB · Views: 63
  • P1121495_zps5squqyui.jpg
    P1121495_zps5squqyui.jpg
    67.7 KB · Views: 67
  • P1121496_zpswz2ysppi.jpg
    P1121496_zpswz2ysppi.jpg
    58.2 KB · Views: 54
  • P1121499_zpsswcjtzof.jpg
    P1121499_zpsswcjtzof.jpg
    49.5 KB · Views: 62
  • P1011500_zpsxppaa2wl.jpg
    P1011500_zpsxppaa2wl.jpg
    50.9 KB · Views: 69
  • P1011502_zpsmxxhqrp6.jpg
    P1011502_zpsmxxhqrp6.jpg
    46.5 KB · Views: 55
  • P1011503_zpsxjsfza4c.jpg
    P1011503_zpsxjsfza4c.jpg
    85.8 KB · Views: 68
  • P1011504_zpsewknnb5b.jpg
    P1011504_zpsewknnb5b.jpg
    53.6 KB · Views: 60
  • P1011505_zpsoeusmanm.jpg
    P1011505_zpsoeusmanm.jpg
    50.3 KB · Views: 68
  • P1121490_zps2fs2egts.jpg
    P1121490_zps2fs2egts.jpg
    45.1 KB · Views: 58
  • P1121491_zpshyqcle5e.jpg
    P1121491_zpshyqcle5e.jpg
    71.5 KB · Views: 58
  • P1011506_zpsugdmrxop.jpg
    P1011506_zpsugdmrxop.jpg
    61.6 KB · Views: 59
  • P1011507_zpsi0gi1ord.jpg
    P1011507_zpsi0gi1ord.jpg
    68.4 KB · Views: 79
  • P1011508_zps3pclvlqp.jpg
    P1011508_zps3pclvlqp.jpg
    47.5 KB · Views: 85
  • P1011509_zpshzbcuhx7.jpg
    P1011509_zpshzbcuhx7.jpg
    57.8 KB · Views: 63
  • P1011511_zpsyprvm2et.jpg
    P1011511_zpsyprvm2et.jpg
    51.6 KB · Views: 59
  • P1011513_zpsaeuz1blp.jpg
    P1011513_zpsaeuz1blp.jpg
    49.3 KB · Views: 67
  • P1011514_zpsqfd2cxoq.jpg
    P1011514_zpsqfd2cxoq.jpg
    57.1 KB · Views: 57
  • P1011515_zpswdfhcrbk.jpg
    P1011515_zpswdfhcrbk.jpg
    54.2 KB · Views: 58
  • P1011516_zpsxzqv7qjv.jpg
    P1011516_zpsxzqv7qjv.jpg
    52.1 KB · Views: 83
  • P1011517_zpsc7csuvda.jpg
    P1011517_zpsc7csuvda.jpg
    58.8 KB · Views: 62
  • P1011518_zpspdf9dadi.jpg
    P1011518_zpspdf9dadi.jpg
    47.7 KB · Views: 59
  • P1101466_zpsdtne5igu.jpg
    P1101466_zpsdtne5igu.jpg
    57 KB · Views: 59
  • P1101467_zpsojdpok1q.jpg
    P1101467_zpsojdpok1q.jpg
    57.2 KB · Views: 69
  • P1101468_zpscw1j2moj.jpg
    P1101468_zpscw1j2moj.jpg
    65.6 KB · Views: 74
  • P1101469_zps0dsik1fr.jpg
    P1101469_zps0dsik1fr.jpg
    68 KB · Views: 62
  • P1101470_zpskuvgcmks.jpg
    P1101470_zpskuvgcmks.jpg
    55.3 KB · Views: 66
  • P1101471_zps0o3ol1jy.jpg
    P1101471_zps0o3ol1jy.jpg
    59.3 KB · Views: 52
  • P1111474_zpsuukgyigw.jpg
    P1111474_zpsuukgyigw.jpg
    78.2 KB · Views: 59
  • P1111475_zpsr8tfgmzm.jpg
    P1111475_zpsr8tfgmzm.jpg
    77.6 KB · Views: 60
  • P1121476_zps5toetlau.jpg
    P1121476_zps5toetlau.jpg
    80.3 KB · Views: 58
  • P1121477_zpsau4omaji.jpg
    P1121477_zpsau4omaji.jpg
    55.9 KB · Views: 59
  • P1121478_zpssvahgsqu.jpg
    P1121478_zpssvahgsqu.jpg
    67 KB · Views: 51
  • P1121479_zpsftmu4deo.jpg
    P1121479_zpsftmu4deo.jpg
    62 KB · Views: 96
  • P1121480_zpsoxtaahp4.jpg
    P1121480_zpsoxtaahp4.jpg
    51.8 KB · Views: 56
  • P1121481_zps7ebknrdv.jpg
    P1121481_zps7ebknrdv.jpg
    95.9 KB · Views: 59
  • P1121482_zpsplyrstzp.jpg
    P1121482_zpsplyrstzp.jpg
    78.5 KB · Views: 51
  • P1121484_zpsqp4zfikj.jpg
    P1121484_zpsqp4zfikj.jpg
    87.7 KB · Views: 55
  • P1121485_zpsx5vsmvgg.jpg
    P1121485_zpsx5vsmvgg.jpg
    49.8 KB · Views: 51
  • P1121486_zpsmvxjmupb.jpg
    P1121486_zpsmvxjmupb.jpg
    52.9 KB · Views: 67
  • P1121488_zpsbsr3dryw.jpg
    P1121488_zpsbsr3dryw.jpg
    51.4 KB · Views: 58
  • P1121487_zpslhmldjug.jpg
    P1121487_zpslhmldjug.jpg
    52.9 KB · Views: 57
  • P1121494_zpslvzk77wc.jpg
    P1121494_zpslvzk77wc.jpg
    56.1 KB · Views: 56
  • P1121495_zps5squqyui.jpg
    P1121495_zps5squqyui.jpg
    67.7 KB · Views: 60
  • P1121496_zpswz2ysppi.jpg
    P1121496_zpswz2ysppi.jpg
    58.2 KB · Views: 59
  • P1121499_zpsswcjtzof.jpg
    P1121499_zpsswcjtzof.jpg
    49.5 KB · Views: 55
  • P1011500_zpsxppaa2wl.jpg
    P1011500_zpsxppaa2wl.jpg
    50.9 KB · Views: 60
  • P1011502_zpsmxxhqrp6.jpg
    P1011502_zpsmxxhqrp6.jpg
    46.5 KB · Views: 52
  • P1011503_zpsxjsfza4c.jpg
    P1011503_zpsxjsfza4c.jpg
    85.8 KB · Views: 52
  • P1011504_zpsewknnb5b.jpg
    P1011504_zpsewknnb5b.jpg
    53.6 KB · Views: 68
  • P1011505_zpsoeusmanm.jpg
    P1011505_zpsoeusmanm.jpg
    50.3 KB · Views: 59
  • P1121490_zps2fs2egts.jpg
    P1121490_zps2fs2egts.jpg
    45.1 KB · Views: 55
  • P1121491_zpshyqcle5e.jpg
    P1121491_zpshyqcle5e.jpg
    71.5 KB · Views: 49
  • P1011506_zpsugdmrxop.jpg
    P1011506_zpsugdmrxop.jpg
    61.6 KB · Views: 59
  • P1011507_zpsi0gi1ord.jpg
    P1011507_zpsi0gi1ord.jpg
    68.4 KB · Views: 58
  • P1011509_zpshzbcuhx7.jpg
    P1011509_zpshzbcuhx7.jpg
    57.8 KB · Views: 53
  • P1011508_zps3pclvlqp.jpg
    P1011508_zps3pclvlqp.jpg
    47.5 KB · Views: 52
  • P1011511_zpsyprvm2et.jpg
    P1011511_zpsyprvm2et.jpg
    51.6 KB · Views: 69
  • P1011513_zpsaeuz1blp.jpg
    P1011513_zpsaeuz1blp.jpg
    49.3 KB · Views: 57
  • P1011514_zpsqfd2cxoq.jpg
    P1011514_zpsqfd2cxoq.jpg
    57.1 KB · Views: 77
  • P1011515_zpswdfhcrbk.jpg
    P1011515_zpswdfhcrbk.jpg
    54.2 KB · Views: 47
  • P1011516_zpsxzqv7qjv.jpg
    P1011516_zpsxzqv7qjv.jpg
    52.1 KB · Views: 61
  • P1011517_zpsc7csuvda.jpg
    P1011517_zpsc7csuvda.jpg
    58.8 KB · Views: 69
  • P1011518_zpspdf9dadi.jpg
    P1011518_zpspdf9dadi.jpg
    47.7 KB · Views: 52
  • P1011520_zpsnvigqvh6.jpg
    P1011520_zpsnvigqvh6.jpg
    62.9 KB · Views: 62
  • P1011521_zpsxtgdwmim.jpg
    P1011521_zpsxtgdwmim.jpg
    57.2 KB · Views: 48
  • P1011522_zpsrqlca8m2.jpg
    P1011522_zpsrqlca8m2.jpg
    53.2 KB · Views: 44
Dobinson and King Springs are both pretty good; I've got a mate who does performance suspension for (old) Volvo's and King Springs do a custom spring rate for him, which is different to their normal lowering springs.
 
Don't like the adverts?  Click here to remove them
Hi Ben can't wait to see the jimmy in action! Looks like a good price of kit!!
 
Also got my 1kzt engine in this weekend all runs fine just getting a new hydrolics hose made up for powersteering on Monday plus having my 2.4 rad reworked to fit the kzt engine so should get that back on Tuesday.
Did u use the 4runner slave cylinder? Or 2.4?
Also having problems with oil pressure switch too which on did u buy to do the job? I can't wait to drive it now will be working on it on nights after work to get it done this weekend! :icon-biggrin::icon-biggrin::icon-biggrin::icon-biggrin:
 
Thanks Craig. :thumbup:

Awesome news on the 1KZ-T, just had a look at you're build thread. :clap:

You in love with the new found power and torque? :icon-twisted:

I'm pretty sure I used the 4-runner one. It mounts to the bell housing doesnt it?

If it does then I will have used the 4-runner one. :think:

Regarding the oil pressure I've had a few issues trying to get mine setup and working properly, a lot of this was down to me connecting it up wrong in the first place and frying the control box which is mounted above the glove box under the dash. It also melted my gauge slightly. Then I fitted a new set of clocks I got from Karl, but as they were out of an import 24volt 70 they fried my oil pressure sender gauge. :oops: :doh:

But after some more work by the auto electrician at work and the purchase of some replacement parts I think I should have it working this week. :pray:

I will make a note of what coloured wires go where and get some pics and that might help you get yours connected properly. :thumbup:
 
Thankyou Ben

yeah if you could that would be great as don't like the idea of not being able to see the gauge moving lol like looking at temp and oil gauges always
many thanks
 
Use the oil pressure sender from the 2.4 engine as this matches your gauge. Threads are the same .
difference between the 3.0 sender is that the sender also has a warning light, the 2.4 is only used to indicate the pressure.
 
Ok then that's handy to no thanks Garry

maybe a dumb question but how far do I do it up all the way or half way?? Cheers
 
The thread on the sender unit is tapered . Therefore apply a small amount of PTFE tape and tighten until half to three quarters of the way into block. Don't over tighten or you could strip the threads.
 
I got to do some work on the project this week, but just for one day.

P1051565_zpskrlna84t.jpg

The first job was to work out where the front hoop of the cage would be.

P1051566_zpsm38fgbcy.jpg

The old body mounts needed removing.

P1051567_zps4hzlwvpk.jpg

P1051568_zpsstkuucl4.jpg

P1051569_zpskswadgzy.jpg

P1051570_zps6mjhkt1k.jpg

P1051571_zpsh94ataxk.jpg

I decided to trim the back off the Jimny dash board in order to mount it closer to the engine rather than wasting space now the buggy wont have a heater matrix and ducting.

P1051572_zpsa0adcgce.jpg

P1051573_zpsrloer7mx.jpg

P1051575_zpsaeff62xm.jpg

P1051576_zps3lvvy9mw.jpg

P1051577_zpsl7xftjfp.jpg

I could then work out exactly where the front hoop would sit.

I want the cage to bolt on and off so we can get it powdercoated.

12mm plates drilled and taped to weld to the chassis and 6mm plates to bolt to the 12mm plates.

P1051562_zpstkxaghgi.jpg

12mm.

P1051563_zpsh85akylm.jpg

All the plates bolted to the 12mm ones ready to be welded to the chassis.

P1051564_zpshnltlgx1.jpg

I tack welded 2 of them on to the front of the chassis.

I could now work out the first hoop.

Marked it out on the floor with chalk.

P1051578_zpsieiev2n5.jpg

P1051579_zpscxaw1ime.jpg

Bent some tube.

P1061580_zpsiljtkp2z.jpg

P1061581_zpsxfjcoodr.jpg

The next bends proved to be a bit tricky as I was trying to bend the tube on a bend.

P1061582_zpsyqkcahmh.jpg

P1061583_zpsobgroc48.jpg

This meant as I started bending the tube it was trying to rotate the tube towards the other bend.

P1061584_zpszy1bt75z.jpg

I did get it eventually though after ratchet strapping the tube to the pallet racking to stop it rotating as I did the second bend.

P1061585_zpsljboc467.jpg

More bending.

P1061586_zpsoqye04kc.jpg

P1061587_zpsei6g5qe6.jpg

I had to cut the ends off the hoop so I could bend it more.

P1061588_zps5phxyggo.jpg

Tacked in position.

P1061589_zps5b1cnz5k.jpg

P1061590_zpskeorvyhe.jpg

P1061591_zpscwcfwv6g.jpg

P1061592_zpsynkmnief.jpg

P1061593_zpsrqjtbdc1.jpg

Another little project I've been working on is another wire rack.

P1071605_zpsjsezxewf.jpg

Unfortunately welding the diagonal pieces on the front was enough to twist the whole thing out of square and make it so that the upright section was leaning over forwards. :doh:

However I remembered something I learnt at TAFE about metal distortion.

That if a piece of metal bends after welding, heating the other side of that piece of metal with a torch will pull it back the other way as it cools down.

Worked a bloody treat! :dance:

P1071600_zpsislafp5v.jpg

P1071601_zpsy7spuwyg.jpg

I picked up some heavy duty castors.

P1071602_zps2g9ltorc.jpg

And drilled some 6mm plates for them to bolt to which will be welded to the bottom of the rack.

P1071606_zpshccxeqoy.jpg

I cut a load of pieces of 30mm angle.

P1071607_zpsj1asmls7.jpg

And started welding them to some 50mm flat.

P1071608_zpsq4zr52uq.jpg

Thats as far as I got on that project as I dropped everything to work on the other project. (I've just updated that thread :icon-wink:)

http://www.landcruiserclub.net/foru...ness-World-Record-Attempt?p=422426#post422426

And finally a little project I've been working on regarding tool storage!

The spanner set my tool box came with isnt bad.

P1081655_zpsqa2mzvaj.jpg

But it hasnt got some of the bigger sizes above 19mm and often its useful to have 2 spanners the same size when undoing/doing up certain bolts rather than using a socket and spanner.

So I thought it would be nice to have one of my other spanner sets in one of the other drawers. Only issue was that the box they were in wouldn't fit in the drawer.

P1081656_zpshd6j5xtm.jpg

My plan was to use some hardwood to help store them like one of my work mates has done with his spanners.

P1081624_zpspbi4mmsp.jpg

P1081625_zpsto5baq7z.jpg

P1081626_zpsehynqdww.jpg

P1081627_zpsmjw9jkat.jpg

Brought one of the drawers home.

P1081657_zpsxtur9trm.jpg

Got some 1mm thick alluminium that fitted snugly in the drawer.

P1081658_zpsmyspn5bh.jpg

A bit of trial fitting and measuring up first.

P1081659_zpsnavh8pit.jpg

Then I could cut some Tasmanian oak into 20mm wide strips.

P1081660_zpsvyoyscth.jpg

P1081661_zpszajzi7a5.jpg

Cut to length and the correct angle.

P1081662_zpsbchhf0cz.jpg

Used my little chop saw to cut some notches.

P1081663_zpspc3kyxi0.jpg

Screwed through the alluminium into the oak to hold the wood in position.

P1081664_zpshslebzdd.jpg

I cocked up slightly by fitting the angled piece of oak too far over for one of the spanners to fit in properly. :doh:

Moving it over, left a couple of holes but oh well.

Moved over and screwed in position with the blue film removed.

P1081667_zpszno7euak.jpg

P1081668_zpshmroazwk.jpg

P1081669_zps32rtpd5f.jpg

P1081670_zpsufewjxxl.jpg

P1081671_zpscx4k4fde.jpg

I will probably use the left over space to store my double ended ring spanners and I might buy some stubby spanners and flexy headed ratchet spanners too. :icon-smile:

I'm still waiting on the delivery of my new Dobinsons suspension and I'm hoping I will have it Monday/Tuesday.

I'm really hoping I can get it all fitted before next weekends 3 day High Country 4wd trip. :icon-biggrin:
 
Blimey that's organised having drawers labelled! Can't beat having everything laid out neatly, I even have all my screw drivers with the snap on label facing upwards lol, quite ocd about it tbh.
 
Thanks guys. :thumbup:

Blimey that's organised having drawers labelled! Can't beat having everything laid out neatly, I even have all my screw drivers with the snap on label facing upwards lol, quite ocd about it tbh.

Yeah definitely makes putting your hand on the right tool quick and easy!

You can also see almost instantly if a tool is missing when it comes time to pack up. :icon-ugeek:

I think you're on your own though with having to have the labels all facing up! :icon-rolleyes: :lol:
 
Thanks guys. :thumbup:


Yeah definitely makes putting your hand on the right tool quick and easy!

You can also see almost instantly if a tool is missing when it comes time to pack up. :icon-ugeek:

I think you're on your own though with having to have the labels all facing up! :icon-rolleyes: :lol:

Keeps it neat and tidy, usually an indication someone been in my tool box as never put back right! Usually a bloody salesman if feeling brave.
 
Hey Ben is there any reason my truck should feel like it's holding back atal? Have I missed a piece of wiring or anything?? Thanks
 
Back
Top