Don't like the adverts?  Click here to remove them

Christine the Cruiser

Started work on fitting my new found ARB Deluxe bar yesterday after work.

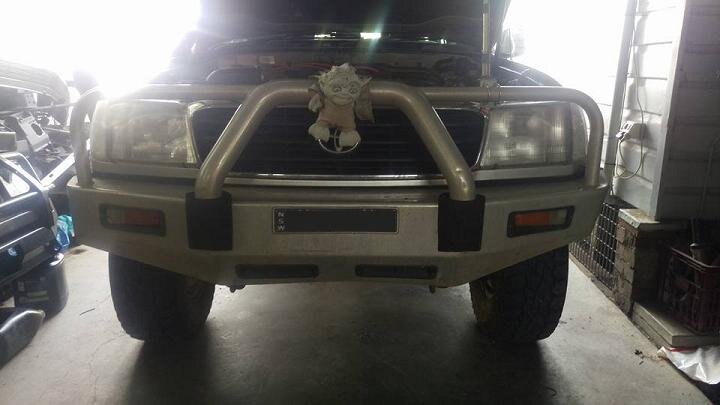
Here's my old bull bar on the front of my car, was abit painful to get off, it's obviuosly been off before as a few of the bolts were different types and had different heads on them, and whoever tightened it up snapped one of the tack welded nuts from the chassis rails so I had to use a pry bar to put pressure on the bolt/nut to undo it.
old bullbar.jpg

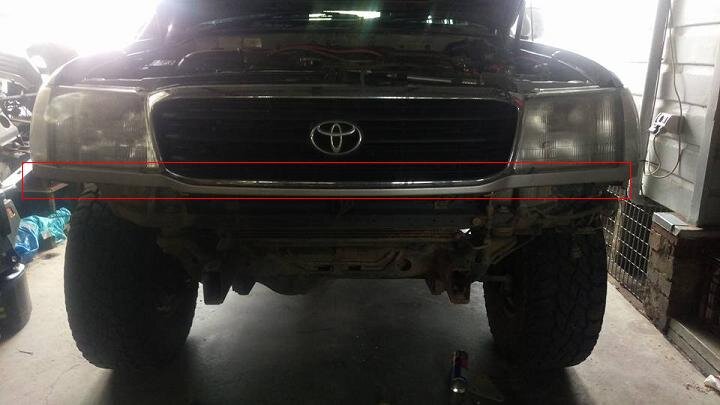
Here's a picture without a bullbar. My chassis rails at the very front were clogged up 80% of the height of the rail with old mud and sand, I always flush my chassis rails after off roading to try and avoid build up but with the bar mount ends being capped and the nearest chassis hole back half a foot there was no way to tell it was there or remove it.
While i have no bar i'll be painting the strip panel that goes under the grill and headlights. The old bullbar had hard rubber mounted ontop to take up the gap from bullbar to panel work and over the years its rubbed a lot of the bottom of the panel back to bare metal.
no bullbar.jpg


I've sanded it back ready for some primer and filler primer, then ill paint her up and polish it back and should be set to fit the new bar on in the next 2 days.
Also have to try and cut my uhf aerial bracket to free the aerial, as the bracket had 1 nut that wasnt stainless and its caused the stainless steel bracket to cop some rust, i'll polish it back and paint it mat black to blend in with the new bar better.
 
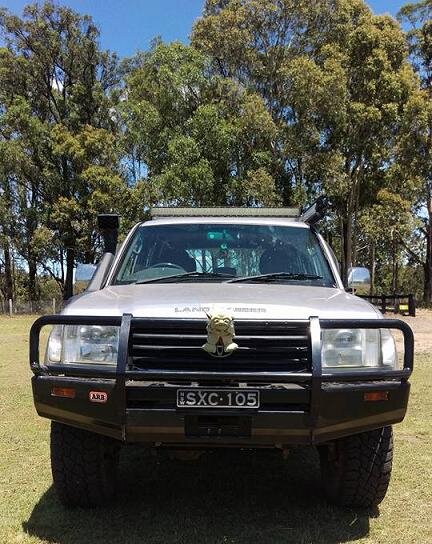
Finished fitting up my steel ARB bar over the weekend.
Painted the front trim and had a much better result as compared to the driver side front quarter panel i painted, but next time i need to buy a lighter shade of paint.
The bar was abit of a pain but nothing few tools and my father's help couldnt sort. Even fitted a new Yoda to the front and hung the old yoda in the shed.
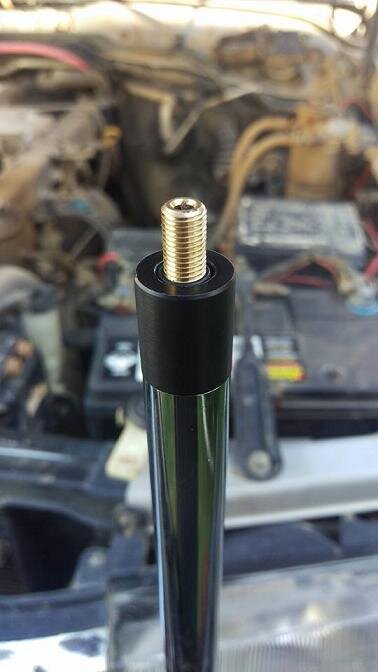
Only outstanding issue, when we were re fitting the aerial the stud at the bottom snapped, cheap chinese plastic thread must have gotten weak after 2 years of duty. Bought a new base just have to re wire the aerial to it, solder and fit.

steel bar small.JPG
 
Nice job there 105.

I must have a 30mm gap between my ARB and the closest bodywork on my 80, can't see the point in trying to close it. I got loads of mud and sand out of my boxes when I first had it. They're fully open now at the front, behind the ARB. I can jet-wash any build up and see it run out.
 
Thanks Clive :)

Yeah my side wings sit about 25mm from my guards which i don't mind, a few roo collisions will probably push the back up so itll be good panel security anyway.
The bar went on in 2 parts, the winch cradle section and then the bar goes over that. The cradle still had open ended rails but the bar is enclosed but i should be able to get enough hose pressure in my rails to keep the mud and grit at bay.

Wired up my aerial, ill do a quick post sometime today to show how, in case anyone was wondering how its done.
 
Snapped the mounting stud on my Oricom aerial after I fit my new bullbar, plastic studs aren't great..
So went to town and seen an old fella who showed me how to wire up a new base myself.

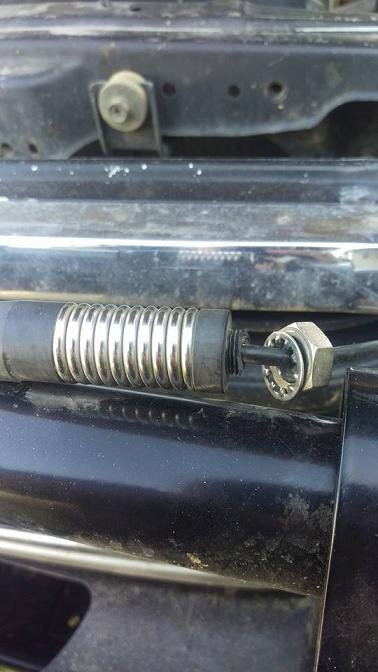
aerial1.jpg
This is what I started with, snapped mounting stud :icon-rolleyes:
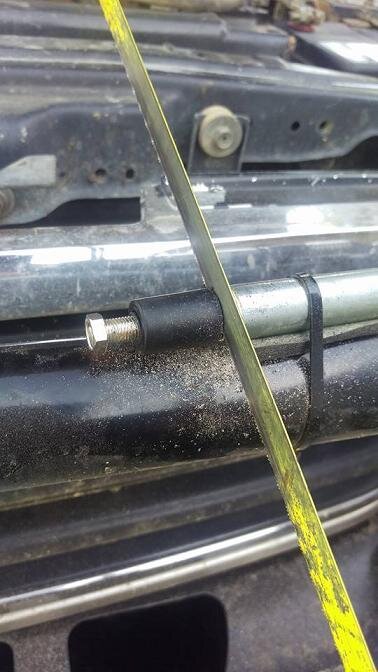
aerial2.jpg
Cut the old base about 2 inches from the end so I would miss all the solder and get straight to the free antenna wire.

aerial3.jpg
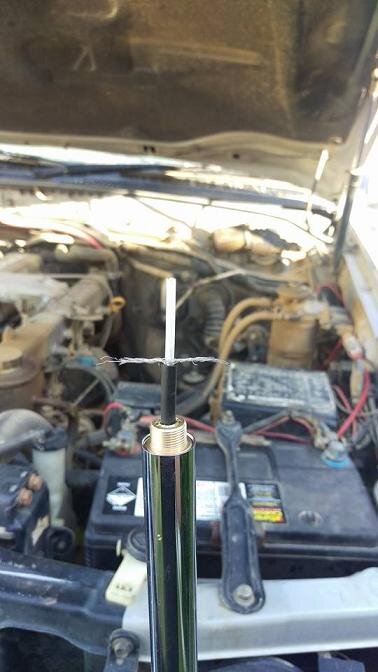
Fed the aerial wire up through the new base then stripped outer insulation back and then the wire casing about 10mm up from the insulation, and then the white layer insulator stuff (sorry dont know technical name) so the inner wires had just over an inch showing. This is how the old fella showed me how to do it, then the thread that the whip screws onto screws down onto the outer wires as an earth, with a nylon washer and small oring to insulate the 2 surfaces.

aerial4.jpg
This is what it ends up looking like once the top threaded section is screwed down, you can just see the very inner wires inside the hole in the middle of this part, and then you just fill it up with solder and she's ready to go again.
 
Nice and neat that, good job.:clap:

I like to see stuff getting repaired, it's all too easy to chuck and replace these days. A bit of ingenuity goes a long way :thumbup:
 
Don't like the adverts?  Click here to remove them
Thanks again Clive, when replacing stuff I always try and upgrade it or keep it as good quality.

Yea a few people said just replace the whole wire and aerial but talked to the right guy about how to repair it and it was a pretty easy and straight up job, glad I done it.:icon-biggrin:


Next up, think I will fit up my spotlights and tidy some wiring for my lightbar while I'm at it.
 
Where are you planning to mount it ?

I have one on the front ARB bumper and one on the roof. But TBH, I see no benefit in the roof mounted bar, I just get some glare off the bonnet.

It's a pain getting a power supply up there too, and just not worth it IMO. I also think the bars look neat down between the headlamps.

image.jpeg
 
The light bar?

I've already got it mounted on the roof, its running and sorted, just want to tidy my wiring for it as i done it in a rush and looks very untidy in my engine bay.
As for glare, its far enough back that the roof blocks the light from hitting my bonnet so no glare issues in my case.

Yea i see a bit on 80 series facebook pages people talking of different ways to wire it, some drill a hole in their air intake before the air box, run it up their snorkel and drill a hole in the side to go straight to the roof. I wouldn't go that way myself as the main reason to have a snorkel is a safer intake for water crossings, drilling holes in it seems illogical haha.

On 100 series there is a lip up wither side of the windscreen that continues to the roof gutters so its easy access to the roof and you only see the wire at the lightbar.


Spotlights I plan to mount where the lightbar on your image is mounted, on the bottom pipe section in the centre of the bullbar.
 
Anyone know where to find a good detailed manual or page showing how to pull the power steering pump off a 1hz 100 series, have a repair manual at home and it only really shows the 'telescopic'? view of all the parts in order..
Has leaked power steering fluid since i bought it and have recently decided to fix it instead of topping up the oil every service. But i want to make sure its not something that will get me in over my head haha.

Don't know on the 100, but on my 80, I had a weeping flexi-pipe to the PS pump for a couple of years until it blew altogether. That was a cheap fix, but it's worth having a nose at that, because I thought it was the pump body leaking, which it wasn't.

Sorry, misunderstood the light bar bit...:? The glare on mine is no problem, but I think I will shift it back a few inches.
 
A quick note on holes in air box and running wires. If you run some nylon air tube in through a good quality cable gland at the base the wires can run inside that as a conduit and be removable or added to without disturbing the watertight seal the cable gland would effect.

Might be worth the thought. [emoji4]
 
Ah okay, how did you diagnose it as the flex pipe Clive? My P/S system leaks and as soon as i see some dusty roads, the whole side of the engine bay that shares my power steering setup is covered in a layer of oily dust. :|
I was told to check the reservoir and pump that you clean it off, and get someone to inspect them while you go to full lock and off a bit and full lock again.
Doing that we found it bubbles out from the middle of my pump where i imagine a gasket or some sort of seal is supposed to be. But i dont see how it can get from there and still cover my reservoir and engine bay in fluid :think: So i want to take it off and replace seals and possibly bearings and the shaft as the lase 10 000km ive noticed the P/S oil getting dirty, was told that would be from worn shaft letting engine oil seep in.
All good haha. Local authorities dont have issues with roof mounted light bars over your part of the world? Technically its not legal in my state but police dont usually pick on you unless the car stick out from the crowd too much.

I sort of understand what you're saying StarCruiser, but cant fully picture it in my head.
I'm happy with my setup going along side of windscreen, only person it bothers is glass repairers when they change out my windscreen haha
 
Ah okay, how did you diagnose it as the flex pipe Clive? My P/S system leaks and as soon as i see some dusty roads, the whole side of the engine bay that shares my power steering setup is covered in a layer of oily dust. :|

Diagnosis was easy, when it decided to burst :lol:

I limped it into a small workshop local to the place where it failed and it was he who told me that it's had been leaking for ages. I had known that something was leaking from the time I bought it, so he was spot on.

3 hours later, it was all shipshape. He made the flexi up in his workshop. End of.
 
Oh bugger haha, atleast you found the issue easy i guess:dance:

Ah okay well lucky they knew how to get it sorted for you in such short time.

I've been lucky enough to so far avoid any issues out on the road requiring a garage stop.
 
I tell you something, driving an 80 with no power steering is no joke. On the open road you can get by, just about but when it comes to turns at junctions or parking, it was a nightmare!

Anyway, it's been dry for 7 years now. The steering box has given me problems too. It's had 2 rebuild's in 8 years, the first early on for leaking seals and the second after the main shaft sheared off at the pitman arm. :wtf:

All sorted with a new shaft and again new seals, the steering is like a dream now. :icon-cool:
 
Ah yeah i could imagine, my father owns a 1976 Holden and it's steering is like trying to pull up an anchor haha.

That's good, besides the shaft snapping, I'm going to buy the kit shortly with all seals, bearings and the shaft included so hopefully it will last another 17 years.
Also found a spot my reservoir is leaking, there's a 2mm or so slit in the metal return line where it butts to the reservoir.
So hopefully i can take it off and maybe smear some solder on it or maybe just scuff it up and use a silicon windscreen adhesive..

Near future i need to take out front passenger side outer axle and swap in a new one, and then replace all seals and check bearings. C/V clicks when i have my front diff engaged and its getting worse, don't want that sucker to snap on a trip if i have to use front locker in a tricky spot.
 
Made a small bracket for my extended diff breathers, just back from the air filter box for the deeper river crossings I'll meet in future travels.
diffbreather.jpg
 
Haven't done much on the big wagon in the last 2 months, but over the previous weekend i did a 1700km trip to Queensland and back to check out a car.


Being Australia it was above 30 degrees celsius most of the time i was driving so i had the air con cranking most of the time and on my return home about 300km out my belts started squealing. Pulled over and turned it off, opened the bonnet and got my father to check the engine bay while i started it, and the a/c belt was spinning but the idler pulley and the air con pulley were not..

Midnight, muggy and beside a dark highway I tried to loosen the bolt for the tensioning pulley but it seemed seized, but the adjusting bolt itself let me take tension off the belt to remove the belt for the drive home.

Next day after a snooze i got an extension bar onto my 14mm socket for some leverage and gave the idler pulley bolt another crack and it started to twist my adjuster bolt?! Bloody thing was seized on, so I removed the adjuster bolt and stuck a big old screwdriver through it to hold. Eventually got the nut cracked and undoing it had to move the screwdriver up after a few turns as it was constantly bending it, i ended up with a 3/4 circle philips head screw driver haha.

Went to the local toyota dealer and $32 AUD for a new pulley i hoped it would solve my issue, belt back on with new pulley. Gave it a start and so far so good, turned the air con on and *cling clang bang ting ting ting ting ting clang*..
Not 100% sure whats happened but i think having the air con going from 6am, most of the day and then most of the night with a trailer in tow has heated some bearing up too much and then heated the idler bearing up which seized the mounting stud and bolt together, and done some damage to the air con compressor internals.

Ill order a $300 ebay special next week and fit a whole new air con compressor and get one of my A/C savy friends to tear the old one down and see what has failed.

Anyone else had this happen and know the issue or know from my story what has failed?

The pulley alone for the the A/C pump is $220 for a genuine one, which is why I'm going a full after market unit for the extra $80.
 
Frank is the man for AC tear downs, IIRC, but I would have thought a recon or replacement would be a more realistic approach, they're complicated inside.

It sounds like yours has seized up altogether, do you have enough oil in the refrigerant? It's worth getting that sorted when you fit the new pump, otherwise you'll have another seized unit on your hands...
 
Back
Top