Don't like the adverts? Click here to remove them
You are using an out of date browser. It may not display this or other websites correctly.
You should upgrade or use an alternative browser.
You should upgrade or use an alternative browser.
LJ70 Build Thread!
- Thread starter Ben
- Start date
How on earth are you going to be able to get that dirty, Rob?
It will break your heart
It will break your heart
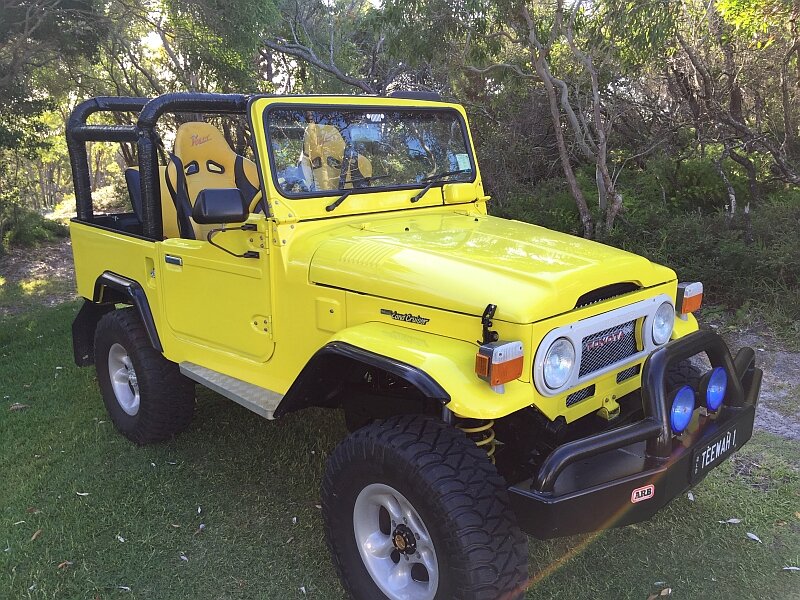
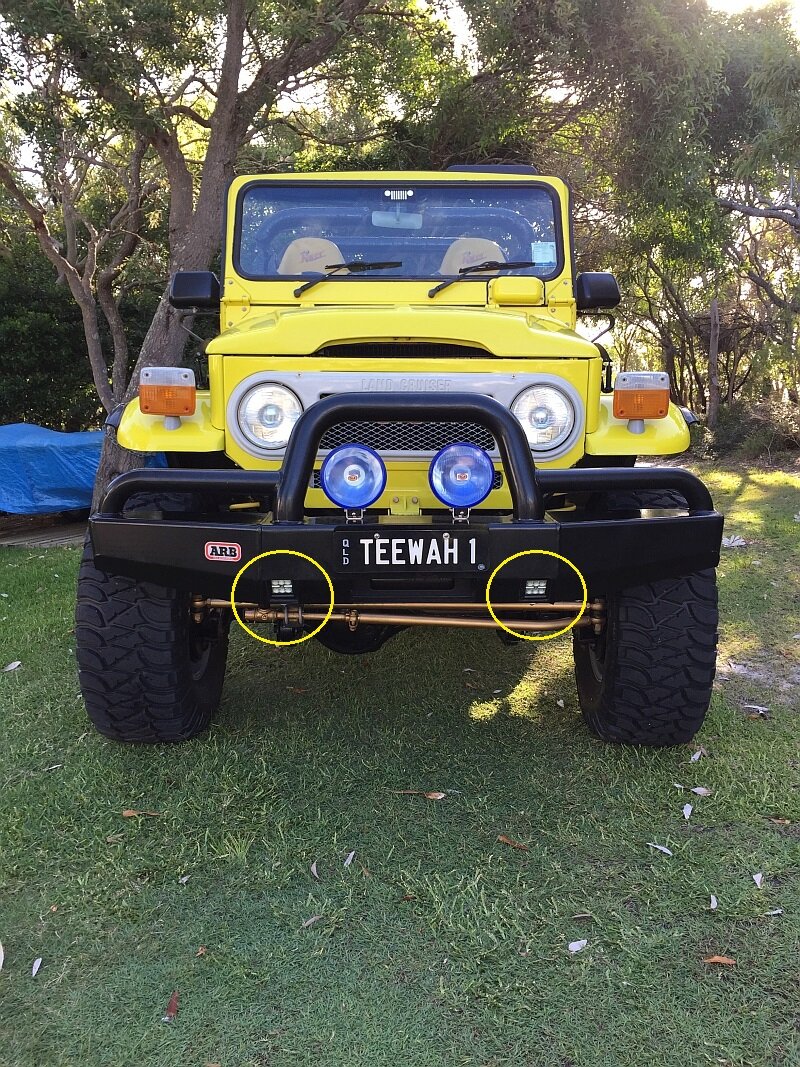
It gets a canvass top on Friday and a wheel alignment for toe-in. I will install a set of 3 deg caster bushes in the front radius arm on Thursday night, as it's got a 2" lift even though its running standard 80 series coils because of the light weigh fibreglass shell.How on earth are you going to be able to get that dirty, Rob? It will break your heart
- Joined
- Oct 13, 2010
- Messages
- 6,055
- Country Flag
Building my second ever roll cage and mounting my vice.
Update time guys...........................
I got the project Maruti up on the hoist and fitted a new exhaust.


Roll cage next!
Now if this was a proper comp spec cage then I would want to mount through the body to the chassis, but as its just a farm/hunting vehicle I decided to mount it to the body.
I used 3mm for the body mounting plates and made sure they all had a fold in them and were bolted on 2 different planes.
Front A pillar mounting plates.


Bent and tack welded on some tube for the first hoop.
I tried to match the angles and height of the standard windscreen surround.


B pillar hoop mounting plates.


All M8 bolts with big washers on the underside.

This next hoop needed 4 bends in total so took a little bit more working out.


Once I was happy with the position I could tack weld it in place.


I drilled down and added an M8 bolt to help secure the mounting plate for the A pillar hoop as it was just held in place with an M6 bolt into an original captive nut.

I cut and notched a piece of tube and tacked it in place at the bottom of the A pillar hoop.

I cut and notched 2 pieces of tube.


These were to connect the 2 hoops.


At this point I was pleased with how it looked but upon sitting in the vehicle I realised I'd cocked up massively!
I'd tried to match the angles and height of the windscreen/A pillar of the standard car and I'd then used a spirit level to make the B pillar hoop the same height.
This resulted in there not being enough head room to comfortably/safely get in and out of the car and also when bouncing around off road there was a very real danger people would bang their heads.
Rather than scrap it all or try and raise the hoops I had an idea!
I cut and bent some more 3mm mounting plates.


And then bent and notched some more tube.

This would give loads of head room and clearance for getting in and out of the truck and I had an idea to integrate it into the protection tube over the lights I wanted to mount on the front.


I also welded one of the 2 tubes I'd cut to connect the 2 hoops, in the middle of the car where there was no risk of it being in the way.


As I said previously I'm choosing to do this project on a tiny budget! My idea being to do it as cheaply as possible using where possible second hand parts already in stock, to save an old Suzuki/Maruti from the crusher, create a cool truck and make the company a few dollars in the process.
So I had the idea of mounting some lights on the top of the cage, not only will they be very useful on a farm vehicle with people stood in the back shooting at night, but they will also look really cool!
But rather than putting new lights on it I chose to use some old second hands one which we would probably never have sold anyway, so killing a few birds with one stone so to speak.
Second hand KC lights.

Made some tabs.

Tacked them on.

And bolted the lights on.


I cut, bent and tack welded on some thick walled 25mm tube across the top of the lights to protect them a bit.


I still had one of the pieces of tube left that I'd cut and notched to connect the 2 hoops as I'd only used one piece in the middle and would you believe it just happened to be the perfect length to connect the 2 pieces of tube I'd just bent and welded on. Complete fluke!
So I used that and notched 2 smaller pieces. These bits of tube would help connect the B pillar hoop with the rest of the cage.


Seat belts next!
They normally bolt to the B pillar, so they would need to mount in a similar position on the roll cage.
Cut and drilled some 6mm flat.

Tacked them on.


Welded the tube to the rear cage mounts and bolted the 3mm mounting plates through the body using M8 bolts and big washers.


Cut some alluminium checkered plate to fill in below the cage as the back of the dash looks quite ugly as its normally covered by the windscreen surround so is open in places.

Drilled and riv-nuted it on.


I cut the fuel filler neck in half and inserted a piece of tube between the 2 with some hose clamps to extend it to account for the 4" bodylift.

I found an old bull bar in the Suzuki parts warehouse. It didnt look particularly great but I knew with a little bit of work it would look perfect on the front of the project and would help finish the front off nicely.
It was also something we were unlikely to ever sell, so in keeping with my idea for this project of using up old second hand/unsellable parts it would be perfect!


Got it on the bench and welded some mounts on it to account for the 4" bodylift.


The cage was now complete and could be removed for fully welding.


I just finished welding it before it was home time.

The next morning I cleaned all the welding splatter off ready for powder coating.

I then put it in the trailer to take to the powder coaters.
I then thought it would be nice to run the wires for the lights inside the tube of the cage rather then have them cable tied to the outside of the tube.
It was easy to drill through the 3mm bulk head mounts and there was already holes in the bulkhead below where the tube is which was nice.

I drilled one 12mm hole in the roll cage which is just enough room for a rubber grommet and the wires. Again not something I could do on a proper comp spec cage as it wouldn't pass scrutineering and it is adding a weakness, but on this I think it will be fine! If this cage does get used it will hopefully only be a slow roll over/onto its side anyway.

I added the checkered plate and one of the Vitara diff casings I've shaved to the trailer, hooked it up to the 60 and took it all to the powder coaters.

Next week were sending the truck to the carby man so he can clean and adjust the carburetors and get it running a bit nicer, then I can sand down and re-spray the body work, then add the powder coated cage, tube doors, lights and get them wired up, make and fit a tow bar, paint and re-fit the bull bar and then shes nearly ready to sell!
We've already got 4 people really interested and its not even finished!
Were hoping to do a few more after this one and if they keep selling we will hopefully keep saving and transforming them!
They work out a lot cheaper than a quad, they can carry a lot more stuff and people, they have a working heater and stereo and there ideal for shooting vehicles as stood on the back your shooting down at the ground which is a lot safer encase you miss, particularly on farms where theres livestock and other people around.
The Miller rep dropped me off a Dynasty 200DX on Friday so I can spend a few days playing with it to see if its the right machine for me.


I had a little play on some pipe.


I think its an amazing machine but I have been getting cold feet slightly as to whether I'm doing the right thing spending/investing that much money on a welder!
I could by a Kempi, Lincoln, Esab etc. for a lot less money and they would probably be almost as good, but then I do really like a lot of the features of the Dynasty.
But $7k RRP for a welder!
Will come in very useful in the future though building custom comp spec roll cages out of exotic metals like chromoly (which is something I'd love to get into) and for welding stainless and alluminium.
I dont know!
But with only 1 week left at TAFE then 3 months off for Christmas I need to get something sorted very soon so I can keep practicing.
I finally got round to fitting the freshly cleaned up wood working vice to my new bench.
Whoever had fitted the last vice had made a hell of a mess of it!
So the first job was to repair the old bench, which I found out this week is over 100 years old!


Cut it out square.

Cut a piece of oak to fit.

Clamped, screwed and glued it in place.

With some of this awesome polyurethane glue.

Sanded it down.

Flipped the bench upside down.

Got some coach bolts and tasmanian oak.

And made the vice fit.


I just need to cut some more oak to repair all the damage on the top of the bench from the old vice being fitted wrongly.

I've got a load more carpentry work to do for the guy I did the other work for so the bench will come in very useful over the next few weeks, as will LJ carrying 5 meter lengths of wood on the roof!
Update time guys...........................
I got the project Maruti up on the hoist and fitted a new exhaust.
Roll cage next!
Now if this was a proper comp spec cage then I would want to mount through the body to the chassis, but as its just a farm/hunting vehicle I decided to mount it to the body.
I used 3mm for the body mounting plates and made sure they all had a fold in them and were bolted on 2 different planes.
Front A pillar mounting plates.
Bent and tack welded on some tube for the first hoop.
I tried to match the angles and height of the standard windscreen surround.
B pillar hoop mounting plates.
All M8 bolts with big washers on the underside.
This next hoop needed 4 bends in total so took a little bit more working out.
Once I was happy with the position I could tack weld it in place.
I drilled down and added an M8 bolt to help secure the mounting plate for the A pillar hoop as it was just held in place with an M6 bolt into an original captive nut.
I cut and notched a piece of tube and tacked it in place at the bottom of the A pillar hoop.
I cut and notched 2 pieces of tube.
These were to connect the 2 hoops.
At this point I was pleased with how it looked but upon sitting in the vehicle I realised I'd cocked up massively!
I'd tried to match the angles and height of the windscreen/A pillar of the standard car and I'd then used a spirit level to make the B pillar hoop the same height.
This resulted in there not being enough head room to comfortably/safely get in and out of the car and also when bouncing around off road there was a very real danger people would bang their heads.

Rather than scrap it all or try and raise the hoops I had an idea!

I cut and bent some more 3mm mounting plates.
And then bent and notched some more tube.
This would give loads of head room and clearance for getting in and out of the truck and I had an idea to integrate it into the protection tube over the lights I wanted to mount on the front.
I also welded one of the 2 tubes I'd cut to connect the 2 hoops, in the middle of the car where there was no risk of it being in the way.
As I said previously I'm choosing to do this project on a tiny budget! My idea being to do it as cheaply as possible using where possible second hand parts already in stock, to save an old Suzuki/Maruti from the crusher, create a cool truck and make the company a few dollars in the process.
So I had the idea of mounting some lights on the top of the cage, not only will they be very useful on a farm vehicle with people stood in the back shooting at night, but they will also look really cool!
But rather than putting new lights on it I chose to use some old second hands one which we would probably never have sold anyway, so killing a few birds with one stone so to speak.
Second hand KC lights.
Made some tabs.
Tacked them on.
And bolted the lights on.
I cut, bent and tack welded on some thick walled 25mm tube across the top of the lights to protect them a bit.
I still had one of the pieces of tube left that I'd cut and notched to connect the 2 hoops as I'd only used one piece in the middle and would you believe it just happened to be the perfect length to connect the 2 pieces of tube I'd just bent and welded on. Complete fluke!
So I used that and notched 2 smaller pieces. These bits of tube would help connect the B pillar hoop with the rest of the cage.
Seat belts next!
They normally bolt to the B pillar, so they would need to mount in a similar position on the roll cage.
Cut and drilled some 6mm flat.
Tacked them on.
Welded the tube to the rear cage mounts and bolted the 3mm mounting plates through the body using M8 bolts and big washers.
Cut some alluminium checkered plate to fill in below the cage as the back of the dash looks quite ugly as its normally covered by the windscreen surround so is open in places.
Drilled and riv-nuted it on.
I cut the fuel filler neck in half and inserted a piece of tube between the 2 with some hose clamps to extend it to account for the 4" bodylift.
I found an old bull bar in the Suzuki parts warehouse. It didnt look particularly great but I knew with a little bit of work it would look perfect on the front of the project and would help finish the front off nicely.
It was also something we were unlikely to ever sell, so in keeping with my idea for this project of using up old second hand/unsellable parts it would be perfect!
Got it on the bench and welded some mounts on it to account for the 4" bodylift.
The cage was now complete and could be removed for fully welding.
I just finished welding it before it was home time.
The next morning I cleaned all the welding splatter off ready for powder coating.
I then put it in the trailer to take to the powder coaters.
I then thought it would be nice to run the wires for the lights inside the tube of the cage rather then have them cable tied to the outside of the tube.
It was easy to drill through the 3mm bulk head mounts and there was already holes in the bulkhead below where the tube is which was nice.
I drilled one 12mm hole in the roll cage which is just enough room for a rubber grommet and the wires. Again not something I could do on a proper comp spec cage as it wouldn't pass scrutineering and it is adding a weakness, but on this I think it will be fine! If this cage does get used it will hopefully only be a slow roll over/onto its side anyway.
I added the checkered plate and one of the Vitara diff casings I've shaved to the trailer, hooked it up to the 60 and took it all to the powder coaters.
Next week were sending the truck to the carby man so he can clean and adjust the carburetors and get it running a bit nicer, then I can sand down and re-spray the body work, then add the powder coated cage, tube doors, lights and get them wired up, make and fit a tow bar, paint and re-fit the bull bar and then shes nearly ready to sell!

We've already got 4 people really interested and its not even finished!
Were hoping to do a few more after this one and if they keep selling we will hopefully keep saving and transforming them!
They work out a lot cheaper than a quad, they can carry a lot more stuff and people, they have a working heater and stereo and there ideal for shooting vehicles as stood on the back your shooting down at the ground which is a lot safer encase you miss, particularly on farms where theres livestock and other people around.
The Miller rep dropped me off a Dynasty 200DX on Friday so I can spend a few days playing with it to see if its the right machine for me.
I had a little play on some pipe.
I think its an amazing machine but I have been getting cold feet slightly as to whether I'm doing the right thing spending/investing that much money on a welder!
I could by a Kempi, Lincoln, Esab etc. for a lot less money and they would probably be almost as good, but then I do really like a lot of the features of the Dynasty.

But $7k RRP for a welder!
Will come in very useful in the future though building custom comp spec roll cages out of exotic metals like chromoly (which is something I'd love to get into) and for welding stainless and alluminium.
I dont know!
But with only 1 week left at TAFE then 3 months off for Christmas I need to get something sorted very soon so I can keep practicing.

I finally got round to fitting the freshly cleaned up wood working vice to my new bench.
Whoever had fitted the last vice had made a hell of a mess of it!
So the first job was to repair the old bench, which I found out this week is over 100 years old!
Cut it out square.
Cut a piece of oak to fit.
Clamped, screwed and glued it in place.
With some of this awesome polyurethane glue.
Sanded it down.
Flipped the bench upside down.
Got some coach bolts and tasmanian oak.
And made the vice fit.
I just need to cut some more oak to repair all the damage on the top of the bench from the old vice being fitted wrongly.
I've got a load more carpentry work to do for the guy I did the other work for so the bench will come in very useful over the next few weeks, as will LJ carrying 5 meter lengths of wood on the roof!
Last edited:
Don't like the adverts? Click here to remove them
Paddler Ed
Well-Known Member
The big thing with the Maruti/Suzuki buggy is that even WorkSafe encourage the use of a proper 4-wheeler over a quad bike (and a 2-wheeler or a horse if more manoeuvrability is required) due to the safer roll over performance, so definitely worth investigating as the sales strategy, and much more clearance and comfort than a Mule or similar.
If you're doing Cromoly... are you going to do bike frames as a side line? I like steel bikes... they ride nice...
If you're doing Cromoly... are you going to do bike frames as a side line? I like steel bikes... they ride nice...
Great work Ben.
Ref the welder I'd say go for it, I've compromised on tools in the past and ended up buying the one I originally wanted anyway!
Agree with Gary 100%
If you can stretch to the welder, go for it. You won't regret it.
Really great work.
peter kohler
New Member
- Joined
- Mar 14, 2014
- Messages
- 39
- Country Flag
Hi Ben,
We do a lot of welding in Stainless, Alloy and Chrome molybdeen steel, so 1 know a thing or 2 about welding.
We bought a new welder last year so I'v been in your shoes.
The Miller looks good, but don't forget that the tig machine doesn't make good welds, the welder does.
and if you can weld good on a crappy welder you certainty can weld good with a high end welder.
Last year we bough a EWM picotig ac/dc welder with a water cooler unit cost +/- 4.5 k in euro's
If you look on the net, they are available in Australia.
The quality of EWM machine's is at least as good as Miller / Kemppi / Lincoln.
If you are planning to do a lot of Alloy welding, choose a machine witch you can upgrade with a water cooler, the torch becomes really hot after welding at higher amp's
( with alloy the 1/2 of the heat stays in the torch )
A footpedal is handy with alloy, you can increase the heat to get the puddle going and increase it a litte as the puddle is going to fast.
Also look very good at your torch, we opted for the smallest water cooled torch, so if we are welding a roll cage in a car we can get every ware with the torch.
We use a torch with a gasflow mesh inside the cup, this helps to stabilize the arc even at very low amps ( and saves a lot of gas, as you can run a lower gas pressure )
the wire feed is very important for a good looking weld, try to learn yourself a good way to do this.
https://www.youtube.com/watch?v=_rVqWeS4rbA Hope this video is helpful.
maybe I have some ideas for roll cage's
Some time's we have to modify or upgrade a existing rollbar, for instance is a driver is to tall or so.
here are some option's we used in the past.
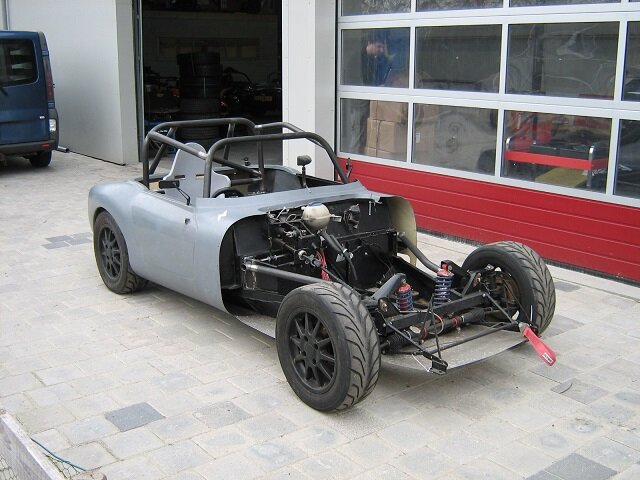
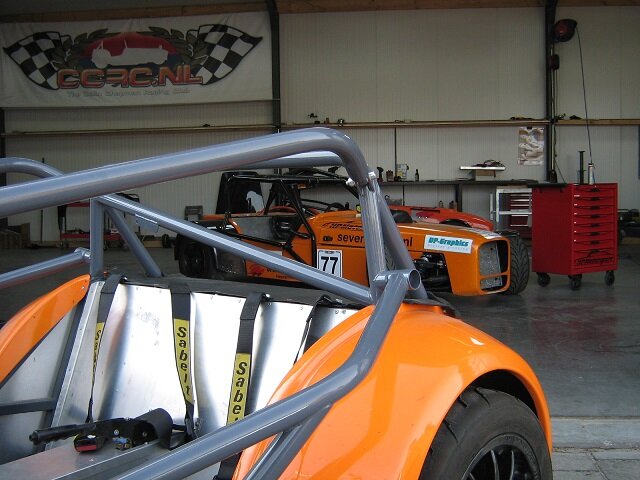
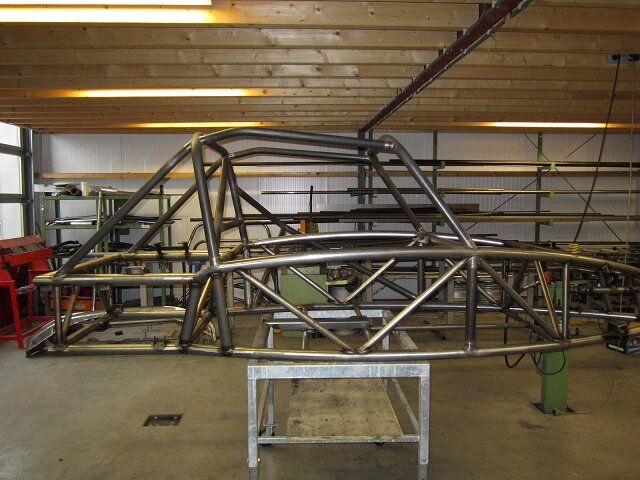
not trying to pollute your threat just some friendly advice.
cheers, peter
We do a lot of welding in Stainless, Alloy and Chrome molybdeen steel, so 1 know a thing or 2 about welding.
We bought a new welder last year so I'v been in your shoes.
The Miller looks good, but don't forget that the tig machine doesn't make good welds, the welder does.
and if you can weld good on a crappy welder you certainty can weld good with a high end welder.
Last year we bough a EWM picotig ac/dc welder with a water cooler unit cost +/- 4.5 k in euro's
If you look on the net, they are available in Australia.
The quality of EWM machine's is at least as good as Miller / Kemppi / Lincoln.
If you are planning to do a lot of Alloy welding, choose a machine witch you can upgrade with a water cooler, the torch becomes really hot after welding at higher amp's
( with alloy the 1/2 of the heat stays in the torch )
A footpedal is handy with alloy, you can increase the heat to get the puddle going and increase it a litte as the puddle is going to fast.
Also look very good at your torch, we opted for the smallest water cooled torch, so if we are welding a roll cage in a car we can get every ware with the torch.
We use a torch with a gasflow mesh inside the cup, this helps to stabilize the arc even at very low amps ( and saves a lot of gas, as you can run a lower gas pressure )

the wire feed is very important for a good looking weld, try to learn yourself a good way to do this.
https://www.youtube.com/watch?v=_rVqWeS4rbA Hope this video is helpful.
maybe I have some ideas for roll cage's
Some time's we have to modify or upgrade a existing rollbar, for instance is a driver is to tall or so.
here are some option's we used in the past.


not trying to pollute your threat just some friendly advice.
cheers, peter
Attachments
peter kohler
New Member
- Joined
- Mar 14, 2014
- Messages
- 39
- Country Flag
Pat
Well-Known Member
- Joined
- Jun 3, 2014
- Messages
- 932
- Country Flag
Ben,I bought a
Kempi at auction last year for $ 400 nz dollars so I would be reluctant to invest in a big sum unless I had first checked out the availability of welders at receivership sales of which in Australasia there are many at this time.The Kempii is a pro 5000with a pro 510 wire feeder and is capable of mig,tig and stick welding .It was about 3 years old and had little use.new retail price was approx.$20,000 nz.good luck Pat
Kempi at auction last year for $ 400 nz dollars so I would be reluctant to invest in a big sum unless I had first checked out the availability of welders at receivership sales of which in Australasia there are many at this time.The Kempii is a pro 5000with a pro 510 wire feeder and is capable of mig,tig and stick welding .It was about 3 years old and had little use.new retail price was approx.$20,000 nz.good luck Pat
- Joined
- Oct 13, 2010
- Messages
- 6,055
- Country Flag
Thanks guys. 
Peter, which country are those welders manufactured in?
I've been trying to avoid buying one made in China!
I will need a foot peddle with the welder but will wait a while to buy a water cooler and water cooled torch until I get more into alluminium welding. I havent done much yet as I'm just concentrating on low carbon steel pipe as that is what the test is on over here.
Thanks for the video, very interesting.
Pat, thats a great price. You did well!
I will keep searching and researching!
peter kohler
New Member
- Joined
- Mar 14, 2014
- Messages
- 39
- Country Flag
Hi Ben,
they are german made.
6.4 k Aus dollar, with trolly, water cooler
http://www.ebay.com.au/itm/ewm-Tetr...098?pt=Schweiß_Löttechnik&hash=item4acd2a1132
they are german made.
6.4 k Aus dollar, with trolly, water cooler
http://www.ebay.com.au/itm/ewm-Tetr...098?pt=Schweiß_Löttechnik&hash=item4acd2a1132
- Joined
- Oct 13, 2010
- Messages
- 6,055
- Country Flag
Thanks Peter. 
My only concern with buying one is the lack of technical support down here for them, at least with Miller, Kempii, Lincoln etc. I have lots of places where I can get those machines fixed and spare parts are easy to get.
I'm sure there a great machine though!
My only concern with buying one is the lack of technical support down here for them, at least with Miller, Kempii, Lincoln etc. I have lots of places where I can get those machines fixed and spare parts are easy to get.

I'm sure there a great machine though!
Paddler Ed
Well-Known Member
Just did a quick search Ben, and the EWM stuff seems to be available from World of Welding (part of BOC) and there are some stores in the Melbourne area (although not as many as there are in the Hunter region up here in NSW. Might be worth a bit of a look...
Pat
Well-Known Member
- Joined
- Jun 3, 2014
- Messages
- 932
- Country Flag
Ben,the water cooler was missing from the Kempii welder but I set up a gravity feed cooler which works very well.we can do continuous mig welding using about 100 litres water per day.Did consider a recirculating system but we have heaps of water so let it run to waste.Kempii water coolers cost about $1250nz?pat
Similar threads
- Replies
- 0
- Views
- 167


