Don't like the adverts?  Click here to remove them

LJ70 Build Thread!

Awesome, thanks guys. :thumbup:

Think I need to do some more research/searching before I commit to anything, but I do need to buy one with in the next week! :think:

If I did buy a cheaper machine I would have some money left over to go towards a brand new car I'm thinking of buying. :shifty:

Rosas, welcome to the club. :icon-biggrin:
 
Well I bit the bullet and went for the Miller! :shifty:

I'd got 8 prices from different companies online and took these into my local welding suppliers and asked if they could match the lowest price which was from a company in Queensland.

They went away and came back and said they suppose they could but it would leave very little profit.

So its ordered and I should have it Friday or Monday! :dance:

It is a lot of money but it has features that non of the other welders have! In particular the multi voltage one. It will run on anything from 110v all the way up to 520v.

So I can run it on 3 phase at work and single phase at home! :icon-ugeek:

Buying such an expensive welder might mean I have to put off buying a brand new 4x4 that I have my heart set on, for a little while longer though! :thumbdown:

I'm going to buy one to replace the Astra but it wont be going off road for quite a few years and will just be a road car. :icon-cool:
 
What 4x4 are you thinking of ?


Sent from my iPad using Tapatalk
 
You wont regret spending the money on a quality machine.
 
Thanks Gary. :icon-biggrin:

I think I will be very happy with it. :thumbup:

Andy........................

Its got a pair of live axles, diesel engine and coils all round! :icon-wink:

Lets see if anyone can guess what it is! :icon-twisted:
 
Thanks Gary. :icon-biggrin:

I think I will be very happy with it. :thumbup:

Andy........................

Its got a pair of live axles, diesel engine and coils all round! :icon-wink:

Lets see if anyone can guess what it is! :icon-twisted:
N

Nissan patrol?
Jeep jk?
70 series? (Not sure on this one though as I think they're just coil front?)
 
Don't like the adverts?  Click here to remove them
70's are all leaf rear!

80's and 105's are no longer made! :icon-ugeek:

10 points to Shayne for guessing correctly! :clap:

Suzuki havent been able to sell the Jimny in my state for a number of years as it hadnt got stability control and ABS. :thumbdown:

But its being relaunched now they've fitted those features and they've included a diesel option! :icon-cool:

4WD Australia magazine and 4WD TV are coming out to photograph and film a brand new diesel Jimny along side my bosses white modified one and Frankenzuke for a feature. :icon-biggrin:

I'm thinking a diesel Jimny would make a great little 4wd. :violin:
 
Work Projects & Tiny Bit Of LJ Work.

Only a little update this week.........................

I needed to make a tow bar for the project Maruti with a receiver hitch so we can fit a tow ball or recovery point.

Cut, folded and drilled some steel chassis brackets.

PB170003_zps83726c9d.jpg

Cut some nice thick box section and welded it together.

PB170004_zpsb55d951b.jpg

PB170005_zpse518950a.jpg

Painted it and bolted it on.

Also added a cheap reverse light that we had in stock and would probably never have sold.

PB170006_zps782c91a0.jpg

PB170007_zpsec486d5b.jpg

PB170010_zps2c2918b4.jpg

We dropped the Maruti off at the carby man so he could get it running a bit smoother. On the way back we picked up the cage from the powder coaters.

PB190011_zpsd0ea3547.jpg

We got the car back and the carby man said we needed to drop the fuel tank out and give it a really good clean as its full of crap.

PB210050_zpsd959b13e.jpg

PB210051_zps2ebeceec.jpg

Hoping to get that project finished and out for sale next week. We did well on the selling cars front this week having sold 2 Suzuki's we had for sale. :icon-biggrin:

I had to build a chainsaw box to replace a poorly built wooden one.

Its shaped on an angle to fit in the rear of an 80 series apparently.

PB190012_zps90686efe.jpg

PB190013_zps5f08872f.jpg

PB190014_zps48f11902.jpg

PB190015_zpsf1ce4595.jpg

I cut some 2.5mm alluminium.

PB190016_zps74ddc1c3.jpg

Folded it.

PB190017_zps00249d15.jpg

PB190018_zps98ed8326.jpg

Made the divide.

PB200019_zpsc9cb0ea2.jpg

PB200020_zpsf9d3bcd9.jpg

PB200021_zps0e5f5217.jpg

PB200022_zps56c74fad.jpg

PB200023_zps174ac1f2.jpg

Cut and folded one end.

PB200024_zps3aee12dd.jpg

PB200025_zps7c438076.jpg

PB200026_zps932ee4c6.jpg

PB200027_zps9c7a0400.jpg

Ready for welding.

PB200028_zpsdf1cfb56.jpg

PB200029_zps3aa9b311.jpg

PB200030_zps20f500f2.jpg

I welded it with the Fronius but i wasnt happy with how the machine welds alluminium. :thumbdown:

Once I ground the weld down it looked fine but I shouldnt have to grind welds down on something like this, so I decided to not do anymore welding on it till I've got my new TIG and I can do it with that. :icon-cool:

PB200031_zps4edc9952.jpg

PB200032_zps8ba9890b.jpg

So I left that project for now and went on to a new one.

One of the auto electricians had requested a new bench. He wanted it to be 2 meters long, 900mm high, 600mm deep, 2 shelves uderneath and to have a back board with more shelves and it had to be on wheels/castors.

So I designed it on paper, did a cutting list and selected and cut all the steel.

PB200033_zps69b2baaf.jpg

And welded it all together.

On a project like this distortion when welding is a constant issue when your trying to build a frame that is square and true in every direction. So there was lots to think about like welding certain sides of the joints first as you know it will pull that way when you weld. :icon-ugeek:

PB200034_zps2b32f8b4.jpg

PB200035_zps71e1cfed.jpg

PB210040_zpsc3c36459.jpg

PB210042_zpse687e59f.jpg

PB210043_zpsa7b0803c.jpg

PB210044_zps98299014.jpg

PB210045_zpsb5478354.jpg

PB210046_zps563a238a.jpg

Cut, marked and drilled some 100mm x 6mm steel flat.

PB210047_zps5a1a8f0d.jpg

And welded it on, this is for the castors to bolt to.

PB210048_zps49ec59d6.jpg

PB210049_zpsb315598c.jpg

I then took it for powder coating.

I finally did some LJ work! :dance:

I did a bit more on my panhard rod chassis drop bracket that you may remember I started on a while ago.

So this is the bit I previously made out of 6mm thick steel, this bit fits inside the chassis panhard rod mount and bolts in place.

PB210036_zps251661dd.jpg

So it needs some more 6mm steel welded to it that will drop down with the panhard rod bolted inside it. I also want the new 6mm steel to fit up perfectly against the contour of the chassis so this new steel needed to be cut in an unusual shape.

Cut some 6mm steel and ground the mill scale off it ready for welding.

PB210037_zpse9079fdd.jpg

First piece clamped in place.

PB210038_zps46530b4d.jpg

PB210039_zps9efa304c.jpg

All tacked together.

PB210052_zps02d83d7e.jpg

PB210053_zps1053430b.jpg

PB210054_zps5ae7effc.jpg

PB210055_zps4cebca80.jpg

PB210056_zps094db206.jpg

When I finally weld the 2 sections together I'm going to TIG it so I get a really nice neat weld all the way round so it fits against the chassis perfectly.

I've brought it home and the next job will be to try it back in place and see if it needs any adjustment to fit against the chassis perfectly, then it can be fully welded. I also need to workout exactly where the new mounting hole needs to be to drop the panhard rod the correct amount to compensate for the lift.

I'm going to take LJ to work one Thursday and stay back after work and finish the panahard rod bracket off, make the new rear spring adaptors and the load area shelf.

Want to get it all done before I have 3.5 weeks off for Christmas as I'm going to take me girlfriend away for a few days 4wding and camping in the High Country. :icon-biggrin:

I'm hoping to have the new welder next week! :dance:
 
Last edited:
Good to see you're still at it Ben, nice fabbing work... enjoy unpacking the new welder :lol:
 
Caprentry Project, Jimny Project, Maruti Project, Work Bench Project and new welder!

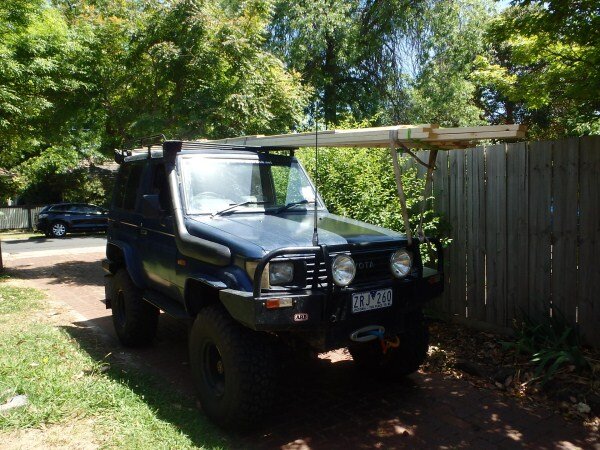
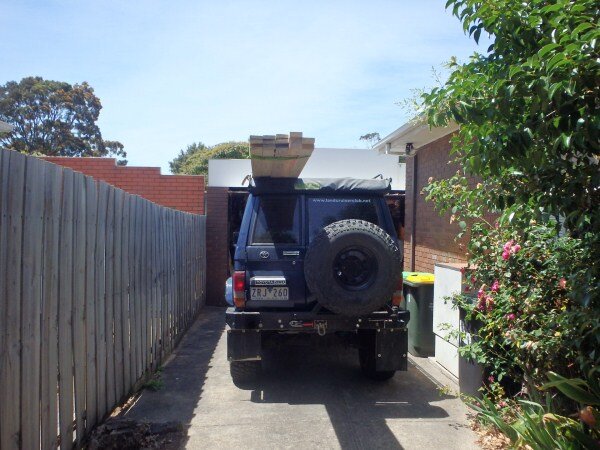
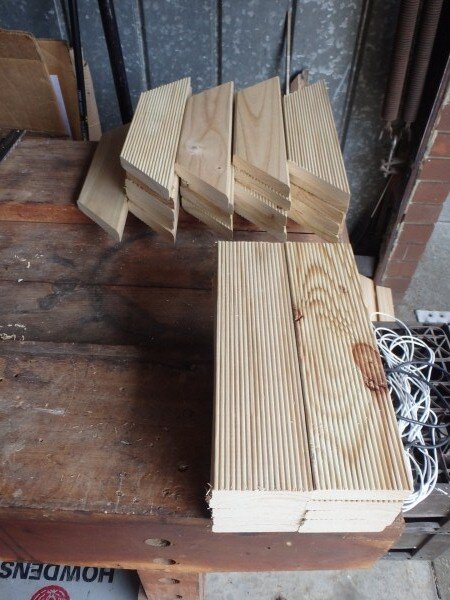
LJ has been working hard again carrying timber for another little carpentry project.

This time 5 meter lengths!

PB230002_zps149b0dd8.jpg

PB230004_zps2fd938c6.jpg

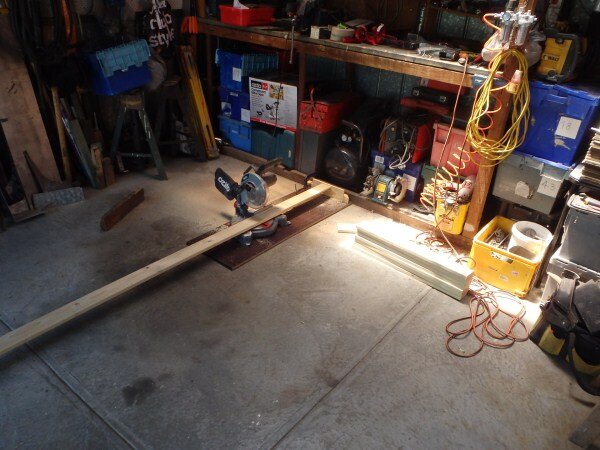
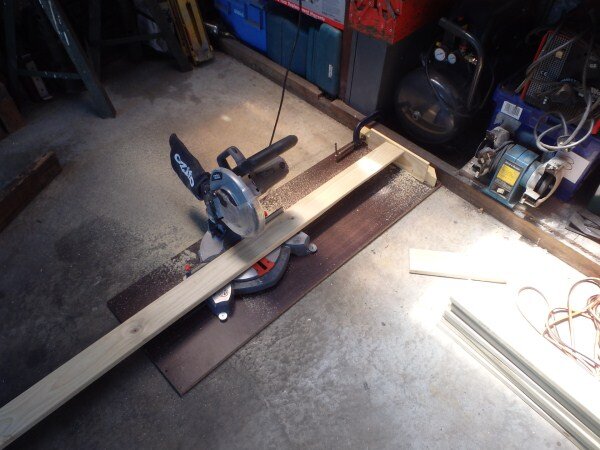
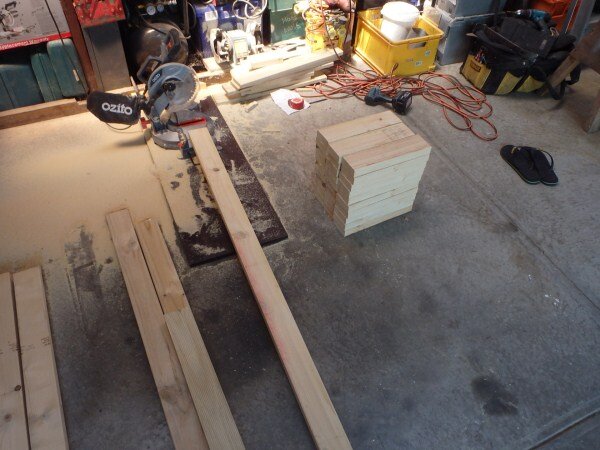
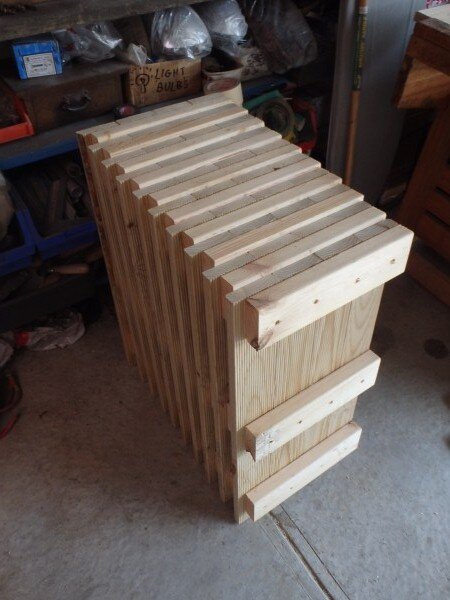
As I needed a lot of pieces of wood the same length I set up a stop for the chop saw.

PB230005_zpsfd79d00b.jpg

PB230006_zps314e81b9.jpg

PB230007_zps1965cc63.jpg

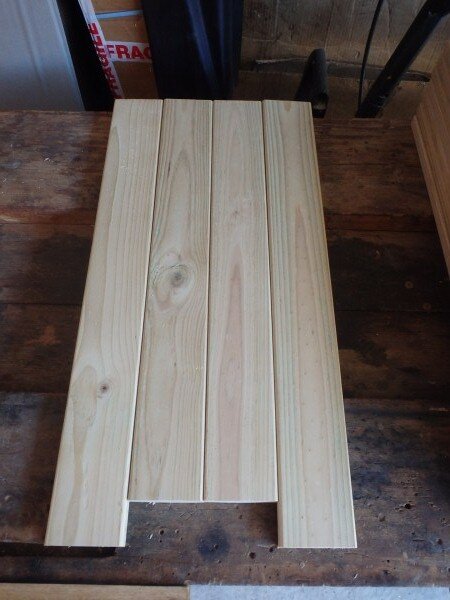
Guess what I'm making yet?

PB230008_zps593eaf33.jpg

PB230009_zpsb2d44a8d.jpg

The new bench once again came in very useful!

PB230010_zps51d574f6.jpg

PB230011_zps1eea096c.jpg

PB230012_zps65616e69.jpg

PB230013_zpsd4476f2d.jpg

PB230014_zpse00dc3a1.jpg

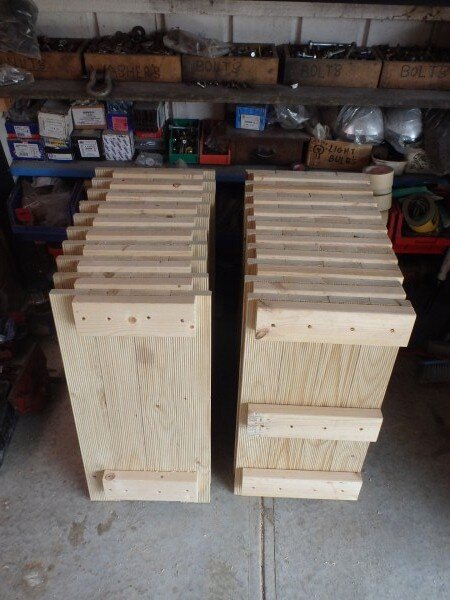
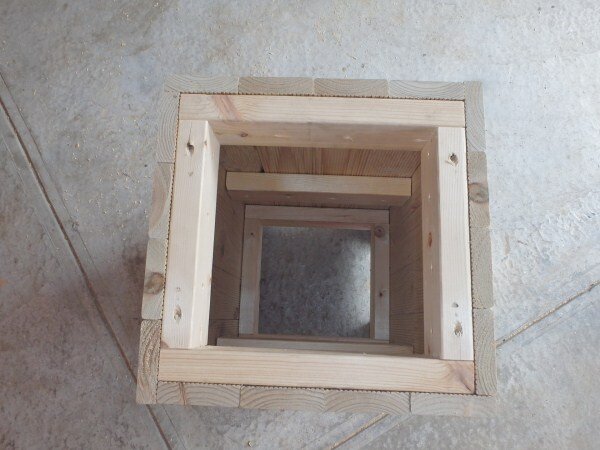
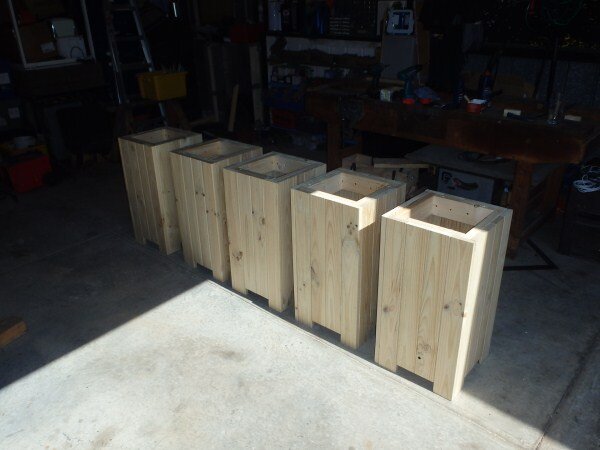
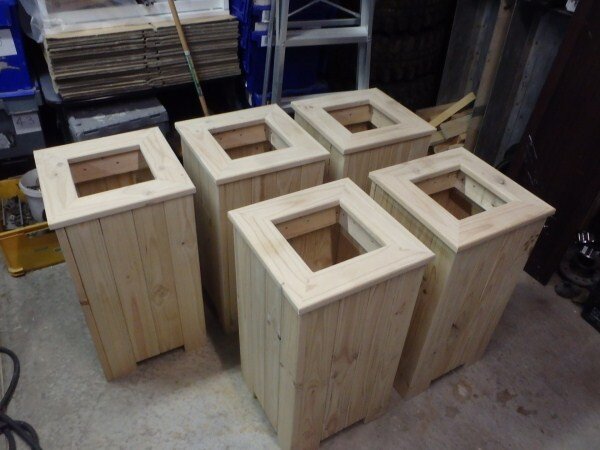
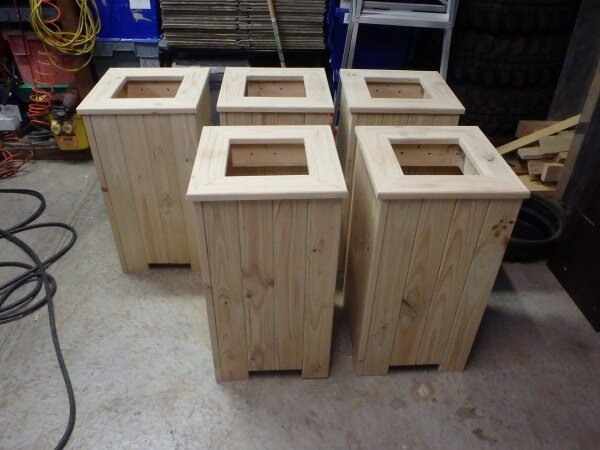
Raised planter boxes for the deck that I recently fixed up.

PB230016_zpsd933b93c.jpg

PB230017_zpsab1a2821.jpg

PB230018_zps4a463f76.jpg

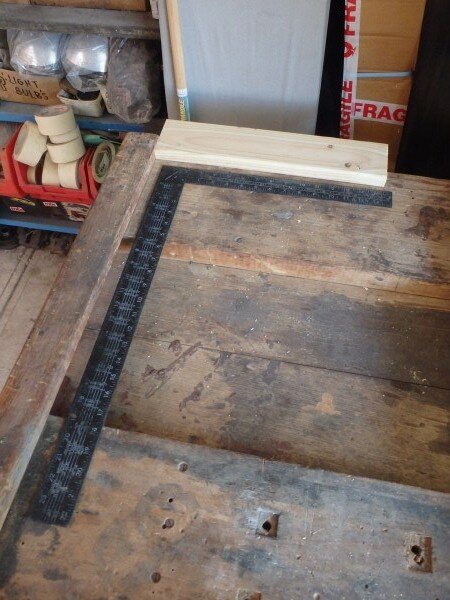
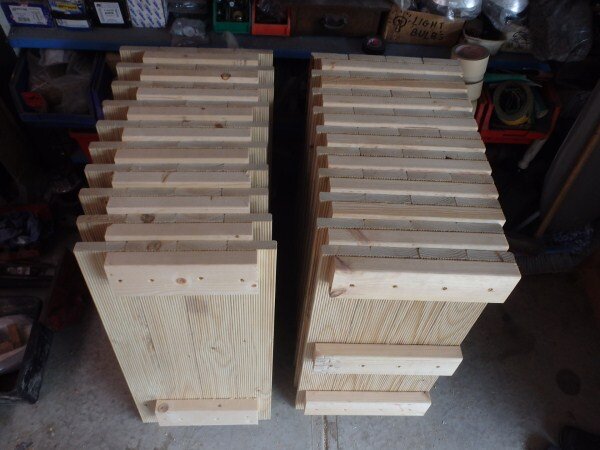
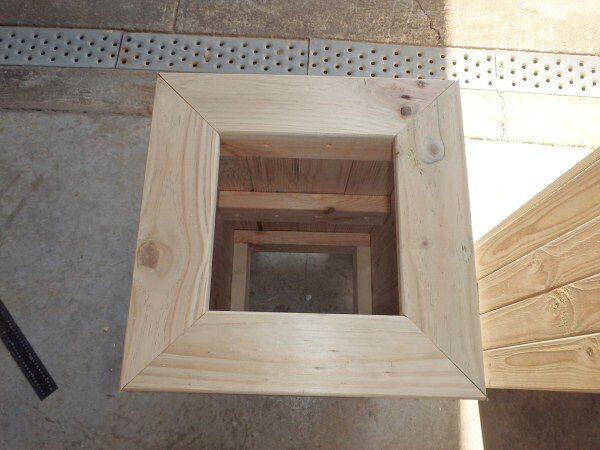
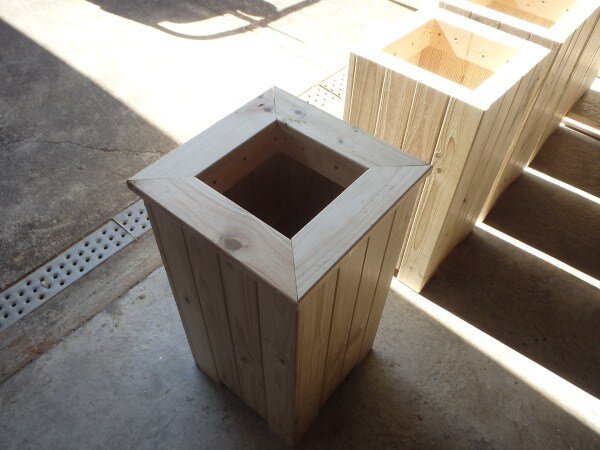
Cut some timber to cap the tops off with.

PB230020_zps0a67fa50.jpg

PB230021_zpsd5f7c437.jpg

Cut more timber.

PB230022_zps2df2b5de.jpg

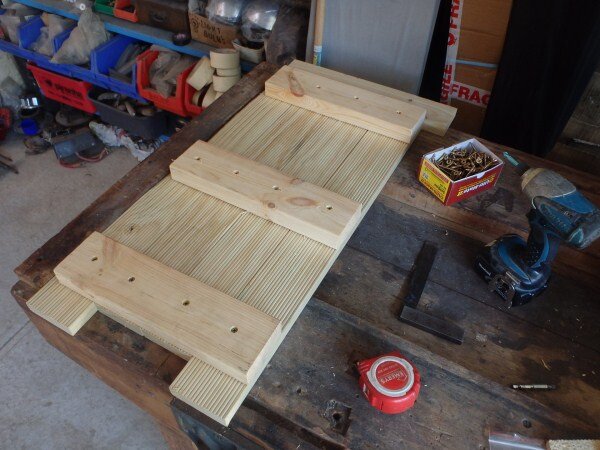
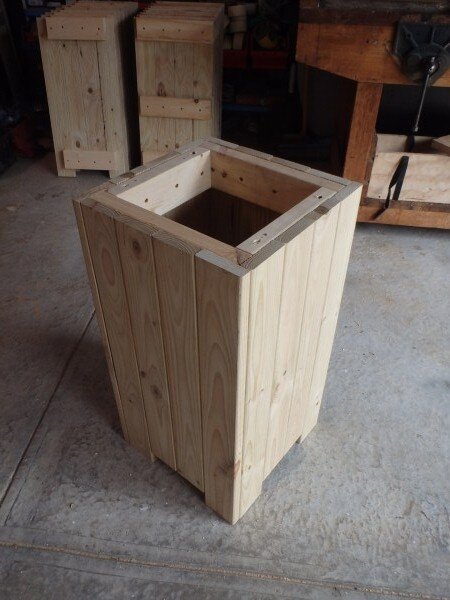
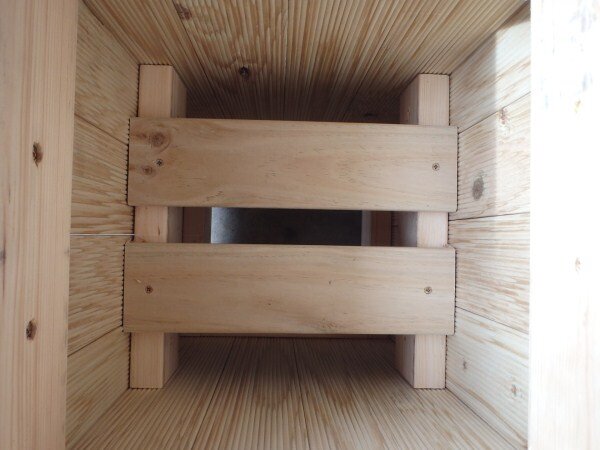
Added a shelf for the plant pot to sit on.

PB230023_zps84550846.jpg

They just need staining now.

PB250068_zps5618cf9f.jpg

PB250069_zps334c311f.jpg

I cant decide whether I will go back to my roots as a carpenter and set myself up making custom furniture/joinery out of wood, or open a workshop designing and building custom 4wd stuff. Either way I want to work for myself at home in a workshop! But that will be a few years off yet, once I'm done in the mines and living on the East coast. :icon-biggrin:

OK 4WD projects next....................................

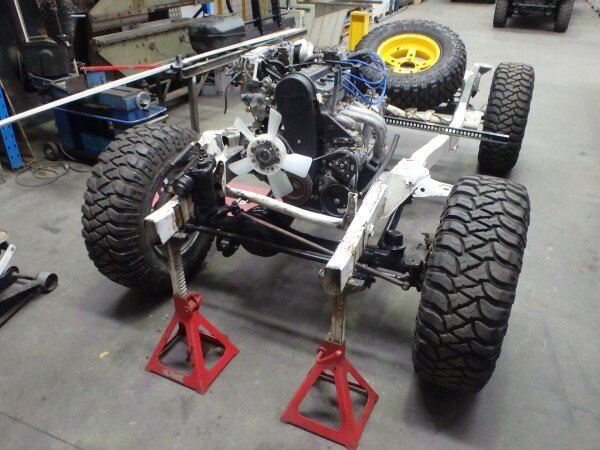
I finally got some time to do a bit of work on our Jimny buggy project. This project has had to take a bit of a back seat while we focus on paying jobs, so its going to be more of a long term project.

PB240024_zpsd9d13cd4.jpg

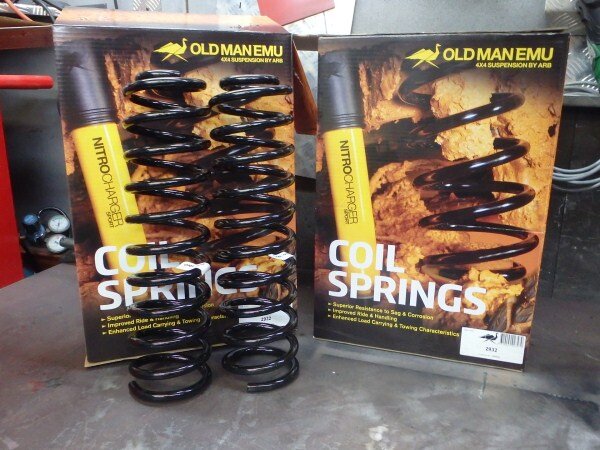
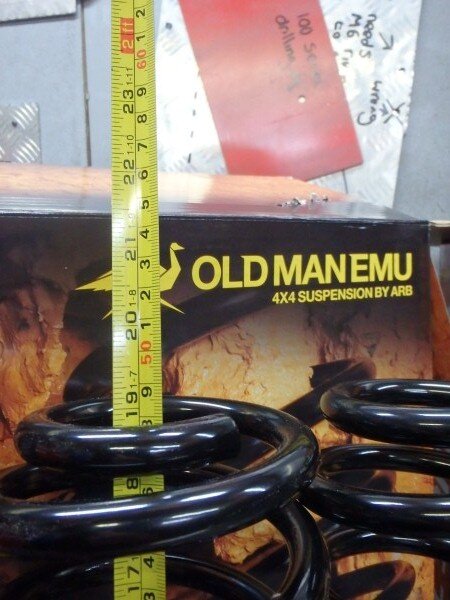
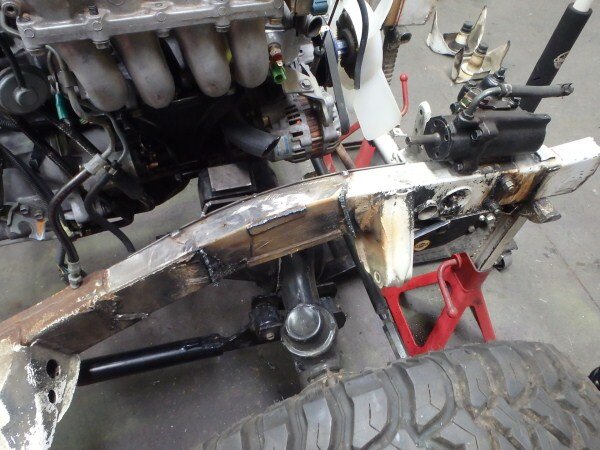
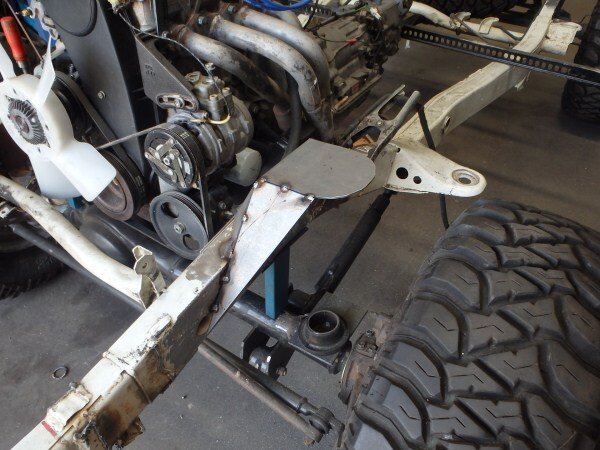
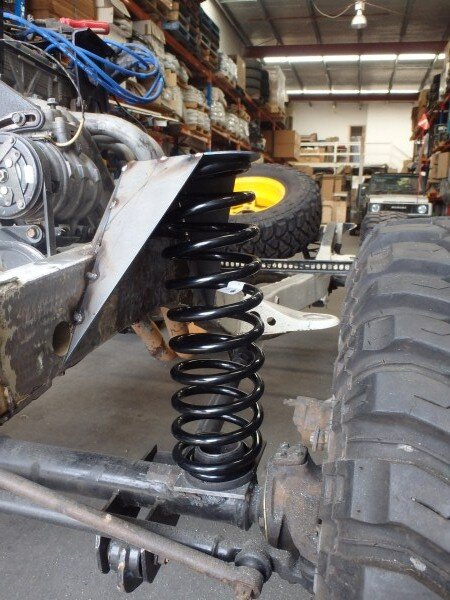
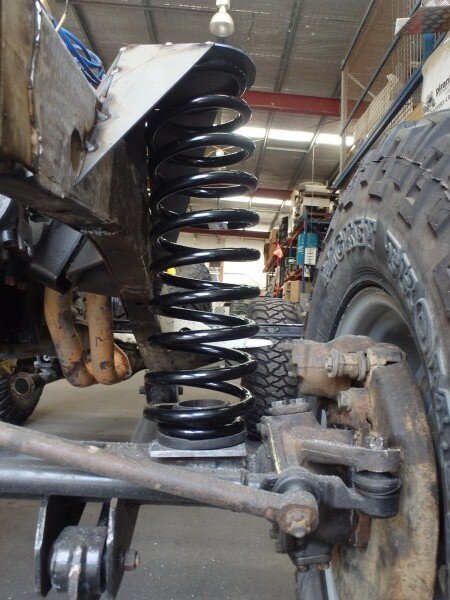
I got some of the longest, off the shelf springs available. Jeep Wrangler front springs.

PB240026_zpsb45d9d57.jpg

PB240028_zpsc7e42f5c.jpg

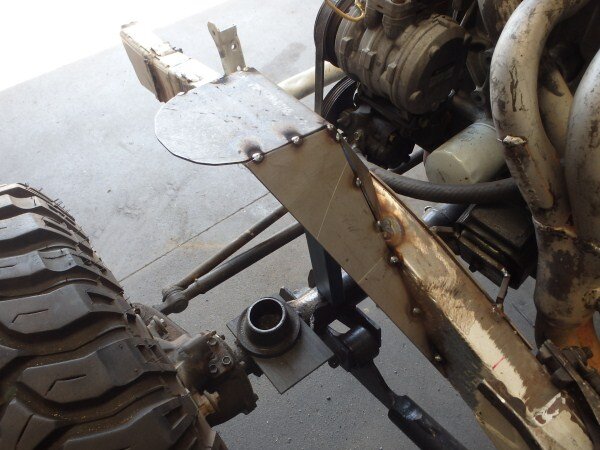
The idea will be to have the truck sitting reasonably low for stability but with loads of droop and articulation. So although there big springs I'm not building some jacked up monster truck, I will just weld the spring purchases onto the chassis higher up.
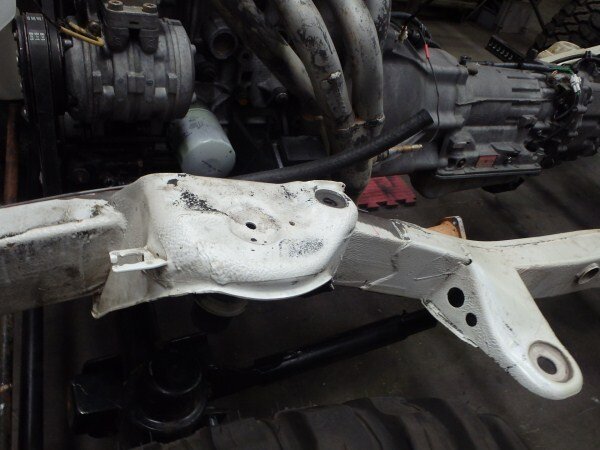
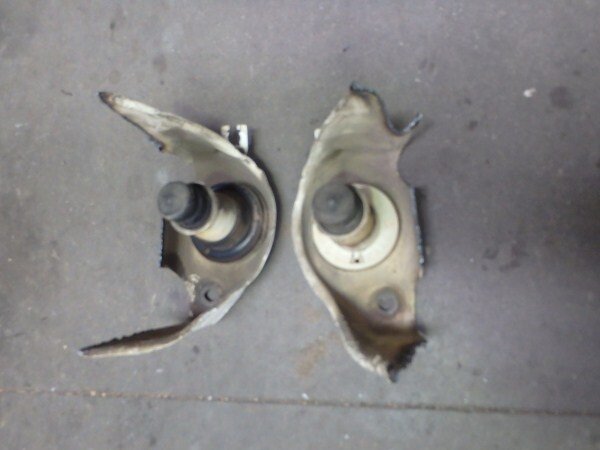
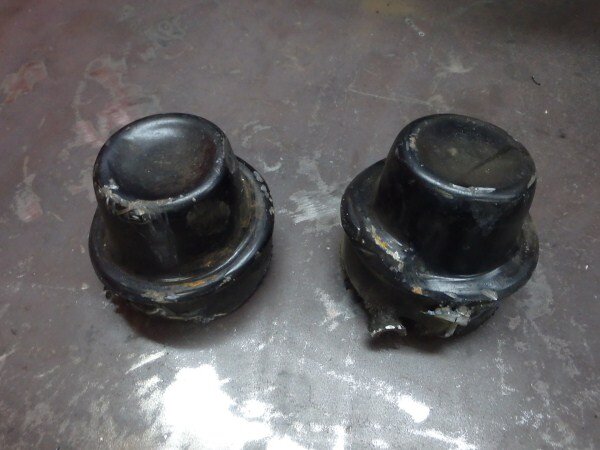
PB240029_zpsc7ffc056.jpg

PB240030_zps50873dac.jpg

Old spring perches.

PB240032_zps4ee80514.jpg

Plasma cut them off.

PB240033_zpsefc165be.jpg

PB240034_zpsc519cb4f.jpg

PB240035_zpsb6c16e94.jpg

The spring perches on the axle were too far inwards and were the wrong size.

PB240036_zpsd0af6b9e.jpg

Plasma cut them off.

PB240037_zpse897d8a8.jpg

PB240038_zps58afe094.jpg

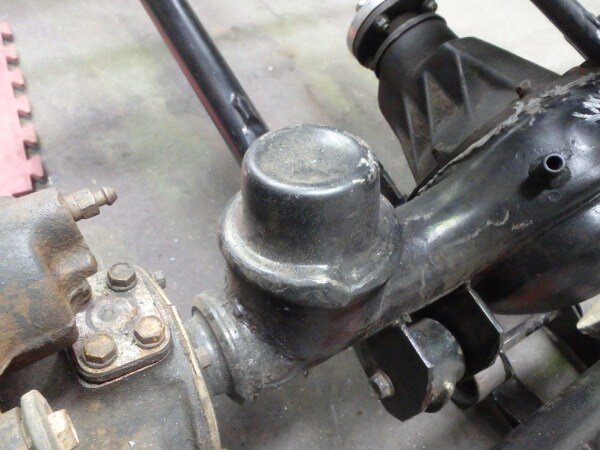
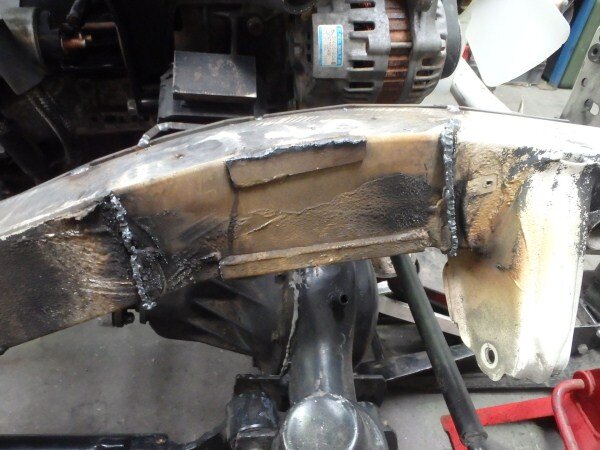
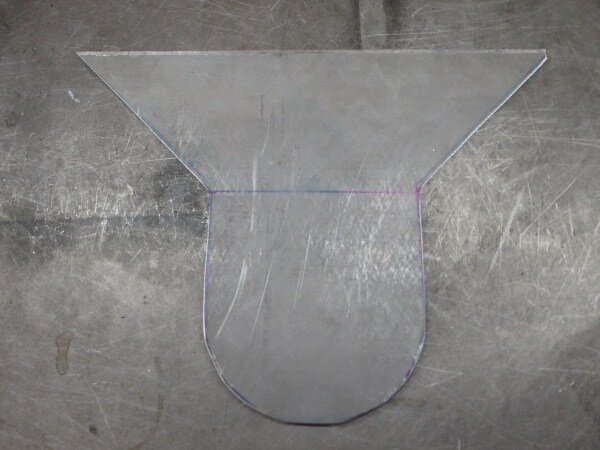
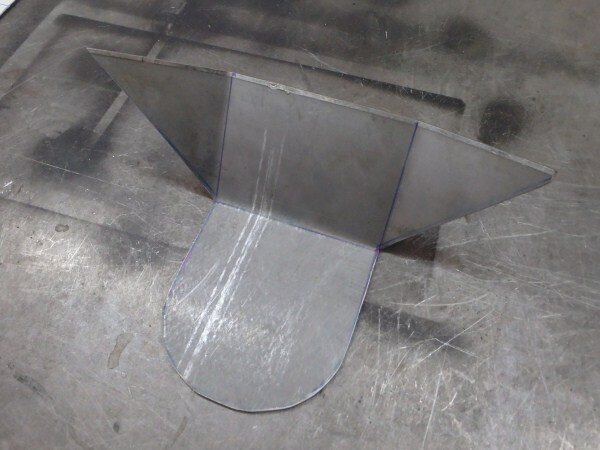
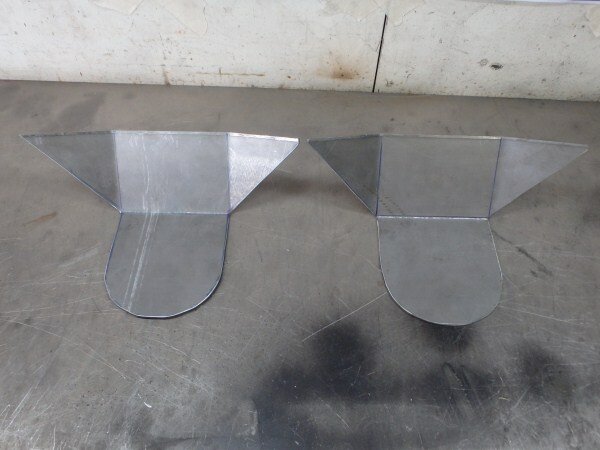
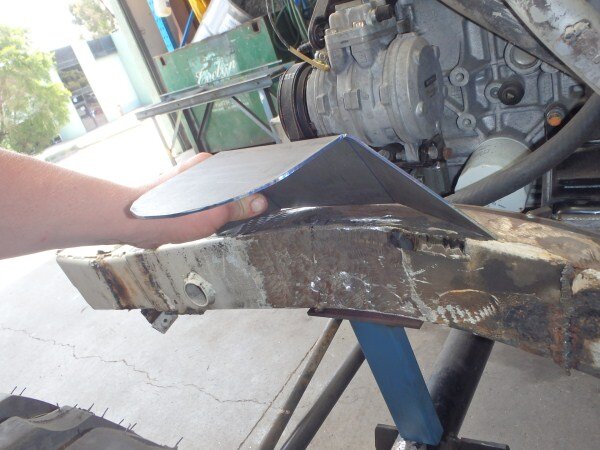
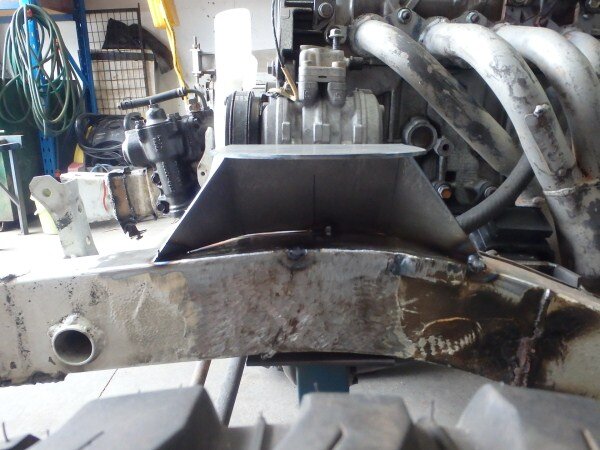
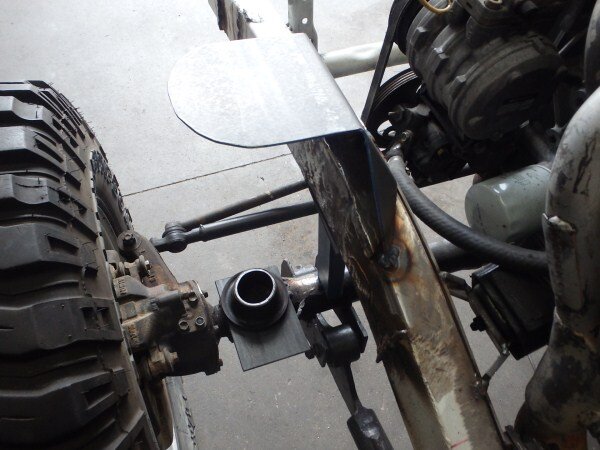
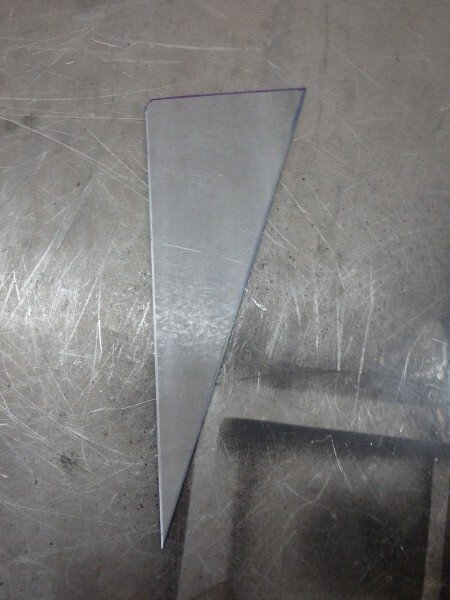
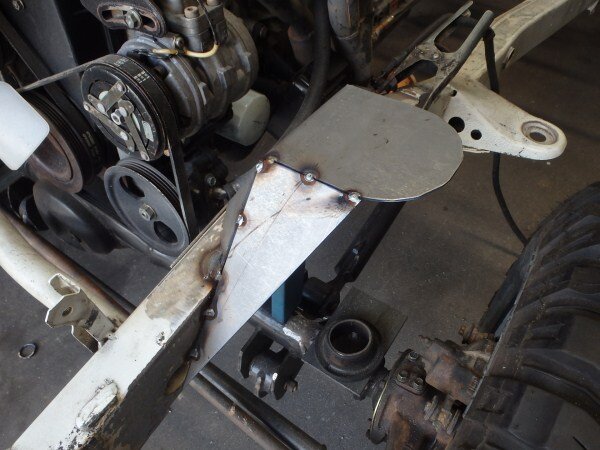
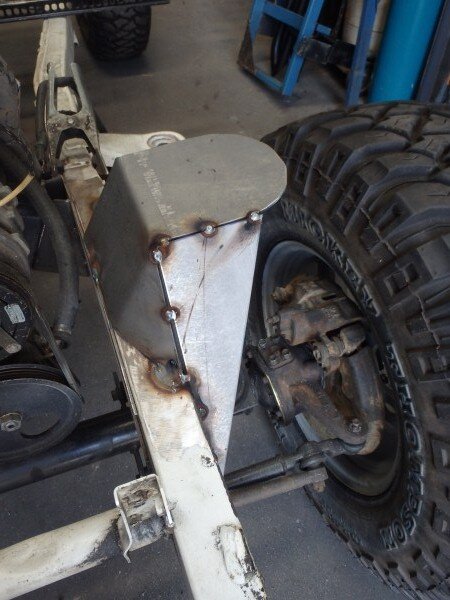
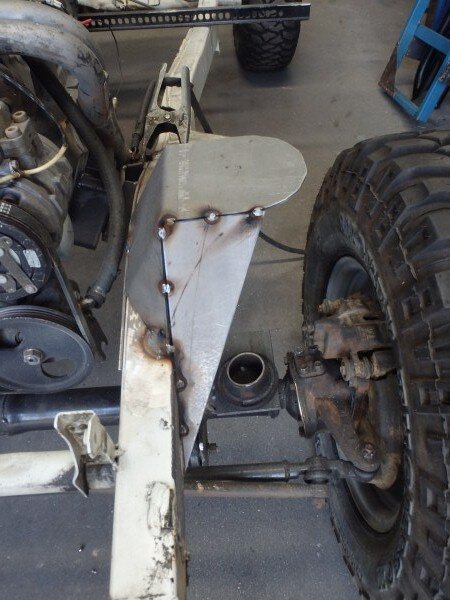
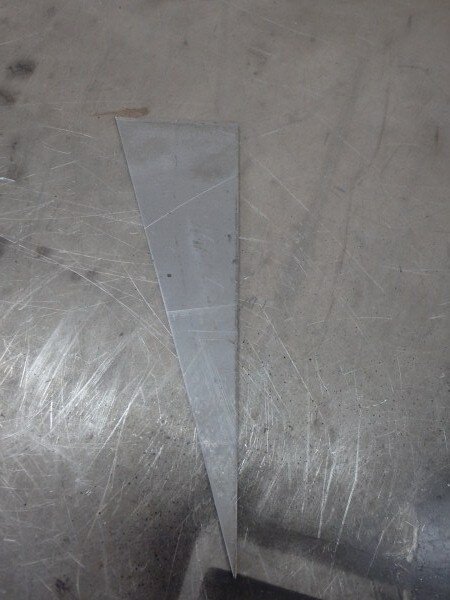
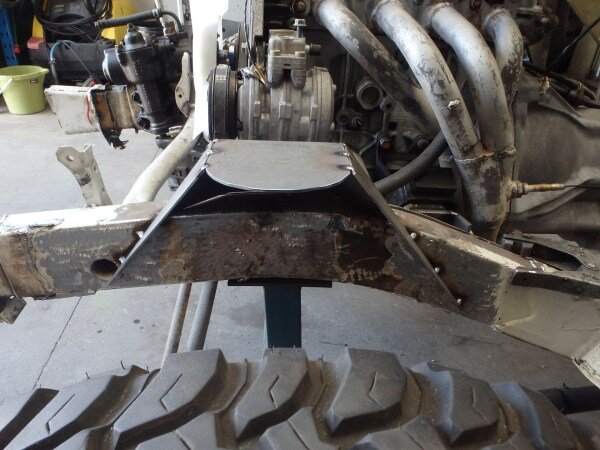
Cut some 6mm plate and welded a piece of tube to it.
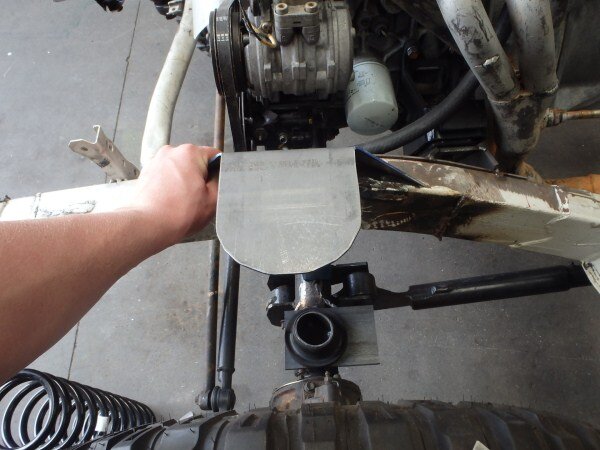
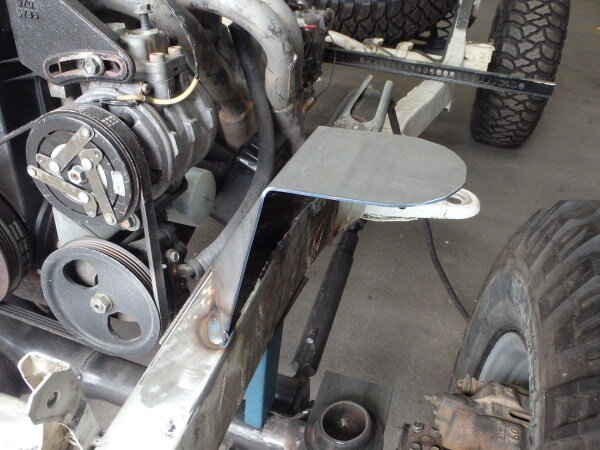
PB240039_zps771ee457.jpg

Tacked it in place.

PB240042_zps5742861a.jpg

PB240043_zps7f2b6bf3.jpg

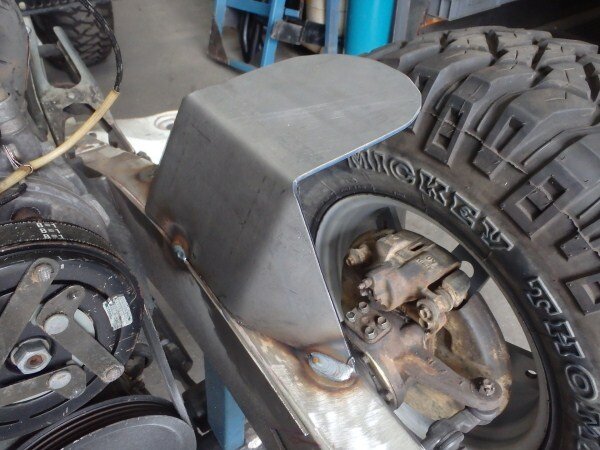
And fitted a rubber spring seat to it.

PB240046_zps1031b47d.jpg

PB240047_zpsd96cfbb4.jpg

PB240049_zpsd5e53528.jpg

That was all I managed to get done on that as we had a customers Suzuki in for a few days which I had to fit suspension, wheels and tyres, cut the arches and add flares, front winch bumper and rock sliders too. No pics of that one, but once that was done I could get back on with my Maruti project!

I needed to clean the tank out as it was full of black sludge.

PB250051_zps290095b0.jpg

I squirted a load of degreaser in it and then steam cleaned it.

PB250052_zps18388056.jpg

I then removed the seats from the Maruti and gave it a good clean.

PB250053_zps4c9cf68f.jpg

PB250054_zps2f662456.jpg

PB250055_zps86efdd23.jpg

The tail gate was knackered.

PB250056_zpsd8c9244d.jpg

So I found a better one.

PB250057_zps6db3fc23.jpg

Re-fitted the tank.

PB250059_zpsd66277a1.jpg

I removed all the plastic flares and did some guard chopping next.

PB250060_zps40c78527.jpg

PB250061_zpsc46bf13e.jpg

PB250062_zps9af3d2f2.jpg

Did that both sides then gave it a very quick sand down with the air sander.

Ready for paint.

PB250063_zpsce6cdb70.jpg

PB250064_zps520c5e17.jpg

PB250065_zpse10a034d.jpg

1 litre of white enamel.

PB250066_zpsd1a93923.jpg

PB250067_zpsec57287f.jpg

The next day after I had re-sprayed it.

PB260070_zpsb9efdf1f.jpg

PB260071_zps5c4b486e.jpg

PB260072_zpsf2071681.jpg

PB260073_zps6372ba4c.jpg

Started bolting stuff back in.

Roll cage first.

PB260078_zpsac8dd81d.jpg

PB260079_zps628400af.jpg

And bull bar.

PB260080_zps100ba4fd.jpg

PB260081_zps24522a5b.jpg

Interior bits next. Floor mats, seat belts etc.

PB280093_zps5f7be2b2.jpg

PB280094_zpscea7640b.jpg

The tray looked pretty tired.

PB280095_zps30fcfdd3.jpg

Rubber matting.

PB280096_zps103ef823.jpg

Much better!

PB280097_zps854e03e3.jpg

As its off road only we dont need side repeaters, so I cut and painted some checkered plate to blank the holes with.

PB280098_zpsfe56b9c7.jpg

PB280100_zps8cfebd79.jpg

Added the checkered plate that caps the back off the dash board off.

PB280101_zps5a63a197.jpg

And flares.

PB280102_zpsd0530a6d.jpg

Seats.

PB280103_zpsf0854be6.jpg

PB280104_zpsc608a0e8.jpg

It now starts and drives perfectly and I took it next door so the auto electricians can wire up the lights.

Its now very close to being finished and sold! I just need to add some of my tube doors, fit a modified airbox (due to the 4" bodylift) and run the engine up to temp and check for any leaks.

PB280105_zps39820adb.jpg

PB280106_zps566b03f5.jpg

PB280108_zps9eb79ff4.jpg

PB280109_zps6d907cf3.jpg

Added some of our stickers in place of the original Sierra badges.

PB280111_zps061fbdfc.jpg

PB280112_zpsde449ddf.jpg

I picked up the work bench I'm building for the auto electricians from the powder coaters.

PB260074_zps0c050d41.jpg

PB260075_zpsd6e8b1dc.jpg

Bolted the castors on.

PB260076_zpsf4bb48f6.jpg

When I get time I need to fit a wooden top, shelves and back board to it.

PB260077_zps455479f4.jpg

I finally got my TIG welder!

PB270082_zpsb0b25fc1.jpg

PB270083_zps3a7041ae.jpg

PB270085_zps86cc44a4.jpg

Need to fit a 3 phase plug to the end, then I want a 3 phase female socket on a cable with a 240volt plug on the other end so I can use it at home and work.

PB270086_zps3fd1fbb6.jpg

The foot pedal.

PB270087_zps34bc0934.jpg

Torch.

PB270088_zps797aa4e8.jpg

It seems like a good one.

PB270089_zpsd8ebd8a4.jpg

Its super flexible which will be useful when welding roll cages etc.

PB270090_zps267a6c22.jpg

PB270091_zpsb0866184.jpg

PB270092_zps6a7a33ae.jpg

It will live at work where its covered by the insurance and is in a very secure alarmed building with CCTV cameras every where but I want to protect my investment from anyone messing with it if I'm not there, or anyone just walking out with it. So I'm going to build a secure metal cabinet for it and weld it underneath my bench. Should also help keep the dust out of it as it will be sealed until I want to use it and open the doors.

Got it on the bench to measure it up.

PB280113_zps49e7eee6.jpg

Marked and cut some 3mm steel ready for folding.

PB280117_zps13702733.jpg

PB280118_zps84d64b3f.jpg

And thats as far as I got.

I will get the welder setup next week and now as TAFE has finished until February/March I can practice like hell for my welding test. :icon-biggrin:

Have a great weekend guys! :thumbup:

Going to be lovely and warm here, 26 today and 32 tomorrow! :icon-cool:
 

Attachments

  • PB230002_zps149b0dd8.jpg
    PB230002_zps149b0dd8.jpg
    105.6 KB · Views: 52
  • PB230004_zps2fd938c6.jpg
    PB230004_zps2fd938c6.jpg
    79 KB · Views: 57
  • PB230005_zpsfd79d00b.jpg
    PB230005_zpsfd79d00b.jpg
    74.4 KB · Views: 61
  • PB230006_zps314e81b9.jpg
    PB230006_zps314e81b9.jpg
    64.6 KB · Views: 67
  • PB230007_zps1965cc63.jpg
    PB230007_zps1965cc63.jpg
    65.3 KB · Views: 145
  • PB230008_zps593eaf33.jpg
    PB230008_zps593eaf33.jpg
    72.7 KB · Views: 57
  • PB230009_zpsb2d44a8d.jpg
    PB230009_zpsb2d44a8d.jpg
    68.2 KB · Views: 53
  • PB230010_zps51d574f6.jpg
    PB230010_zps51d574f6.jpg
    92.1 KB · Views: 89
  • PB230011_zps1eea096c.jpg
    PB230011_zps1eea096c.jpg
    70.6 KB · Views: 48
  • PB230012_zps65616e69.jpg
    PB230012_zps65616e69.jpg
    77.2 KB · Views: 64
  • PB230013_zpsd4476f2d.jpg
    PB230013_zpsd4476f2d.jpg
    84.8 KB · Views: 47
  • PB230014_zpse00dc3a1.jpg
    PB230014_zpse00dc3a1.jpg
    56.3 KB · Views: 56
  • PB230016_zpsd933b93c.jpg
    PB230016_zpsd933b93c.jpg
    75.9 KB · Views: 50
  • PB230017_zpsab1a2821.jpg
    PB230017_zpsab1a2821.jpg
    56.3 KB · Views: 60
  • PB230018_zps4a463f76.jpg
    PB230018_zps4a463f76.jpg
    45.9 KB · Views: 50
  • PB230020_zps0a67fa50.jpg
    PB230020_zps0a67fa50.jpg
    54 KB · Views: 52
  • PB230021_zpsd5f7c437.jpg
    PB230021_zpsd5f7c437.jpg
    58 KB · Views: 50
  • PB230022_zps2df2b5de.jpg
    PB230022_zps2df2b5de.jpg
    95.4 KB · Views: 60
  • PB230023_zps84550846.jpg
    PB230023_zps84550846.jpg
    48.4 KB · Views: 52
  • PB250068_zps5618cf9f.jpg
    PB250068_zps5618cf9f.jpg
    53.9 KB · Views: 73
  • PB250069_zps334c311f.jpg
    PB250069_zps334c311f.jpg
    58.5 KB · Views: 50
  • PB240024_zpsd9d13cd4.jpg
    PB240024_zpsd9d13cd4.jpg
    75.8 KB · Views: 54
  • PB240026_zpsb45d9d57.jpg
    PB240026_zpsb45d9d57.jpg
    86.4 KB · Views: 45
  • PB240029_zpsc7ffc056.jpg
    PB240029_zpsc7ffc056.jpg
    77 KB · Views: 56
  • PB240028_zpsc7e42f5c.jpg
    PB240028_zpsc7e42f5c.jpg
    86.3 KB · Views: 55
  • PB240030_zps50873dac.jpg
    PB240030_zps50873dac.jpg
    73.5 KB · Views: 49
  • PB240032_zps4ee80514.jpg
    PB240032_zps4ee80514.jpg
    55.7 KB · Views: 53
  • PB240033_zpsefc165be.jpg
    PB240033_zpsefc165be.jpg
    36.8 KB · Views: 58
  • PB240034_zpsc519cb4f.jpg
    PB240034_zpsc519cb4f.jpg
    77.5 KB · Views: 57
  • PB240036_zpsd0af6b9e.jpg
    PB240036_zpsd0af6b9e.jpg
    64 KB · Views: 55
  • PB240035_zpsb6c16e94.jpg
    PB240035_zpsb6c16e94.jpg
    68.1 KB · Views: 51
  • PB240037_zpse897d8a8.jpg
    PB240037_zpse897d8a8.jpg
    52.9 KB · Views: 57
Last edited:
:lol:

Soon mate. :icon-wink:

I bolted some of my tube doors on project Maruti.

PC010009_zps17c669b4.jpg

PC010010_zpsd74a9d90.jpg

PC010011_zps2efcb159.jpg

PC010012_zps673ed694.jpg

PC020037_zps5eb0b774.jpg

PC020038_zps206409f3.jpg

PC020039_zpsb204cf05.jpg

The auto electrician wired the lights up.

PC010028_zpsfc058848.jpg

PC010027_zps4075843b.jpg

PC010029_zpsf736ffd1.jpg

Its now being put out the front for sale and my next 2 Suzuki projects have turned up. :icon-cool:

PC020045_zps160e0856.jpg

I had to fit some really expensive seats to a beautiful new 70 series duel cab for a customer.

PC010013_zpsf540a9a3.jpg

New seats all the way from Germany.

PC010014_zps7aa7623d.jpg

To replace the factory ones.

PC010015_zps15f5e4b0.jpg

PC010016_zpsa509ad91.jpg

They bolted in very easily and as soon as I sat in them I decided when I buy one of these 70's I want these seats in it!

They are so comfortable!! :clap:

PC010017_zps6b9c866f.jpg

PC010018_zps5aa7af54.jpg

Something LandCruisers have always lacked! A decent arm rest!

PC010019_zps10423803.jpg

PC010020_zps835cd696.jpg

PC010021_zps84dd7fab.jpg

I finished the chainsaw box.

My TIG wasnt setup yet and didnt even have a plug on it so I welded it using the fronious.

PC010022_zps81c31211.jpg

PC010024_zps7d87a987.jpg

PC010025_zpsf21522e5.jpg

PC010026_zps6b8d52b1.jpg

PC030060_zps87fab06d.jpg

PC030061_zps9e856aa0.jpg

PC030062_zps413502b0.jpg

PC030063_zps2a557c7d.jpg

I did a bit more on the auto electricians new portable workbench.

PC020040_zps8788dccd.jpg

Cut some wood.

PC020041_zps8fa7e2c1.jpg

PC020042_zpsc7197947.jpg

Added some checkered plate around the bottom so when things get dropped they dont bounce under the bench.

PC020043_zps2fba0cea.jpg

PC020044_zpsb8e797b0.jpg

The electrician brought me out a 3 phase plug and fitted it for me.

PC010030_zps71448d3d.jpg

I finished making the cabinet below my bench.

PC010031_zpsc9349543.jpg

PC010032_zps7e870679.jpg

PC010034_zps15eee751.jpg

PC010035_zps9fef287a.jpg

PC010036_zpsf69ae016.jpg

PC020050_zpsc8445298.jpg

PC020051_zpsbdeed61e.jpg

PC020052_zps056a0fdc.jpg

PC020053_zps73bae26a.jpg

To use it I just need to unlock the door and pull the TIG torch out.

PC020054_zps8241e4bd.jpg

Then when I'm done it all locks away.

PC020055_zpsc24a80ea.jpg

I had a couple of hours to spend on my project Jimny yesterday.

PC040064_zps14e064a8.jpg

Needed to make and weld some spring perches onto the chassis.

PC040065_zps597122e8.jpg

cut some 3mm steel.

PC040066_zps4e2831af.jpg

Bent it.

PC040067_zps981d7e46.jpg

PC040068_zpse77679a2.jpg

PC040069_zps1b3c534d.jpg

PC040070_zps67f4ffbe.jpg

I was happy it would work so I made another one for the other side.

PC040071_zpsc6372ce1.jpg

Tacked them in place.

PC040072_zps56c54919.jpg

PC040073_zps26940e88.jpg

PC040074_zpsf0094c9d.jpg

PC040075_zps8faa8fd8.jpg

Cut some more steel.

PC040076_zpsf65e5df4.jpg

Welded it on.

PC040077_zps9b92f460.jpg

PC040078_zps692d2c92.jpg

PC040079_zps1e3a9caf.jpg

PC040080_zpsec353eb7.jpg

Cut some more.

PC040081_zpsb9233da0.jpg

Welded it on.

PC040082_zpsb1bc0b9a.jpg

PC040083_zps2e9b38fd.jpg

PC040084_zps305678e7.jpg

Tried a spring in.

PC040085_zps43c009b6.jpg

PC040086_zps939ab42e.jpg

PC040087_zpsd09d41a0.jpg

PC040088_zps64ea8907.jpg

PC040089_zps94fa1e87.jpg

Other side.

PC040090_zpsf9e31120.jpg

PC040091_zpsb32abd23.jpg

I didnt add the front triangle brace yet as I'm not sure if I'm going to use the original chassis panhard rod mount yet or not, thats my next job.

PC040092_zpsbfc6dfcc.jpg

Both springs in and I'm very pleased with the height its sitting at.

PC040093_zps1aad7e05.jpg

PC040094_zps687e471c.jpg

PC040095_zps1a181a47.jpg

My next job is to sort the front panhard rod out. Then I can mount the back axle which is going to be a lot simpler than the front and much more fun! I'm going for a 4 link setup. :icon-biggrin:

I finished the timber planters and that job has paid for my ridiculously expensive Christmas day flights to Tasmania. :icon-cool:

Sanded them down.

PC020056_zps8a24cad8.jpg

Stained them.

PC020057_zps75e04d3e.jpg

PC020058_zps6125cb05.jpg

PC020059_zpsab6a3a92.jpg

I delivered them then went back the next day to fit a new bathroom sink and taps for the guy, he had by this point added the plants and positioned them on his deck.

PC040096_zps0c48e9a7.jpg

PC040097_zps46f77bc2.jpg

Only 2 weeks left at work for me now then 3.5 weeks off! :dance:

Stereosonic music festival this weekend, then Tassie trip over Christmas then a 4wd trip to the High Country at the start of January! So lots to look forward to! :icon-biggrin:
 

Attachments

  • PC040066_zps4e2831af.jpg
    PC040066_zps4e2831af.jpg
    53 KB · Views: 46
  • PC040067_zps981d7e46.jpg
    PC040067_zps981d7e46.jpg
    52.6 KB · Views: 63
  • PC040068_zpse77679a2.jpg
    PC040068_zpse77679a2.jpg
    56.5 KB · Views: 55
  • PC040069_zps1b3c534d.jpg
    PC040069_zps1b3c534d.jpg
    61.8 KB · Views: 46
  • PC040071_zpsc6372ce1.jpg
    PC040071_zpsc6372ce1.jpg
    46.3 KB · Views: 48
  • PC040070_zps67f4ffbe.jpg
    PC040070_zps67f4ffbe.jpg
    69.4 KB · Views: 42
  • PC040072_zps56c54919.jpg
    PC040072_zps56c54919.jpg
    77.9 KB · Views: 55
  • PC040073_zps26940e88.jpg
    PC040073_zps26940e88.jpg
    71 KB · Views: 43
  • PC040074_zpsf0094c9d.jpg
    PC040074_zpsf0094c9d.jpg
    71.7 KB · Views: 48
  • PC040075_zps8faa8fd8.jpg
    PC040075_zps8faa8fd8.jpg
    64.3 KB · Views: 50
  • PC040076_zpsf65e5df4.jpg
    PC040076_zpsf65e5df4.jpg
    74 KB · Views: 52
  • PC040077_zps9b92f460.jpg
    PC040077_zps9b92f460.jpg
    78.9 KB · Views: 57
  • PC040078_zps692d2c92.jpg
    PC040078_zps692d2c92.jpg
    68 KB · Views: 52
  • PC040079_zps1e3a9caf.jpg
    PC040079_zps1e3a9caf.jpg
    86.3 KB · Views: 42
  • PC040080_zpsec353eb7.jpg
    PC040080_zpsec353eb7.jpg
    88.2 KB · Views: 66
  • PC040081_zpsb9233da0.jpg
    PC040081_zpsb9233da0.jpg
    72 KB · Views: 66
  • PC040082_zpsb1bc0b9a.jpg
    PC040082_zpsb1bc0b9a.jpg
    67.6 KB · Views: 68
  • PC040083_zps2e9b38fd.jpg
    PC040083_zps2e9b38fd.jpg
    88.4 KB · Views: 46
  • PC040084_zps305678e7.jpg
    PC040084_zps305678e7.jpg
    74.4 KB · Views: 51
  • PC040085_zps43c009b6.jpg
    PC040085_zps43c009b6.jpg
    107 KB · Views: 49
  • PC040086_zps939ab42e.jpg
    PC040086_zps939ab42e.jpg
    101.1 KB · Views: 46
Those Recaros aren't cheap...£850 a pop, plus the seat bases.

Very comfortable though, having mine in the 95 was fantastic.
 
Back
Top