Don't like the adverts?  Click here to remove them

LJ70 Build Thread!

Truck license .... Great!

Tree house ..... Fantastic!

Trailer repairs and winch .... Brill!

Busy boy as usual Ben, you'll be needing another holiday soon....:lol: :thumbup:
 
Thanks mate. :thumbup:

Will be on an almost permanent holiday soon when were living in sunny Queensland! :icon-cool:
 
Airboat, Trailer Project & LJ.

I did some more work on the Airboat project this week.

The freshly upholstered seats turned up.

DSCN4854_zpssdxr2shi.jpg


DSCN4855_zpsnn5fmrgz.jpg


DSCN4856_zpspwrjg7l5.jpg


DSCN4857_zps53rjrtjd.jpg


DSCN4858_zpsawby6tzd.jpg


DSCN4860_zpspzzc7bbh.jpg


Built an alluminium frame to mount the 2 passenger seats to the boat.

DSCN4868_zpsjcs0x8g2.jpg


DSCN4870_zpsgruzpgqa.jpg


DSCN4871_zpsp0z304sb.jpg


DSCN4874_zpsroxr1bsj.jpg


DSCN4884_zpsd2a9txny.jpg


Bolted the seats to the frame.

DSCN4885_zpsfag2gost.jpg


DSCN4886_zpsfnno88ef.jpg


Just need to weld the frame in position now.

DSCN4887_zpscfuekw3i.jpg


DSCN4888_zps9xchx62w.jpg


Engine next.

We've decided to use the Subaru WRX Impreza engine.

DSCN4889_zpsr6ruclbf.jpg


DSCN4890_zpsk56w11h9.jpg


DSCN4891_zpslrvuz24m.jpg


This is the propeller we will be using. A $2000 variable pitch one built in the USA.

DSCN4892_zpss6pddrb5.jpg


DSCN4893_zpscu6m7klt.jpg


This is the sexy billet alluminium hub.

DSCN4896_zpscm7tscv0.jpg


DSCN4897_zpshx7eij2b.jpg


DSCN4899_zpstqkjd1sv.jpg


DSCN4900_zps5bijqyog.jpg


DSCN4901_zpsdpvywk0u.jpg


DSCN4902_zpsd0yjnzim.jpg


I needed to make up a really strong cradle which can be welded to the bottom of the boat and then have the engine bolted to it.

First job was to make a template.

DSCN4905_zpssxiy4vmz.jpg


Picked up a sheet of 20mm thick alluminium.

DSCN4906_zps4d4b9rdh.jpg


DSCN4907_zpsbk0xjjjz.jpg


DSCN4908_zps0bne6ema.jpg


Fitted an alluminium blade in the circular saw to quickly and accurately cut the thick sheet.

DSCN4909_zpslvxa9enf.jpg


Cut the center out on the bandsaw.

DSCN4911_zpsbdyhwehm.jpg


DSCN4912_zpslclklcyi.jpg


Clamped the cardboard template back in position and marked where all the holes needed to be.

DSCN4913_zpswtek3nkm.jpg


Drilled the holes.

DSCN4914_zpsg0iltkkz.jpg


Cut a hole out for the starter motor.

DSCN4915_zps3nceduqt.jpg


DSCN4916_zpscmwzlj2p.jpg


Bolted it on to the engine.

DSCN4917_zpsf4nf0uji.jpg


Used some washers to pack out the starter motor until it was in the perfect spot.

DSCN4918_zpsdsuuxj7p.jpg


DSCN4919_zpskjazwlof.jpg


DSCN4920_zpshqn6ipqy.jpg


Picked up a 40mm thick chunk of alluminium.

DSCN4921_zpszxz0zz2h.jpg


Marked out where it needed cutting and hole sawing.

DSCN4922_zpsimontaha.jpg


DSCN4923_zpsegrj9ifs.jpg


Took over half an hour on the drill press to cut the 60mm hole all the way through the 40mm alluminiumm! Was bloody slow going!

DSCN4926_zps0uvrwtxk.jpg


DSCN4927_zpsm4pi1cjv.jpg


Clamped to the bench ready to be cut with the circular saw.

DSCN4928_zpsnhdbjpsx.jpg


DSCN4929_zpscsed2ort.jpg


Prepared the edges of the weld joint.

DSCN4930_zpskxmuessn.jpg


Clamped it on.

DSCN4931_zpsd4w2cism.jpg


DSCN4932_zps2xadmaop.jpg


Welded it then bolted it back onto the engine.

DSCN4933_zps6vzpwjf1.jpg


DSCN4934_zpsp5asgz6f.jpg


DSCN4935_zps30kqatjt.jpg


I needed to pick up on the threaded holes in the bottom of the engine where the engine mounts normally bolt on.

DSCN4940_zpslheiflph.jpg


DSCN4941_zpsj2bvejdk.jpg


Cut and drilled some 12mm alluminium.

DSCN4943_zps5vofade4.jpg


DSCN4944_zpsm4izafjm.jpg


DSCN4945_zpsredwjhtp.jpg


DSCN4946_zpsyxhfjarp.jpg


Cut a gusset.

DSCN4947_zpsrmvo9i9w.jpg


DSCN4948_zpsdfxfrou8.jpg


DSCN4950_zpsdrl77zli.jpg


Made another one for the other side.

DSCN4951_zps1qommfkn.jpg


Another gusset.

DSCN4952_zpsoxxd81ma.jpg


DSCN4953_zpsplov6o1z.jpg


DSCN4954_zpsalynygnu.jpg


DSCN4955_zps8uzpqx8x.jpg


DSCN4956_zpsm2vavkuk.jpg


Tacked it together then removed it and fully welded it.

DSCN4957_zpsrfhbhk0x.jpg


DSCN4958_zps3uhjp9kk.jpg


DSCN4959_zpso0uk5sl8.jpg


Bolted back on to the engine.

DSCN4960_zpszfzll8wr.jpg


DSCN4961_zpscsdagv7w.jpg


DSCN4962_zpsxeyvc6qo.jpg


DSCN4963_zpspnjjtquu.jpg


I wont get to finish building the Airboat but my boss knows an engineer who has said he will finish it for him. I'm hoping to fly down to have a go on it once its finished! :icon-biggrin:

I did a bit more on the trailer project.

We've decided to make the ramps out of alluminium. We were going to make them in steel but I worked out they would weigh about 50kg each!

Got some really strong 100mm channel with a nice thick 10mm wall.

DSCN4862_zpsjdxib9qi.jpg


And cut up some 10mm thick 50mm angle to weld between the sections of channel.

DSCN4863_zpsmcz6ewdp.jpg


DSCN4864_zpshr4mccll.jpg


Will get them welded it up this week.

I started making some alluminium boxes for the trailer.

One will have a 10" Optima mounted in it for the winch. The other will store ratchet straps etc.

DSCN4964_zpsa38wp1hq.jpg


DSCN4965_zps1tbrio3o.jpg


DSCN4967_zpsrynfniyx.jpg


DSCN4973_zpsd9pjjb94.jpg


DSCN4976_zpseldew7sp.jpg


I fusion welded the outside corners of the boxes, so no filler rod, just melting and fusing the 2 sheets together. :icon-cool:

DSCN4977_zpsqcfxplkm.jpg


Fitted a door with stainless steel piano hinge and stainless steel spring bolt.

DSCN4978_zpsw45wbx7p.jpg


DSCN4979_zpswugajrfy.jpg


DSCN4980_zpsgj9zij57.jpg


DSCN4981_zps2dmarxnu.jpg


The prototype battery tray I recently designed for the new Nissan Navara has now been copied by one of our suppliers and the first batch of 150 turned up the other day and there now flying off the shelves! :icon-biggrin:

DSCN4865_zpsy4wx0m7p.jpg


DSCN4866_zpssejdvfnv.jpg


DSCN4867_zpsxqrcdm4h.jpg


And that was another week at work!

Oh we did also pick up all the timber to finish the tree house and next week were going to do another long hard week on it and hopefully get it finished! :dance:

LJ next..................................

The paintwork on LJ has been looking a bit damaged in places, not to mention a few dents I picked up last year.

So this week I made a start doing some filling and sanding.

DSCN4875_zpsbzhr8ojl.jpg


DSCN4877_zpslu3lxl1u.jpg


DSCN4878_zpsabdsamzx.jpg


DSCN4879_zpsygy1ble6.jpg


DSCN4880_zpsjxhle9oy.jpg


DSCN4881_zpsltubnkxj.jpg


DSCN4882_zps7sdx1dwj.jpg


DSCN4982_zpsfxhsa2bl.jpg


DSCN4983_zpsm0ndffom.jpg


Today I sanded down the filler.

DSCN4984_zpsyfjwrznc.jpg


DSCN4985_zpsbafbgr2v.jpg


Masked everything up that I didnt want painting.

DSCN4986_zpsgo1phkws.jpg


DSCN4988_zpsxif652ux.jpg


DSCN4989_zpsdwo3nxuv.jpg


DSCN4990_zpst5pf0yo5.jpg


And splashed some paint on it.

DSCN4991_zps9xdsfx2r.jpg


Should get a few hours this week to pull the rest of the masking tape off and get LJ put back together. :icon-biggrin:

I did more coats of paint this time and didnt bother thinning the paint down so I'm hoping it should be a bit tougher this time.

I want to get another few years out of this shell ideally. Then when I re-shell I'm thinking of either fitting a super rare soft top body (if I can find one) or maybe a 40 series body. :think:
 

Attachments

  • DSCN4854_zpssdxr2shi.jpg
    DSCN4854_zpssdxr2shi.jpg
    72.2 KB · Views: 36
  • DSCN4855_zpsnn5fmrgz.jpg
    DSCN4855_zpsnn5fmrgz.jpg
    72.4 KB · Views: 37
  • DSCN4856_zpspwrjg7l5.jpg
    DSCN4856_zpspwrjg7l5.jpg
    90.8 KB · Views: 36
  • DSCN4857_zps53rjrtjd.jpg
    DSCN4857_zps53rjrtjd.jpg
    65.2 KB · Views: 40
  • DSCN4858_zpsawby6tzd.jpg
    DSCN4858_zpsawby6tzd.jpg
    67.4 KB · Views: 30
  • DSCN4860_zpspzzc7bbh.jpg
    DSCN4860_zpspzzc7bbh.jpg
    58.2 KB · Views: 42
  • DSCN4868_zpsjcs0x8g2.jpg
    DSCN4868_zpsjcs0x8g2.jpg
    65.6 KB · Views: 37
  • DSCN4871_zpsp0z304sb.jpg
    DSCN4871_zpsp0z304sb.jpg
    58.8 KB · Views: 30
  • DSCN4870_zpsgruzpgqa.jpg
    DSCN4870_zpsgruzpgqa.jpg
    60.8 KB · Views: 34
  • DSCN4874_zpsroxr1bsj.jpg
    DSCN4874_zpsroxr1bsj.jpg
    56.4 KB · Views: 37
  • DSCN4884_zpsd2a9txny.jpg
    DSCN4884_zpsd2a9txny.jpg
    69.5 KB · Views: 37
  • DSCN4885_zpsfag2gost.jpg
    DSCN4885_zpsfag2gost.jpg
    75.4 KB · Views: 38
  • DSCN4886_zpsfnno88ef.jpg
    DSCN4886_zpsfnno88ef.jpg
    87.2 KB · Views: 34
  • DSCN4888_zps9xchx62w.jpg
    DSCN4888_zps9xchx62w.jpg
    67.8 KB · Views: 40
  • DSCN4887_zpscfuekw3i.jpg
    DSCN4887_zpscfuekw3i.jpg
    71.4 KB · Views: 34
  • DSCN4889_zpsr6ruclbf.jpg
    DSCN4889_zpsr6ruclbf.jpg
    60.6 KB · Views: 37
  • DSCN4890_zpsk56w11h9.jpg
    DSCN4890_zpsk56w11h9.jpg
    65.3 KB · Views: 45
  • DSCN4891_zpslrvuz24m.jpg
    DSCN4891_zpslrvuz24m.jpg
    64.9 KB · Views: 40
  • DSCN4892_zpss6pddrb5.jpg
    DSCN4892_zpss6pddrb5.jpg
    63.6 KB · Views: 34
  • DSCN4893_zpscu6m7klt.jpg
    DSCN4893_zpscu6m7klt.jpg
    46.7 KB · Views: 34
  • DSCN4896_zpscm7tscv0.jpg
    DSCN4896_zpscm7tscv0.jpg
    55.4 KB · Views: 34
  • DSCN4899_zpstqkjd1sv.jpg
    DSCN4899_zpstqkjd1sv.jpg
    80 KB · Views: 36
  • DSCN4897_zpshx7eij2b.jpg
    DSCN4897_zpshx7eij2b.jpg
    70.7 KB · Views: 33
  • DSCN4900_zps5bijqyog.jpg
    DSCN4900_zps5bijqyog.jpg
    96.2 KB · Views: 34
  • DSCN4901_zpsdpvywk0u.jpg
    DSCN4901_zpsdpvywk0u.jpg
    64 KB · Views: 33
  • DSCN4902_zpsd0yjnzim.jpg
    DSCN4902_zpsd0yjnzim.jpg
    61 KB · Views: 38
  • DSCN4905_zpssxiy4vmz.jpg
    DSCN4905_zpssxiy4vmz.jpg
    76.7 KB · Views: 33
  • DSCN4908_zps0bne6ema.jpg
    DSCN4908_zps0bne6ema.jpg
    42.2 KB · Views: 39
  • DSCN4907_zpsbk0xjjjz.jpg
    DSCN4907_zpsbk0xjjjz.jpg
    39.2 KB · Views: 40
  • DSCN4906_zps4d4b9rdh.jpg
    DSCN4906_zps4d4b9rdh.jpg
    48.4 KB · Views: 41
Last edited:
The air boat is looking tough mate, great work on the engine mounts. It's a shame you won't be there to complete it. Hopefully your boss can post a link to it working on youtube? You really fit a lot into your weeks don't you! Just casually paint the car after work...!
I didn't get a chance to do my truck license on the weekend as I'm always working weekends. I just decided to give it a go in peak hour traffic mid week! It took a bit to get the hang of the Eaton RoadRanger gearbox, but got it in the end. It's actually easier to drive a truck than a car sometims isn't it. Being able to see over all the cars is nice. I got 95% for the final test.
Have you figured out your final plan for the big move yet?
 
Thanks mate. :thumbup:

I'm hoping to fly down and be there for its maiden voyage, so will of course get pics n video. :icon-cool:

I chose to drive a truck with a syncromesh gearbox, so I've got a restricted license. I figured most of the trucks I'm likely to drive in the foreseeable future will be synro so I decided to go for the easier, cheaper option. :think:

My new Heavy license came in the post this week and I've finally got full motorcycle entitlement added from my UK license, so now I'm saving up for a 450 enduro! :icon-twisted:

Things are progressing well on the planning for the big move. The truck is booked, but because its GVM is 16 tonnes I've got to buy a drivers logbook and fill it in so that if/when I get pulled over at the heavy vehicle weigh bridges etc. I can show that I'm managing fatigue and work hours as per the law.

A minor expense and inconvenience, but thankfully I can still drive up and down in 4 days! :icon-smile:

I've made one slight error in that I presumed the best way to get from Melbourne to the Gold Coast was along the Hume to Sydney and then straight up the Pacific Highway, so I booked a motel in Newcastle for the night on our trip up.

But talking to a few truck drivers, I learnt that that really isnt a good route in a truck and a much better route is to go up the Newell Highway instead. :doh:

So we will use the Newell on all the other trips, but we will go the other way on the first run up so as not to loose the cost of the motel.

So were going up and down in the truck. Then I'm driving LJ up and Bec is driving her car up. We will take our time more and camp in national parks/state forests along the way.

Then a week later I'm flying down and driving the Astra up. Decided for the sake of an $89 flight + $200-$300 in fuel I may as well just drive it up. I wont need a motel or anything as I will drive until I'm tired then get a couple of hours sleep with the seat reclined and then drive the rest of the way.

So in total I'm estimating 80-90 hours of driving for me and I should have all our worldly possessions up in Queensland, ready for our new life in the sun! :thumbup:
 
Last edited:
Good stuff mate, Syncro would have been so much easier. Another student was doing syncro while I was using the RoadRanger, we were comparing our days during our breaks, the hardest part for him was the size of the truck. For me I didn't get a chance to think about that, I was to busy double clutching and missing gears!!! Part of me wished I did it in a Syncro for ease of learning, but I'm happy I learnt with the RoadRanger, you just never know when you'll need it.
I couldn't help myself, I bought a little truck the day after I got my license, a Mazda T4100, 4.1 litre, 6 cylinder diesel. New injector pump, front springs, starter motor, radiator and brand new heavy duty tray. GVM of 7030kgs. It was a project for a guy who decided he wasn't going to bother getting his truck license, and wanted a quick sale for some xmas cash. He had put 8k into it on top of what he paid for it. I picked it up for $4500. Bargain of the year!
A friend of mine is an interstate furniture removalist, I told him about your up coming mission, he said to tell you to be careful that you don't over do it and fall asleep at the wheel. Take your time and get plenty of quality rest along the way. And to lock your doors at the truck stops or the hookers will be in your cab before you know it! apparently they'll stop off at truck stops looking for business!
 
Don't like the adverts?  Click here to remove them
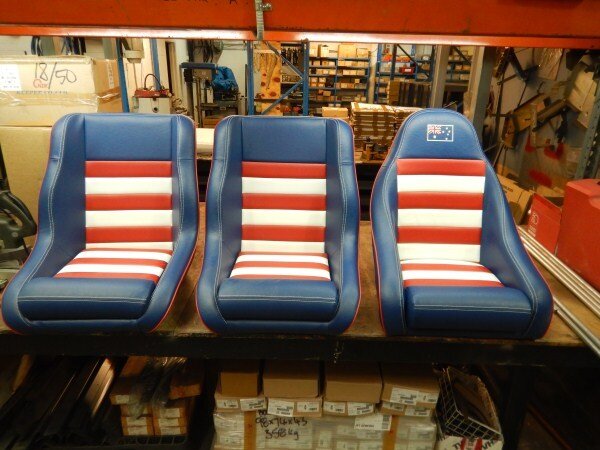
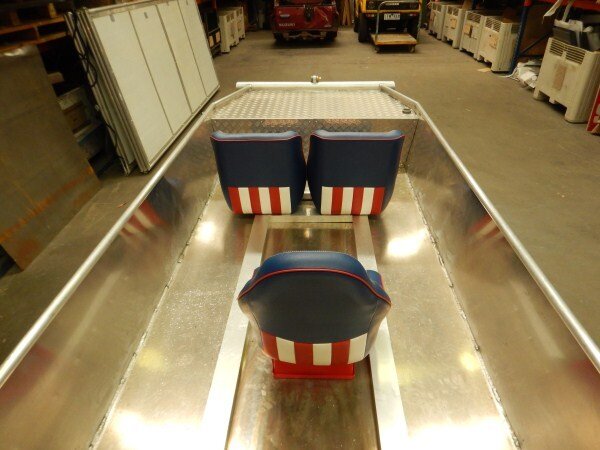
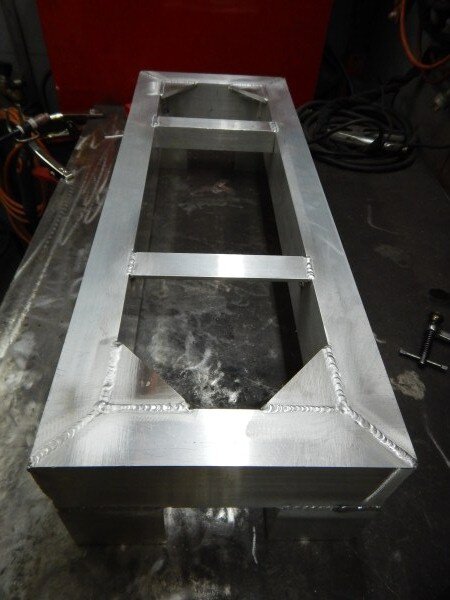
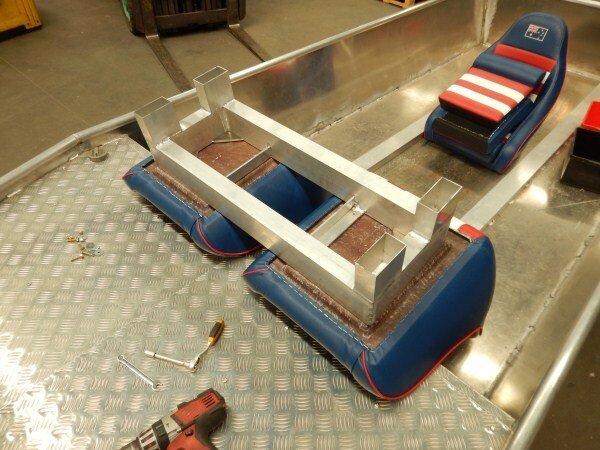
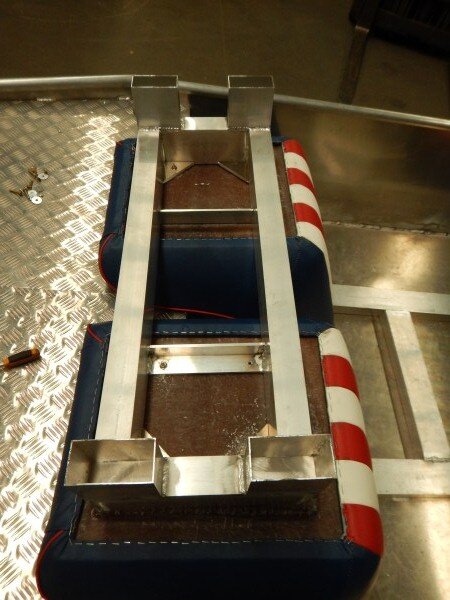
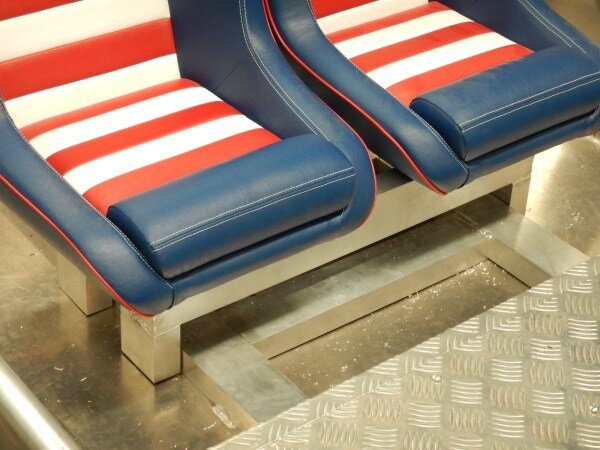
I finished my work on the trailer build this week.

Mounted the 2 alluminium boxes I made.

DSCN5008_zps0vwmsj11.jpg


DSCN5009_zpsaamme4ss.jpg


DSCN5010_zpsv1u0ytjy.jpg


DSCN5017_zpsxfwz7box.jpg


The one side will have a 10" Optima in it for the winch.

DSCN5011_zpscqqyvhvi.jpg


The other side will carry ratchet straps and the fair lead for the concealed winch.

DSCN5012_zpsficwx2r1.jpg


The winch has been wired up now.

DSCN5014_zps1wwl3mjv.jpg


And with the door shut and section of floor back in place the winch is completely hidden.

DSCN5015_zpsn2as9cle.jpg


I needed to re-mount the spare wheel.

So I made a bracket for it.

DSCN5018_zpsi4w2dvka.jpg


DSCN5019_zpsaf2idpcp.jpg


DSCN5020_zpsh75pjc53.jpg


DSCN5021_zpsffatobnr.jpg


With it tack welded in position I could test fit the wheel.

DSCN5022_zpsdguaroz6.jpg


DSCN5023_zpsyoz3pwox.jpg


Ramps next.

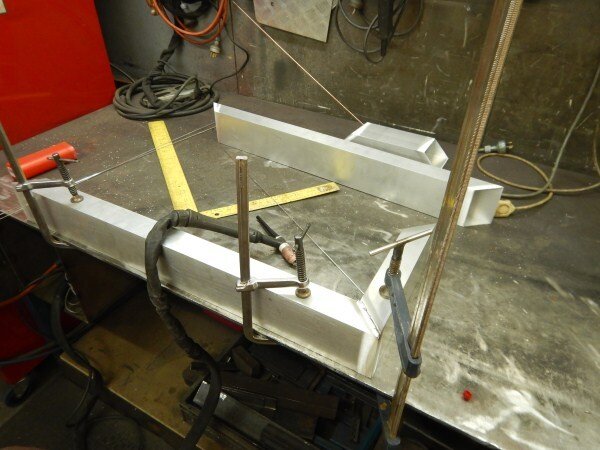
Cut the ends to the correct angles.

DSCN5024_zpsjkxu8ll9.jpg


DSCN5025_zpsfbu6dgmm.jpg


DSCN5026_zpsqhtryvsx.jpg


Marked where all the pieces of angle would go.

DSCN5027_zpsibqrbkpt.jpg


DSCN5028_zpsqopjvwjv.jpg


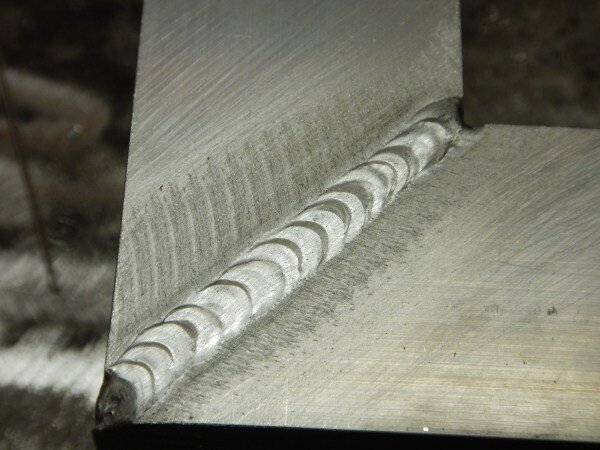
I could then weld all the pieces of angle in position.

DSCN5029_zpsc30uu5dj.jpg


DSCN5030_zpsbxynuovn.jpg


DSCN5031_zpsqyubd4qk.jpg


DSCN5035_zpsrkeyzwxn.jpg


DSCN5037_zpsh4icwmlf.jpg


I welded a length of thick 25mm angle along the back of the trailer.

DSCN5039_zpsowi7cfai.jpg


DSCN5041_zpsbnzvfrxw.jpg


I could then work out how best to hook the ramps on.

DSCN5042_zpsbhbpidyx.jpg


DSCN5043_zps9cvdijqw.jpg


I picked up some really thick alluminium angle to cut down and weld to the ramps.

DSCN5044_zpsbcl3kmuz.jpg


Clamped and tacked a piece on.

DSCN5045_zpsezpov5ii.jpg


DSCN5046_zpshir7pxwb.jpg


Tested it.

DSCN5047_zpsq5xcmvxp.jpg


Then fully welded it on.

DSCN5050_zps1njdrdcy.jpg


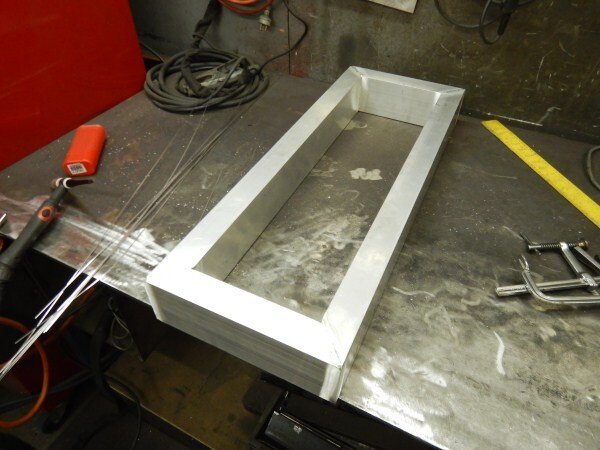
I trimmed the other end of the ramps to allow me to fit some 6mm checker plate.

DSCN5051_zpsoutbw46e.jpg


DSCN5052_zpsiiddtj36.jpg


DSCN5053_zps8lthu6br.jpg


DSCN5054_zpsu2mrjgxh.jpg


DSCN5055_zps6ipz0rmw.jpg


DSCN5056_zpsvh6iwp32.jpg


I folded up a piece of 3mm checker plate to fit inside the box under the tray, to separate the winch and the ramps.

DSCN5057_zpsgxgpzwhw.jpg


DSCN5058_zpsimbtsfxl.jpg


DSCN5061_zps09k7v6pv.jpg


Tested the ramps.

DSCN5072_zpsf7yamxrw.jpg


DSCN5073_zpsteebsxtx.jpg


DSCN5071_zps8vk3ydqe.jpg


DSCN5070_zpsanvqgvb5.jpg


DSCN5066_zpsznvarlse.jpg


DSCN5065_zpsuaa2hkqi.jpg


DSCN5064_zpsftd3jgoq.jpg


DSCN5063_zps6sz52rf7.jpg


DSCN5062_zps67zfh4sw.jpg


DSCN5074_zps0rwmis6m.jpg


Ive got to make a big gate for the side of my bosses house.

The opening between the side of the house and neighbors house isnt square.

DSCN5076_zpsne7dlmbr.jpg


Because the opening isnt square I wanted adjustable hinges, but for some reason none of our local suppliers had any adjustable hinges, or had ever seen them before. Something I would have sourced very easily in the UK. :crazy:

So I decided I would have to design and make my own.

The parts.

DSCN5077_zpselpuy5l2.jpg


TIG welded them together.

DSCN5090_zpsosekgt8y.jpg


Drilled the frame for the gate and welded them in position.

DSCN5091_zpsn92owmoc.jpg


DSCN5092_zpsjflfsw0v.jpg


DSCN5093_zpspecx9qut.jpg


DSCN5094_zps4kflzoov.jpg


DSCN5095_zpsrhhcgbdw.jpg


Next week I will be away at the farm working on the tree house all week so I've been busy getting materials ready for that.

One thing I needed was 2 gallows brackets to help support the roof over the firemans pole.

I decided to make them a bit quirky I would make them out of pieces of High lift jack as weve got lots of bits of them at work, as High Lift in the USA used to ship them in crates made of sections of high lift.

Started by cutting 2 pieces to length with 45 degree cuts.

DSCN5096_zpsamhhgt9g.jpg


DSCN5097_zps7njwzh8i.jpg


One of the pieces was punched wrong, I'm guessing thats why it ended up as scrap.

DSCN5098_zpsdx5g83ku.jpg


Found some plates that I could weld onto the ends.

DSCN5099_zpsuy1buoxp.jpg


DSCN5100_zpsky24ljsz.jpg


Welded them on and then hung them up for a coat of black paint.

DSCN5101_zpscmzcjaie.jpg


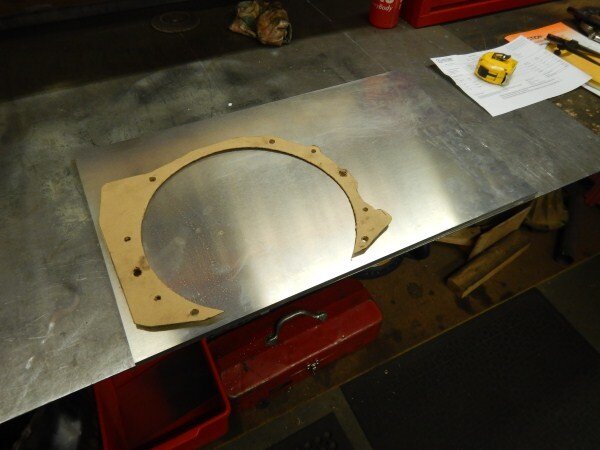
The week before last my mate Brady (who had the white 60 series and cute black labrador) turned up at my work in one of his stunning cars, so I could measure up to make some covers for his engine bay.

DSCN4972_zpsxoxakkkq.jpg


Next to the huge 6 litre V8 he had 2 items he wanted covers making for.

DSCN4968_zpsxzh3ej1u.jpg


He wanted the brake pipes/ABS covering up.

DSCN4969_zpsgnpogmfa.jpg


And on the other side an electrical component.

DSCN4970_zps5pkdcx4n.jpg


Cut and folded some 1.2mm alluminium.

DSCN5032_zpsb02j5eip.jpg


DSCN5033_zpsgyp9hwxr.jpg


DSCN5034_zpsj8dcvnwt.jpg


Welded.

DSCN5075_zps6fa5qoqs.jpg


Test fitting.

DSCN5117_zpsgwozxd3z.jpg


DSCN5118_zpstih67f8r.jpg


They will need a slight trim around the brake pipes and electrical wiring to make them both sit down a bit. Then Brady will get them painted the same colour as the car. :icon-cool:

OK.......................

Finally back to LJ.

So last weekend I did a bit more work on putting LJ back together after I had done the painting.

DSCN5002_zpssg3jy4nr.jpg


DSCN5003_zpsfdeaox9p.jpg


DSCN5004_zpsbyal4z8k.jpg


The areas I filled have come up great.

DSCN5005_zpsxozyabz9.jpg


DSCN5006_zps2qts1idw.jpg


The paintwork is a bit orange pealy in places so I might cut and polish it all in about a month once the paint has fully hardened and dried.

Some parts I ordered a few months ago finally turned up!

A replacement glovebox lid and an aircon pump mounting bracket.

Sadly the anti roll bar/swaybar bracket I also requested wasnt in the box though, so I still cant re-fit an ARB.

DSCN5078_zpsqyskfaet.jpg


DSCN5079_zpshuyk9m3x.jpg


DSCN5080_zpskbshhaof.jpg


Stripped and cleaned the aircon pump bracket.

DSCN5081_zpsqoc3ksx4.jpg


The bearing felt ok but decided for the sake of $3 I would change it.

DSCN5082_zps7d8qtofi.jpg


DSCN5083_zpssu5nupds.jpg


DSCN5085_zpsfkgmdh7u.jpg


DSCN5086_zpsnk0myodo.jpg


Re-assembled it.

DSCN5087_zpssck85ago.jpg


DSCN5088_zpsdqertkwy.jpg


DSCN5089_zpsntlc0wwj.jpg


The empty space for it on the side of my 1KZ-T engine.

DSCN5102_zps7e7csid7.jpg


DSCN5103_zpskzd5velc.jpg


Bolted it on.

DSCN5104_zpsdh3xmrcq.jpg


Was hoping to have the new aircon pump fitted and the whole system gassed up and working in time for the huge road trip up to the new house, but because of the ridicolous amount of time it took for the mounting bracket to reach me, its not looking like I will have time now. :thumbdown:

When I removed LJ's grill for the paintwork I spotted the drivers side headlight had been hit by a stone and was broken. :doh:

DSCN5107_zpsahscjgli.jpg


I had the original lights that I had to change when I got LJ on the road here, as the enginear wrongly thought the head lights were rusty. It wasnt rust it was Lincomb sand!

DSCN5109_zpsp1cfjehb.jpg


DSCN5110_zps16r9o9ge.jpg


So I soaked one in the sink with some hot water and soap.

DSCN5108_zpswgpitbwz.jpg


And managed to get all the sand cleaned out.

DSCN5111_zpsxdb3z2ut.jpg


Re-fitted the roof rack.

DSCN5112_zpsskrf79sc.jpg


DSCN5113_zps6x9jeosm.jpg


And put LJ to work!

One of the big bed shops here had an upsize sale on where by you could buy any size matress for the price of a single.

So we bought a top of the range king size one for the price of a single, a huge saving!

DSCN5115_zps50bno8wq.jpg


DSCN5116_zpstulu2qcf.jpg


Once weve moved into our new house one of my first projects in my new garage will be to design and build us a bed for it out of Tasmanian oak. :icon-biggrin:

So a full week at the farm next week to hopefully get the tree house finished!

Then 3 days at Piranha then were done and can hit the road and start the big move! :dance:

Cant wait!! :icon-biggrin:
 
Paint looks good Ben but you know a widened 40 body is the only way to go when the time comes :thumbup:
 
:lol: :thumbup:

I'd quite like to build one from scratch out of alluminium. :think:

Lots of companies in the USA offering alluminium bodies for various classic 4wd's. :icon-cool:
 
Your turning out top work and I"'m sure your services will be in great demand.regards Pat
 
Been busy as usual then. Are you sure there's not 40 hours in a day over in Aus?!
 
[emoji23]

Thanks guys. [emoji106]

This week is going to be really long as everyday needs to be a 12-14 hour day, so I can hopefully get the tree house finished! [emoji3]


Sent from my iPhone using Tapatalk
 
Tree House.

After 4 16 hour days, the tree house is done and I'm back in Melbourne! :sleeping-sleep::dance:

Will get a big update up some time over the next few days. :icon-wink:

Before then heres a little video, shot half way through construction this week. :icon-cool:

 
Love it Ben…especially the use of the Grand Designs music! [emoji108][emoji122] and it's got power to it!! [emoji4]

One question…
How do you stop it filling up with nasty spiders and other such things?
 
Last edited:
Love it Ben…especially the use of the Grand Designs music! [emoji108][emoji122] and it's got power to it!! [emoji4]

One question…
How do you stop it filling up with nasty spiders and other such things?

haha, we live with spiders and snakes every day. I have a massive wolf spider that lives on the dashboard of my car, it catches all the fly's and never bothers me. We have eastern brown snakes (second most deadly snake in the world) that cruise through the backyard and shed, they catch the mice!
The trick is to respect the wildlife, but don't worry about it. 99% of the time the creatures just want to protect them selves and run in the opposite direction. My in-laws have a tourism business, they have people from all over the world stay with them. Its really funny watching them cop a spider to the face for the first time or seeing a snake. They go into such panic. catching Redback spiders and chucking them on your mates is just a laugh for us Aussie's! The best one is finding a snake that's been killed and chucking it at a friends feet, they do a special kind of dance while yelling some pretty full on words!!!
We're a weird bunch over here...
 
Hmmm…I now know you don't work for the Australian Tourist Board……[emoji6]

During a trip to India, my wife saw a sign warning of Cobras in the park we were visiting. 'Are there Cobras here', she asked our guide. 'Oh yes, many Cobras' said he. As he saw the colour drain from my wife, he added 'Only in rainy season…'

[emoji6]
 
Last edited:
:lol:

All the time I've spent working on the tree house I've not seen a single spider or snake.

I know there out there, but there not a problem. I am however mindful when reaching into his dusty wood shed when looking for timber or when moving a big pile of tin sheets that had been sat for the past few months. :icon-smile:

Just edited, re-sized and uploaded all the pics. Will start writing the update soon. :icon-wink:
 
https://youtu.be/ggYvZMBpvnY

This link is a video I took yesterday at work! It'll give you an idea of what it's like on a daily basis...!
I'm not sure if it'll work as a link or if you'll need to copy and paste it? I'm writing this on my phone and its not as user friendly as my laptop.
 
Back
Top