Don't like the adverts?  Click here to remove them

LJ70 Build Thread!

Jon Wildsmith said:
No reason they shouldn't last now you've done the bolts up properly Ben :thumbup:

i hope so John. :)

Chris said:
Ben, I know it's all cool now, but had you considered that damage might have started to occur when you pressed the bushes in? They are a tight fit and generally need greasing up like a little piggy to slip 'em in. Done dry as it looks in your pic, they might suffer a little.

Chris


no i dont think any damage was done when i fitted them. i used plenty of grease and it was quite easy to turn the handle of the vice and they popped straight in.

no pics of the bushes covered in grease as i wiped it off before taking the pics. it was white grease supplied with the bushes. :think:
 
Then that explains that then Ben. Clearly not an issue.


Chris
 
Chris said:
Ben, I know it's all coool now, but had you considered that damage might have started to occur when you pressed the bushes in? They are a tight fit and generally need greasing up like a little piggy to slip 'em in. Done dry as it looks in your pic, they might suffer a little.

Chris

I thought the same myself but i have never pressed any bushes in or seen it done. I did think to myself should they be pressed in together rarther than the poly bit go first then the metal insert..... like i said tho,ive never done the job before.

karl
 
A correctly made void bush uses an inner and outer steel tube, placed in a jig with liquid "rubber" poured in between. The rubber bonds to the steel and makes for an impervious joint. This is why you need to tighten the bolts after the motor is in a normal static mode. All cheap void bushes use rubber tubes pressed between the inner and outer tubes. There is no bonding between them.

As Ben didn't tighten up the bolt to the correct torque, the movement this allowed was probably a major factor in the damage to the polybush insert.

Roger
 
thanks guys. :thumbup:

Karl the instructions said to put the metal sleeve in afterwards, and IMHO i dont think it would be easy, maybe even possible to push the bush in with the metal sleeve already in place. :think:
 
Don't like the adverts?  Click here to remove them
update time! :dance:

i wanted to fit my other, more aggressive set of tyres ready for laning trips this sunday and next sunday.

P4190001.jpg


decided to change the back ones first, as the fronts will be coming off to fit the locker.

P4190002.jpg


front wheels off.

P4190004.jpg


its been raining all day and all week here in Shropshire. :thumbdown:

but i wasnt going to let something like constant showers put me off doing what I wanted to do! :naughty:

so i worked under a tarp.

P4190003.jpg


P4190005.jpg


P4190006.jpg


the tarp kept the rain off me, but it did nothing for the puddles i was having to work in. :(

P4190007.jpg


CV and shaft out.

P4190008.jpg


bit of a mess this side as the oil seal needs replacing as its been leaking oil everywhere.

P4190009.jpg


P4190010.jpg


P4190011.jpg


so one side done, and all the bits on the bench ready for cleaning.

P4190012.jpg


P4190013.jpg


P4190014.jpg


managed to rig the tarp up a bit better on the other side as i had things to attach it to.

P4190015.jpg


this side was a lot nicer to work on as everything wasnt covered in diff oil.

P4190016.jpg


P4190017.jpg


wanted to keep all the bits from this side separate from the other side, so rigged up another bench to lay everything out on.

P4190018.jpg


P4190019.jpg


with the shafts out i could finally remove the diff.

unbolted the steering damper first, and was pleasantly surprised to find that it seems to be working ok.

P4190020.jpg


unbolted the prop.

P4190021.jpg


was getting dark by this point.

P4190023.jpg


removed all the bolts around the diff, and had a bucket ready to lift it into.

P4190024.jpg


P4190025.jpg


i expected it to put up a fight, but it came out very easily and wasnt as heavy as i was expecting.

P4190026.jpg


P4190027.jpg


P4190028.jpg


going to leave it hung upside down for 36 hours, to let all the oil drain out.

P4190029.jpg


so the workshop is now full of bits of front axle to clean and sort out ready for re-assembly.

P4190030.jpg


put some bags over the hubs to keep the rain out.

P4190031.jpg


going to get all the bits degreased and cleaned tomorrow. :thumbup:
 
The diff will be a bit heavier with the ARB fitted, bit more metal in those than the standard carrier :)
 
thats not a bad thing though John, the amount ive lifted the truck, adding more low down weight can only be a good thing! :thumbup:

had to go out and buy a 1/4" NPt thread tap today, for the hole that will need drilling and tapping in the diff.

why they cant use a normal metric size i dont know, had a right game finding some where that had that size tap. :angry-banghead:
 
You could have borrowed mine Ben, it's not like it's something I use on a daily basis! I'm sure you've read up on it but it's a tapered thread so you have to judge how far to go in with it to get a good fit.
 
Thanks John. :)

i havnt read up on it, but i noticed when looking at the tap and comparing it to the threaded insert bit, that if i was to tap all the way, then the the insert would be far too loose and probably fall right through. :thumbdown:

i was worried id got the wrong tap, due to it being so tapered. :?

does seem a funny size to use. i thought the Ozzy's have been using metric for years?

maybe there main market for toyota air lockers in the US and thats why they use that size. :think:
 
No idea why they use that size Ben, I couldn't make any sense of it either :)
 
Might it be something to do with tapping into relatively thin materials? If you use a straight thread, you can only tighten against the shoulder of the hole. As it's straight, you don't get much to tighten against. If it's tapered then it essentially locks on the taper with a greater surface area. I don't think that tapered metric threads are very common are they?

Honestly I'm just making this stuff up.

Chris
 
The standard tapered thread in the UK is GAS, as used by plumbers.

As ARB supply their diff-locks directly to the UK, they should, out of courtesy, use our thread sizes.

Roger
 
bloody cars! not had much luck the last few days. :angry-banghead:
 
Care to share it with us... saw your post on facebook :shock:
 
just having a beer and uploading some pics now Rob. ;)

update coming shortly. :thumbup:
 
so Friday afternoon i made a start cleaning all the axle parts up.

started with the side where the oil seal had failed.

P4200001.jpg


P4200002.jpg


got most of the old grease out/off with blue roll, and then used a petrol soaked rag to clean the rest off.

P4200004.jpg


other side was ok.

P4200005.jpg


started cleaning the stripped out axle parts.

P4200006.jpg


at this point everything was great! :dance:

i decided to nip out and buy some diff oil ready for the refitting of the locker.

knowing what i know now, i should have stayed at home. :roll:

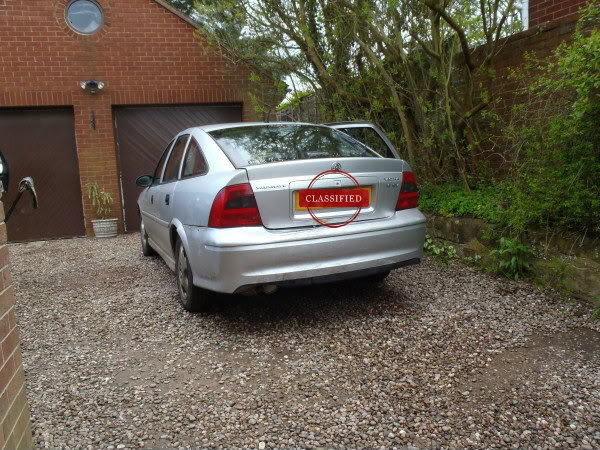
so i borrowed my mums car, and was on the way back. indicating and turning off a busy A road, and BANG! some tw@ who was on the wrong side of the road overtaking ran straight into the back of me, as i was turning the sheer force of it spun me 180 degrees. :angry-banghead:

first thought was 5hit what the hell just happened? :shock:

then i thought 5hit my mum really isnt going to be impressed. :thumbdown:

then i thought f**k, ive got to drive to the other side of Birmingham tomorrow to get the ARB locker built into my diff, in THIS car! :shock: :thumbdown: :( :evil: :doh:

i mean what sort of idiot crashes into other peoples cars? :whistle:

id never do anything like that. :liar:

so after getting the details off a guy who stopped to check if we were both ok, as he was a witness.
swapping details with the guy who hit me, i limped the damaged car home.

P4200007.jpg


P4200008.jpg


P4200009.jpg


P4200010.jpg


so after telling my mum that ive written her car off it was time to get it ready for the long drive with the diff the next day. :twisted:

struggled to get the spare wheel out, even with a 3ft crowbar. :shock:

P4200012.jpg


so out with the sledge hammer.

P4200013.jpg


i needed to try and pull the rear end out, so that the boot lid would close properly. so i knew there was only one thing for it a Toyota! :clap:

attached a strop.

P4200014.jpg


and called my mate and told him i could do with a hand, his truck and his winch. :twisted:

P4200015.jpg


lots of winching, hammering and banging later and the car was almost perfect! :clap:

P4200016.jpg


P4200017.jpg


bumper was re-attached with 60mm tec screws that are normally used for fixing metal cladding to factories and warehouses.

P4200019.jpg


so back to the axle parts cleaning.

one side done.

P4200022.jpg


beer and 12hours of dance music on radio one, helped me work late into the night. Pete Tong was playing some great music! :banana-rainbow:

P4200020.jpg


other side done.

P4200023.jpg


i also had some more factory service manuals delivered! :clap:

thats 5 ive got now. 3 more and i will have all the ones i need! :dance:

P4200024.jpg


so that was yesterday! 8-)
 
so i got up this morning and had an hour or so free before i needed to leave for Rogers.

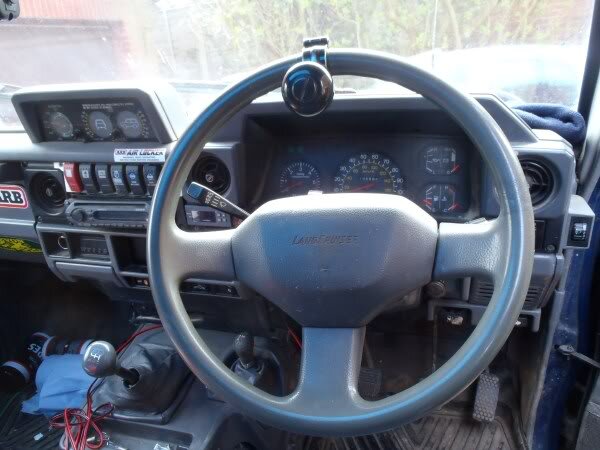
as ive mentioned before i want a removable, quick release steering wheel, to hopefully prevent the majority of car thieves from steeling my truck.

so standard wheel.

P4210025.jpg


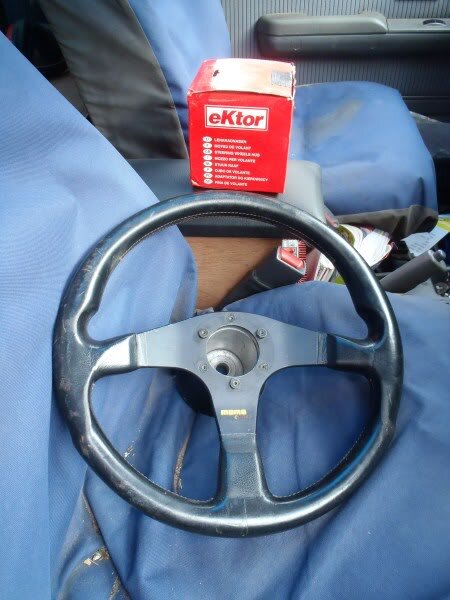
got a second hand steering wheel and a new toyota boss off my mate.

P4210026.jpg


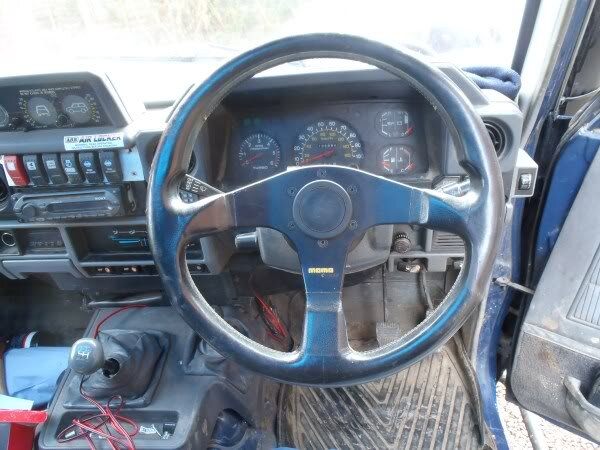
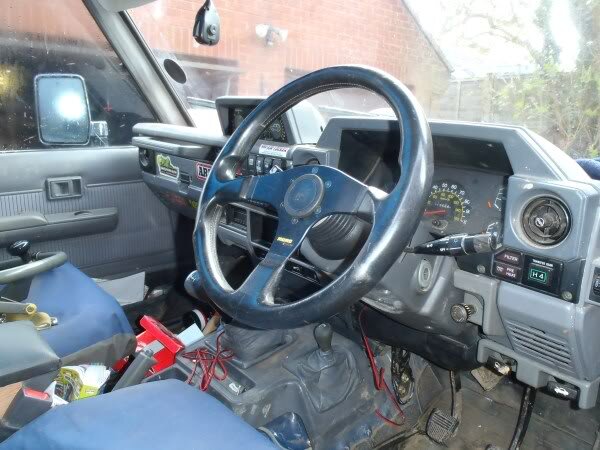
i decided to fit the wheel and then see how i get on with it over the next few weeks, if i decide i like it i will order the quick release boss that fits between the steering wheel boss and wheel.

P4210027.jpg


P4210029.jpg


car looked ok in the daylight! 8-)

P4210031.jpg


so i loaded it up with the diff, ARB locker, instructions and other bits and pieces id need.

P4210030.jpg


soon got to Rogers and made a start on fitting the locker. :dance:

first job was to strip down my diff.

P4210033.jpg


P4210035.jpg


P4210036.jpg


P4210037.jpg


pulled the bearings off.

P4210038.jpg


P4210039.jpg


P4210040.jpg


soaked everything in petrol.

P4210041.jpg


soon realised that my 45mm standard bearings wouldnt fit with the new locker that needs 50mm bearings! :doh:

called around and ordered the new bearings.

we decided to finish cleaning everything up.

P4210043.jpg


then disaster! Roger found a crack in the ring gear! :(

P4210044.jpg


P4210045.jpg


P4210046.jpg


tidied the tools up and put all the bits of diff and locker neatly on the bench.

P4210047.jpg


Roger then kindly offered to show me some of his local green lanes. :dance: 8-) :thumbup:

impassable at ALL times? :roll: unless your in a Mighty Toyota LandCruiser! :twisted:

P4210048.jpg


was a great ford. :clap:

P4210049.jpg


such a beautiful example of a KZJ70! :clap:

P4210050.jpg


P4210051.jpg


P4210052.jpg


Huge thanks to Roger for his help with my diff, and the excellent laning, and to his lovely wife Viv for making some great sandwiches and plenty of cups of tea! :clap: :thumbup:

i could have got devon 4x4 to fit the locker in the diff, like they did with the back one, but im keen to learn how to do it myself.

my aim is to one day be able to do any mechanical task/job that needs doing on my vehicles, and not to have to risk using a garage ever again! :thumbup:

so i need a new ring and pinion! :pray:
 

Attachments

  • P4210025.jpg
    P4210025.jpg
    46.6 KB · Views: 63
  • P4210026.jpg
    P4210026.jpg
    47.8 KB · Views: 63
  • P4210027.jpg
    P4210027.jpg
    56.8 KB · Views: 63
  • P4210029.jpg
    P4210029.jpg
    57.8 KB · Views: 60
  • P4210031.jpg
    P4210031.jpg
    93.1 KB · Views: 60
YYY
Back
Top