Don't like the adverts? Click here to remove them
You are using an out of date browser. It may not display this or other websites correctly.
You should upgrade or use an alternative browser.
You should upgrade or use an alternative browser.
LJ70 Build Thread!
- Thread starter Ben
- Start date
- Joined
- Oct 13, 2010
- Messages
- 6,058
- Country Flag

Yes but I'm only renting Chas and when the lease is up Erin will be moving into her new apartment thats currently being built. So if I can resist the temptation to pack everything up and move to Byron, then I will move back closer to work and probably just get a small 1 or 2 bed bungalow (they call them units here) and live alone for the next year. 

Looking promising Ben, can't wait to see the arches finished and all sprayed in 
I was surprised that you want to lower the back some, given the type of froading you do, but sure you know best. The prop spacers look the business and will save a load of heartache and balancing issues you may get cut and shuffling the props.
Good stuff mate
I was surprised that you want to lower the back some, given the type of froading you do, but sure you know best. The prop spacers look the business and will save a load of heartache and balancing issues you may get cut and shuffling the props.
Good stuff mate
- Joined
- Oct 13, 2010
- Messages
- 6,058
- Country Flag
Thanks Clive.
The lifted 80 series springs that I've fitted to the back have given it a bit too much lift and now I've cut 45mm off the arches its got far to much space between the top of the tyre and bottom of the panel.
I only want enough lift to clear the tyres at maximum articulation. Anymore lift than it needs is just going to make it even more unstable off road.
Just about to head out to the garage for a night of grinding, drilling and welding.
Just about to head out to the garage for a night of grinding, drilling and welding.
Ah, ... no time for LJ then
stumog
Well-Known Member
- Joined
- Oct 3, 2012
- Messages
- 3,853
- Country Flag

Thanks guys.
Stu I guessed.
Fingers crossed it works out OK.
I think it will having seen how much other people have drilled mounts to lower arms and also how much the castor correction plates you can buy drop it by.

I thought you were going to say that for some reason lets hope you are correct.
i am sure it will be fine if you have seen similar before i am sure a couple of MM wouldnt make that much difference. I am supprised how moving the mount down and forward abit has extended your wheel base as much as it has>
stu
Don't like the adverts? Click here to remove them
Paddler Ed
Well-Known Member
Delz just made a good point... have you painted that newly exposed edge that the oil drum flare butts upto? Otherwise is there a chance that rust could build in there even with the filler etc on top.
- Joined
- Oct 13, 2010
- Messages
- 6,058
- Country Flag
Ah, ... no time for LJ then
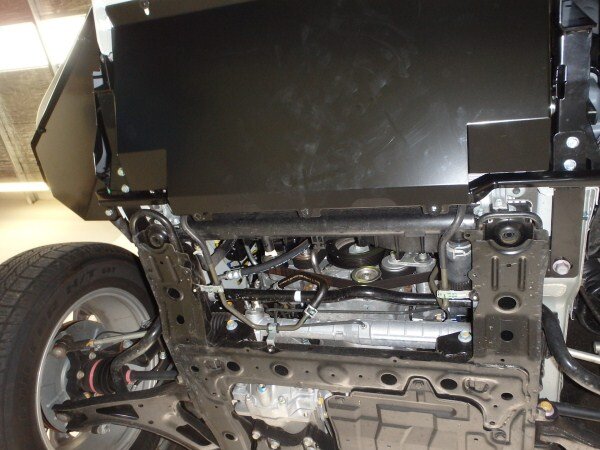
Been making the front panhard rod relocation bracket out of 6mm plate!
Going to take it to work tomorrow and fully weld it then get it electro plated.
I thought you were going to say that for some reason lets hope you are correct.
i am sure it will be fine if you have seen similar before i am sure a couple of MM wouldnt make that much difference. I am surprised how moving the mount down and forward a bit has extended your wheel base as much as it has>
stu
Well I've moved the rear radius arm mounting bolt 50mm further forwards and 10mm down. So the wheel base is 50mm longer and dropping the arm 10mm should correct the castor.
Loosing the castor correction bushes will give me more articulation too as those bushes limit articulation a lot by the very nature of their design!
New bushes will be here tomorrow.
- Joined
- Oct 13, 2010
- Messages
- 6,058
- Country Flag
Delz just made a good point... have you painted that newly exposed edge that the oil drum flare butts upto? Otherwise is there a chance that rust could build in there even with the filler etc on top.
Not yet Ed as I'm going to be welding it to the drum.
Once its all welded it will be getting filled/seam sealed/painted/ etc.
Craigmorley
Well-Known Member
- Joined
- Apr 26, 2014
- Messages
- 341
- Country Flag

Not yet Ed as I'm going to be welding it to the drum.
Once its all welded it will be getting filled/seam sealed/painted/ etc.
Cant can't wait to see how it all looks when Uve finished Ben
keep it up the drums will be solid I caught mine on mound at weekend not Evan moved it!!
10 time better than rubber ones
- Joined
- Oct 13, 2010
- Messages
- 6,058
- Country Flag
A question for the 80 series gurus on here.............................
What length are standard 80 series rear shocks?
Just working on an update now, but with 350+ pics to go through, edit, re-size, upload and type up might take a while.
Thanks Craig.
I've had a few issues with the first arch I've fitted where by its lost its nice shape by being bent open/apart to suit the arch.
I'm thinking on the other side I might have to make a few cuts in the rolled edge to relieve the tension and then weld them back up afterwards. If this works I might get another drum for the one rear side I've fitted as I'm really not happy with it.
Anyway.........................
I will get the pics up and everyone can see what I mean.
What length are standard 80 series rear shocks?
Just working on an update now, but with 350+ pics to go through, edit, re-size, upload and type up might take a while.
Cant can't wait to see how it all looks when Uve finished Ben
keep it up the drums will be solid I caught mine on mound at weekend not Evan moved it!!")
10 time better than rubber ones
Thanks Craig.
I've had a few issues with the first arch I've fitted where by its lost its nice shape by being bent open/apart to suit the arch.
I'm thinking on the other side I might have to make a few cuts in the rolled edge to relieve the tension and then weld them back up afterwards. If this works I might get another drum for the one rear side I've fitted as I'm really not happy with it.
Anyway.........................
I will get the pics up and everyone can see what I mean.
- Joined
- Oct 13, 2010
- Messages
- 6,058
- Country Flag
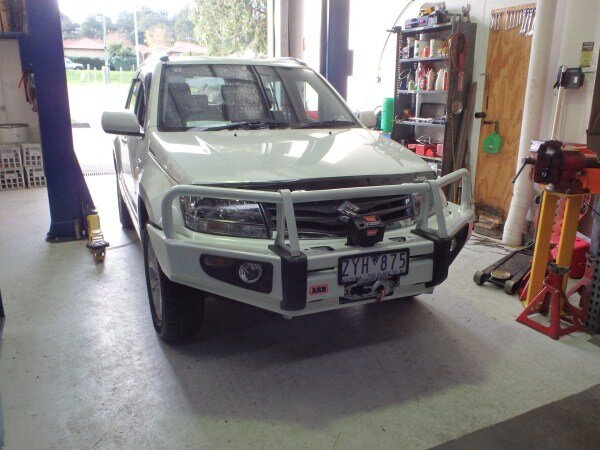
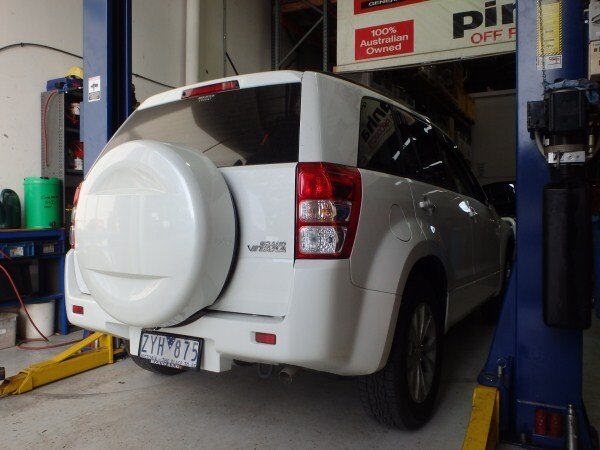
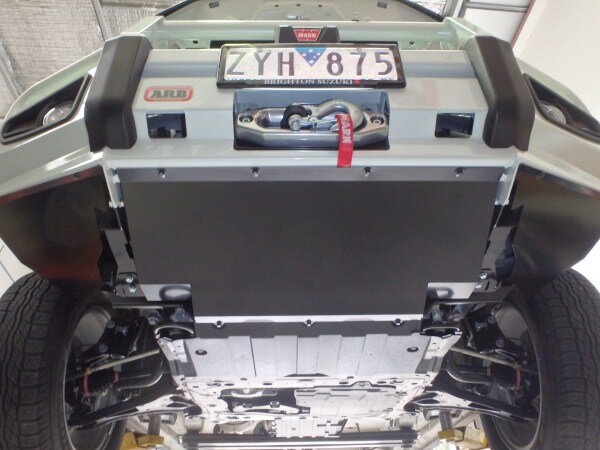
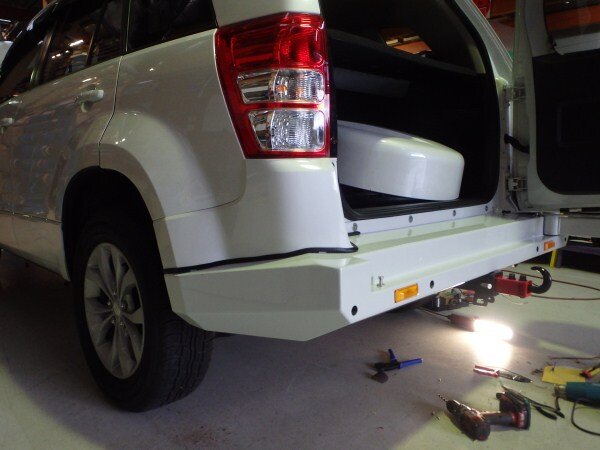
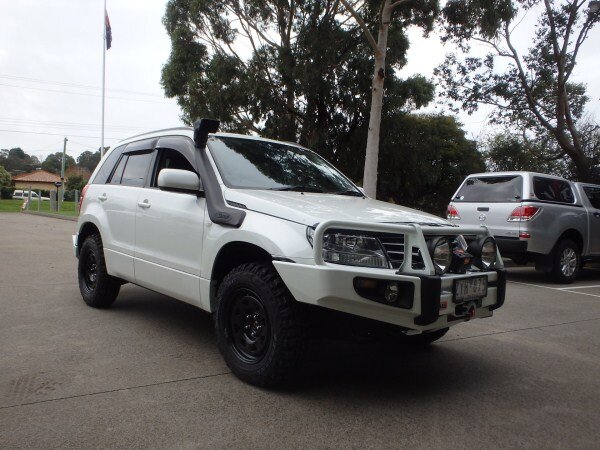
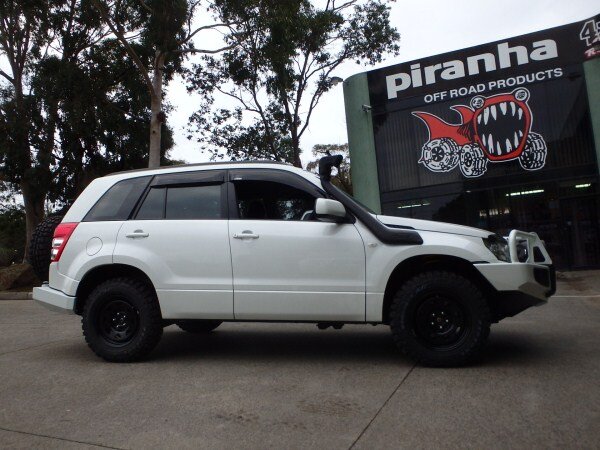
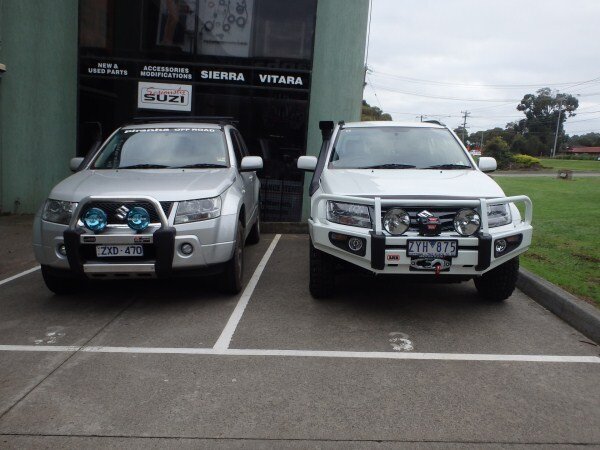
A few work pics first...........................
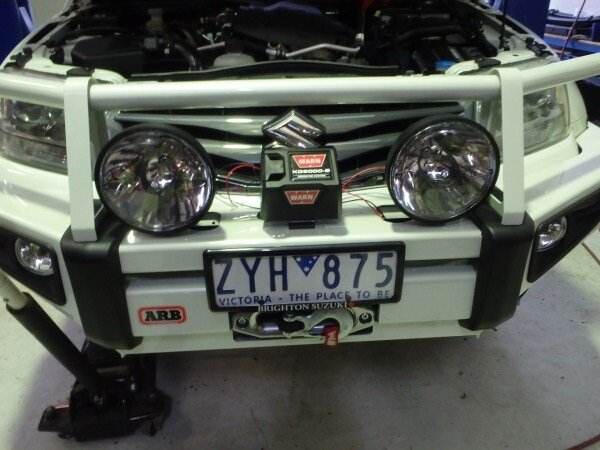
We had a brand new Suzuki in this week that we had to fit a load of bits to.
It had gone to ARB first to have a bullbar and winch fitted.


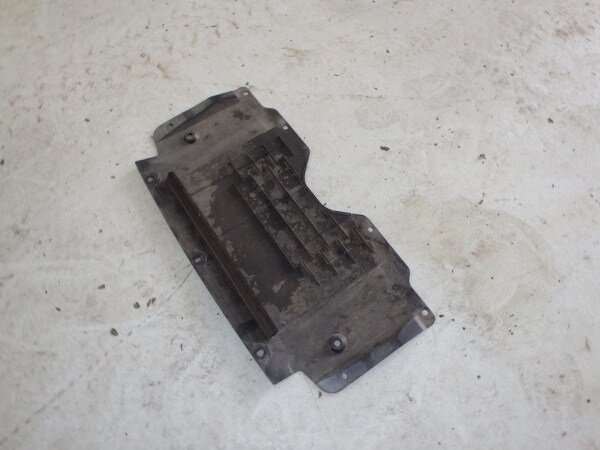
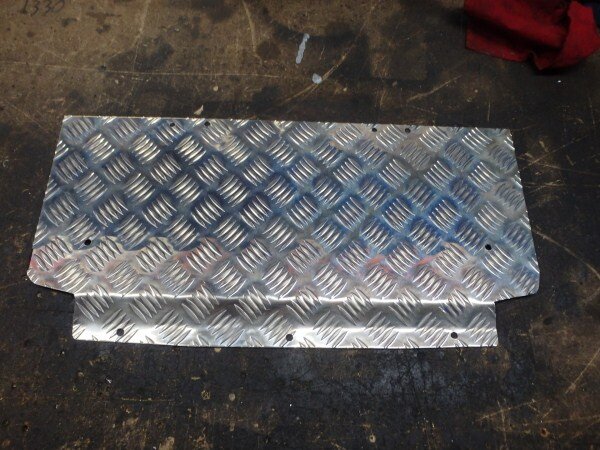
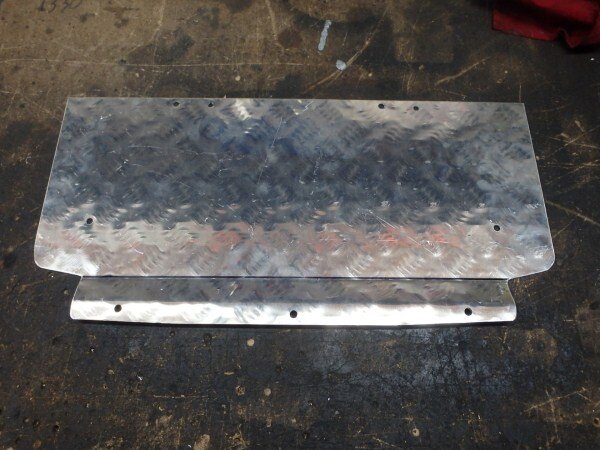
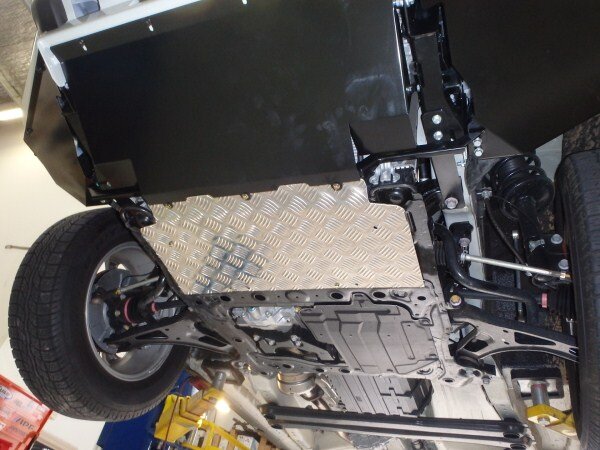
I had to make a bash guard to replace the factory plastic one.


I also fitted diff and GB/TB breathers.


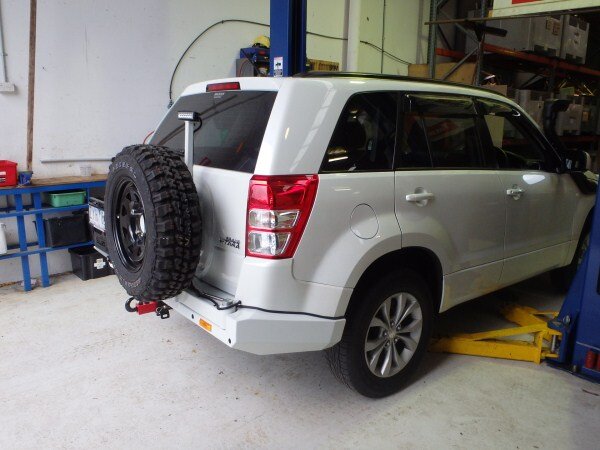
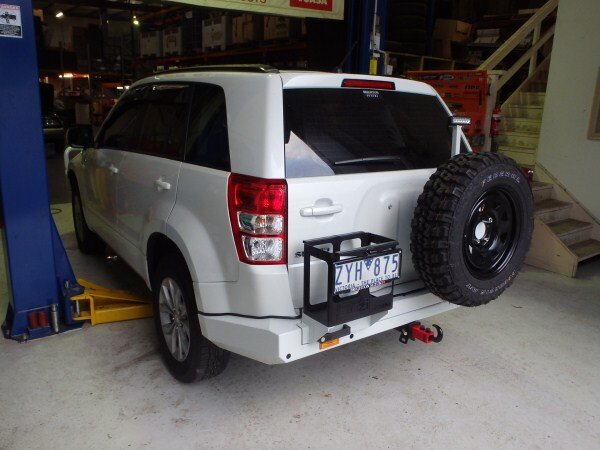
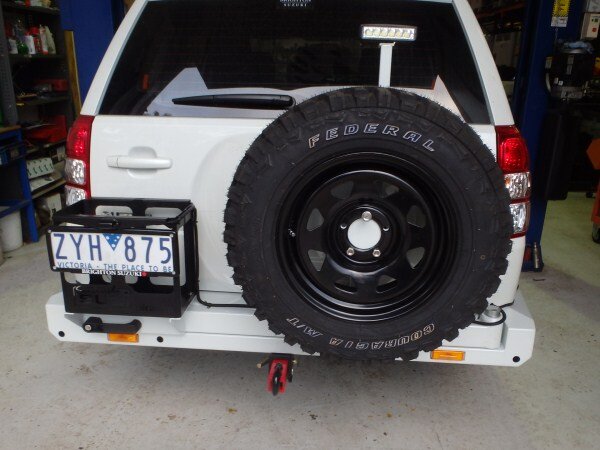
We fitted one of our rear bumpers.


Trimmed the corners off the standard bar.


I had to fit a suspension lift next.

The rear was easy.

But the front was coil overs so needed the spring compressor.

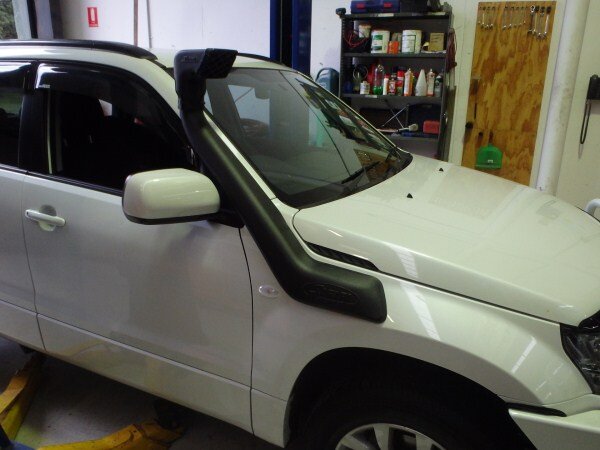
We fitted a snorkel.


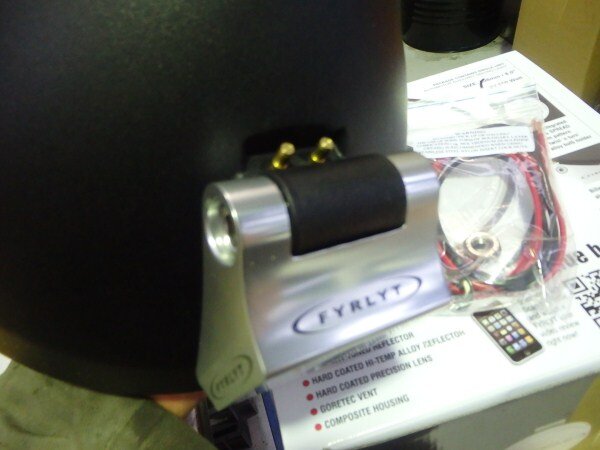
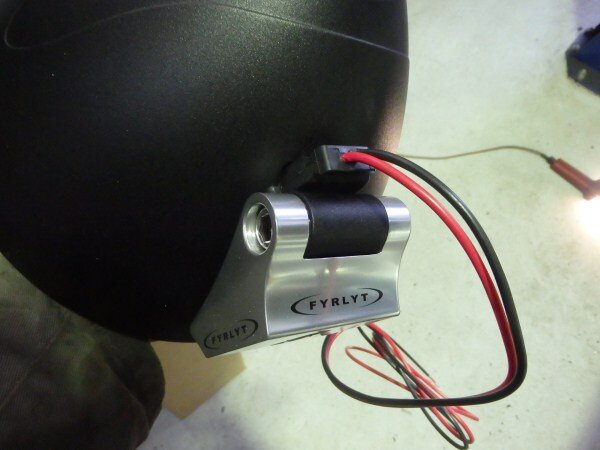
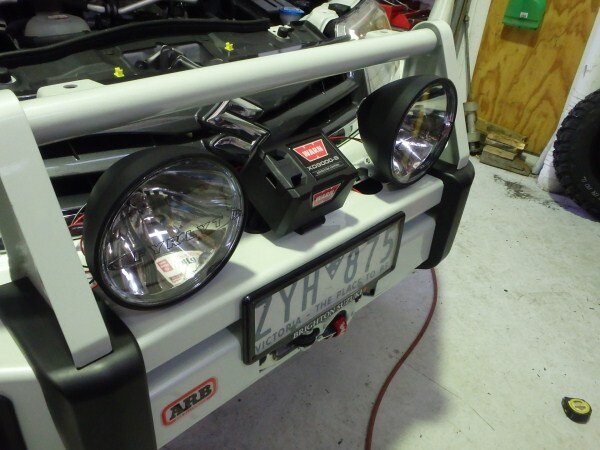
I fitted some lights.
I've not seen these before but I like them!

Aussie made and they have a nice mounting point made from billet alluminium. I also like how the wires/connector just plugs into the back.


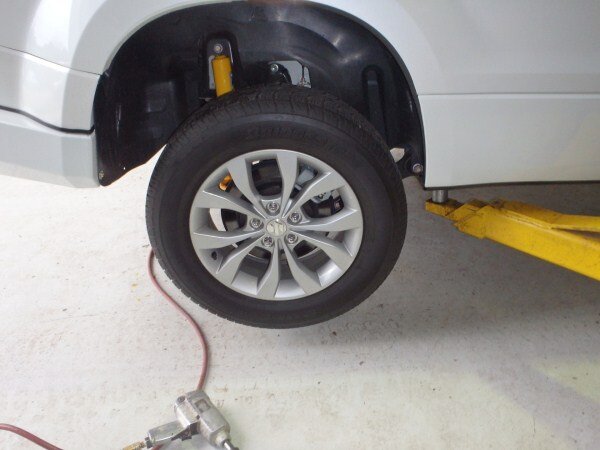
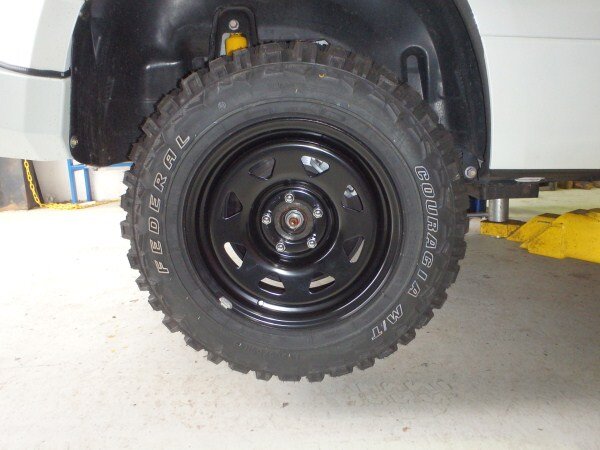
My last job was to change the wheels and tyres.


All done.


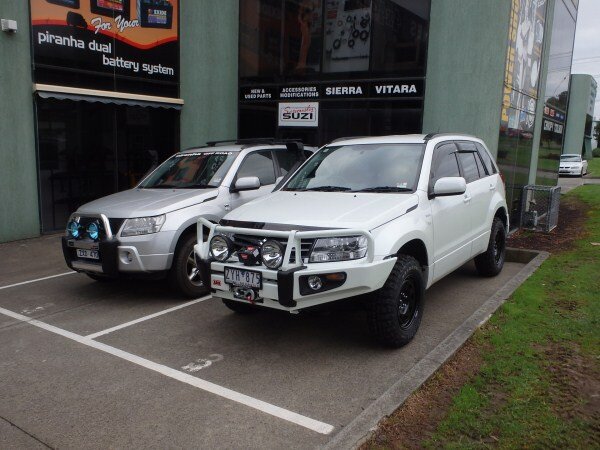
Parked next to ours for comparison.


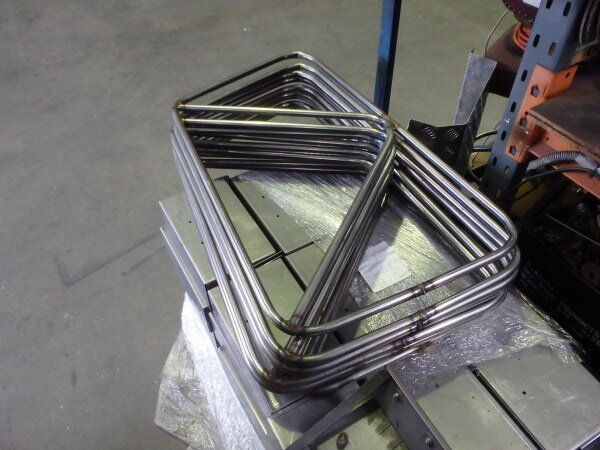
I got the Suzuki tube doors finished.


Cut a load of latch mounting plates.

Drilled them.

And welded them in place.

The last job before they were ready for powder coating was to smooth all the welds down and remove any splatter.

I also made the receiver plates for the latches and sent them for electro plating.

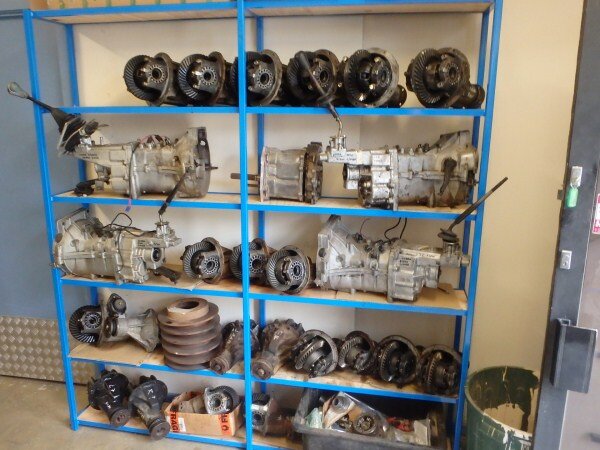
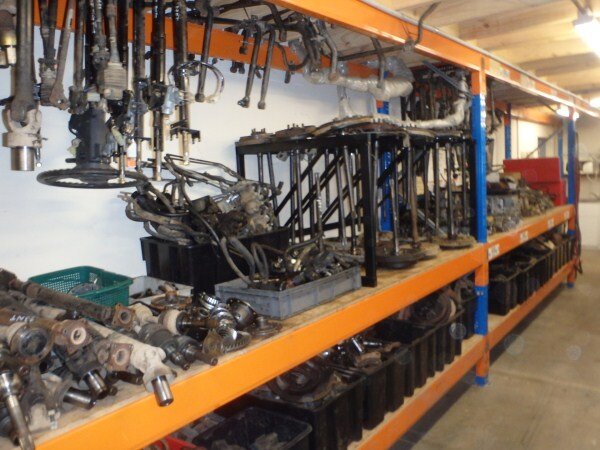
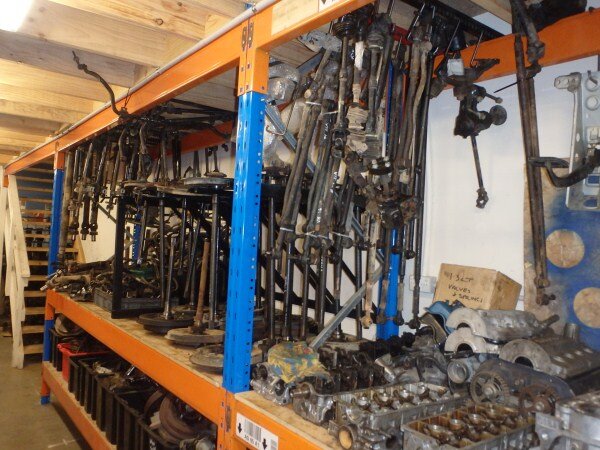
We stripped the diffs and half shafts out of all the Suzuki axles we had as their the bits that sell. I hung most of the old casings up.

And put all the diffs on shelves.

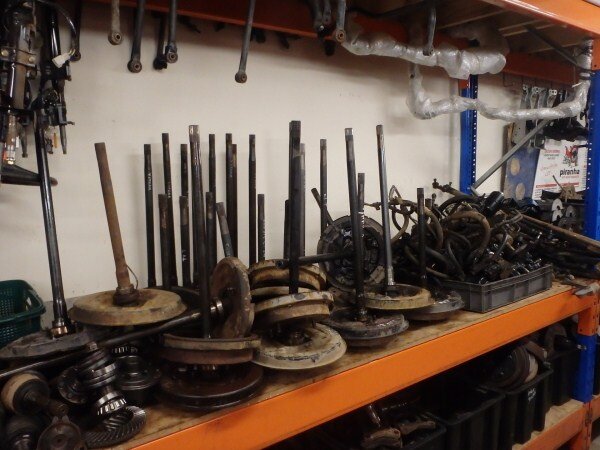
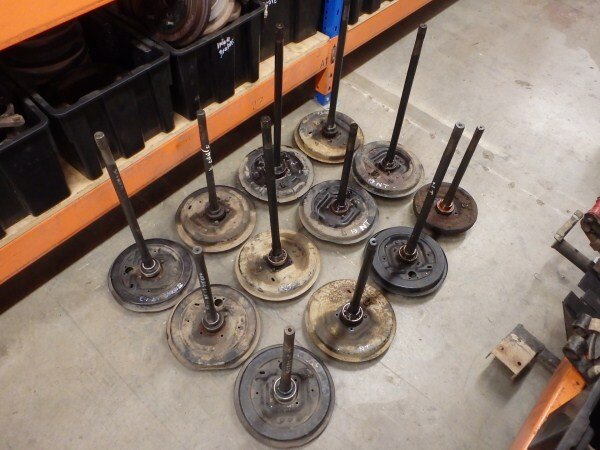
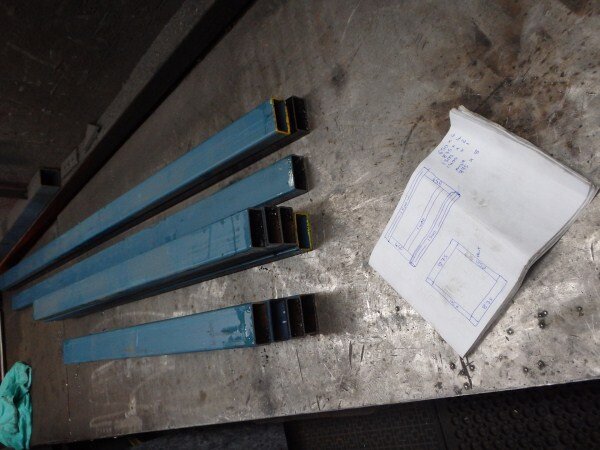
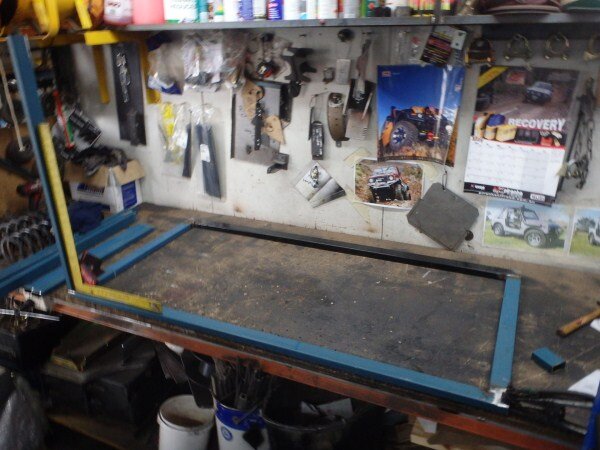
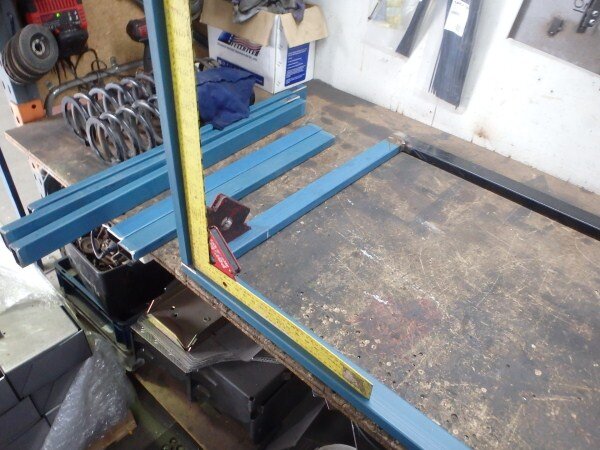
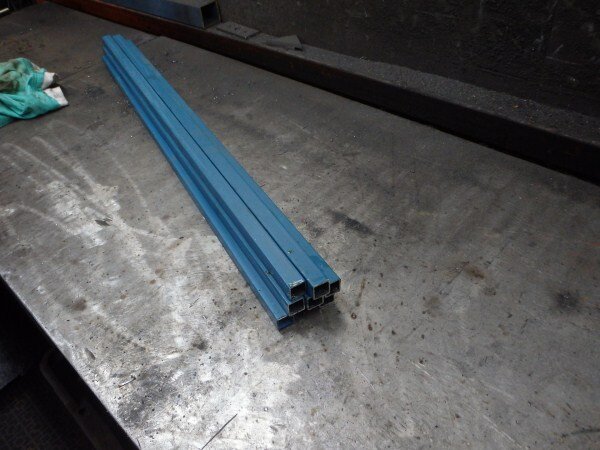
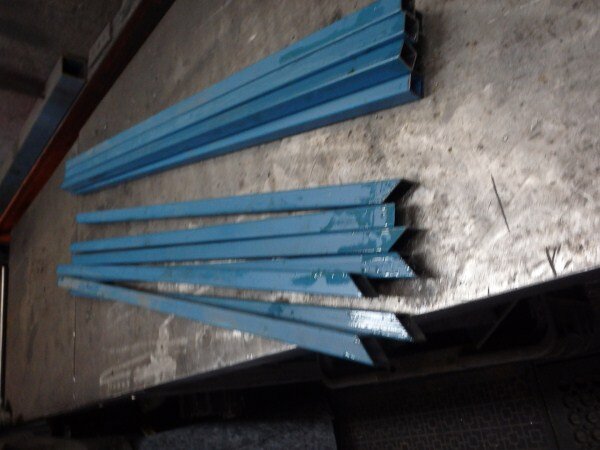
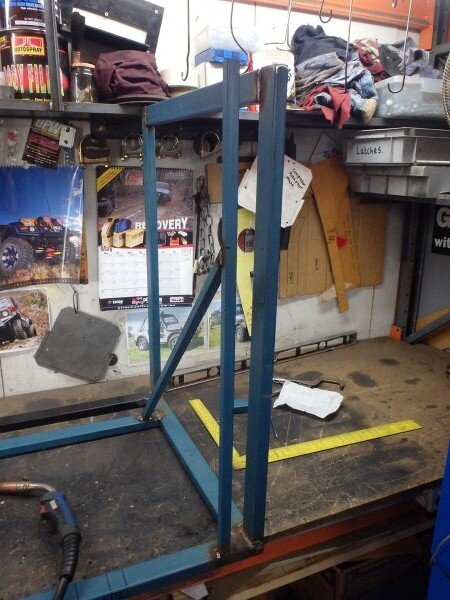
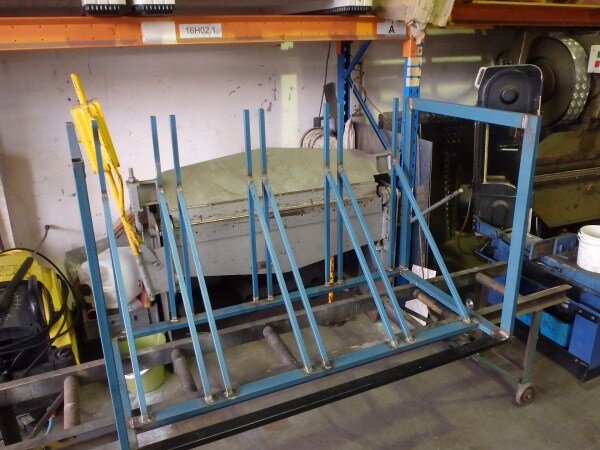
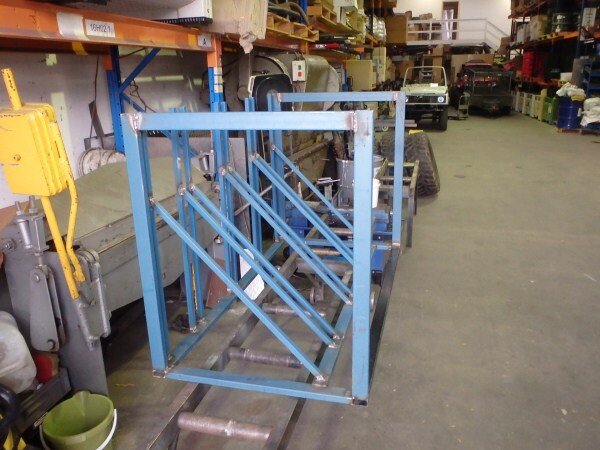
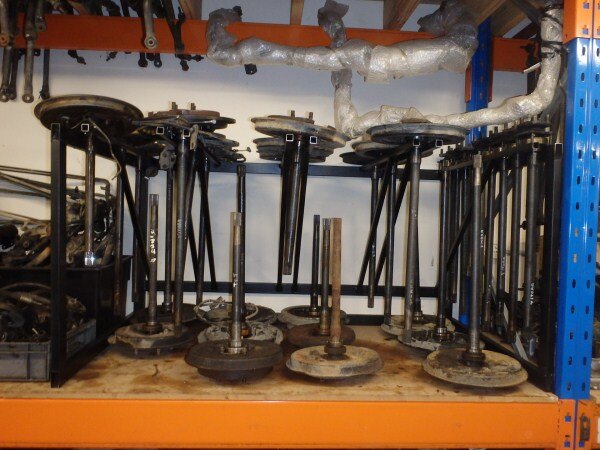
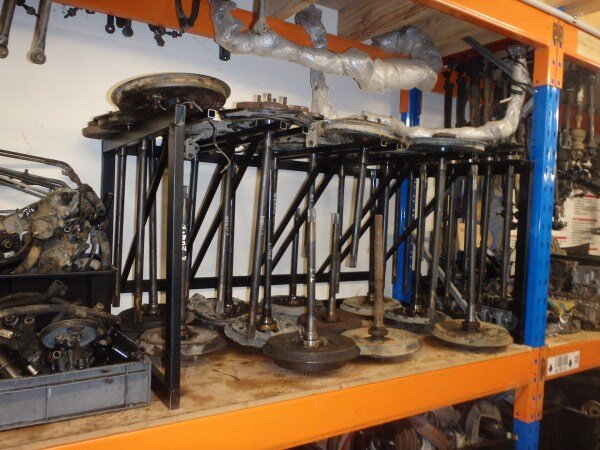
We decided to build a rack to store all the half shafts (or axles as they call them down here.)


I cut a load of steel.

And stuck it all together.


Cut more steel.


Painted it.

And fitted it.


LJ next............................
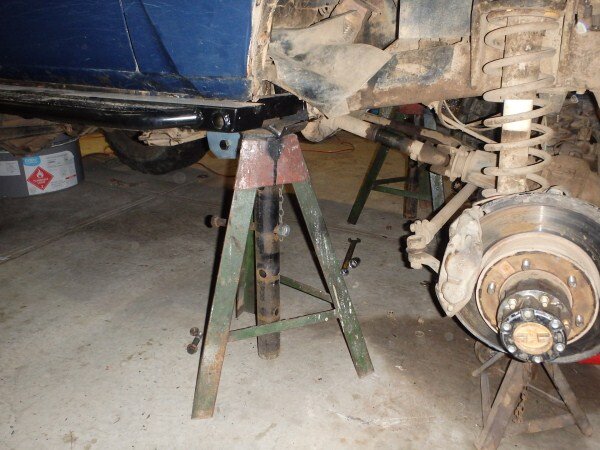
I got LJ safely supported on my big axle stands.

I decided I wasnt happy with the angle the springs and shocks were at after moving the axle 50mm further forward, it didnt look too bad before but with the wheel removed it was now more noticeable.
The springs and shocks desperately needed changing anyway.


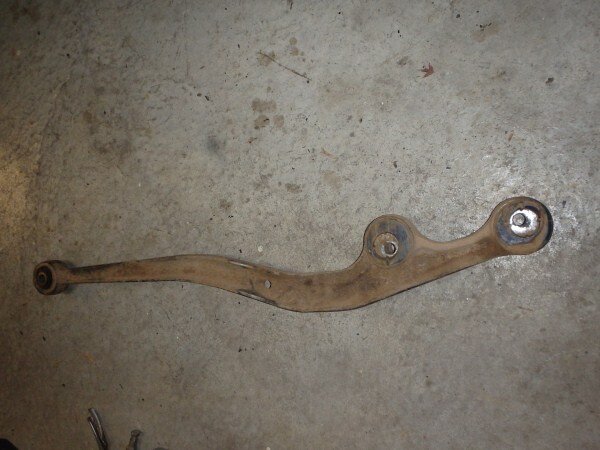
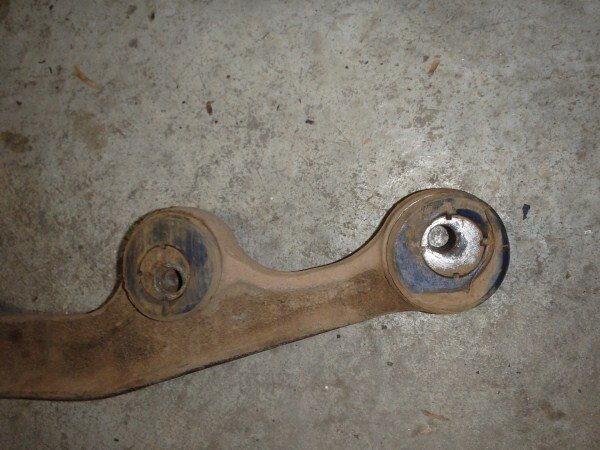
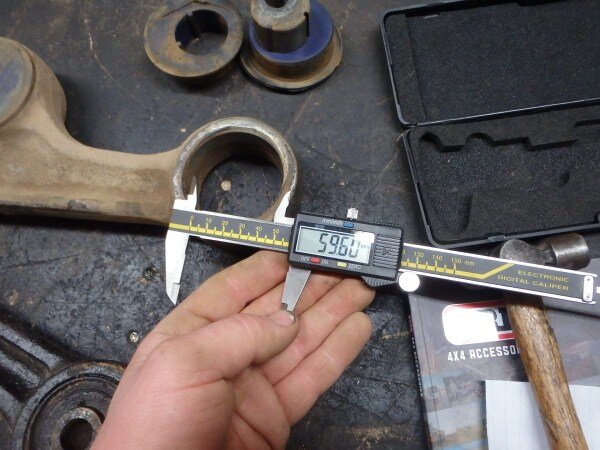
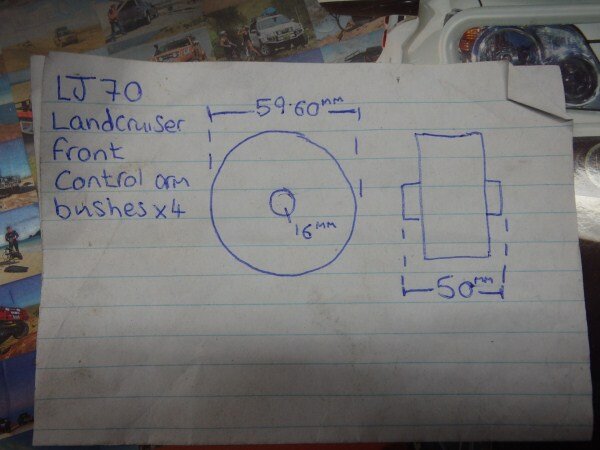
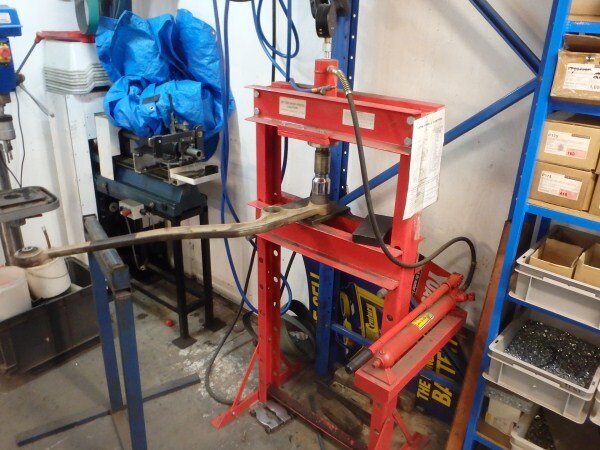
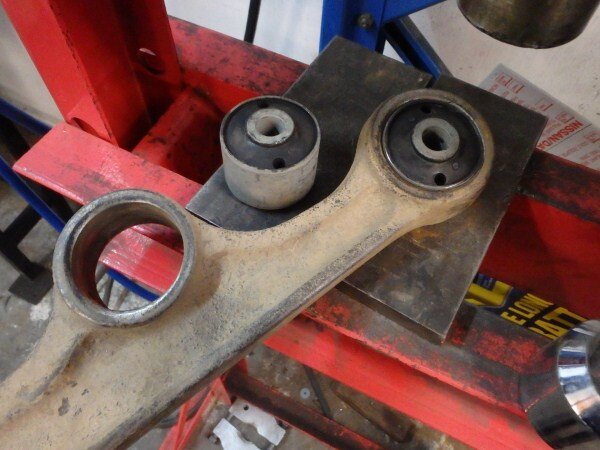
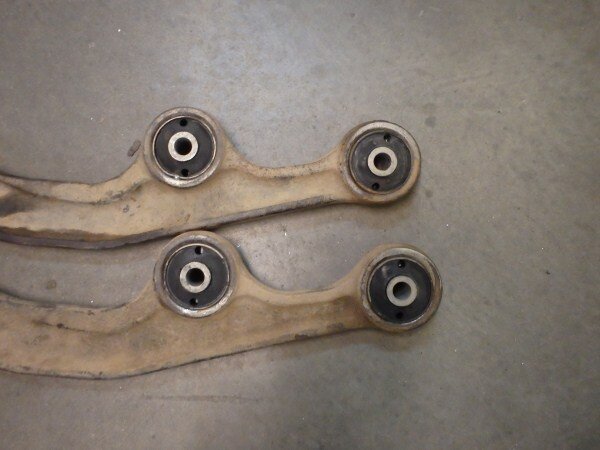
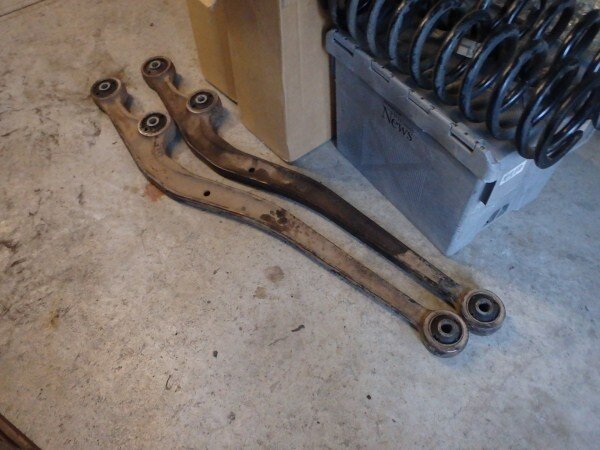
I needed to replace the badly worn Ironman 80 series castor correction bushes in my radius arms.


I took a spare arm in so I could measure the bushes.

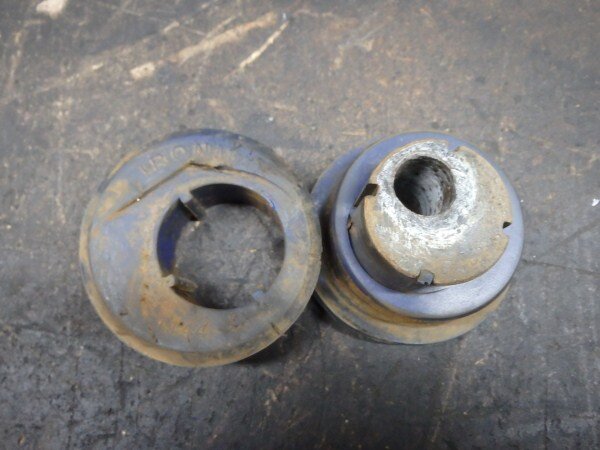
Old Ironman CC bush.

Measured up.

Gave my boss the size.

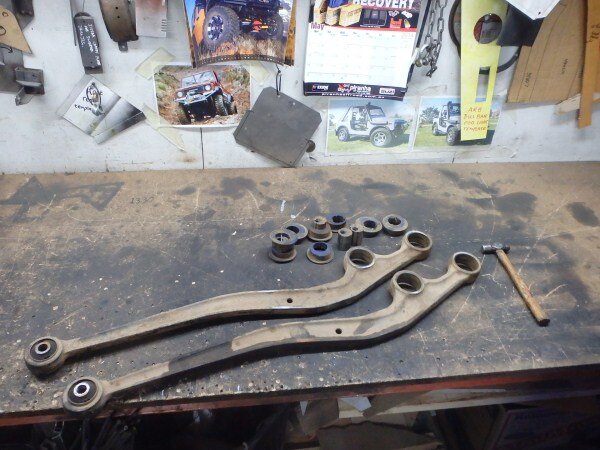
The next day the new bushes arrived.
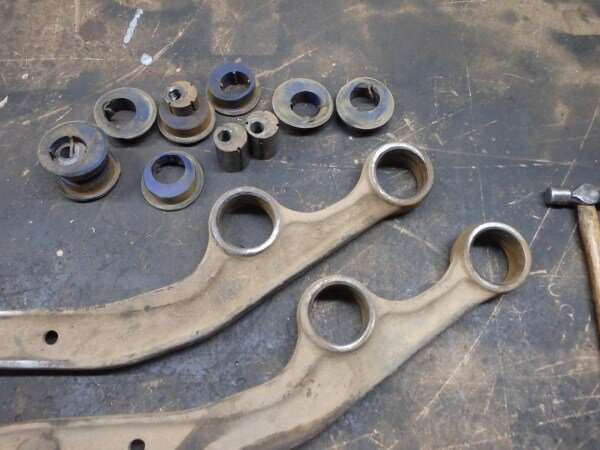
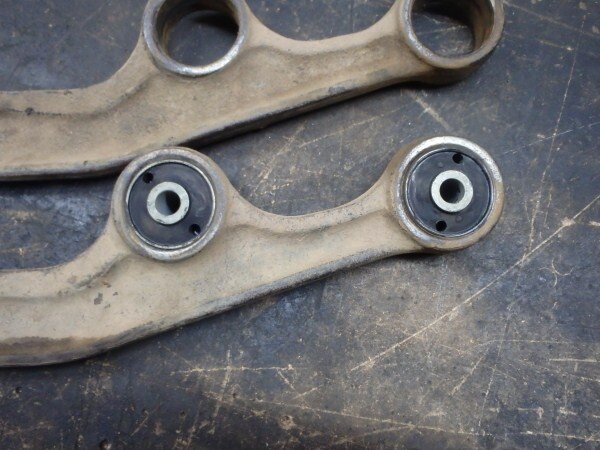
So I knocked the old ones out.


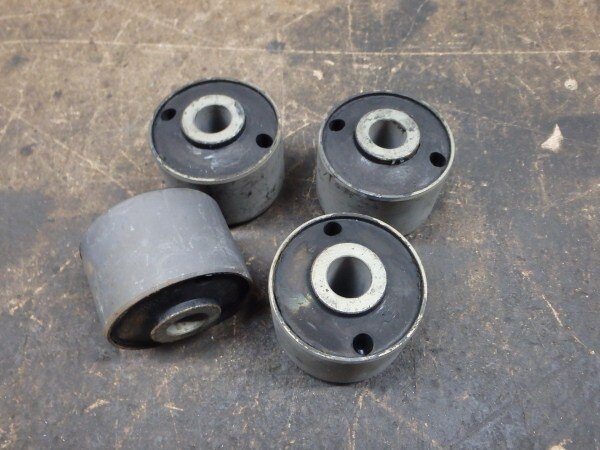
New bushes.

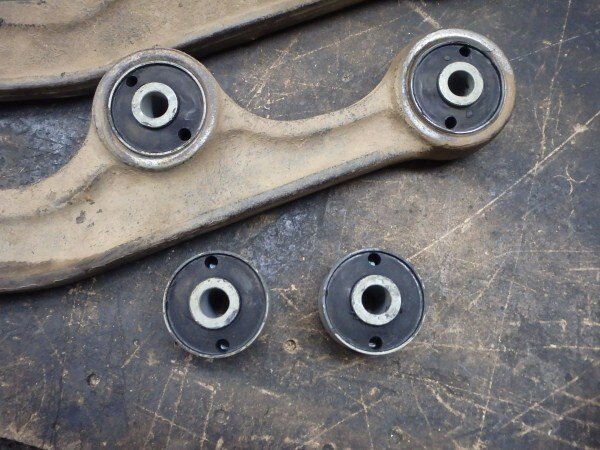
And pressed the new ones in.


I mistakenly put them in the wrong way round as I wanted the indents in the vertical plane for maximum articulation.


So I pressed them back out and turned them around.


They took a fair amount of pressure to get them in.

All done.

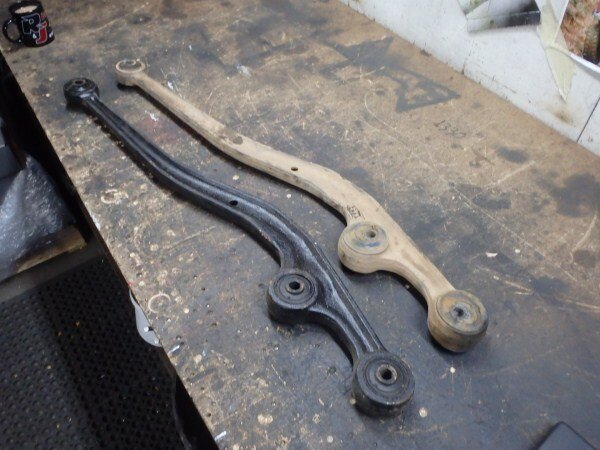
I brought home with me an old suspension lift kit off and 80 series, 79 series front coil springs and my arms with the new bushes.


I re-fitted the arms.

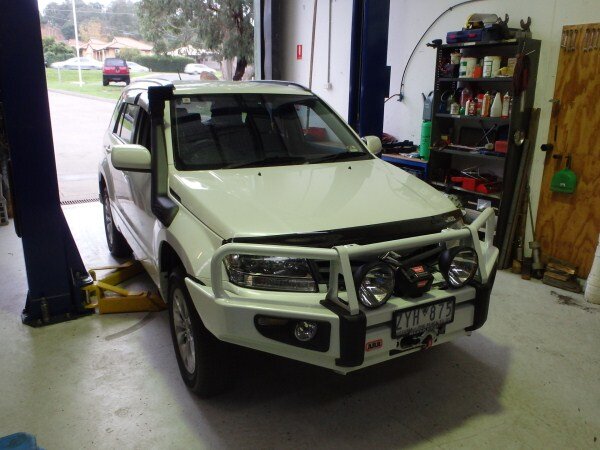
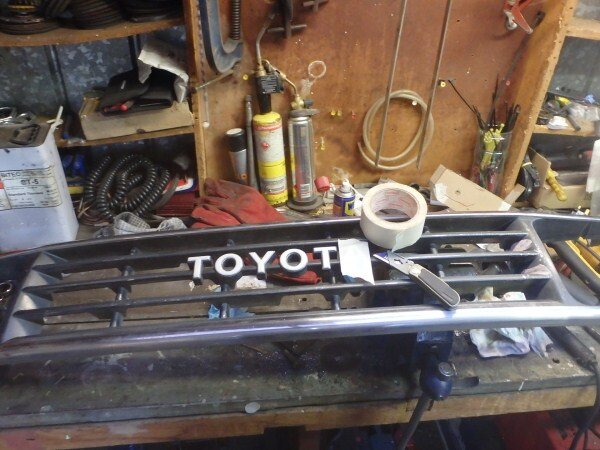
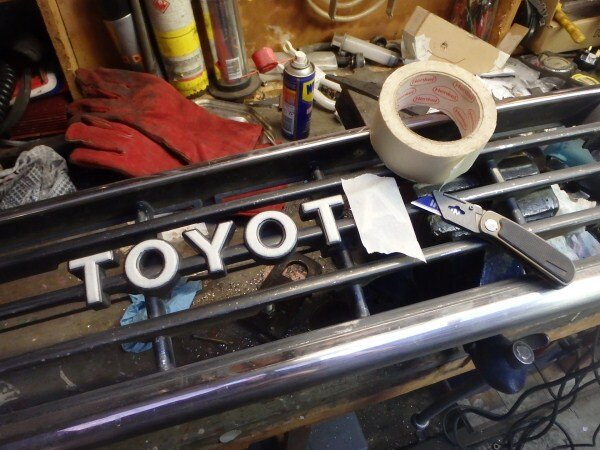
And then did some work on the grill.

Masked over the letters.

Did some filling.


Got it painted with primer.


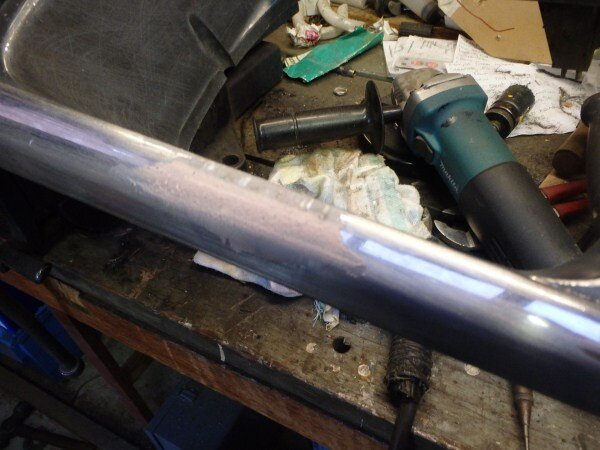
Turned my attention to the rear arch I'd previously started on.

Decided to take it back off and try a different wire cup in the grinder to clean all the resin off.


Got it spotlessly clean.

Got it bolted back on.

Continued working my way round drilling and bolting it in place through the inner arch.

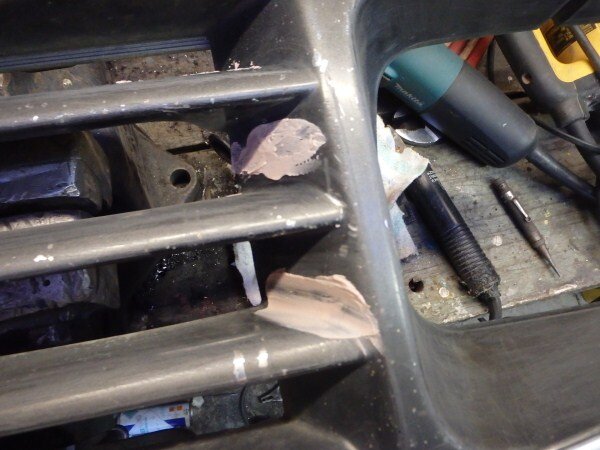
But it was beginning to distort slightly.


I thought I may be able to gently push the center section down a bit by using some clamps but this distorted the outer rolled edge.


I'm not sure if its salvageable or if I will have to get another drum and start again with this side. I'm thinking had I put a cut through the rolled edge with the grinder then maybe it wouldn't have distorted. I could then weld and grind down this cut afterwards.


I cleaned the inside of another drum up.

Sprayed the grill black.


I couldn't decide if I liked the letters black or not.


Removed the masking tape.


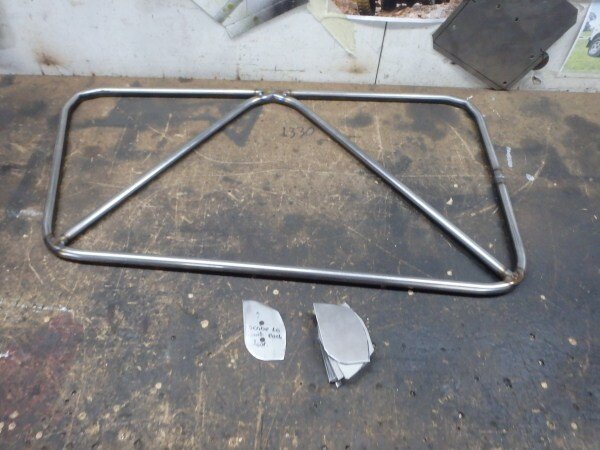
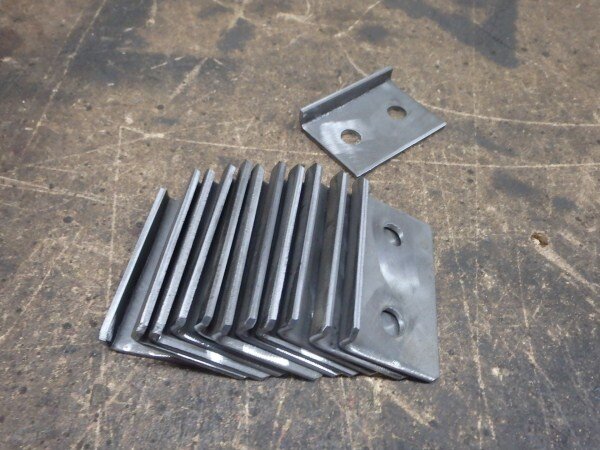
I made the panhard rod relocation bracket.
I decided to use 6mm steel but I think 4 or 5mm would have been thick enough but we didn't have any.

Made sure I was happy with my cardboard template.

Marked it out on the steel.

And cut it out.

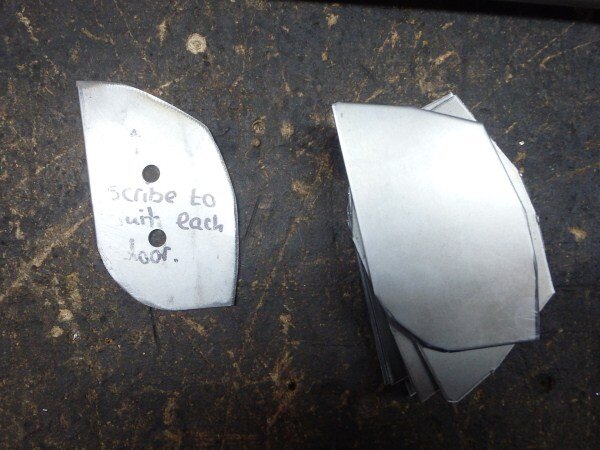
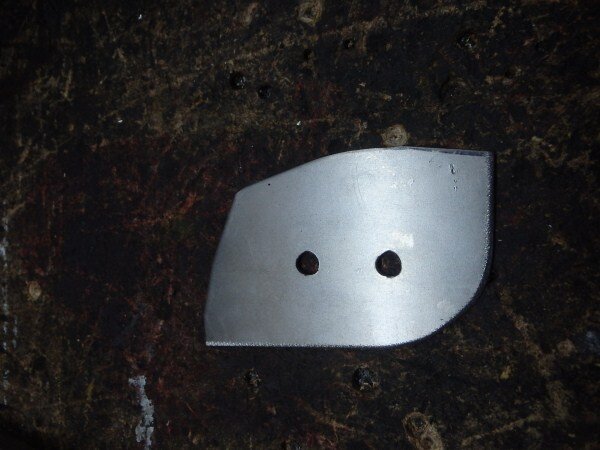
Drilled a pilot hole and found a suitable hole saw.


With the drill on a slow speed and with plenty of cutting fluid I drilled through the 6mm steel.


Cut and marked some more steel.

Put it in the vice.


And bent it using a sledge hammer.

Tack welded it to the first piece.

Test fitting it to get the correct angle as it isnt square to the chassis rail.


Bent some steel on the brake press.


To go on the side.

Tack welded it all together.


Drilled the 15mm hole for the panhard rod.


Turned the amps up high to get the welds to really bite in.


Picked up some bolts. M15 for the panhard rod and M12 to mount the bracket through some existing holes in the chassis.


Welded the inside as well.


Then smoothed them down with the die grinder.

Smoothed down the external welds.


Test fitting.


I cut a crush tube for inside the panhard rod mount on the chassis.


Had to use a ratchet strap to pull the axle across to get the panhard rod mounted.

Got the new bracket fitted, the M15 bolt will need cutting to length.

I still need to drill the new mount for the M12 bolt that will bolt the bracket to the chassis.

I also want to add a gusset or 2 to brace from the chassis to above the panhard.


Front suspension next...........................
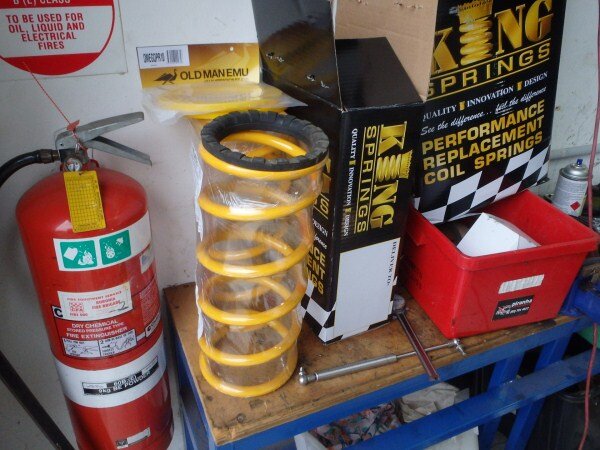
Fitted to LJ was worn out +50mm Ironman springs. Id brought home with me worn out 80 series springs and shocks and some OME 79 series front springs.
The 80 series fronts were almost the right size but was a little too wide to fit the chassis mount.

The 79 springs looked like they would fit better.


I took one my old springs off.
The other springs were only slightly taller but they had thicker coils and more of them.

The 79 spring fitted perfectly on the chassis end but not on the axle.

Because the spring perches were too big.


The bottom shock mount was totally flogged out despite me welding washers onto the axle a few years ago before I painted it.

The pin on the bottom of the shock was badly damaged.


So I decided to cut the spring perches off my axle in order to fit the 79 ones and to move the springs back 50mm. I also wanted to change the bottom shock mount.
Marked where I wanted to cut them and I wanted to do it in such a way that I can always weld the cut pieces back on should I ever need to put it back to standard.


And cut them off.


I remembered that I made a pair of spring adapters last year when I wanted to fit 79 springs, that I didn't use as they added too much height to the springs so gave LJ far too much lift. As I was now making new spring mounts I thought I would be able to use them.


I wanted to remove the bottom section as that would make it sit 20mm lower.


I put a spring in place to work out roughly how big to make the new spring perch.


I then used some cardboard to make a template.

I cut some 6mm steel.


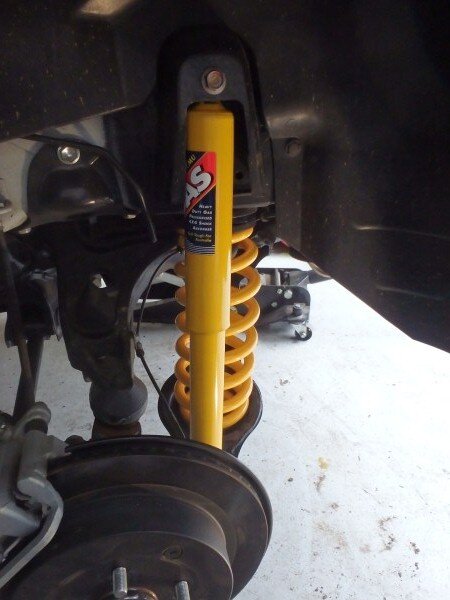
80 series rear shocks looked like they would fit perfectly from my new spring perch on the axle to as high as possible in the wheel arch, so a good 50mm above my old top shock mount.
I wanted the longest shock possible for maximum articulation and the 80 rear looked ideal.

I was pretty limited for steel today so had to use what I had in the garage.
I cut a piece out of some 5mm thick angle.


I wanted it to pick up a captive nut on the axle, I thought I would use that and a hole above the radius arms where I could put another bolt and then weld along the top of the axle tube. I decided that should be strong enough yet easily removed if I ever have to.

Drilled a hole for an M8 bolt


And bolted it on.
This would kick the back of the spring perch up slightly to a similar angle to the standard perch and help give me clearance arounf the brake caliper.


Marked where it needed to be on bigger piece and then got them on the bench ready to tack weld together.

I ground back the end to ensure I get good root penetration for a nice strong weld.


I needed to bend it to the correct angle.

Test fitted it.

Got it back on the bench ready for final welding.


Back on LJ.

The OME 79 springs still have the labels on like the OME 80 series front springs that are currently fitted to the back of LJ.


With this number I will find out from ARB whether they are standard height or lift springs, I will also do the same with the rear springs.

Got the spring and spring perch in position.


I put a wheel back on so I could see how it would sit on this new spring and perch.


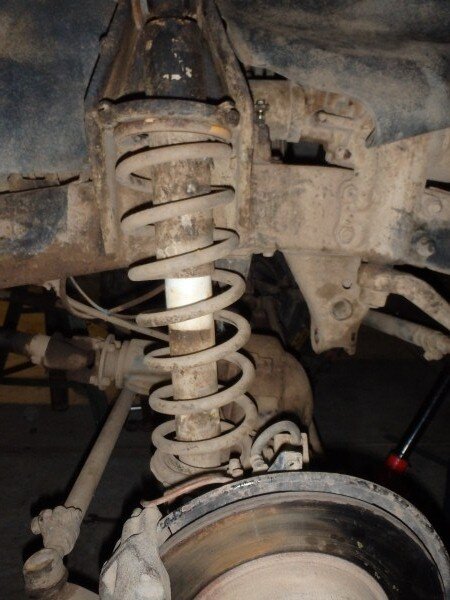
The spring was sitting perfectly straight and had plenty of clearance against the chassis and brake caliper.


I measured the back and compared it to the front.

I feel the back is far too high and needs to come down a bit but it still hasnt got any weight in the back from the drawer system, fridge, high lift, 4 waffle boards and all my recovery gear and tools. The spare isnt mounted on the back yet either so it should go down a bit.

Front side with new spring.


Other front on old spring.


Wheel back off.

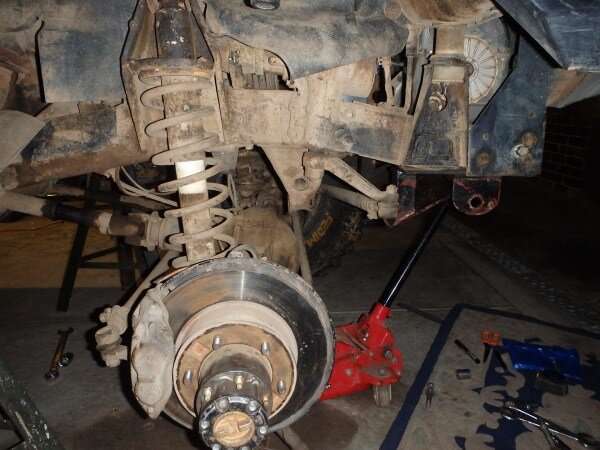
The 80 series rear shocks are the perfect length.

I will make some bolt on brackets that will convert my standard chassis mount to a pin type to suit the 80 series pin mount. These will mount the shock as high as possible to allow me to fit the longest shock possible.


I got the De walt cold cut saw set up.

And cut some angle to length. I'd forgotten what a nice cut it does on steel, no sparks, no heat, no burr, nothing and cuts through the steel quickly!


So my idea was to use angle.


But the 50mm angle I had wasnt really wide enough.


I will make the brackets at work out of 75mm angle.
I made a start on the other side.


Cut off the old spring perch.


Cut the bottom off the other spring adaptor.


I fitted both springs in place.


Tried the wheels back on.

I marked where the spring perch needed to be.

I wanted to make the bottom shock mounts next. 6mm steel would have been perfect but I didnt have any left. All I had was 100mm x 10mm.
Marked and cut 2 strips.


Marked and center punched wheret he holes needed drilling.

Drilled through with a 4mm drill bit.

Then went straight through with a sharp 14mm drill bit.


So 4 x 14mm holes through 10mm steel all on one 18v Makita battery.

I found a piece of wood the exact same width as the bottom shock mount.

I clamped the wood in place with a piece of 10mm each side. I had to position them so the spring seat would fit over them.


I ground where the weld would be both sides so that the center piece of the 10mm steel was only 3mm wide where it was in contact with the metal below.

Tack welded it.

Then repositioned it ready for fully welding.

Welded.

This is how the shocks will mount.


Ground the others.

Clamped and welded them.


Next I clamped and welded the spring perch on.


In position on the car.

And complete with springs and shocks.


Tomorrow I need to bolt and weld the new spring perches on and finish the panhard rod mount.

And hopefully get the drum arches cut and bolted on.
Then on Monday make the top bolt on shock mounts and then I can get them and the panhard rod bracket electroplated.
We had a brand new Suzuki in this week that we had to fit a load of bits to.
It had gone to ARB first to have a bullbar and winch fitted.


I had to make a bash guard to replace the factory plastic one.


I also fitted diff and GB/TB breathers.


We fitted one of our rear bumpers.


Trimmed the corners off the standard bar.


I had to fit a suspension lift next.

The rear was easy.

But the front was coil overs so needed the spring compressor.

We fitted a snorkel.


I fitted some lights.
I've not seen these before but I like them!

Aussie made and they have a nice mounting point made from billet alluminium. I also like how the wires/connector just plugs into the back.


My last job was to change the wheels and tyres.


All done.


Parked next to ours for comparison.


I got the Suzuki tube doors finished.


Cut a load of latch mounting plates.

Drilled them.

And welded them in place.

The last job before they were ready for powder coating was to smooth all the welds down and remove any splatter.

I also made the receiver plates for the latches and sent them for electro plating.

We stripped the diffs and half shafts out of all the Suzuki axles we had as their the bits that sell. I hung most of the old casings up.

And put all the diffs on shelves.

We decided to build a rack to store all the half shafts (or axles as they call them down here.)


I cut a load of steel.

And stuck it all together.


Cut more steel.


Painted it.

And fitted it.


LJ next............................
I got LJ safely supported on my big axle stands.

I decided I wasnt happy with the angle the springs and shocks were at after moving the axle 50mm further forward, it didnt look too bad before but with the wheel removed it was now more noticeable.
The springs and shocks desperately needed changing anyway.


I needed to replace the badly worn Ironman 80 series castor correction bushes in my radius arms.


I took a spare arm in so I could measure the bushes.

Old Ironman CC bush.

Measured up.

Gave my boss the size.

The next day the new bushes arrived.
So I knocked the old ones out.


New bushes.

And pressed the new ones in.


I mistakenly put them in the wrong way round as I wanted the indents in the vertical plane for maximum articulation.


So I pressed them back out and turned them around.


They took a fair amount of pressure to get them in.

All done.

I brought home with me an old suspension lift kit off and 80 series, 79 series front coil springs and my arms with the new bushes.


I re-fitted the arms.

And then did some work on the grill.

Masked over the letters.

Did some filling.


Got it painted with primer.


Turned my attention to the rear arch I'd previously started on.

Decided to take it back off and try a different wire cup in the grinder to clean all the resin off.


Got it spotlessly clean.

Got it bolted back on.

Continued working my way round drilling and bolting it in place through the inner arch.

But it was beginning to distort slightly.


I thought I may be able to gently push the center section down a bit by using some clamps but this distorted the outer rolled edge.


I'm not sure if its salvageable or if I will have to get another drum and start again with this side. I'm thinking had I put a cut through the rolled edge with the grinder then maybe it wouldn't have distorted. I could then weld and grind down this cut afterwards.


I cleaned the inside of another drum up.

Sprayed the grill black.


I couldn't decide if I liked the letters black or not.


Removed the masking tape.


I made the panhard rod relocation bracket.
I decided to use 6mm steel but I think 4 or 5mm would have been thick enough but we didn't have any.

Made sure I was happy with my cardboard template.

Marked it out on the steel.

And cut it out.

Drilled a pilot hole and found a suitable hole saw.


With the drill on a slow speed and with plenty of cutting fluid I drilled through the 6mm steel.


Cut and marked some more steel.

Put it in the vice.


And bent it using a sledge hammer.

Tack welded it to the first piece.

Test fitting it to get the correct angle as it isnt square to the chassis rail.


Bent some steel on the brake press.


To go on the side.

Tack welded it all together.


Drilled the 15mm hole for the panhard rod.


Turned the amps up high to get the welds to really bite in.


Picked up some bolts. M15 for the panhard rod and M12 to mount the bracket through some existing holes in the chassis.


Welded the inside as well.


Then smoothed them down with the die grinder.

Smoothed down the external welds.


Test fitting.


I cut a crush tube for inside the panhard rod mount on the chassis.


Had to use a ratchet strap to pull the axle across to get the panhard rod mounted.

Got the new bracket fitted, the M15 bolt will need cutting to length.

I still need to drill the new mount for the M12 bolt that will bolt the bracket to the chassis.

I also want to add a gusset or 2 to brace from the chassis to above the panhard.


Front suspension next...........................
Fitted to LJ was worn out +50mm Ironman springs. Id brought home with me worn out 80 series springs and shocks and some OME 79 series front springs.
The 80 series fronts were almost the right size but was a little too wide to fit the chassis mount.

The 79 springs looked like they would fit better.


I took one my old springs off.
The other springs were only slightly taller but they had thicker coils and more of them.

The 79 spring fitted perfectly on the chassis end but not on the axle.

Because the spring perches were too big.


The bottom shock mount was totally flogged out despite me welding washers onto the axle a few years ago before I painted it.

The pin on the bottom of the shock was badly damaged.


So I decided to cut the spring perches off my axle in order to fit the 79 ones and to move the springs back 50mm. I also wanted to change the bottom shock mount.
Marked where I wanted to cut them and I wanted to do it in such a way that I can always weld the cut pieces back on should I ever need to put it back to standard.


And cut them off.


I remembered that I made a pair of spring adapters last year when I wanted to fit 79 springs, that I didn't use as they added too much height to the springs so gave LJ far too much lift. As I was now making new spring mounts I thought I would be able to use them.


I wanted to remove the bottom section as that would make it sit 20mm lower.


I put a spring in place to work out roughly how big to make the new spring perch.


I then used some cardboard to make a template.

I cut some 6mm steel.


80 series rear shocks looked like they would fit perfectly from my new spring perch on the axle to as high as possible in the wheel arch, so a good 50mm above my old top shock mount.
I wanted the longest shock possible for maximum articulation and the 80 rear looked ideal.

I was pretty limited for steel today so had to use what I had in the garage.
I cut a piece out of some 5mm thick angle.


I wanted it to pick up a captive nut on the axle, I thought I would use that and a hole above the radius arms where I could put another bolt and then weld along the top of the axle tube. I decided that should be strong enough yet easily removed if I ever have to.

Drilled a hole for an M8 bolt


And bolted it on.
This would kick the back of the spring perch up slightly to a similar angle to the standard perch and help give me clearance arounf the brake caliper.


Marked where it needed to be on bigger piece and then got them on the bench ready to tack weld together.

I ground back the end to ensure I get good root penetration for a nice strong weld.


I needed to bend it to the correct angle.

Test fitted it.

Got it back on the bench ready for final welding.

Back on LJ.

The OME 79 springs still have the labels on like the OME 80 series front springs that are currently fitted to the back of LJ.


With this number I will find out from ARB whether they are standard height or lift springs, I will also do the same with the rear springs.

Got the spring and spring perch in position.


I put a wheel back on so I could see how it would sit on this new spring and perch.


The spring was sitting perfectly straight and had plenty of clearance against the chassis and brake caliper.


I measured the back and compared it to the front.

I feel the back is far too high and needs to come down a bit but it still hasnt got any weight in the back from the drawer system, fridge, high lift, 4 waffle boards and all my recovery gear and tools. The spare isnt mounted on the back yet either so it should go down a bit.

Front side with new spring.


Other front on old spring.


Wheel back off.

The 80 series rear shocks are the perfect length.

I will make some bolt on brackets that will convert my standard chassis mount to a pin type to suit the 80 series pin mount. These will mount the shock as high as possible to allow me to fit the longest shock possible.


I got the De walt cold cut saw set up.

And cut some angle to length. I'd forgotten what a nice cut it does on steel, no sparks, no heat, no burr, nothing and cuts through the steel quickly!


So my idea was to use angle.


But the 50mm angle I had wasnt really wide enough.


I will make the brackets at work out of 75mm angle.
I made a start on the other side.


Cut off the old spring perch.


Cut the bottom off the other spring adaptor.


I fitted both springs in place.


Tried the wheels back on.

I marked where the spring perch needed to be.

I wanted to make the bottom shock mounts next. 6mm steel would have been perfect but I didnt have any left. All I had was 100mm x 10mm.
Marked and cut 2 strips.


Marked and center punched wheret he holes needed drilling.

Drilled through with a 4mm drill bit.

Then went straight through with a sharp 14mm drill bit.


So 4 x 14mm holes through 10mm steel all on one 18v Makita battery.

I found a piece of wood the exact same width as the bottom shock mount.

I clamped the wood in place with a piece of 10mm each side. I had to position them so the spring seat would fit over them.


I ground where the weld would be both sides so that the center piece of the 10mm steel was only 3mm wide where it was in contact with the metal below.

Tack welded it.

Then repositioned it ready for fully welding.

Welded.

This is how the shocks will mount.


Ground the others.

Clamped and welded them.


Next I clamped and welded the spring perch on.


In position on the car.

And complete with springs and shocks.


Tomorrow I need to bolt and weld the new spring perches on and finish the panhard rod mount.

And hopefully get the drum arches cut and bolted on.
Then on Monday make the top bolt on shock mounts and then I can get them and the panhard rod bracket electroplated.
Attachments
-
 P5260001_zps010a0159.jpg68.5 KB · Views: 58
 -
 P5260003_zpsb5e07e70.jpg55.1 KB · Views: 63
 -
 P5260005_zpsbacf0064.jpg63.5 KB · Views: 55
 -
 P5260006_zps0a718e6e.jpg63.7 KB · Views: 64
 -
 P5260010_zps7260f72c.jpg48.8 KB · Views: 58
 -
 P5260011_zpsb0107abc.jpg69.9 KB · Views: 65
 -
 P5260012_zpsd862e691.jpg86 KB · Views: 52
 -
 P5260013_zps2bdabaca.jpg68.4 KB · Views: 61
 -
 P5260017_zps2a1f9d93.jpg73 KB · Views: 57
 -
 P5260014_zps62f3e96e.jpg55.7 KB · Views: 63
 -
 P5260015_zps71133ea3.jpg72.2 KB · Views: 67
 -
 P5260016_zps060c6483.jpg56.1 KB · Views: 56
 -
 P5270033_zpsd39d20c0.jpg48.6 KB · Views: 68
 -
 P5270032_zpsc01d8e88.jpg56.8 KB · Views: 50
 -
 P5280078_zps1e58227d.jpg45 KB · Views: 52
 -
 P5280079_zps441dd277.jpg50.7 KB · Views: 51
 -
 P5270034_zps55a2947e.jpg82.2 KB · Views: 57
 -
 P5270035_zpsebd16a42.jpg69.7 KB · Views: 64
 -
 P5270036_zpse6ffc576.jpg74.2 KB · Views: 64
 -
 P5290087_zps0c7d0eb4.jpg66.2 KB · Views: 60
 -
 P5290088_zpsc9a77b00.jpg53.2 KB · Views: 55
 -
 P5270037_zpsad77b9b2.jpg56 KB · Views: 42
 -
 P5270038_zps34bd2c1d.jpg42.4 KB · Views: 63
 -
 P5270039_zps78023ed0.jpg44.2 KB · Views: 60
 -
 P5270040_zpse1b066c2.jpg64.8 KB · Views: 55
 -
 P5270041_zps71faffbf.jpg66.1 KB · Views: 50
 -
 P5290089_zps4413d383.jpg60.3 KB · Views: 54
 -
 P5290090_zps4f513de0.jpg67.9 KB · Views: 46
 -
 P5290091_zps76680f73.jpg57.7 KB · Views: 56
 -
 P5290092_zps3f9f18e8.jpg60.6 KB · Views: 60
 -
 P5290094_zps1e7c2f56.jpg46.7 KB · Views: 62
 -
 P5290093_zps427dd718.jpg47.3 KB · Views: 59
 -
 P5290095_zps6059fd68.jpg56.2 KB · Views: 75
 -
 P5290096_zps16942aca.jpg79 KB · Views: 46
 -
 P5290097_zps146e95e5.jpg79.8 KB · Views: 58
 -
 P5290098_zps807c16e2.jpg72.3 KB · Views: 54
 -
 P5280062_zpsc8768a62.jpg70.8 KB · Views: 77
 -
 P5290099_zpsd0279bd6.jpg62.7 KB · Views: 52
 -
 P5280063_zpse02c3cf1.jpg63 KB · Views: 63
 -
 P5280064_zpsa18ea4a5.jpg64.1 KB · Views: 62
 -
 P5280065_zpsde06eaaf.jpg54.7 KB · Views: 55
 -
 P5280066_zps624cfd47.jpg61.3 KB · Views: 52
 -
 P5290101_zps8d0c276f.jpg72.7 KB · Views: 40
 -
 P5290100_zpsb7550d51.jpg76.1 KB · Views: 93
 -
 P5290102_zpsf33438dc.jpg56.2 KB · Views: 64
 -
 P5290103_zps570074bd.jpg79.7 KB · Views: 52
 -
 P5290104_zps63a757f5.jpg68.5 KB · Views: 48
 -
 P5290105_zps6645e183.jpg69.1 KB · Views: 55
 -
 P5290106_zps38a52b4d.jpg62.2 KB · Views: 56
 -
 P5290108_zpsf4308d8f.jpg69.6 KB · Views: 59
 -
 P5290109_zpsc2793b7e.jpg78 KB · Views: 58
 -
 P5290127_zps8d4b2ca5.jpg63.2 KB · Views: 63
 -
 P5290128_zps6542169c.jpg50.4 KB · Views: 50
 -
 P5290130_zpsa8ee0568.jpg105.3 KB · Views: 65
 -
 P5290129_zps3b2f39f2.jpg83.6 KB · Views: 55
 -
 P5290132_zpscce893c6.jpg77.7 KB · Views: 49
 -
 P5290133_zps9e93d94e.jpg73.3 KB · Views: 56
 -
 P5290134_zps2ae80a3f.jpg80.3 KB · Views: 50
 -
 P5290140_zpsdb913de8.jpg78 KB · Views: 48
 -
 P5290141_zps9ed354e2.jpg93 KB · Views: 61
 -
 P5290142_zps42ac1f22.jpg75.9 KB · Views: 59
 -
 P5290143_zps28c3c446.jpg82.8 KB · Views: 54
 -
 P5270022_zpsfb388035.jpg75.9 KB · Views: 52
 -
 P5270023_zps409d2a7f.jpg78.6 KB · Views: 49
 -
 P5270025_zpsa2fe8288.jpg85.4 KB · Views: 60
 -
 P5270019_zps176bf4c5.jpg59.4 KB · Views: 63
 -
 P5270020_zps9b7a3222.jpg66.5 KB · Views: 65
 -
 P5270028_zpsac2b157c.jpg54.9 KB · Views: 54
 -
 P5270027_zpsad20d4af.jpg67.2 KB · Views: 61
 -
 P5270030_zpsbc8015aa.jpg71.9 KB · Views: 52
 -
 P5270031_zpsd7b90be8.jpg49.4 KB · Views: 58
 -
 P5290080_zps6ba797df.jpg76.5 KB · Views: 69
 -
 P5290082_zps5eeb261b.jpg66.6 KB · Views: 57
 -
 P5290081_zps3d379d24.jpg68.2 KB · Views: 49
 -
 P5290083_zps6ca21292.jpg82.6 KB · Views: 60
 -
 P5290084_zps936db9cf.jpg65.9 KB · Views: 54
 -
 P5290085_zpse2a65dd2.jpg69.2 KB · Views: 58
 -
 P5290086_zpsa501a580.jpg80.7 KB · Views: 52
 -
 P5290115_zpsd84c7ad6.jpg50.5 KB · Views: 53
 -
 P5290110_zpsc564cf35.jpg58.8 KB · Views: 61
 -
 P5290116_zps0226bdd5.jpg47.2 KB · Views: 62
 -
 P5290111_zpsaab1a463.jpg56.2 KB · Views: 67
 -
 P5290144_zps3b4d0522.jpg79.9 KB · Views: 61
 -
 P5300145_zpsd65ed594.jpg81 KB · Views: 52
 -
 P5300149_zps0852233e.jpg61.6 KB · Views: 38
 -
 P5300150_zps60ddfeaa.jpg74.1 KB · Views: 69
 -
 P5300151_zps673c3b7a.jpg79.1 KB · Views: 55
 -
 P5300152_zpsb5f49043.jpg61.5 KB · Views: 65
 -
 P5300153_zpsf58dd1ad.jpg61.5 KB · Views: 49


Craigmorley
Well-Known Member
- Joined
- Apr 26, 2014
- Messages
- 341
- Country Flag
Hi ben about the arches to stop the distortion u Might be better off tack welding the drum to the body on the outside then fix the inside. That's what I did as my first one distorted so had to cut it off again. Once there attached inside and out then you can bash then in please with club hammer or copper hammer just to get the arch a nice shape. Shock mounts all look good though well impressed mate.
- Joined
- Oct 13, 2010
- Messages
- 6,058
- Country Flag
Thanks guys.
Thanks Craig only thing is I dont have a MIG at home so cant really weld them on.
My plan was to get them all bolted on and then take it to work this Thursday and weld them then.
I'm hoping the fronts will be easier as its less of a radius so hopefully they wont kink as easily.
I need to know what 80 series rear shocks measure as standard as I'm not sure whether the ones I have are standard height or lifted. All I know is that they are the perfect length and I want to order some new ones tomorrow but obviously need to know what size to get.
Anyone know?

Paddler Ed
Well-Known Member
I need to know what 80 series rear shocks measure as standard as I'm not sure whether the ones I have are standard height or lifted. All I know is that they are the perfect length and I want to order some new ones tomorrow but obviously need to know what size to get.
Anyone know?
I had a quick look on line to find the length; I did know of a site that had the length of shocks but couldn't find it... What might work is working backwards; 80 series stock springs give a 2" lift to a 130 series 4Runner/Surf, so I wonder if the length of a shock is the same as a 2" lift shock for a 4Runner/Surf...
I had a quick look on line to find the length; I did know of a site that had the length of shocks but couldn't find it... What might work is working backwards; 80 series stock springs give a 2" lift to a 130 series 4Runner/Surf, so I wonder if the length of a shock is the same as a 2" lift shock for a 4Runner/Surf...
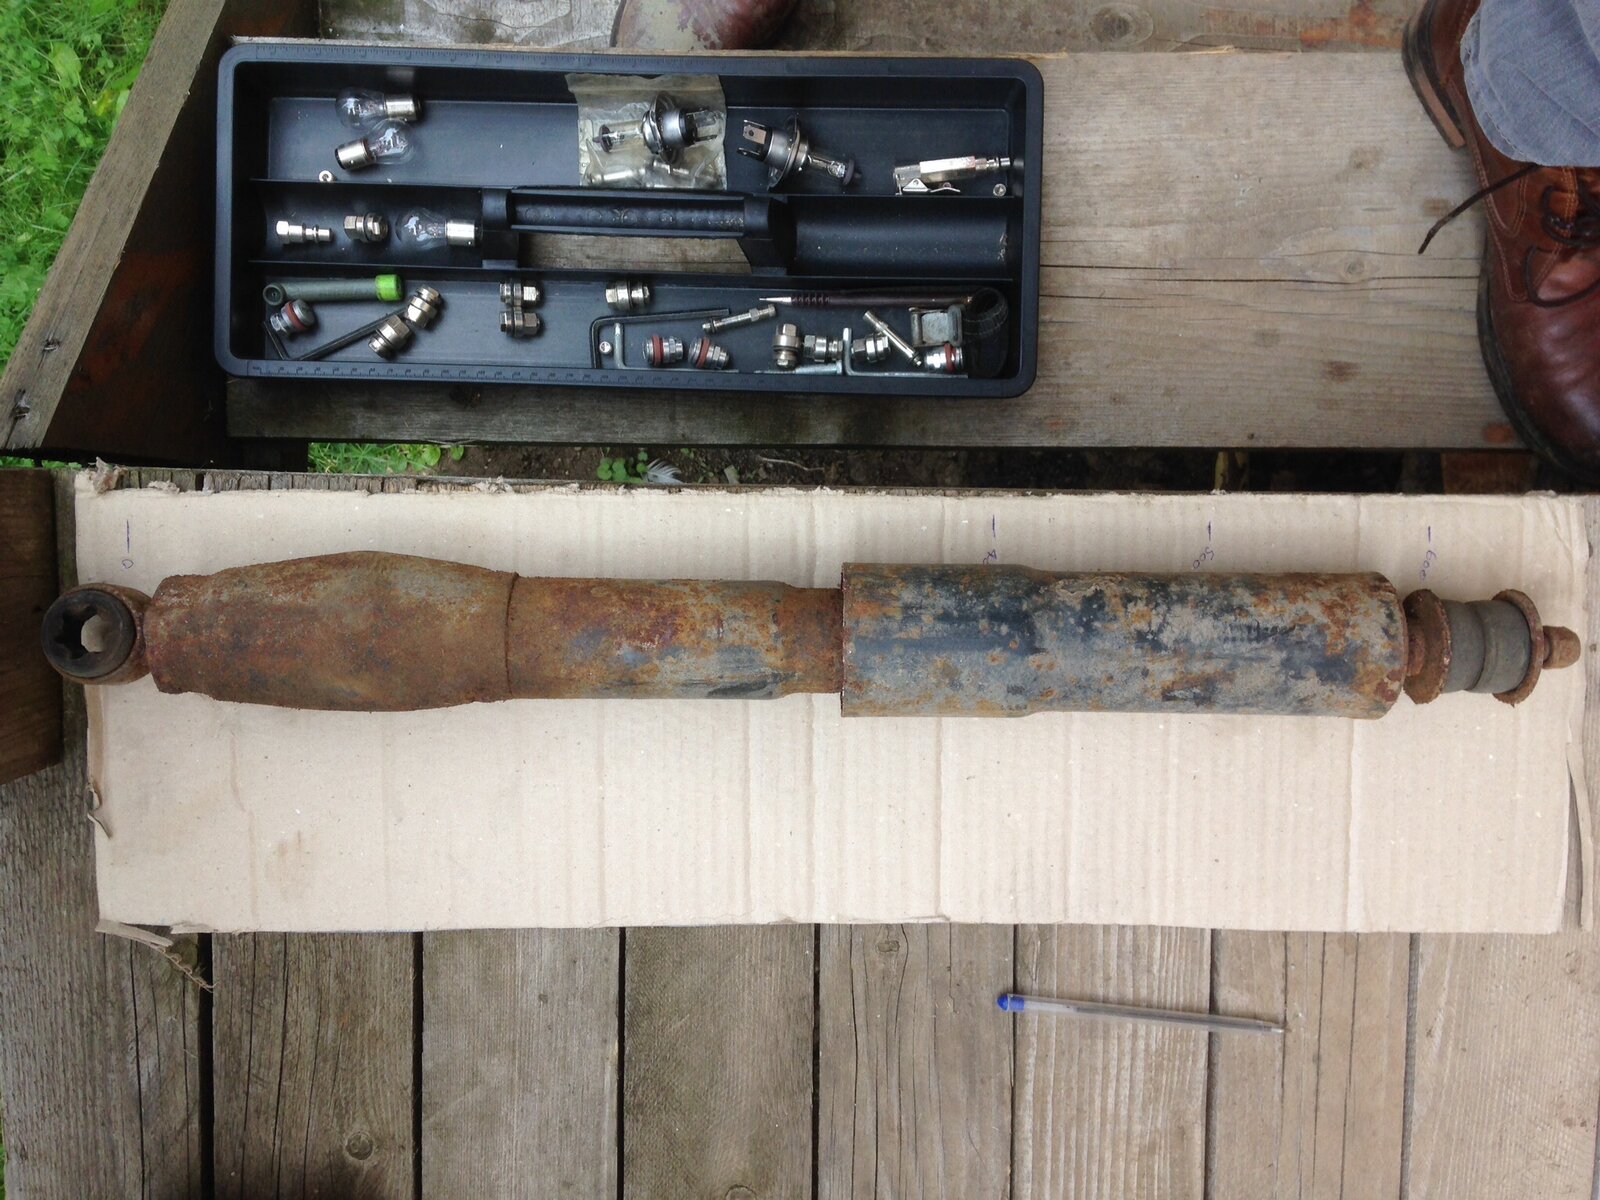
I had a rummage in the shed and found my old stock rear 80 shocks Ben, and from the centre of the bottom mounting eye to the centre of the top pin rubbers, i.e. the top mount plate, I can confirm that extended they measure 60cm exactly, fully compressed, they're 43cm.
Although it's not clear from my distorted photo attached, I couldn't find my measuring tape but I transcribed measurements from my toolbox lid...
Attachments
Last edited:
Blown80
Well-Known Member
Ben, I have full data specs at work so can get those lengths to you. I have to shoot off early though for some photo shoot stuff, but if I get a quick chance I'll text you the normal 80 series front shock lengths used for a std to 50mm lift.
Looking at the pix, it might even pay to cut the dust shroud off the shocks to create more clearance. It's only a metal sleeve, and you're pretty handy with a cutting disc. You can always slip a rubber boot over the piston if you're worried about the hardened chrome but usually not an issue up front.
You've done a heap of work since I last checked, well done. There's a couple of questions I've got for you though.
Have you done a full steering lock to lock check to make sure the drag link is going to clear the new Panhard rod mount sticking out further?
Also, the raised sides on those new spring mounts might squeak like a bastard as they rub up the side of the bottom coil. Hard to see if there is much clearance. They will do a lot of fast movement over millions of corrugations shortly.
But great to see what you have achieved for yourself.
Similar threads
- Replies
- 6
- Views
- 377