Don't like the adverts?  Click here to remove them

LJ78 Build Thread

Ok, I think I'm clear now. Just as I know nothing about 70's, please tell me what is so special about the chassis of LJ compared to the chassis of RJ as, in essence, it's that and the running gear you are swapping? Unless I've still got it wrong. :crazy:

I think I've got it... the identity of LJ is the chassis as opposed to the body, therefore keeping the chassis and putting the RJ body on keeps LJ going.... It's like the missus getting a boob job or a face lift - the bit inside is still the same, it's just the appearance has changed!


....Alternatively, Ben could just remove the roof off of LJ (again...) as he has convenient welds to cut from that repair... :p
 
It's beginning to show that I haven't read Ben's thread from the beginning on account of not having a spare week (I'm a slow reader :) ). I sort of get the boob job analogy, but this is more like a whole body transplant with most of the personality too, I just don't see what the attraction is in keeping one chassis over another. Aren't they identical? I mean save for the number? I've probably got this totally wrong but it just seems an inordinate amount of work to do for a chassis number.

Don't get me wrong here Ben, you've got your reasons for this and that's all that matters. I'm just trying to understand the logic behind it is all.

I get the 78 with the best (diesel) engine and the camper build and all the many benefits this will have.
What I don't get is swapping LJ with RJ and what benefit(s) this will have.

Sorry if I'm being thick here.
 
I think Ben is keeping the lj chassis because it is different to the RJ chassis. The old round headlight lj/rj70's have different length rear springs, odd shock absorbers and the radius arms are also different, intact the front axle knuckles are different too as the older ones are almost identical to hilux.
But his lj70 and lj78 chassis are very similar with the same suspension. Would make spares a lot easier and also mean he can still use all of his original suspension setup, but soft top body and 1uz V8
 
Good on you,Ben,they are a great wagon.I was brought up thinking that Yankee cars were the best then I deviated into English cars a near new
1954 Ford Anglia but not much room when out with girls then a Vauxhall Velox
which was a dog later on marriage and back to yank tanks,room for kids dog and odd times goats,the r&m wore me down so more variety and then I
went for drive in a Jap import KZJ78 and have never looked back,they're the best.

Thanks Pat, good to hear from you mate. :thumbup:

Ok, I think I'm clear now. Just as I know nothing about 70's, please tell me what is so special about the chassis of LJ compared to the chassis of RJ as, in essence, it's that and the running gear you are swapping? Unless I've still got it wrong. :crazy:

:lol:

Well firstly I can never part with LJ, not after all the adventures we've had and the fact I shipped it half way round the world with me. :shifty:

But the body isnt great, for many years I abused it and its not going to last forever in the condition its in. :doh:

But the chassis is good, the axles have got ARB lockers front and rear and I had brand new ring, pinions and bearings fitted.

The brakes have been upgraded with the rear converted to disc and the front got bigger calipers and vented discs.

All new Dobinsons suspension.

I replaced all the uni joints on the prop shafts, built and fitted a heavy duty steering bar along with all new tie rod ends.

And the engine and G&T box are running great! :thumbup:

So in short I've spent a fortune and a lot of time and have got a great car mechanically, its just the body that is tired. :icon-biggrin:

Now the chassis on RJ is in good condition, its been freshly painted, the suspension is OK but everything else is an unknown yet as I havent driven it before. :think:

The other great thing about keeping LJ's chassis and running gear is its an identical setup to the 78, where as RJ is running the older stye suspension and front end body work.

So by having 2 70's both with identical suspension/axles and sharing the same front end on the body, it means I can get rid of a huge amount of spare parts that wont fit either of these vehicles and just keep the bits that fit the 2 I will have. :icon-cool:
 
I think Ben is keeping the lj chassis because it is different to the RJ chassis. The old round headlight lj/rj70's have different length rear springs, odd shock absorbers and the radius arms are also different, intact the front axle knuckles are different too as the older ones are almost identical to hilux.
But his lj70 and lj78 chassis are very similar with the same suspension. Would make spares a lot easier and also mean he can still use all of his original suspension setup, but soft top body and 1uz V8

Thanks mate, thats all correct. :thumbup:

We were both writing at the same time. :doh:
 
Don't like the adverts?  Click here to remove them
Thanks Ben, that's clear and I'm now with you. I guess I would do the same but it would probably take me several years to do, if indeed I completed the project.
 
:thumbup:

My boss is letting me take an RDO tomorrow, Mrs is away all weekend, so that gives me 3 solid days to get stuck into the build. :dance:

I want the 2lt engine out of the 78 and in the RJ chassis by the end of the weekend and maybe even the 1KZ bolted in place in the 78 chassis. :icon-twisted:

All depends on how much of a killer the heat wave is, meant to be sunny and 36 Saturday and 38 Sunday so I'm going to cook! :angry-extinguishfl:
 
"The Mrs" eh Ben? You've been married only months…next you'll be calling Bec SWMBO!
:lol:
 
:lol: :thumbup:

Its torture that I havent been able to really get stuck into this build yet as I'm busy working on the RJ70 so I can get it finished and sold to release some cash for this one. :icon-neutral:

I've done a little bit though, mainly to help get RJ finished.

*Apologies if you guys have already seen some of these pics in the RJ70 Build Thread, the 2 threads are going to overlap a little for a while.

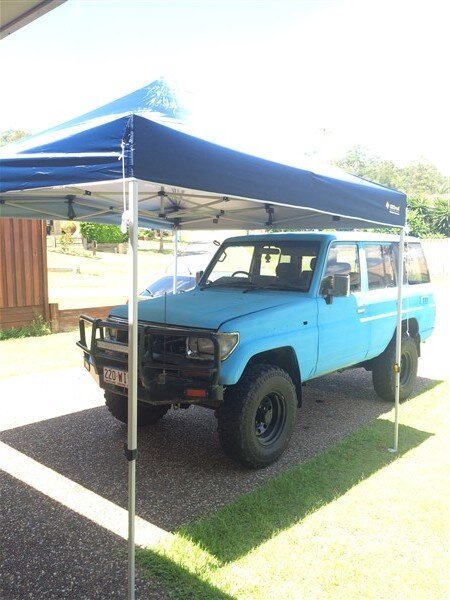
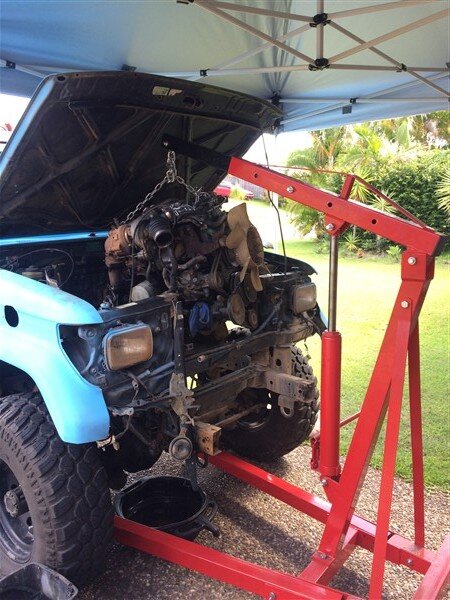
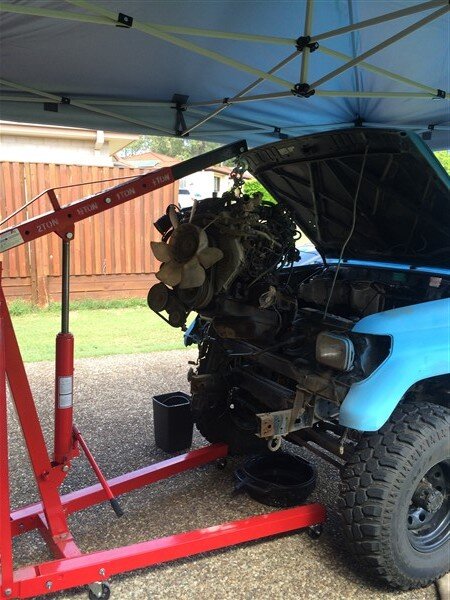
Got a gazebo setup to shade me from the summer sun.
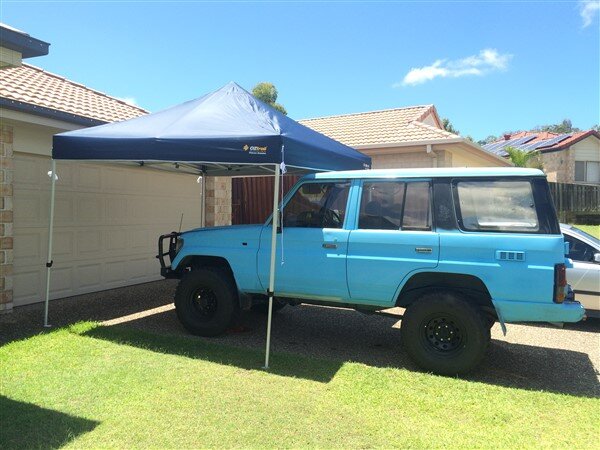
IMG_5308_zpsdwp1wd5q.jpg

IMG_5309_zpsd8dk0sos.jpg

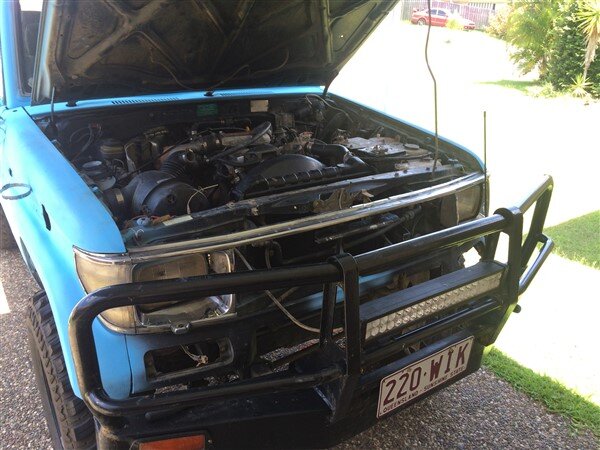
And began stripping the 78 down.

IMG_5310_zpsizc1nb5v.jpg

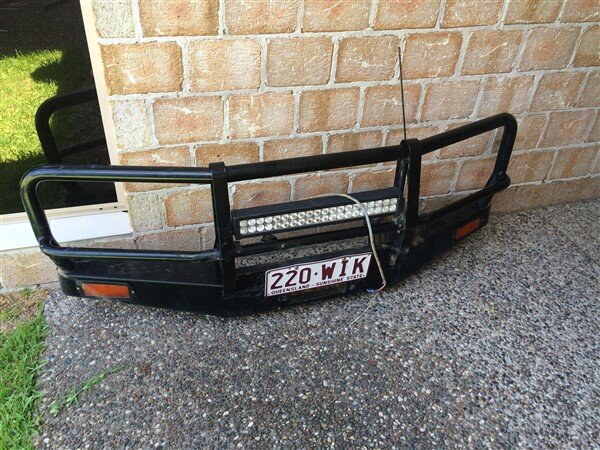
Bullbar off.

IMG_5313_zpsnpywcttw.jpg

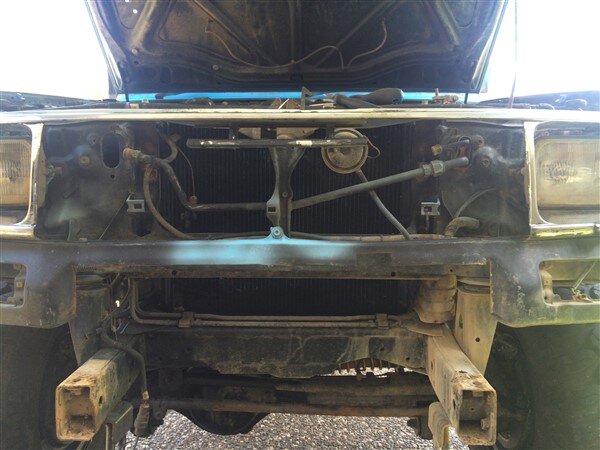
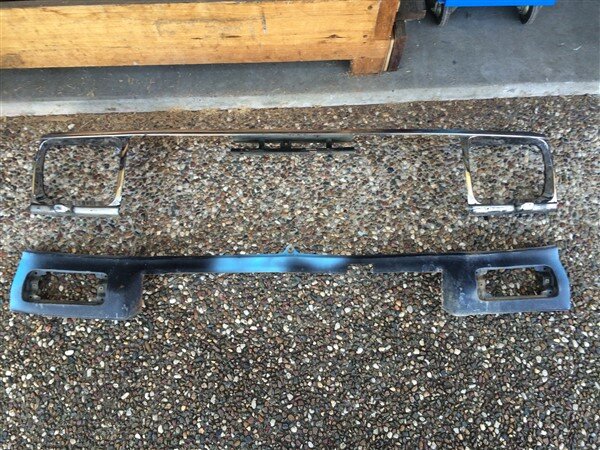
Which revealed the badly butchered grill and bottom panel.
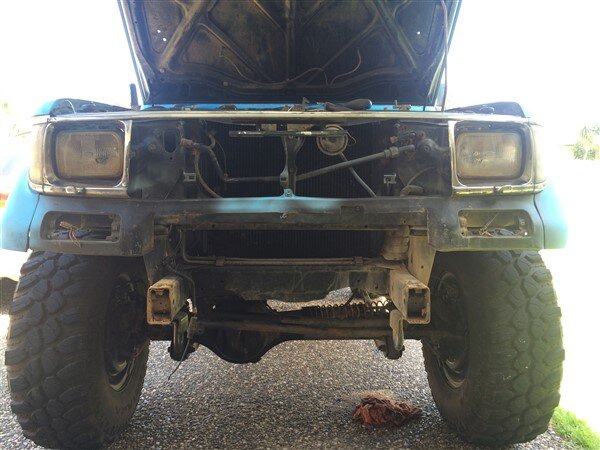
IMG_5314_zpsw46pcraa.jpg

IMG_5315_zpsbjxccozz.jpg

These 2 will have to be binned.

IMG_5316_zpss19guynm.jpg

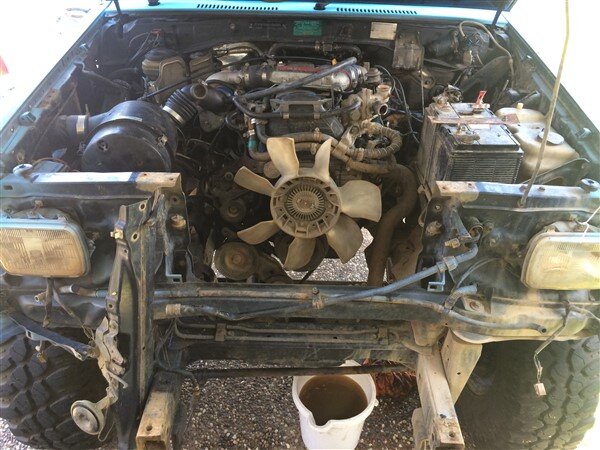
With those removed I could access the cooling system more easily.
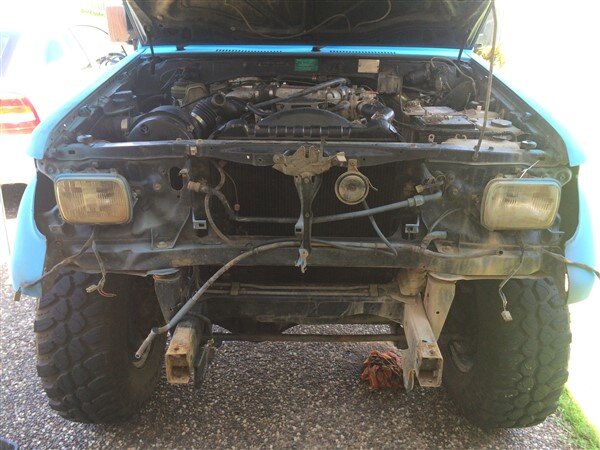
IMG_5317_zpscdizw6ml.jpg

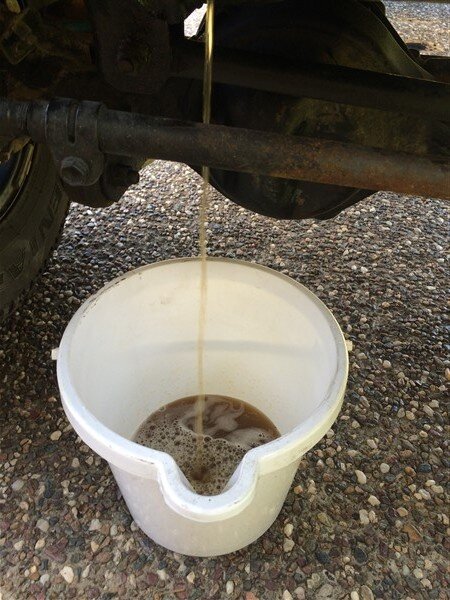
Drained the coolant.

IMG_5318_zpsrkgyq60v.jpg

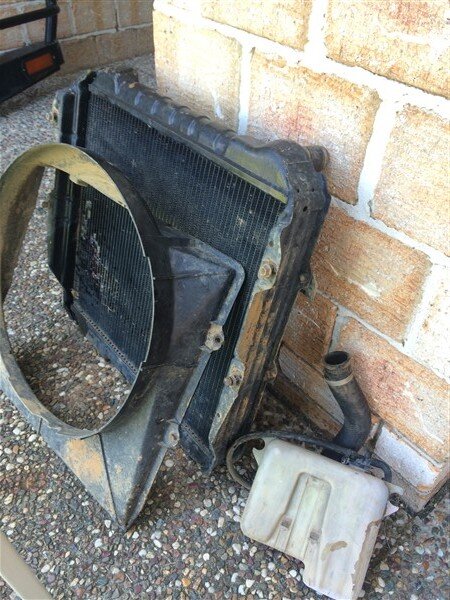
Pulled the rad out.

IMG_5319_zpsk7iskqdd.jpg

IMG_5320_zpsf6y2fbxd.jpg

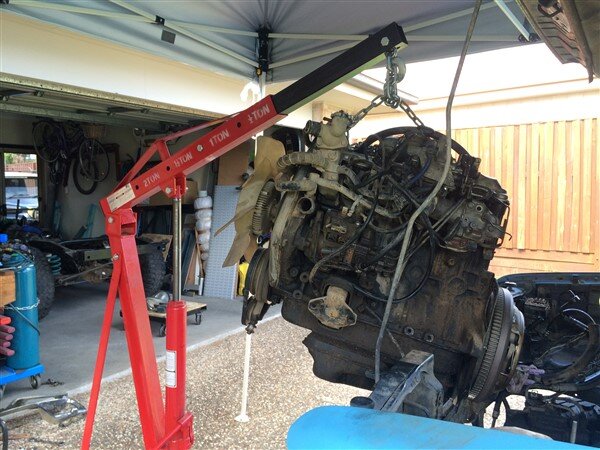
Engine came out next.

IMG_5321_zpsyjfjp7wn.jpg

IMG_5323_zpsv9yewptz.jpg

IMG_5324_zpszbot1ygi.jpg

Thats now gone in the RJ70 chassis.
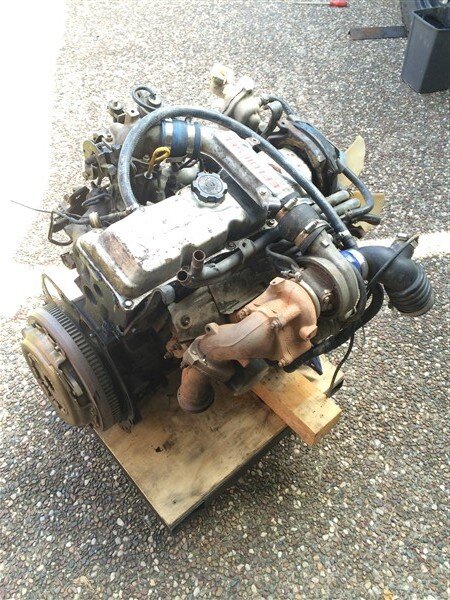
IMG_5326_zpsvv7kgwaq.jpg

Meanwhile I've been trying to work out how to wire it up.

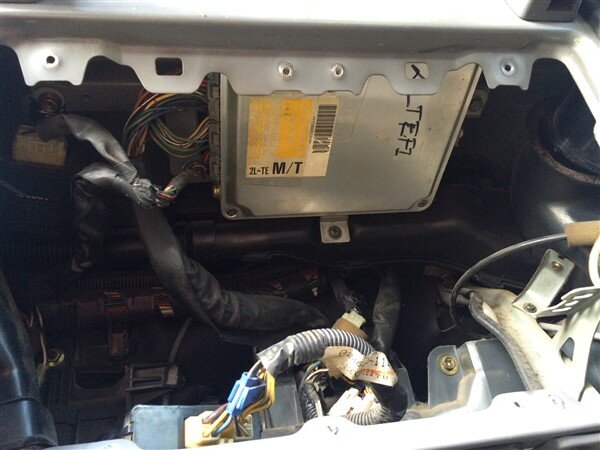
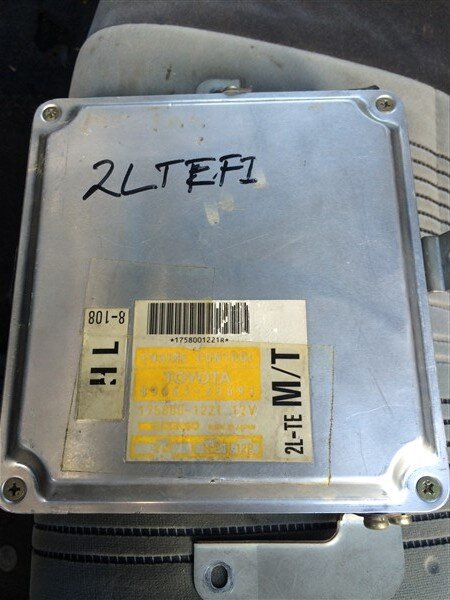
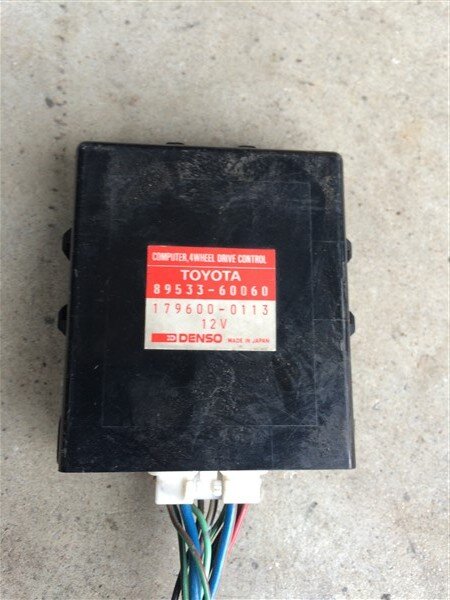
Found the ECU mounted under the dash in the 78.
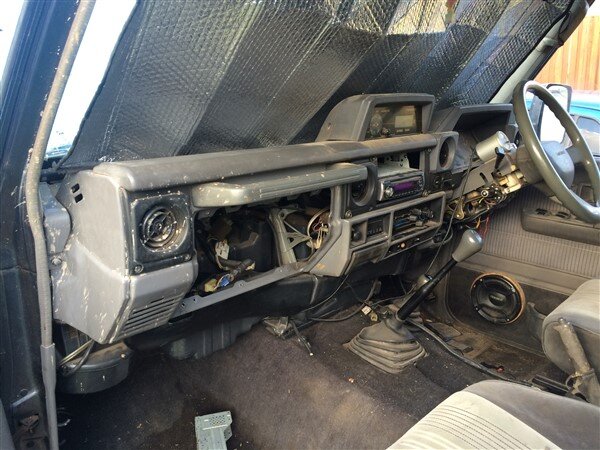
IMG_5417_zpsjmrw1kwe.jpg

IMG_5418_zpsc9hwgjyq.jpg

Pulled it out.

IMG_5419_zpsekxlqwbc.jpg

Along with the engine bay wiring loom that plugs into the ECU.
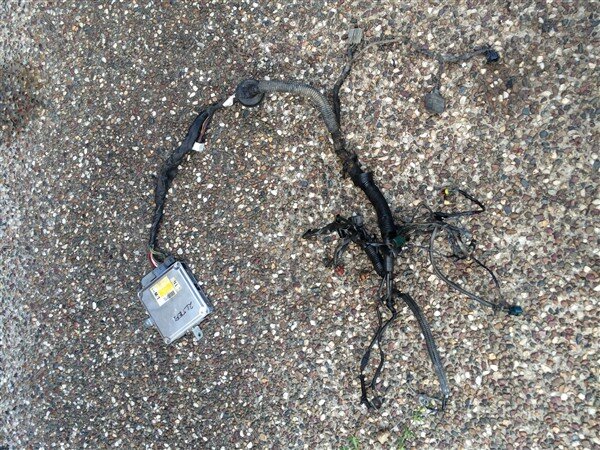
IMG_5424_zpsdofowanx.jpg

I hoped the EFI section of loom that connects to the ECU and engine might unplug off the standard loom but sadly it doesnt. :doh:

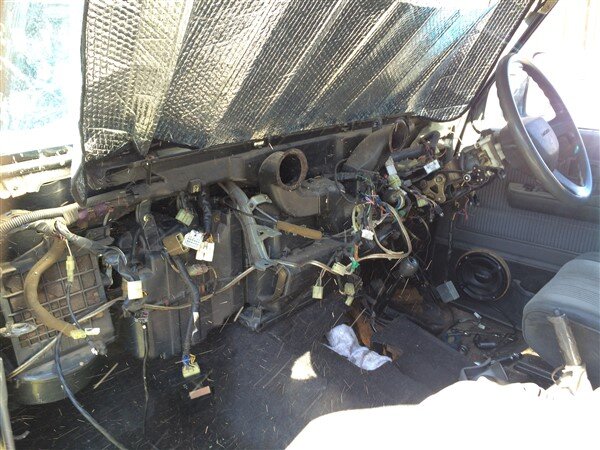
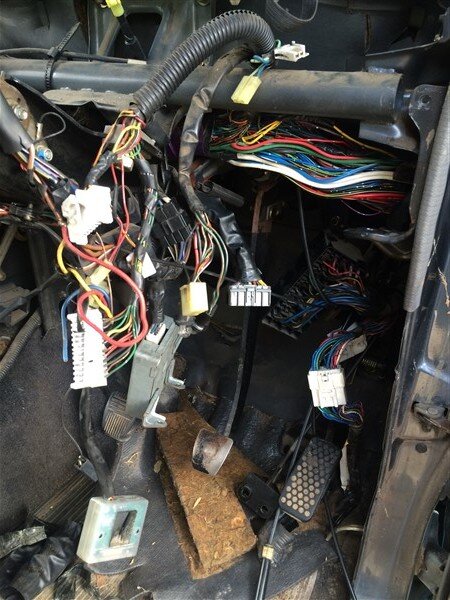
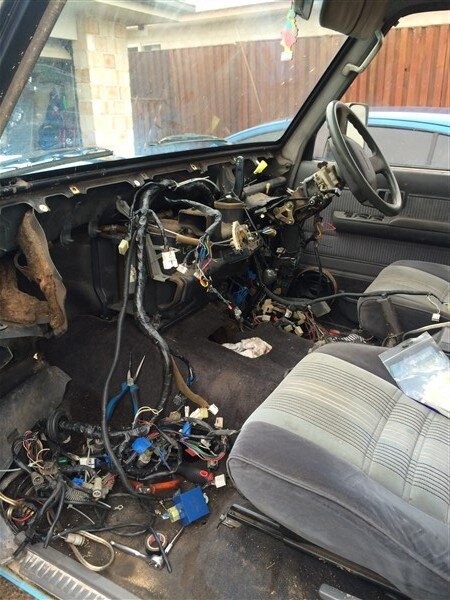
So I decided to completely remove the loom from the dashboard forwards.

Dash out.
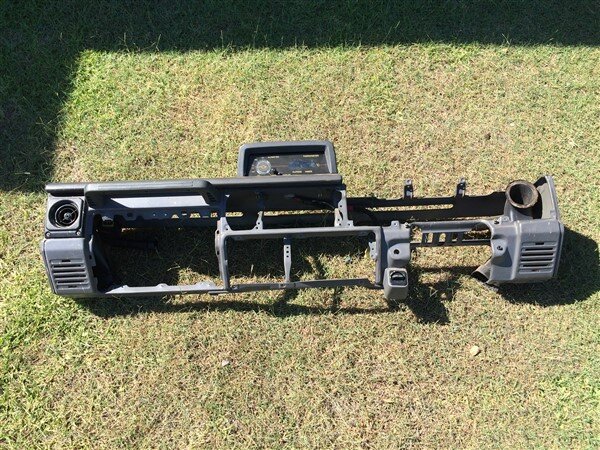
IMG_5517_zpsok2atvsx.jpg

IMG_5518_zpsuwrjgo2q.jpg

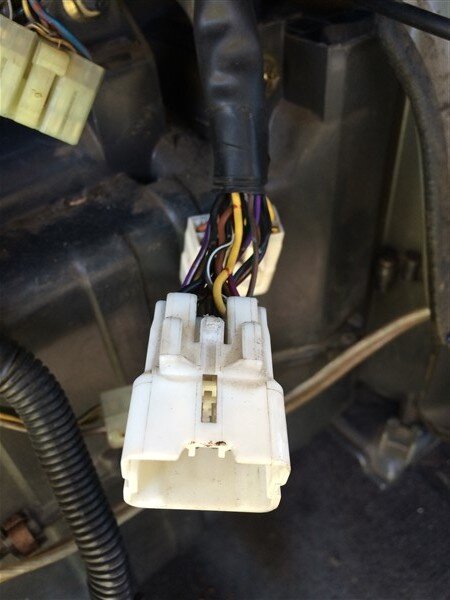
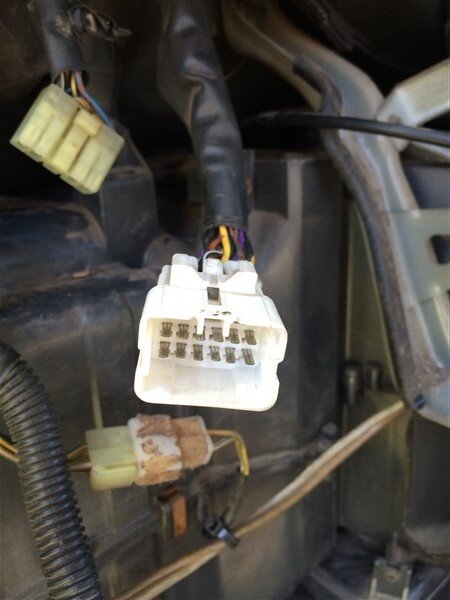
There was one connector going from the ECU into the main loom, with 14 wires and I hoped I could trace all those wires and just remove that section of loom and graft it into the loom in LJ's old body which is on the RJ70 chassis.
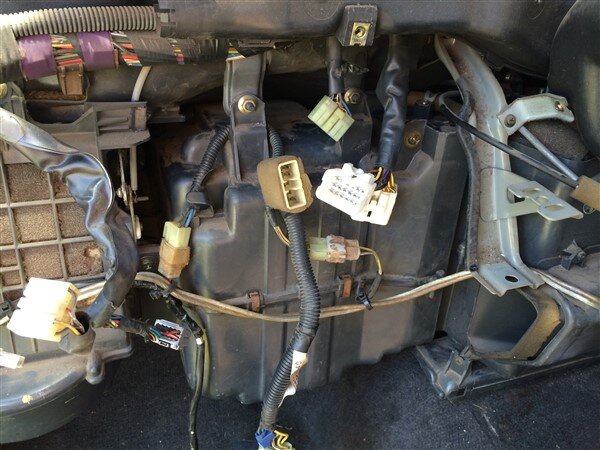
IMG_5519_zpsnyyk3srm.jpg

This connector.

IMG_5520_zpsktdvkbcq.jpg

IMG_5521_zpswet8djop.jpg

I managed to trace most of them but it was too tricky with the loom in place.
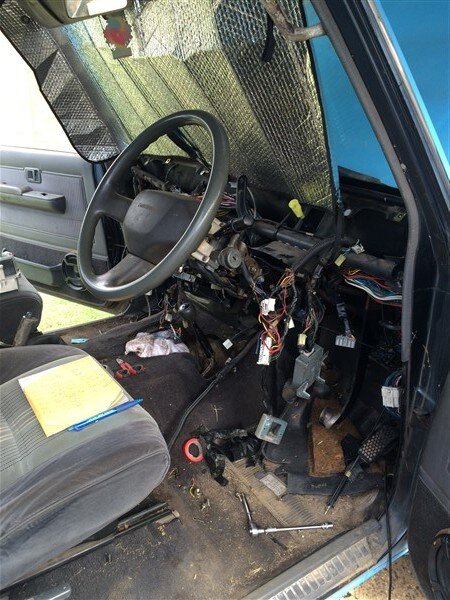
IMG_5554_zpsro5ttpkn.jpg

IMG_5555_zpsnipyw0sg.jpg

IMG_5556_zpsvkdowzla.jpg

So I decided to completely remove it.
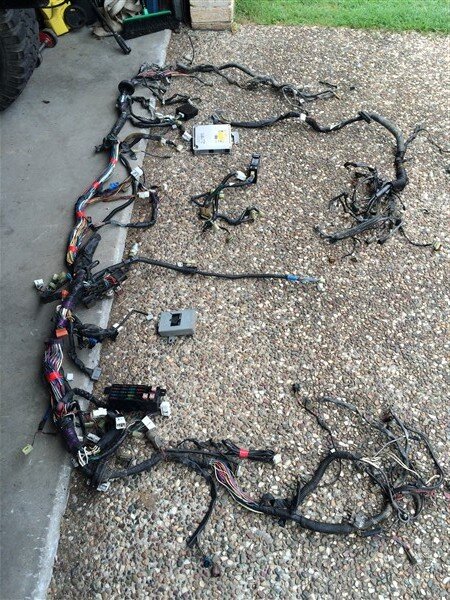
IMG_5562_zpsm5ycnvc3.jpg

A few things can be deleted completely before it goes back in like the adjustable front shocks and the auto locking front hubs as they will be getting changed to more reliable manual ones.

So these boxes and their wiring can be removed.
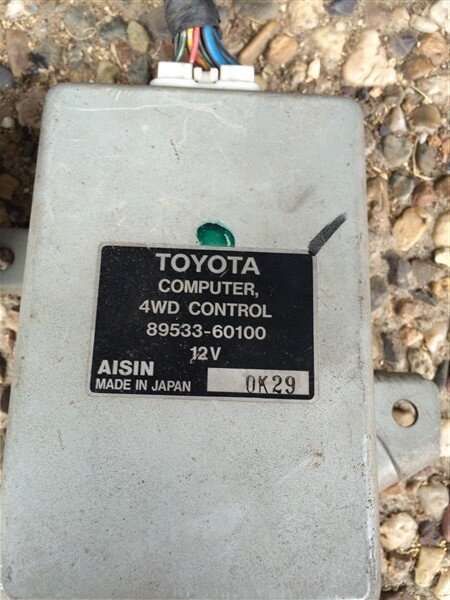
IMG_5563_zps9xsnx41p.jpg

IMG_5564_zpsh6miesei.jpg

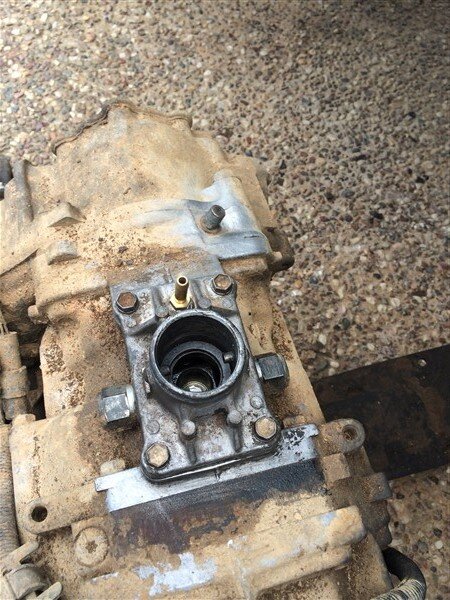
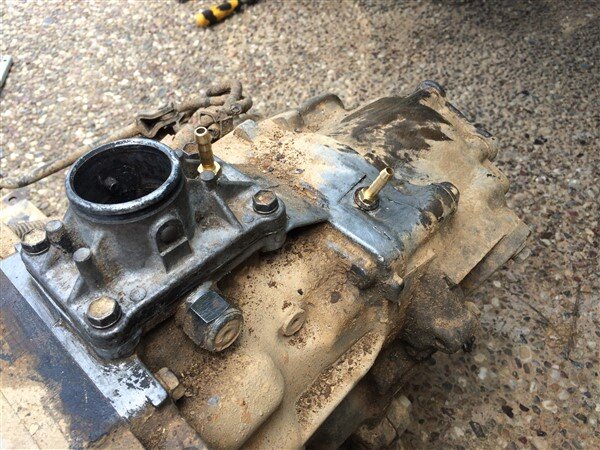
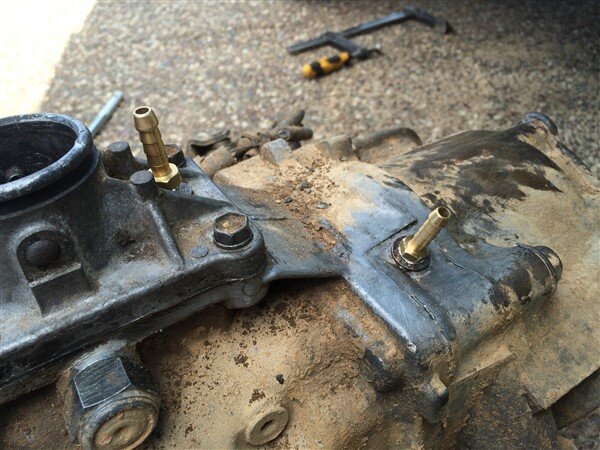
I decided as the engine was out I would drop the gearbox/transferbox and fit some breathers to it.
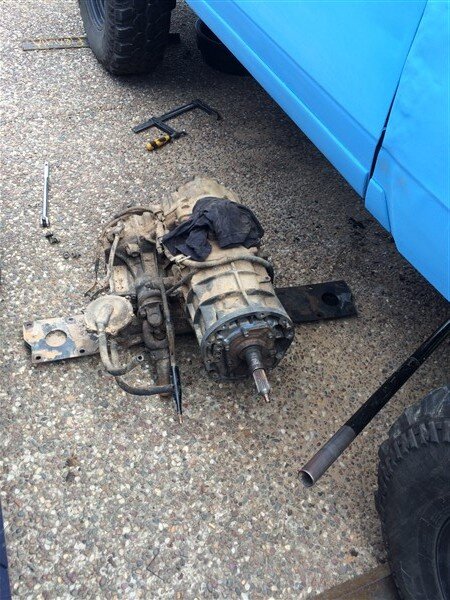
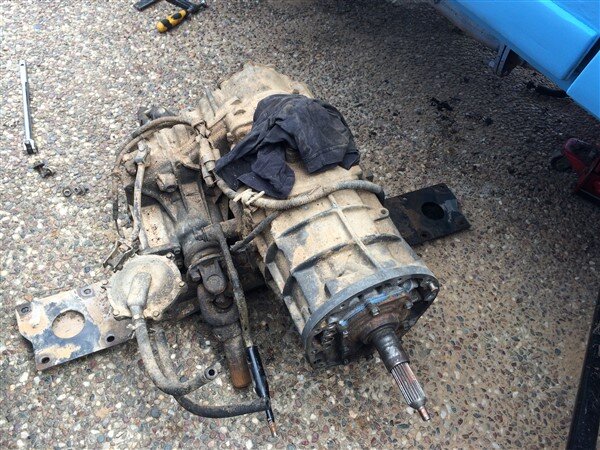
IMG_5506_zpsfln2xut2.jpg

IMG_5507_zpsynclxwwu.jpg

Partly because I wanted to fit this standard top bit to RJ's box in place of the one I had already drilled and tapped.
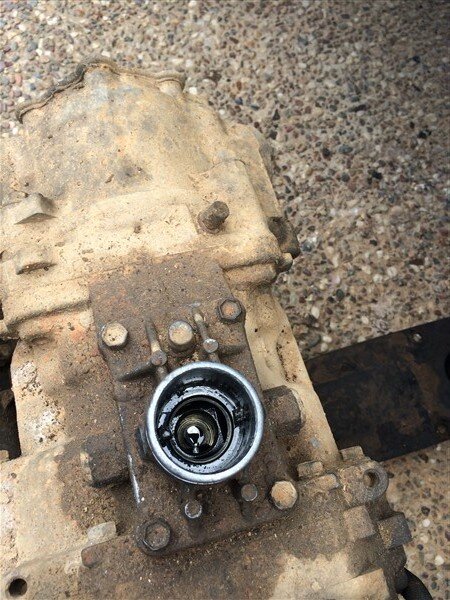
IMG_5508_zpsjtj6siri.jpg

Bolted RJ's one on.

IMG_5509_zpshcsjhvxh.jpg

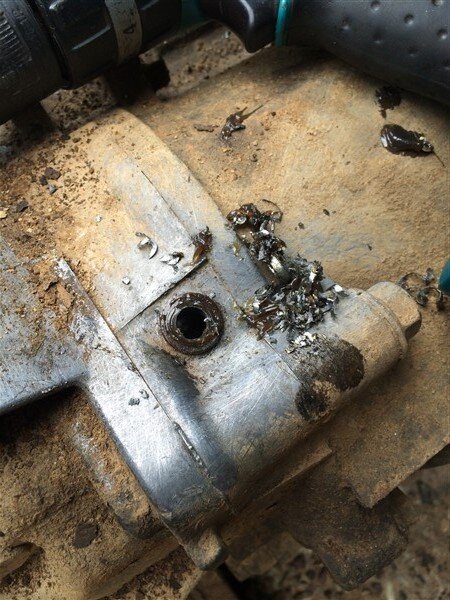
I just needed to do the transfercase breather next.
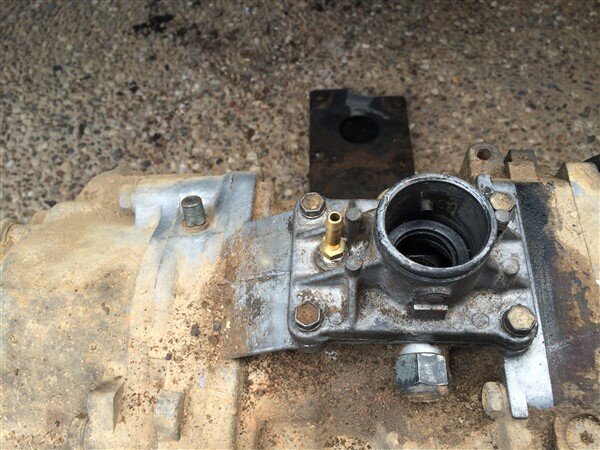
IMG_5510_zpsealfoivp.jpg

Popped this little cap off.

IMG_5511_zpsbcumjbll.jpg

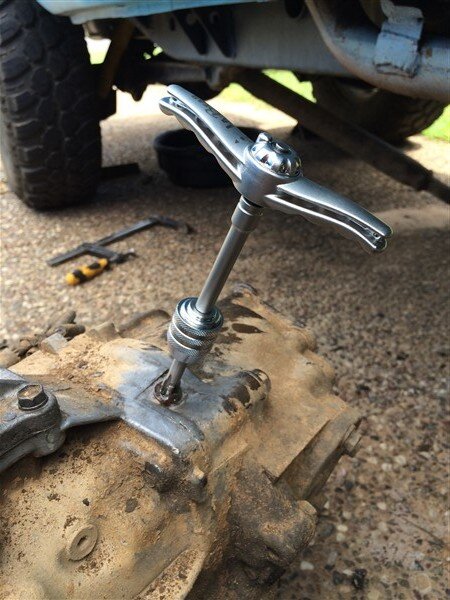
And with lots of grease to pick up the swarf I drilled it out.
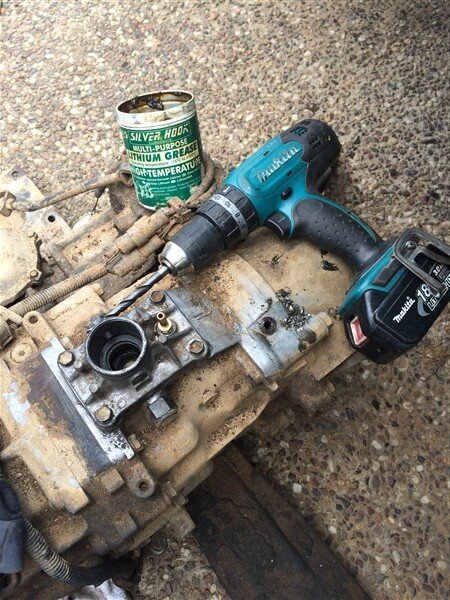
IMG_5512_zpspemqki4v.jpg

IMG_5513_zpslwrjyr3a.jpg

Tapped it.

IMG_5514_zpszdbsahws.jpg

And screwed in a fitting.

IMG_5515_zpssso3s8kc.jpg

IMG_5516_zpse5pqfpjw.jpg

I wrestled the box back into place and bolted the cross member back on, then when I was checking underneath and looking at the leaking rear seal behind the rear output flange I found the bearings in the back of the transferbox are shot as there was a lot of movement. :doh:

So my plan now is to fit the 1KZ-T engine out of LJ with LJ's box(s) and then before I fit the 78 box into LJ with the 1UZ V8 I will replace those bearings, like I did in LJ's a few years ago. :think:

I'm also thinking as the box needs to come back out, I might as well treat the couple of tiny spots of surface rust underneath the floor pan and then dinitrol the whole of the underside of the body and chassis. :)

While on the subject of rust I found 2 bits that need some work. :(

Thankfully their in spots that are pretty hidden.

Behind the drivers side tail light the seam sealant has failed and what looked like a rust bubble turned into a hole when I poked it with a screw driver.
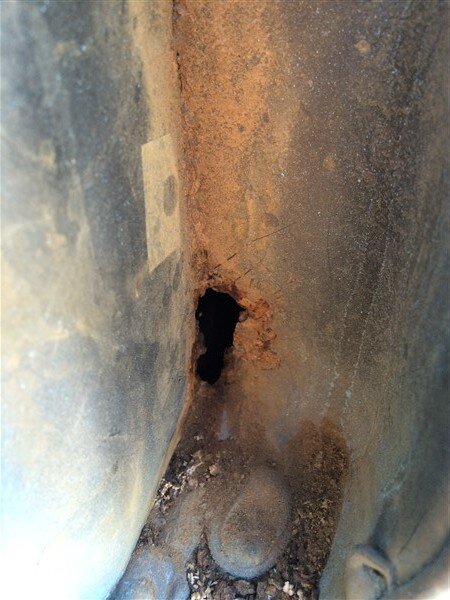
IMG_5528_zpsjeqz2myn.jpg

And the other is behind the rear bumper on the passenger side.
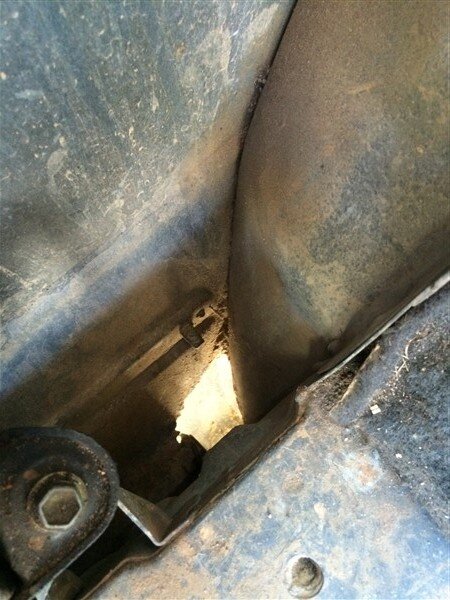
IMG_5524_zpsoddylt99.jpg

The rear bumper really is a shocking design as firstly it mounts to both the chassis and the body which isnt a good idea as the body is rubber mounted to the chassis and the 2 are meant to move independently of each other, slightly.

And 2 it holds a lot of mud and crap against the body and its difficult to clean that area, so its encouraging rot.
:thumbdown:

The bumper will be going and I will design and build something more suitable. :icon-cool:

While on the subject of the body, these grills had to go.
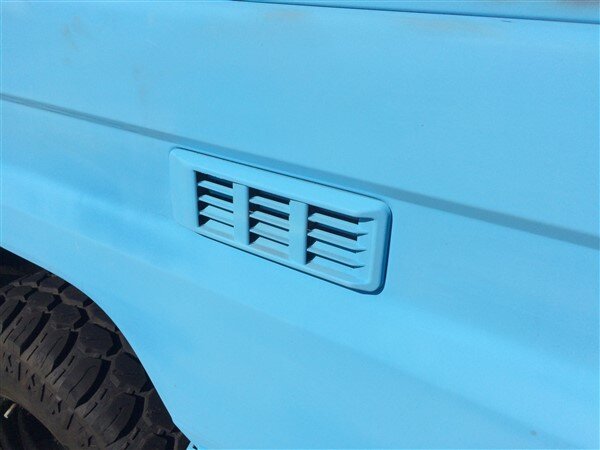
IMG_5525_zpsc8brzgze.jpg

They were removed, painted black, fitted to LJ's old body.

IMG_5532_zps4accnees.jpg

And LJ's black plastic ones fitted in their place.
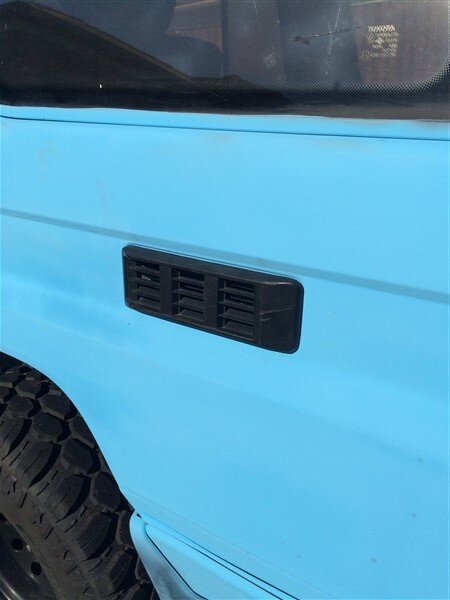
IMG_5526_zpskwe9okph.jpg

I picked up a sand blaster cheap the other day.
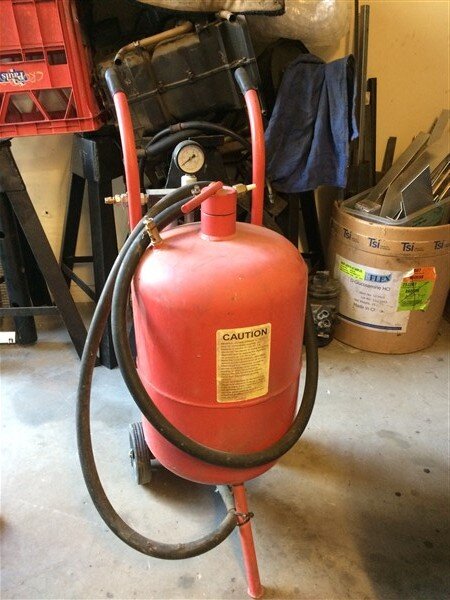
IMG_5492_zpsuq2b4fhc.jpg

Thinking it might be useful for some of the body work that needs doing and I will blast the entire soft top body before it gets painted and fitted to LJ. :icon-cool:

I havent been doing too much work to the 78 as I've been concentrating on the RJ70, so I can get it sold, but I am going to try and keep doing little bits to it.

I pulled the cheap nasty light bar and aerial off the bullbar the other day.
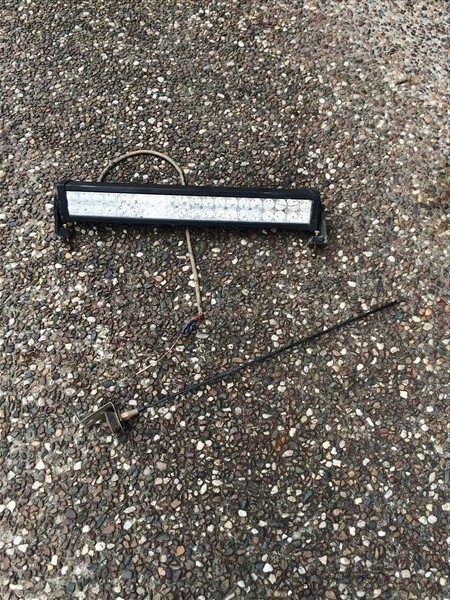
IMG_5565_zpstkbpbgyx.jpg

Looks better already!

I'm thinking of having my round LED driving lights in the middle and I might see if I can find a light bar to mount in the space below. :think:

IMG_5566_zpsrntesob9.jpg

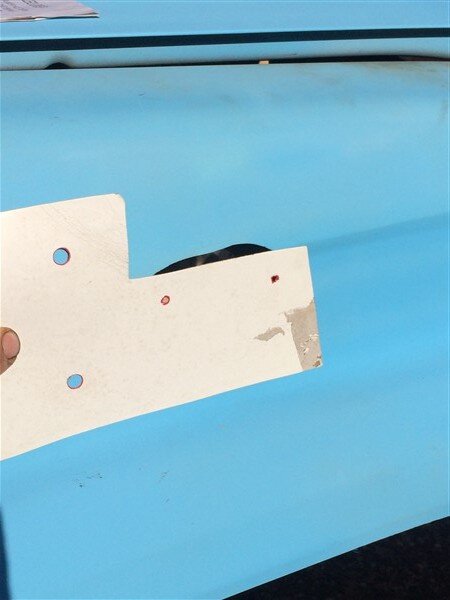
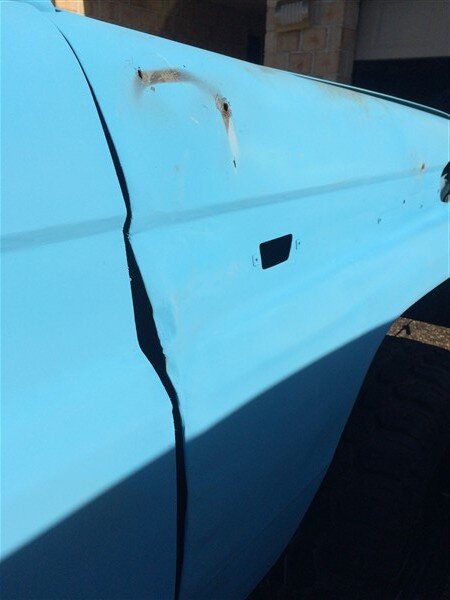
I've only got one spare drivers side wing/guard and even thats slightly damaged so I wanted to see if I could use the guard that came on the 78, if I repaired all the dents and damage.

The only thing was, would the hole from the shitty pvc pipe snorkel be covered. :?

Fortunately I still had the template and instructions from when I bought and fitted the snorkel to LJ 6.5 years ago.
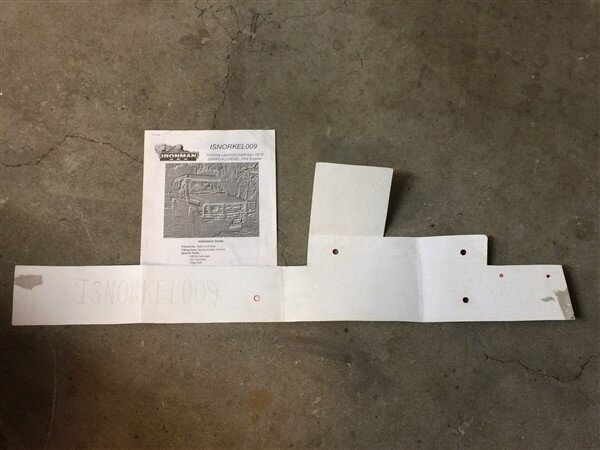
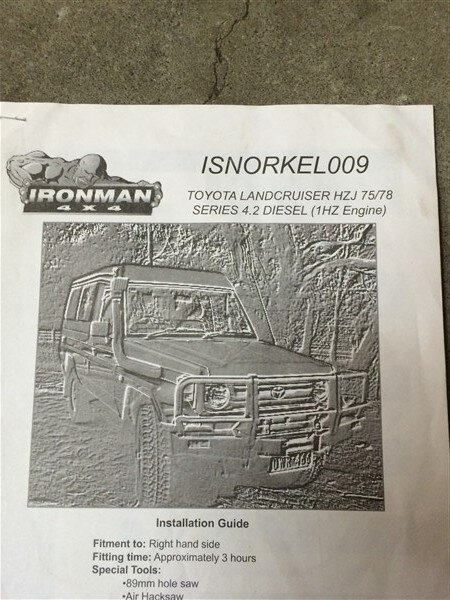
IMG_5588_zpsjbgthdxp.jpg

IMG_5589_zps7hkic85w.jpg

IMG_5591_zpsab0wd4yk.jpg

And the snorkel should just cover the hole the previous owner put in the panel. :dance:

IMG_5590_zpsqxlksjr3.jpg

It is going to take some work though to try and get all the damage repaired. I'm thinking I will remove the panel completely and panel beat the dents out. :think:

IMG_5592_zpsp3slxq6y.jpg

But at least sticking with the standard guard means that it is already the correct colour in the engine bay, where as if I fit one of the other panels I've got it would need to be painted first to ensure its the correct colour. :)

So my plan is to pull the gearbox back out, clean up and repair all the rust and dinitrol the underside.

Then drop the new engine and box in.

Make an exhaust system for it.

Sand all the blue primer off it and drive it to a panel shop and get it re-painted in 2pak in its original dark bluey grey metalic paint. :icon-biggrin:
 
Making good progress there Ben, you certainly don't let the grass grow beneath your feet ;)
 
I reckon you'll have the neighbour's up in arms if you start sand blasting on the front lawn Ben. :eusa-naughty: And they take a lot of air, and the protective gear is like something for use in outer space. No doubt you have a plan.
 
Thanks guys. :thumbup:

I reckon you'll have the neighbour's up in arms if you start sand blasting on the front lawn Ben. :eusa-naughty: And they take a lot of air, and the protective gear is like something for use in outer space. No doubt you have a plan.

Plan is to bring the body to work on a weekend and do it here! :shifty:

Across the road from our engineering workshops is the central energy plant and inside there is 2 of the biggest compressors I've ever seen, the tanks on them must be 800-1000 litres! :wtf:

And they feed all the airlines in our workshop, so I'm going to plug into that and do it outside with a huge tarp setup to hopefully catch most of the garnet so I can re-use it a few times during the course of the day. :icon-cool:
 
Great work in progress Ben and a good find with the 78!

My 1990 71 that I rewired and fitted the 1kzt (e:thumbdown:)... with the 2lt (e:thumbdown:) wiring I found that there's a different glow timer which is in the ecu and not in the unit above the glovebox on the manual loom so there's a mission to either get the timer fitted into it or use a switch that will activate the glow timer under the bonnet. I used the headlight washer switch to activate the glow relay in the end.
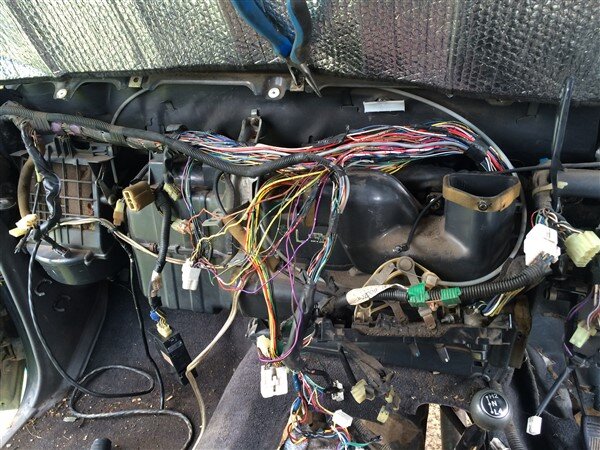
Also on the 1990 71 and possibly the 78 all the plugs for the indicators, side lights, rear light and a few more are completely different to any of the other 70's (light duty) after 91 etc, so there was a lot of time consuming faffing about looking for the appropriate wiring connectors... was a right PITA! Turned out well in the end.

I personally from experience would keep the 78 loom with the 78 and modify to suit and fit a manual pump to the 2lt (e:puke-front:)!!

I can tell you which wires are what also.. Keep up the good work maan!:thumbup:
 
Thanks mate. :thumbup:

Great minds think a like. ;)

I decided a couple of days ago to put the 78 loom back together and refit it in the 78 and I ordered a manual fuel pump for the 2lt that I've fitted in the RJ70. :icon-biggrin:

I'm a bit worried about getting the 1KZ-T to work with the 78 loom though as on the 78 loom all the engine sensors are wired through the ECU which I'm going to remove. :?
 
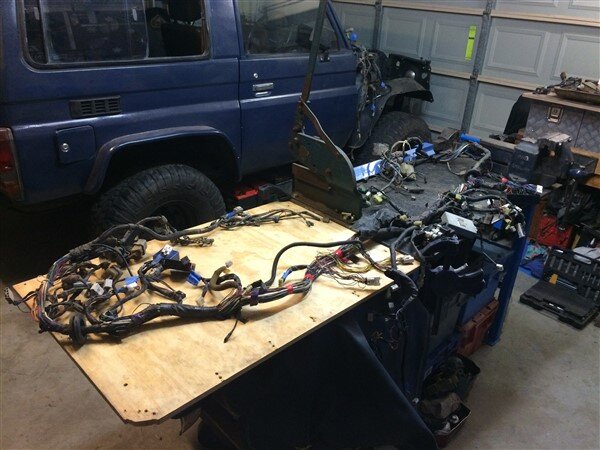
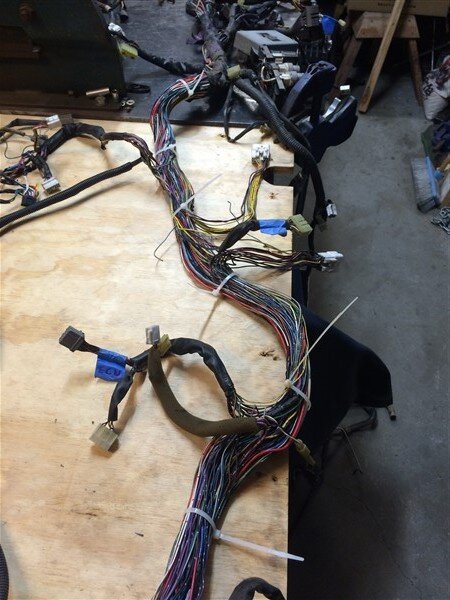
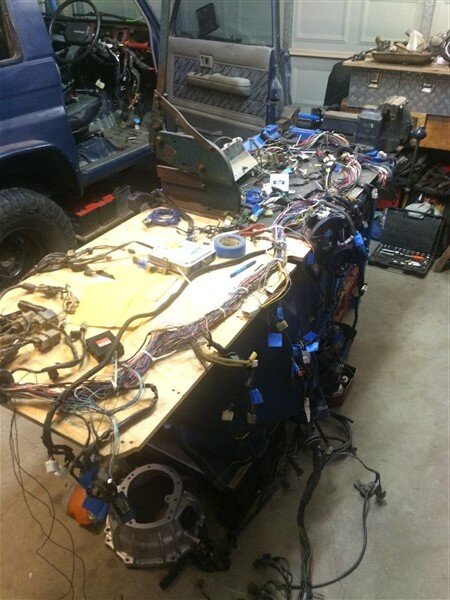
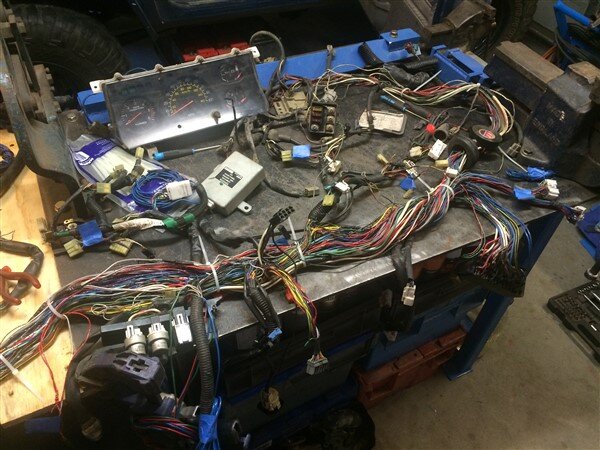
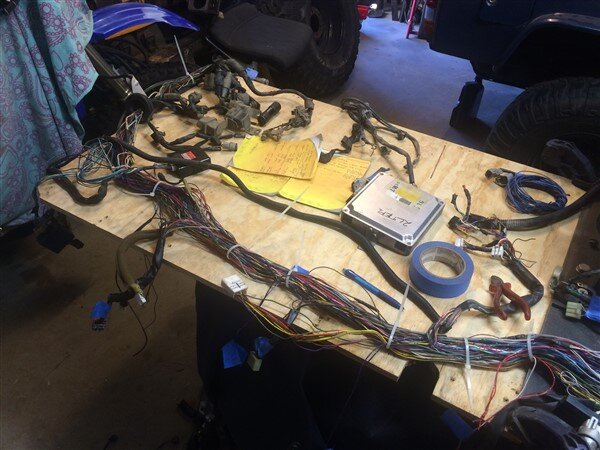
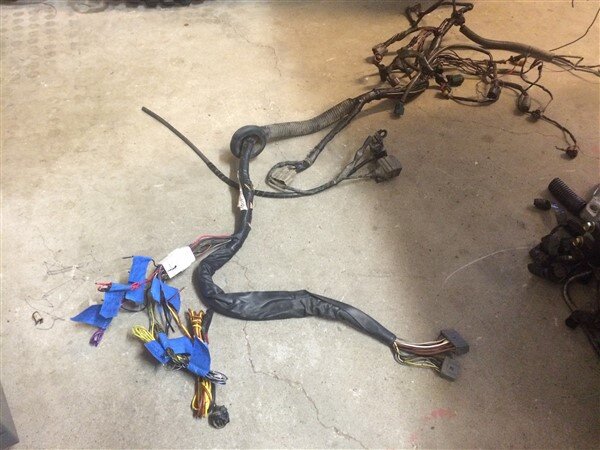
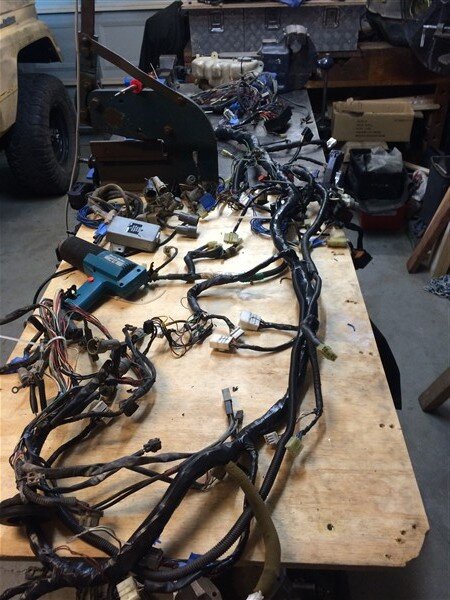
So I got the 78 loom on the bench ready to begin surgery.

IMG_5613_zpsbrwergci.jpg

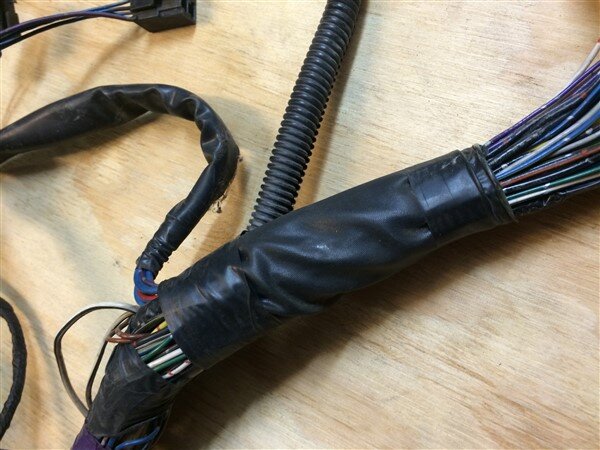
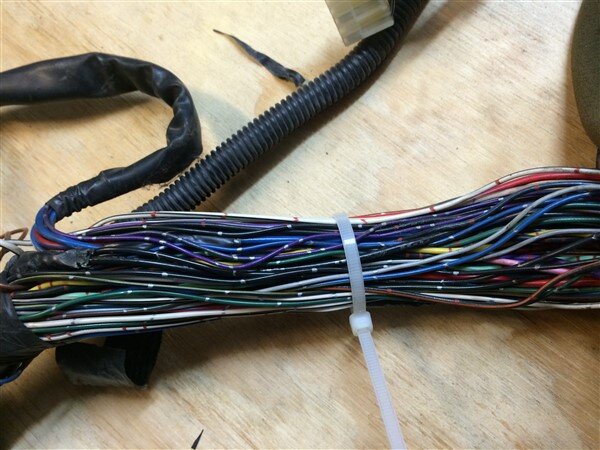
I cut back all the outer sheathing.

IMG_5614_zpsl7evx6km.jpg

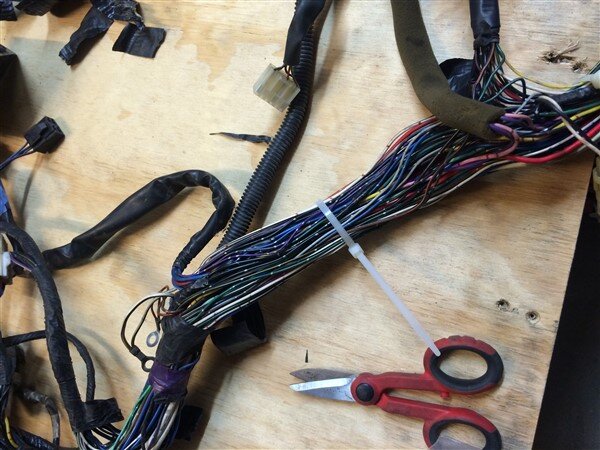
And used cable ties to keep the loom roughly together, but to give me enough slack to trace and remove wires.

IMG_5615_zpsf0x5zolp.jpg

IMG_5616_zpsco24qh7d.jpg

IMG_5617_zpssad6gi5d.jpg

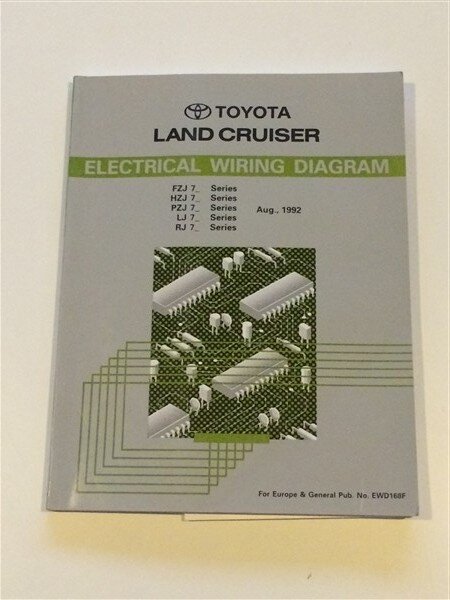
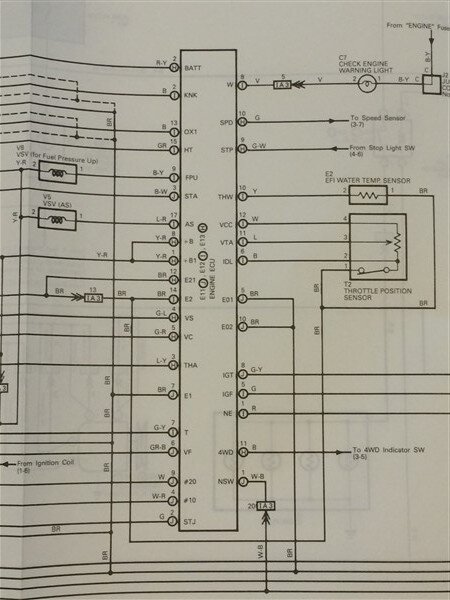
I thought this book would help me.

IMG_5618_zpsnhvinlq1.jpg

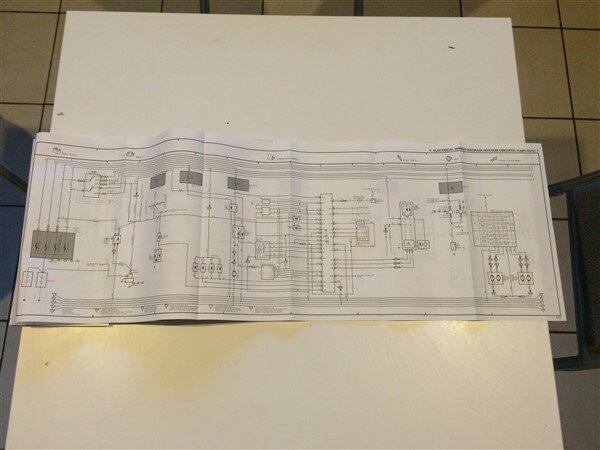
The wiring loom had an ECU on it.

IMG_5619_zpszm0fmvib.jpg

But sadly it was for the 22r engine and non of the colours matched my loom. :doh:

IMG_5620_zpskby59mi6.jpg

But I carried on regardless and instead followed each wire from the ECU plugs and chased them all the way back to the different components they connect to.

IMG_5632_zpsqyghk3ki.jpg

IMG_5633_zpsusrzraqe.jpg

IMG_5634_zpsa25dlaul.jpg

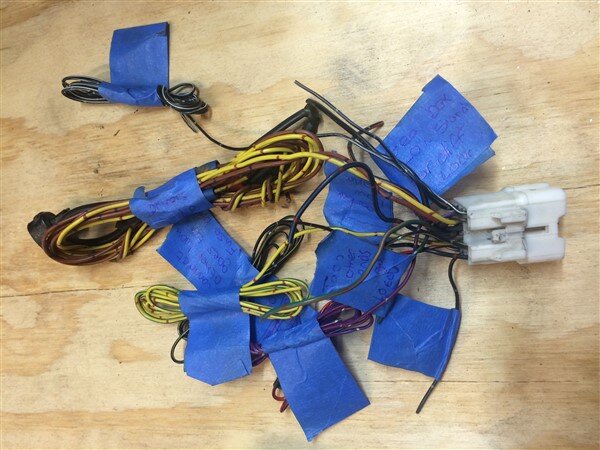
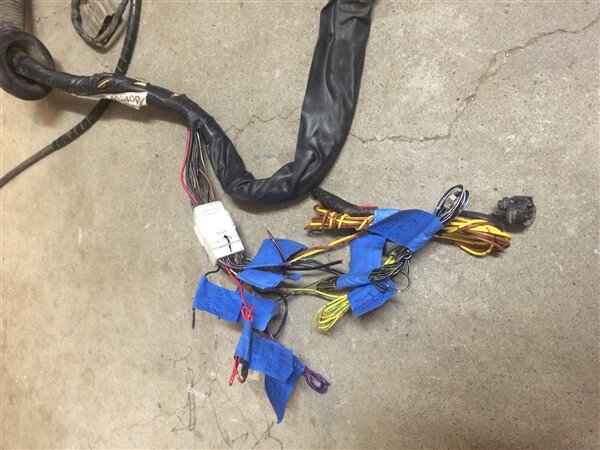
I labeled everything and cut out the ECU connector from the loom.

IMG_5641_zpsj5fn7wqn.jpg

That connected to the engine loom.

IMG_5642_zpspuz20ikd.jpg

IMG_5643_zpsaedswhi0.jpg

But the more I removed from the loom for the engine the more things I found that were inter connected and the more it was looking like I would have to remove. :?

At this point I called a few auto electricians but none of them wanted to tough it, they all wanted to just do easy wiring jobs like wiring winches, lights, trailer brakes etc. and didnt want the challenge of this job. :doh:

So at this point I decided I would order a manual fuel pump for the 2lt-e engine and put the 78 loom back together. :think:

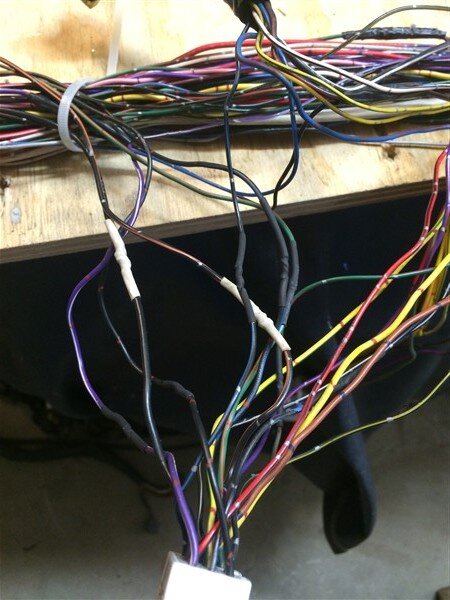
Luckily I had labeled everything very methodically so I was able to solder and heat shrink every wire back together.

IMG_5670_zpswfwatxw7.jpg

Tapped the loom back together.

IMG_5671_zpssywphajx.jpg

And made a start refitting it in the 78.

IMG_5672_zpshurhdprz.jpg

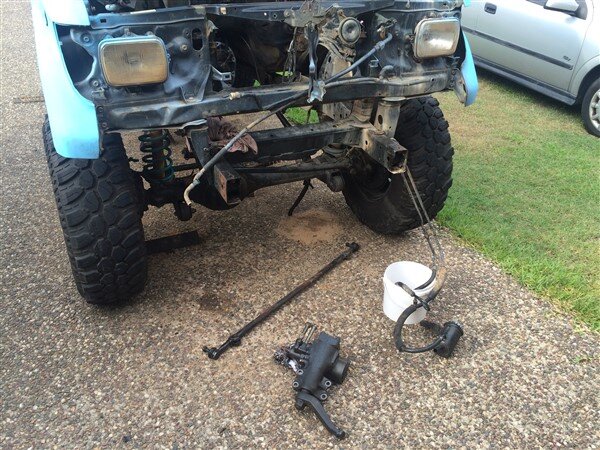
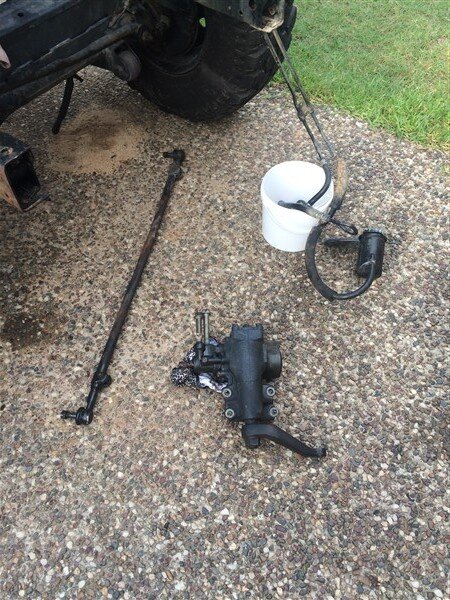
I removed the leaking power steering box this week along with the bent steering bar.

IMG_5661_zps2axy0h9a.jpg

IMG_5662_zpshrlbweda.jpg

I'm going to make a heavy duty steering bar for it as the standard ones do bend easily off road and I've got a decent box to fit off my RJ70, which I've converted to manual steering. :think:

Before I fit any of that though I want to pull the gearbox/transferbox back out and degrease and pressure washer the entire underside of the vehicle and engine bay. Then I want to treat the small rust patches and get the whole lot coated in some Dinitrol to protect it all. :icon-biggrin:

I've found a bullbar and drivers side front guard that I want to buy, only issue is their in Sydney so I will have a 20 hour round trip if I drive down to get them. :shifty:

IMG_5628_zpsltrnqw3z.jpg

IMG_5629_zpsy92a4uce.jpg
 
Just purchased my first part for this build! :shifty:

Megazip.net were having a 10% birthday sale which ends tonight, so I've just ordered the piece of glass I need for the drivers side rear door. :icon-cool:

Priced up the other bits I need to order to make this 70 look as good as when it left the factory and I'm looking at $370 Australian dollars for both rear light, interior light lens, 2 x aerials (1 for the 78 and 1 for LJ) and some clips that hold the grill on, all from the UAE via Amayama.com.

Then I want to replace all the lights on the front for these crystal clear ones:

http://www.ebay.com.au/itm/Toyota-L...684033?hash=item258b77f341:g:Yi0AAOSw3YNXYhDO

I need to order some gear stick gaitors, thats $175 from Japan via Amayama.

Then a few oil seals and possibly some door seals if I cant clean the paint off the ones that are fitted. :think:

So about another $1k and I should have all the bits. :icon-biggrin:
 
I was thinking about the build driving into work today and was thinking that do I really want to risk putting an expensive paint job over the top of that blue primer that has been painted on top of rattle can black.

After all anyone stupid enough to paint a car with rattle cans is probably stupid enough to have done no prep first, so they probably never sanded the car down to key the surface.

Then I thought what if I dont need to respray the whole car at all, what if I can cut and polish through those layers of paint back down to the dark bluish grey, metallic paint underneath. :think:

What do you think?

Got to be worth a go I think. :icon-biggrin:
This one will replace my LJ70 as my camping/overland vehicle.

I dread to think how many hours you would waste trying to polish it back to the original paint and then you would still need a respray because every ridge and fold would polish through to bare metal before the surrounding area came good .

Because its you and because i have little doubt you can i would suggest stripping it to a bare shell and taking it to a sandblaster who would likely strip it to bare metal using walnut shell or something similar in a couple of hours .

Also at the painters i would choose a readily available off the shelf paint and colour so touchup will never be a problem , marine topcoat/brightside if the painter was ok with it .
 
True.

If I had got it before the previous owner painted it in the thick, blue, primer filler, then I think I could have polished through the rattle can paint job. But the primer is too thick. :doh:

I'm going to sand the primer off the entire car and try to get down to the original paint, then get it primed and painted in 2k. :icon-biggrin:

I see no point in taking it back to bare metal, I think back to the original will be fine, then a good few coats of 2k primer and top coat. :think:

The original paint is easy to get as any paint shop can mix it for me using the original paint code. I want this car to look as good as it did when it left the factory and I quite like the metallic dark bluey grey that it was originally and will be again.

This wont be a toy to smash up at pay n plays, its going to be a family car/camping/overland vehicle so it shouldnt get damaged with the sort of driving I intend on doing in it and I want to keep it looking smart. :icon-cool:

Cant wait to get it resprayed!! Its embarrassing how terrible it currently looks sat on my drive! :shifty:
 
Back
Top